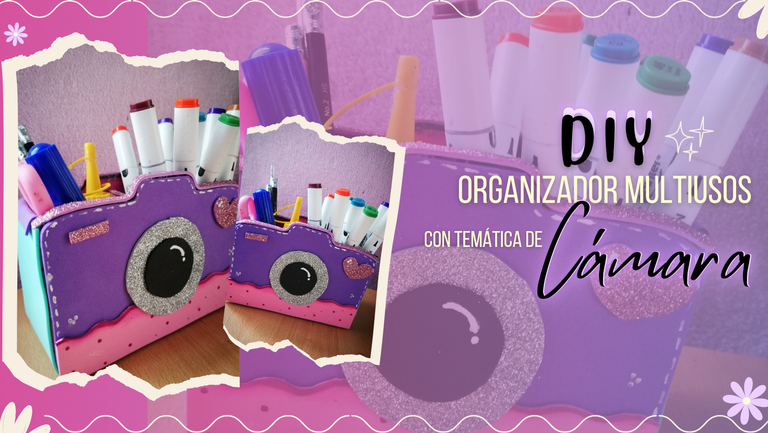
Cuando amamos las manualidades y además somos amantes a todo lo que tenga que ver con lápices, plumones y marcadores, un portalapiz u organizador no es suficiente, además que siempre queremos renovar los que ya tenemos.
En mi paso el día de hoy te muestro como realizar un lindo organizador multiusos, puesto que también por su diseño fácilmente lo podríamos usar para mantener en orden nuestras brochas de maquillaje..
Sin más, te muestro el paso a paso 📸💗
Hi Hivers! How are you? Here we are quite well, happy to spend once again as every week by this creative community💗.
When we love crafts and we love everything that has to do with pencils, pens and markers, a pencil holder or organizer is not enough, plus we always want to renew the ones we already have.
In my step today I show you how to make a nice multipurpose organizer, since also by its design we could easily use it to keep in order our makeup brushes...Without further ado, I show you the step by step 📸💗.

Materiales:
- Cartón
- Foami liso de colores (morado, turquesa y rosado)
- Foami escarchado (morado y plateado)
- Cartulina
- Pintura al frío color blanco
- Silicón
- Tijera
- Cardboard
- Plain colored Foami (purple, turquoise and pink)
- Frosted Foami (purple and silver)
- Cardboard
- Cold paint in white color
- Silicone
- Scissors

Paso a Paso | Step by Step
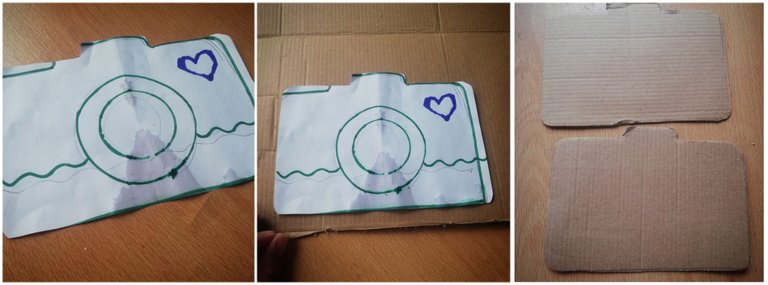
✨ En la mitad de una hoja blanca hice la cámara, o mejor dicho el patrón a utilizar, el cual luego plasme en el cartón y recorte dos piezas.
✨ On half of a white sheet I made the camera, or rather the pattern to be used, which I then shaped into cardboard and cut out two pieces.
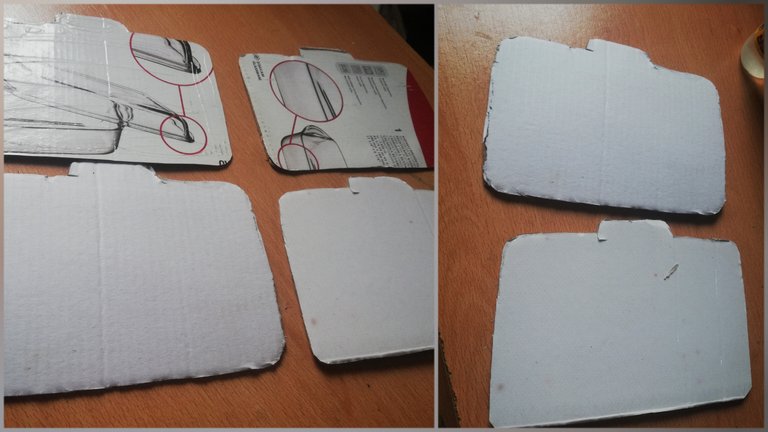
✨ Teniendo en cuenta que el cartón que utilicé estaba bastante fino, decidí cortar dos piezas más y pegar una sobre otra, a fin de obtener dos piezas más resistentes.
✨ Considering that the cardboard I used was quite thin, I decided to cut two more pieces and glue one on top of the other, in order to get two stronger pieces.
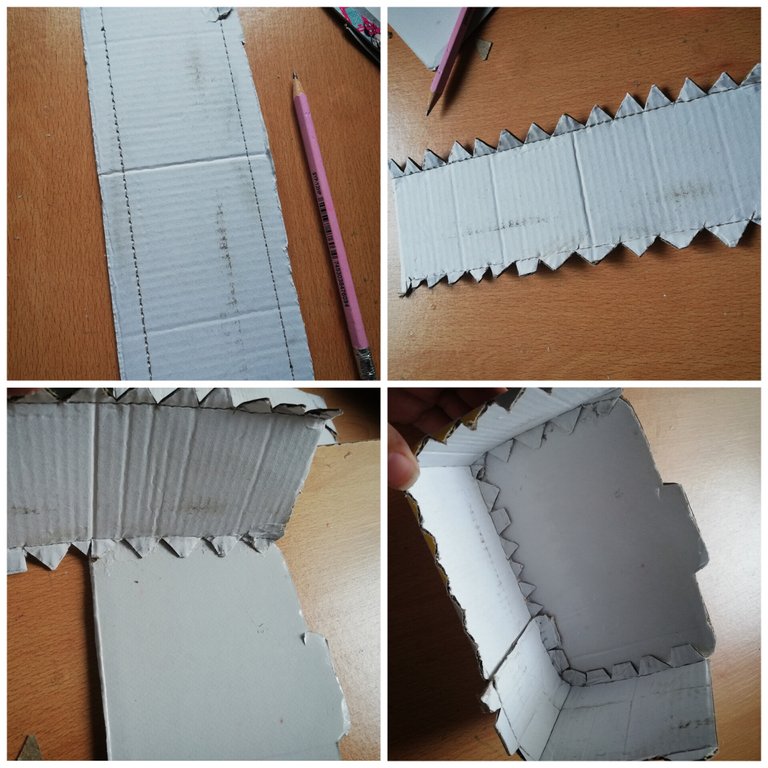
✨Luego medí una tira de cartón de un ancho de 6cm y adicionando 1cm a cada lado para realizar unas pestañas, y que se me facilitará pegar las piezas frontal y trasera de la cámara.
✨Then I measured a strip of cardboard with a width of 6cm and added 1cm on each side to make some tabs, to make it easier for me to glue the front and back pieces of the camera.
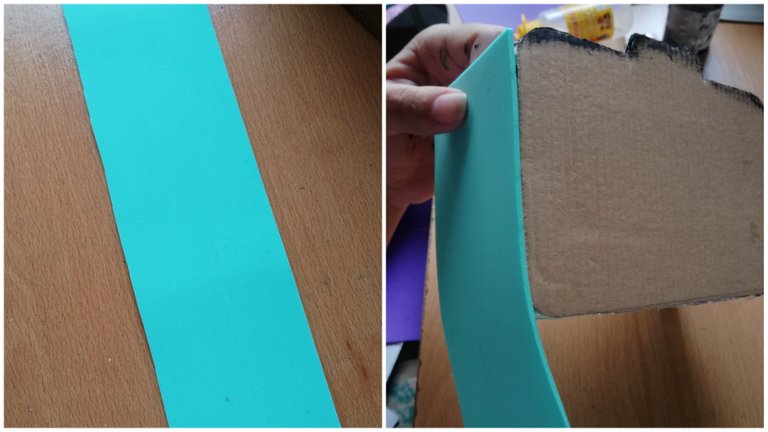
✨Una vez armada la cámara, llegó mi momento favorito, decorar jaja. Para esto, comencé por hacer los costados, por lo que recorté una tira en Foami turquesa de 6cm y pegue en todo alrededor. (Si haces este mismo diseño, fácil puedes usar los colores de tu preferencia)
✨Once the camera was assembled, came my favorite moment, decorating haha. For this, I started by making the sides, so I cut out a 6cm strip of turquoise Foami and glued it all around (If you do this same design, you can easily use the colors of your preference).
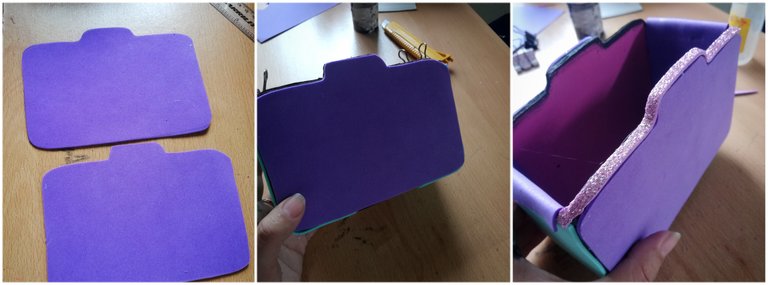
✨En Foami morado recorté las dos piezas o forma de la cámara y pegue una a cada lado (para ser frontal y trasera) y como extra, corte la misma forma en cartulina negra y fucsia y las pegue en el interior, esto a fin de darle un mejor acabado, y para los laterales unos retazos de foami morado que al sobresalir doble hacia afuera y pegue.
✨ También corte unas tiras de 0,40cm en Foami escarchado y pegue cubriendo los bordes. (olvide por completo tomar las fotos de este paso)
✨In purple Foami I cut out the two pieces or shape of the camera and glued one on each side (to be front and back) and as an extra, I cut the same shape in black and fuchsia cardboard and glued them inside, this in order to give it a better finish, and for the sides some scraps of purple foami that when protruding fold outwards and glued.
✨ Also cut some 0,40cm strips in frosted foami and glue them covering the edges (I completely forgot to take pictures of this step).
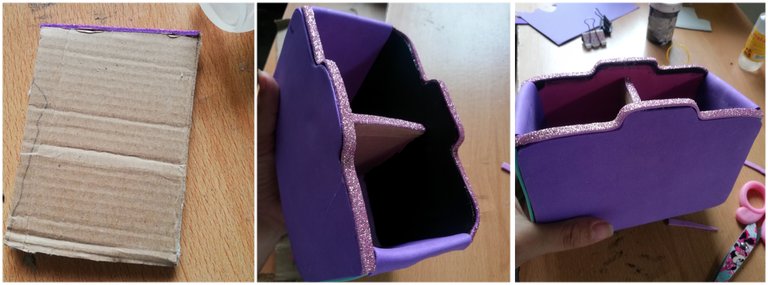
✨ Corte un rectángulo de cartón de 6cm de ancho (más bajo que la cámara) y también pegue una tira de Foami a fin de cubrir su borde superior.
✨ Hecho el rectángulo, lo pegue en la parte interna de la cámara a fin de obtener un separador y u organizador de 2 espacios 🙈
✨ Cut a 6cm wide rectangle of cardboard (lower than the camera) and also glue a strip of Foami in order to cover its top edge.
✨ Made the rectangle, glue it on the inner part of the camera in order to obtain a separator and or organizer of 2 spaces 🙈
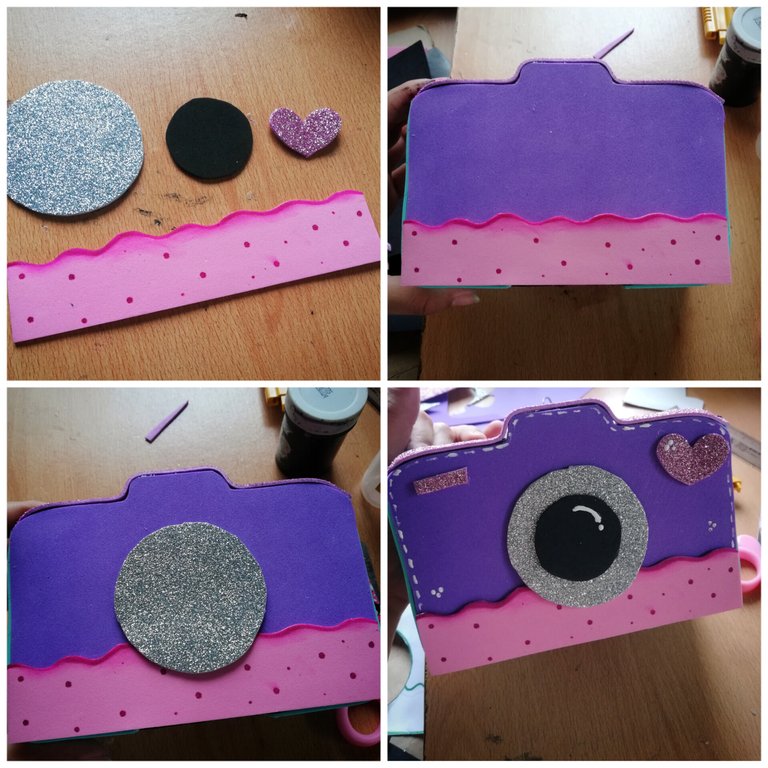
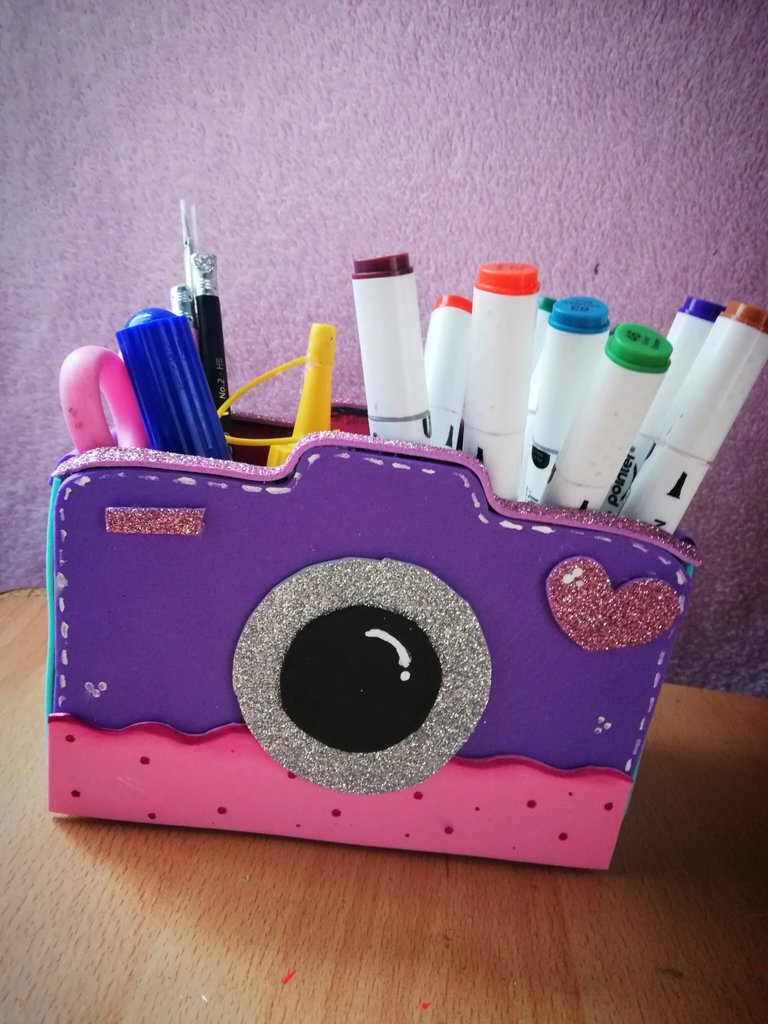
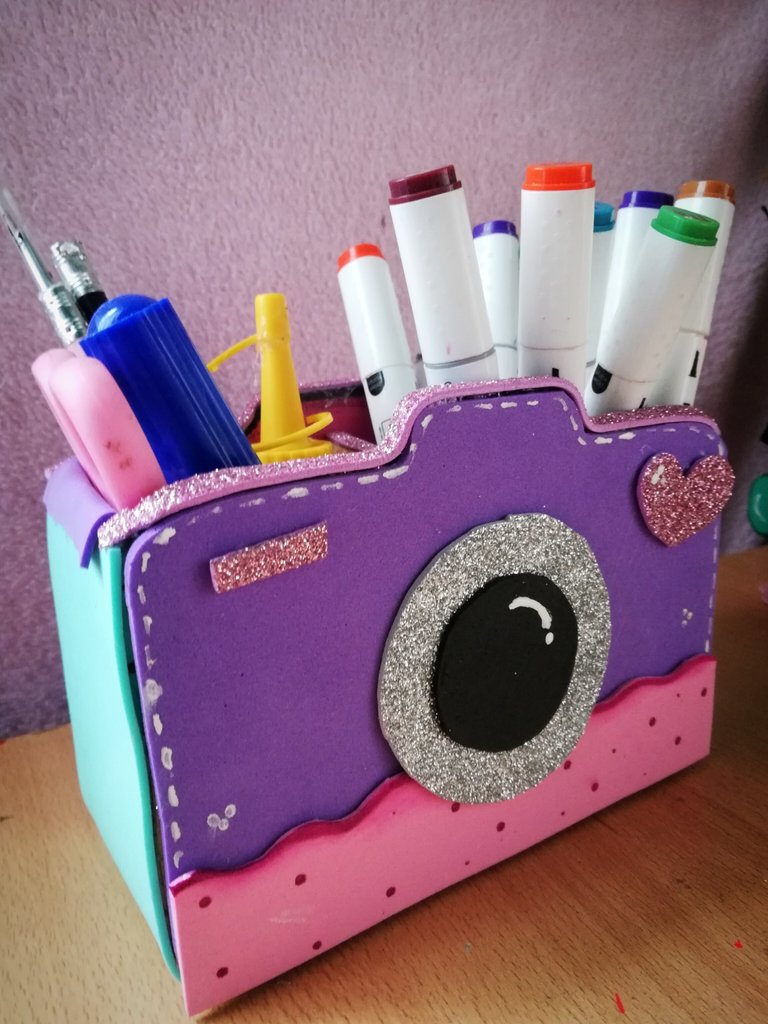
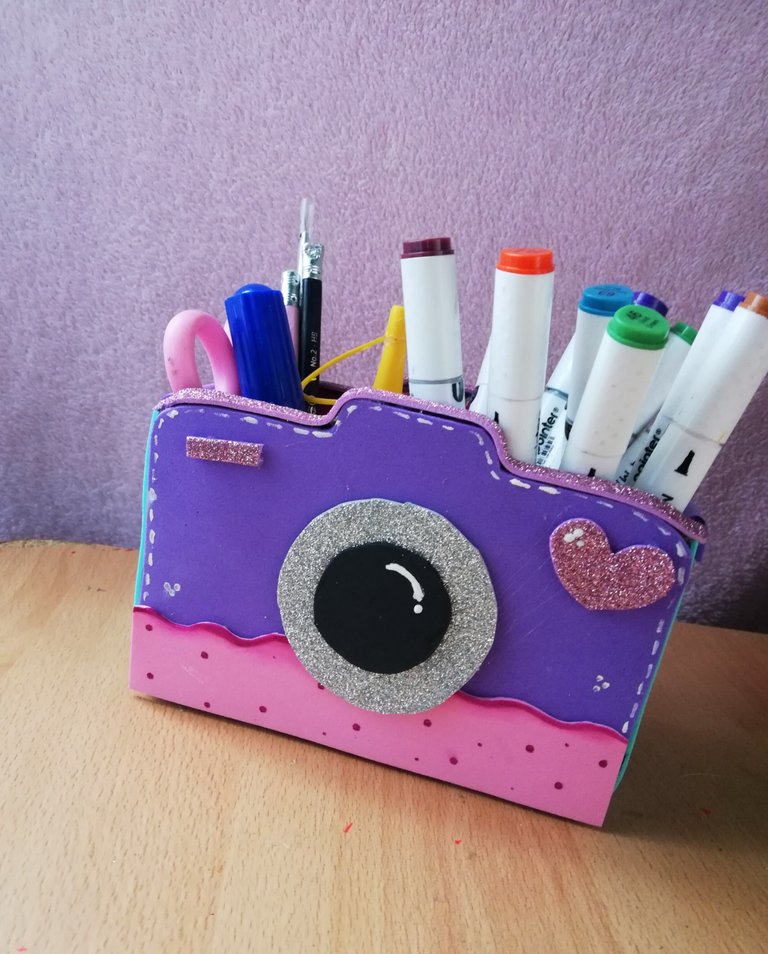
✨ Por último solo quedaba agregar los detalles de la cámara, por lo que en Foami rosa corte una tira y la difumine con marcador rosa, adicionando algunos puntos; hice dos círculos uno más grande que otro en plateado y negro, y también recorté un corazón en Foami morado escarchado.
✨ Su armado fue muy fácil, en la parte inferior pegue la tira rosa, luego el círculo grande y luego el más pequeño. A uno de sus lados superior, pegue el corazón y a su otro lado un mini rectángulo; adicional con pintura al frío color blanca le di un poco de luz y delinee el borde en forma de puntadas. ¡Culminando así este trabajo!
✨ Finally all that was left was to add the details of the camera, so in pink Foami I cut a strip and blurred it with pink marker, adding some dots; I made two circles one bigger than the other in silver and black, and I also cut out a heart in frosted purple Foami.
✨ Its assembly was very easy, at the bottom I glued the pink strip, then the big circle and then the smaller one. On one of its upper sides, I glued the heart and on the other side a mini rectangle; additionally with white cold paint I gave it a little light and outlined the edge in the form of stitches. thus completing this work!

Resultados | Result
Y de esta forma obtenemos un lindo organizador, que como mencioné anteriormente lo podemos usar para nuestras brochas y cositas de maquillaje, o como en mi caso, para organizar mis marcadores y darle una vista más bonita a mi mesa creativa.
Sin más amigos, me despido esperando que esté post sea de su agrado.. ¡HASTA UNA PRÓXIMA MANUALIDAD✂️🎀🎨!
And in this way we get a nice organizer, which as I mentioned before we can use it for our brushes and makeup stuff, or as in my case, to organize my markers and give a nicer look to my creative table.
Without further ado friends, I say goodbye hoping that this post is to your liking... SEE YOU NEXT TIME MANUALIDAD✂️🎀🎨!
📷Ediciones | Editing in Canva and Picstar
✨Traducciones | Translations in Deepl


