De verdad no recuerdo hace cuanto o desde que edad comencé a sentir tanto gusto por crear, por ver como hacia realidad esas ideas que surgían de la nada, buscando darle utilidad a los pocos o muchos materiales que pudiera tener a la mano, solo se que desde muy chiquita es uno de mis pasatiempos favoritos o ese ámbito donde siento que mi creatividad va un poco más allá.
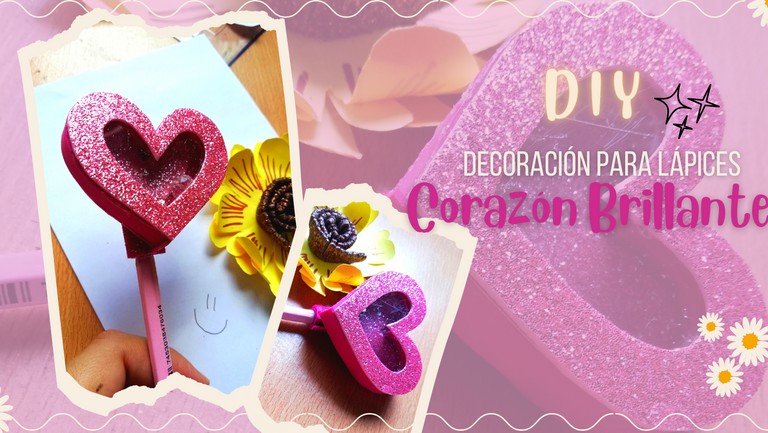
Hoy quiero compartirles una nueva forma para embellecer nuestros lápices, muy brillante y que además puedes personalizar a tu gusto.. Sin más aquí te muestro como realice esta brillante decoración en forma de corazón💗
Hello Friends✨! Howdy, for me it will always be a pleasure to return to this, one of my favorite communities, where creativity abounds and where everyone contributes their knowledge through tutorials and various creations.
I really do not remember how long ago or from what age I began to feel so much pleasure to create, to see how to realize those ideas that came out of nowhere, looking to give utility to the few or many materials that I could have at hand, I just know that since I was very little it is one of my favorite hobbies or that area where I feel that my creativity goes a little further.
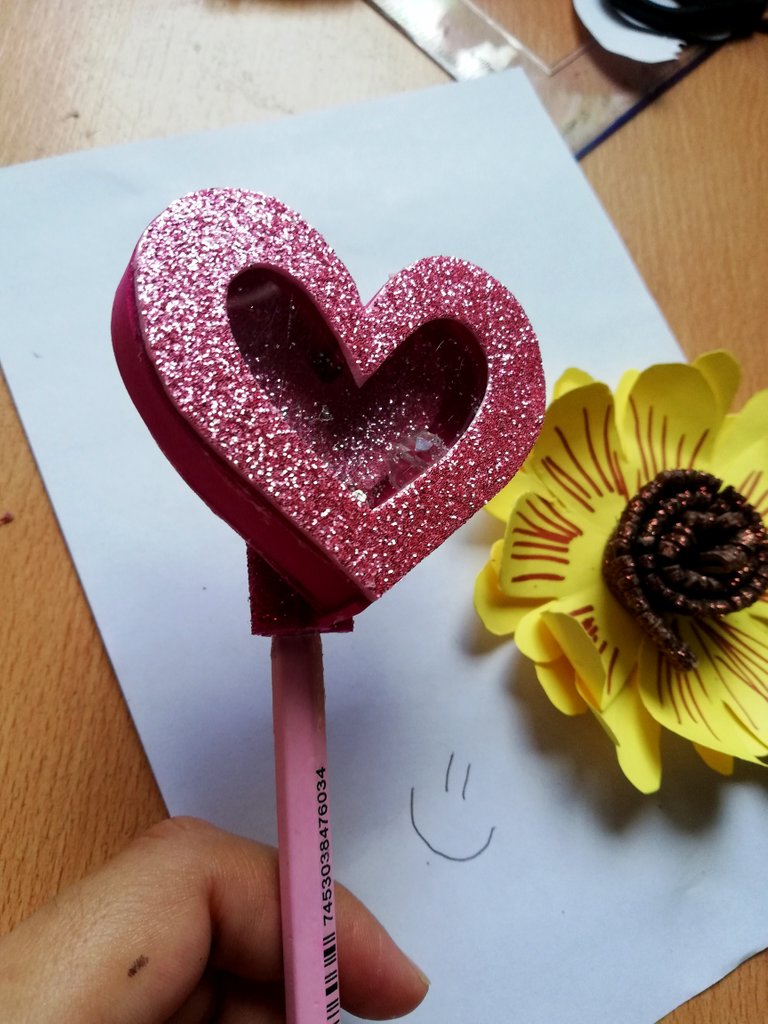
Today I want to share with you a new way to embellish our pencils, very bright and you can also customize it to your liking. Without further ado here I show you how to make this brilliant heart shaped decoration💗.

Materiales:
- Foami escarchado (fucsia y rosado)
- Foami liso fucsia
- Retazo de acetato
- Perlas de bisuteria
- Silicón
- Tijeras
Materials:
- Frosted foami (fuchsia and pink)
- Smooth fuchsia foami
- Acetate scraps
- Jewelry beads
- Silicone
- Scissors

Paso a Paso | Step by Step
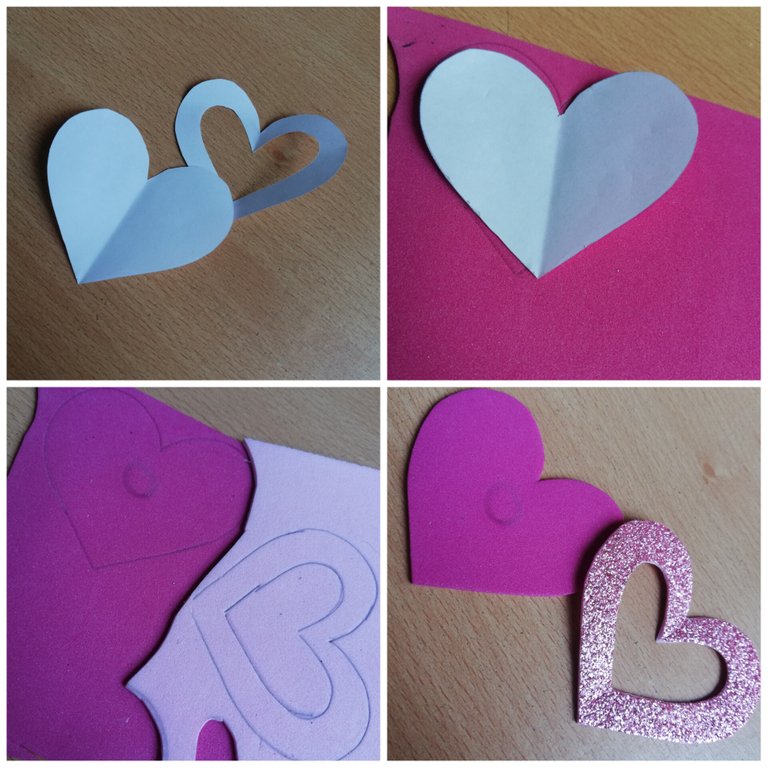
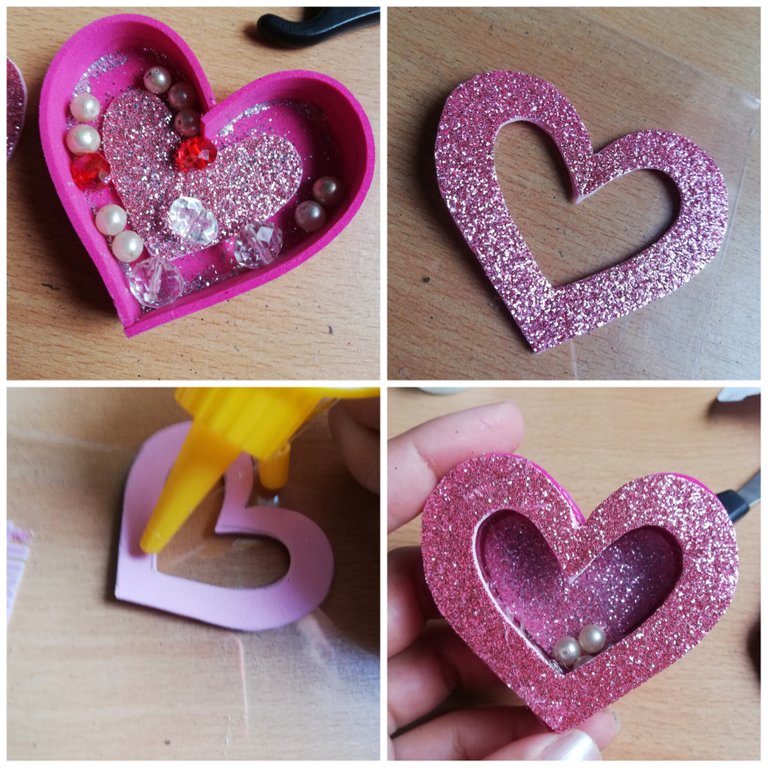
1️⃣ En una hoja blanca dibujé y recorte dos corazones del mismo tamaño, a diferencia que a uno de ellos le retire el centro dejándolo hueco. Luego marque en los Foami correspondientes a los colores que usaría y los recorté.
1️⃣ On a white sheet I drew and cut out two hearts of the same size, except that I removed the center of one of them leaving it hollow. Then I marked on the Foami corresponding to the colors I would use and cut them out.
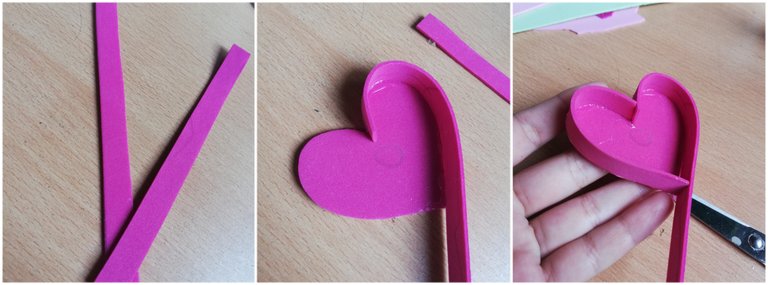
2️⃣ Corte dos tiras con un ancho aproximado 1cm, y con Silicón pegue por toda la orilla del corazón completo (dejandolo tipo cajita). Recorté los excedentes y selle muy bien todo con Silicón.
2️⃣ Cut two strips with an approximate width of 1cm, and with Silicone glue all around the edge of the whole heart (leaving it like a little box). Cut off the excess and seal everything very well with Silicone.
3️⃣ Una vez armado el corazón base, lo pegue sobre Foami escarchado fucsia y recorté (esto para dr efecto brillante por ambos lados). Con el sobrante del corazón rosa que corte al principio, decidí pegarlo en el interior de la base.
3️⃣ Once the base heart was assembled, I glued it on fuchsia frosted Foami and cut it out (this for a shiny effect on both sides). With the leftover pink heart I cut at the beginning, I decided to glue it on the inside of the base.
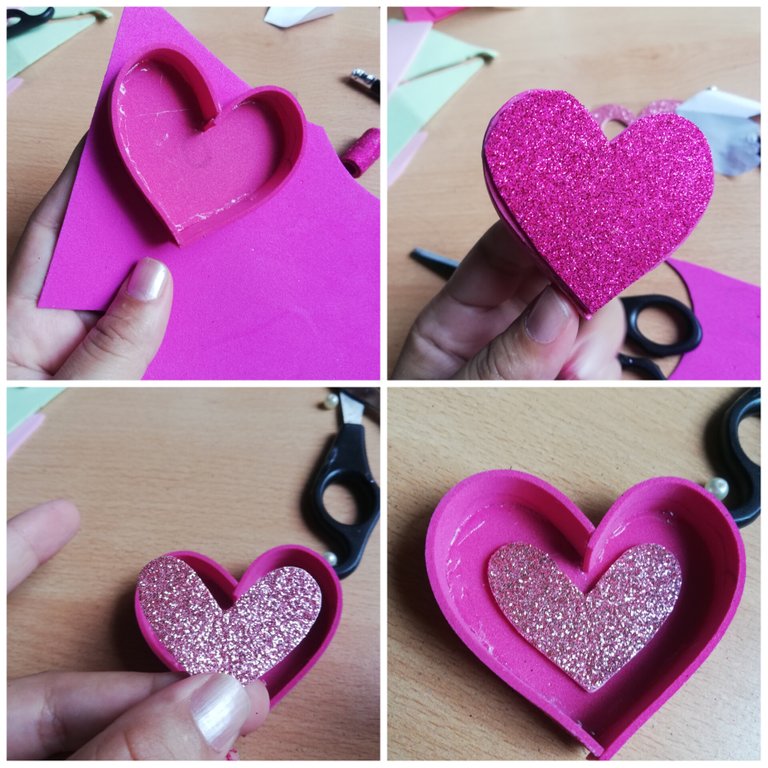
4️⃣ Una ves listo el paso anterior, coloque en el interior del corazón base unas perlas de bisuteria (use estas porque era las que tenía a la mano, pero quedaría perfecto mostazillas pequeñas o bien esas brillantina que se usan para las uñas).
5️⃣ Pegue un Retazo de acetato al corazón rosa hueco, y luego pegue esto sobre el anterior sellando y dejando así tipo un sonajero de pepitas😍
4️⃣ Once the previous step is ready, place some costume jewelry pearls inside the heart base (I used these because they were the ones I had on hand, but it would be perfect to use small mostazillas or those glitters that are used for nails).
5️⃣ Glue a piece of acetate to the hollow pink heart, and then glue this over the previous one sealing it and leaving it like a rattle of nuggets😍.
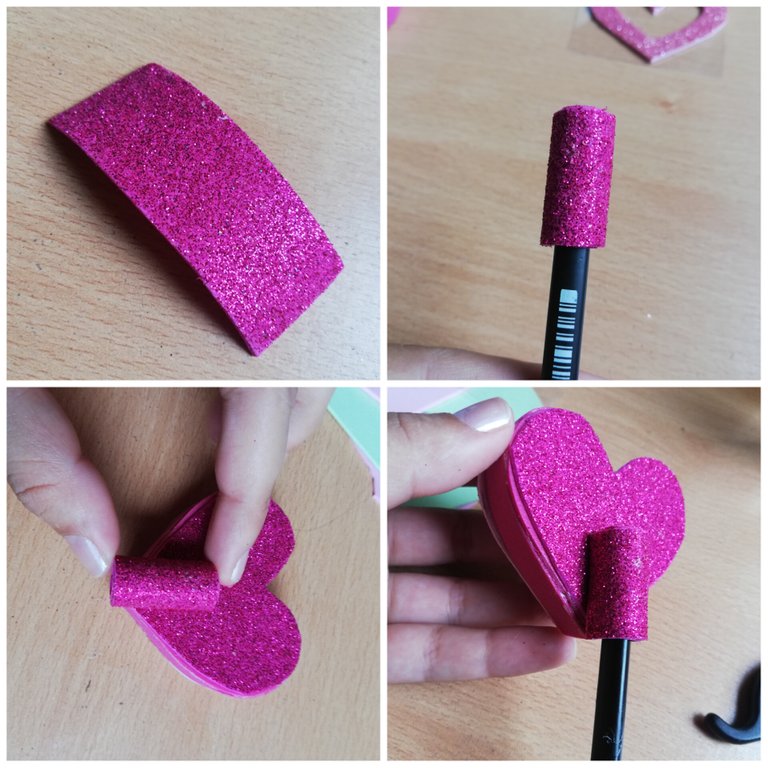
6️⃣ Recorté en Foami fucsia un rectángulo de 3cm × 9cm, el cual pegue en forma de cilindro (ayudándome con un lápiz para medir su grosor), y luego pegue a la parte trasera del corazón Brillante, y así de esta forma poder quitar y colocar cada vez que se desee la decoración al lápiz, así como cambiarlo y colocarlo al lápiz que más te guste🙈
6️⃣ I cut in fuchsia Foami a rectangle of 3cm × 9cm, which I glued in the shape of a cylinder (helping me with a pencil to measure its thickness), and then glued to the back of the Glitter heart, and thus in this way to remove and place every time you want the decoration to the pencil, as well as change it and place it to the pencil that you like🙈

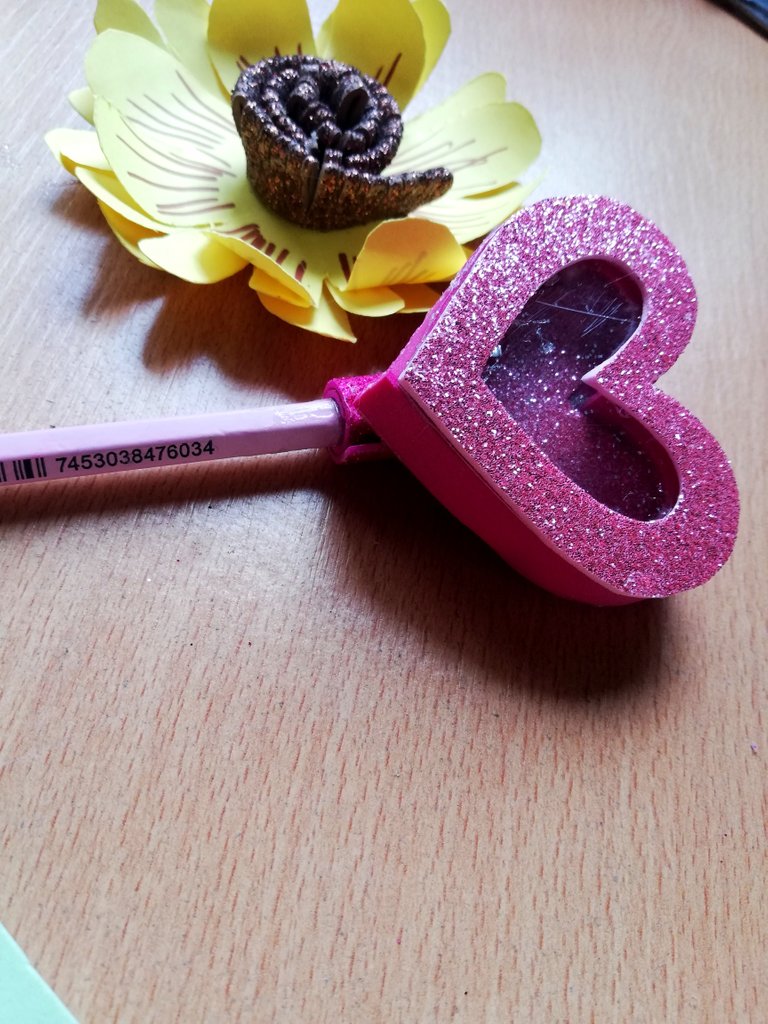
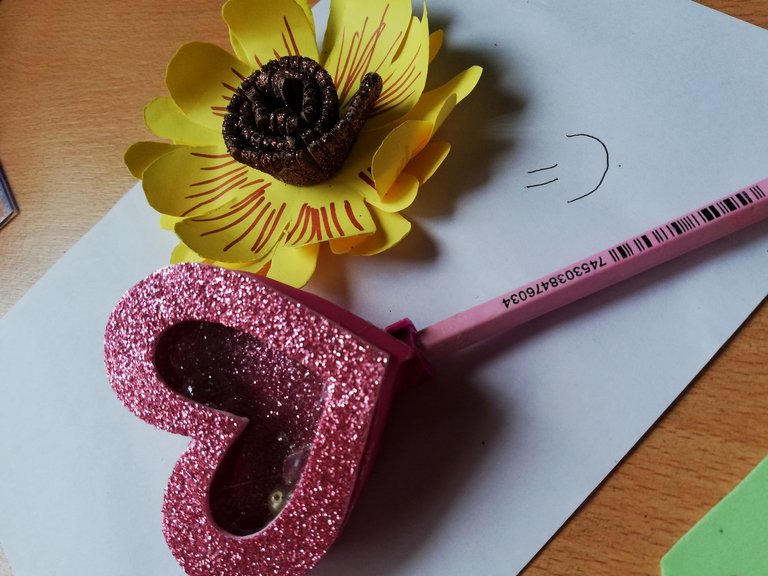
Resultados | Result✨
Siento que es una forma muy fácil y rápida para decorar nuestros bolígrafos o lápices, además de brindarle un poco de tu toque personal..🌸
Espero que les guste y que este post sea de su agrado amigos, pero cuéntame ¿decorarias así tus lápices?
I feel it's a very easy and quick way to decorate our pens or pencils, as well as giving them a little bit of your personal touch.🌸
I hope you like it and that this post is to your liking friends, but tell me would you decorate your pencils like this?
¡Hasta una próxima oportunidad amigos ✨🌸!
¡Until next time friends ✨🌸!
📷Ediciones | Editing in Canva and Picstar
✨Traducciones | Translations in Deepl


