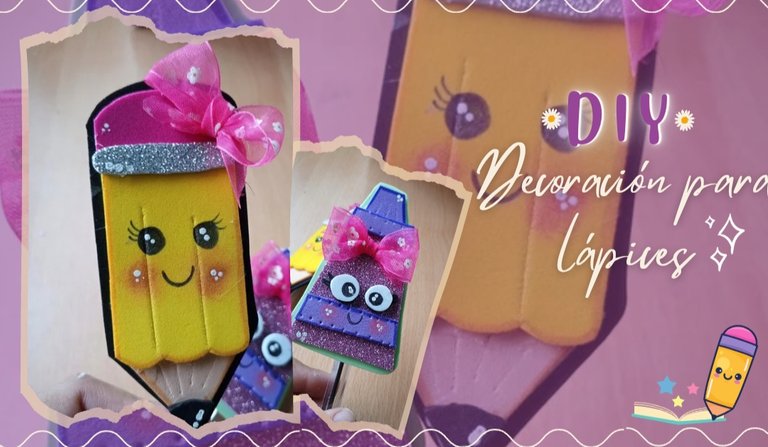
Hello creative friends! I hope you are feeling great and have had a wonderful day.... Every January 15th we commemorate those people who give their all to share their knowledge and who dedicate a great part of their lives to teach others, happy teacher's day (in case there are any of you who read me). Now, this Tuesday 16th being Lionella's back to school, they had a little activity to commemorate their teachers, each child had to learn a poem, and in turn my little girl asked me that she wanted to give something to her teachers, so I thought it was great to decorate them some pens with a school theme, and here I show you how easy it was ✨💗

Materiales:
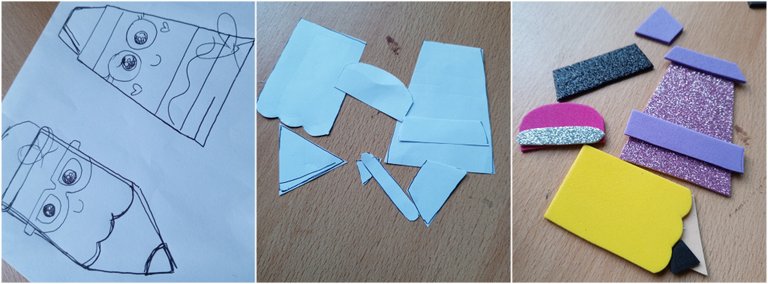
Foami liso de colores, amarillo, fucsia, morado, negro y verde claro.
Foami escarchado morado y plateado
Pintura al frio blanca
Marcador negro
Silicón
Cinta
Materials:
Plain Foami in colors, yellow, fuchsia, purple, purple, black and light green.
Purple and silver frosted Foami.
White cold paint
Black marker
Silicone
Tape
Paso a Paso | Step by Step✨
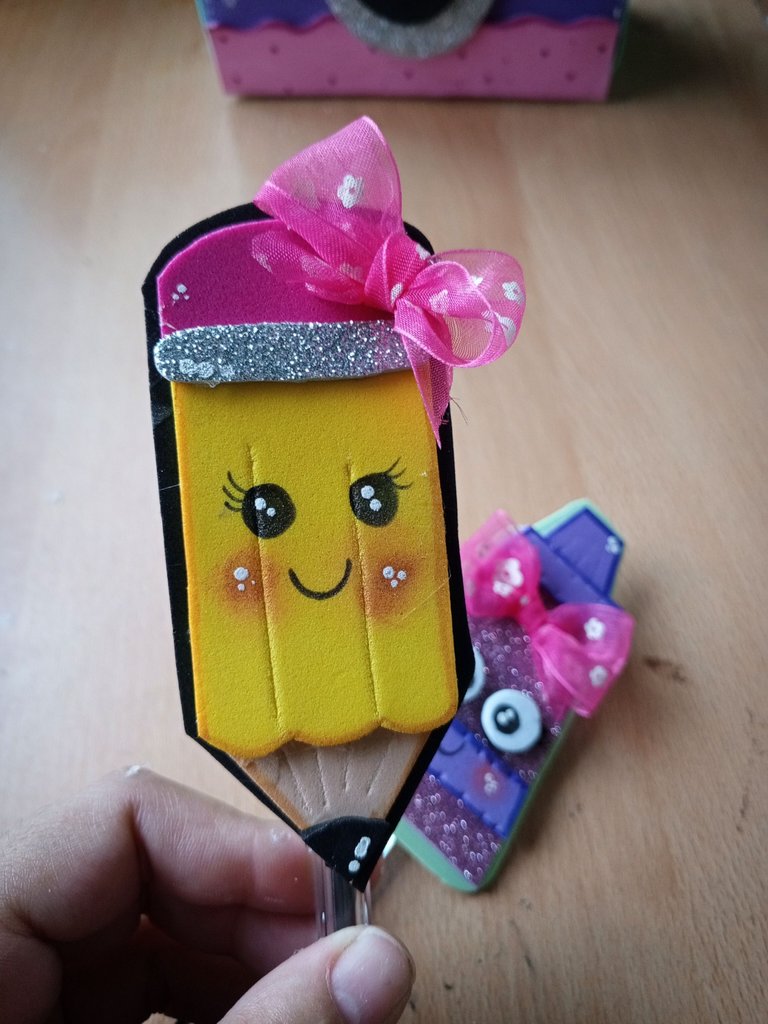
🩷 First, like most of my crafts, I drew myself a sketch in this case from a pencil and a paint stick, which I then used to cut out the patterns and shape each one on the foami corresponding to each color.
🩷 I started to assemble the pencil, first with light brown marker I blurred the body and tip of the pencil, with the help of the pointer I made some relief lines, and in I proceeded to glue each piece with silicone.

🩷Then with a marker I drew the eyes, eyelashes and mouth. I also colored the cheeks with blusher, to which I added a little light with white cold paint and the help of the pointer, I also made dots in the rest of the pencil, once dry I pasted on black foami and cut leaving a small border.
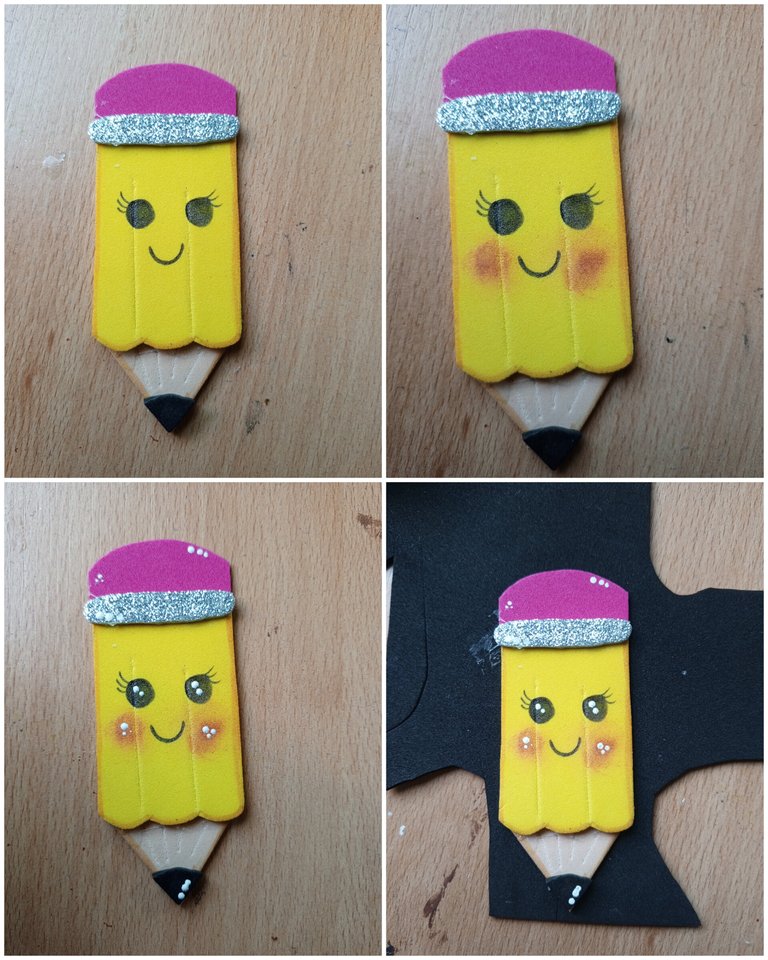
🩷 Then at the top, in what would be the eraser glue a mini bow made with ribbon and to finish on the back glue a strip of foami the same width of the pencil,just leaving a space to place the pen.

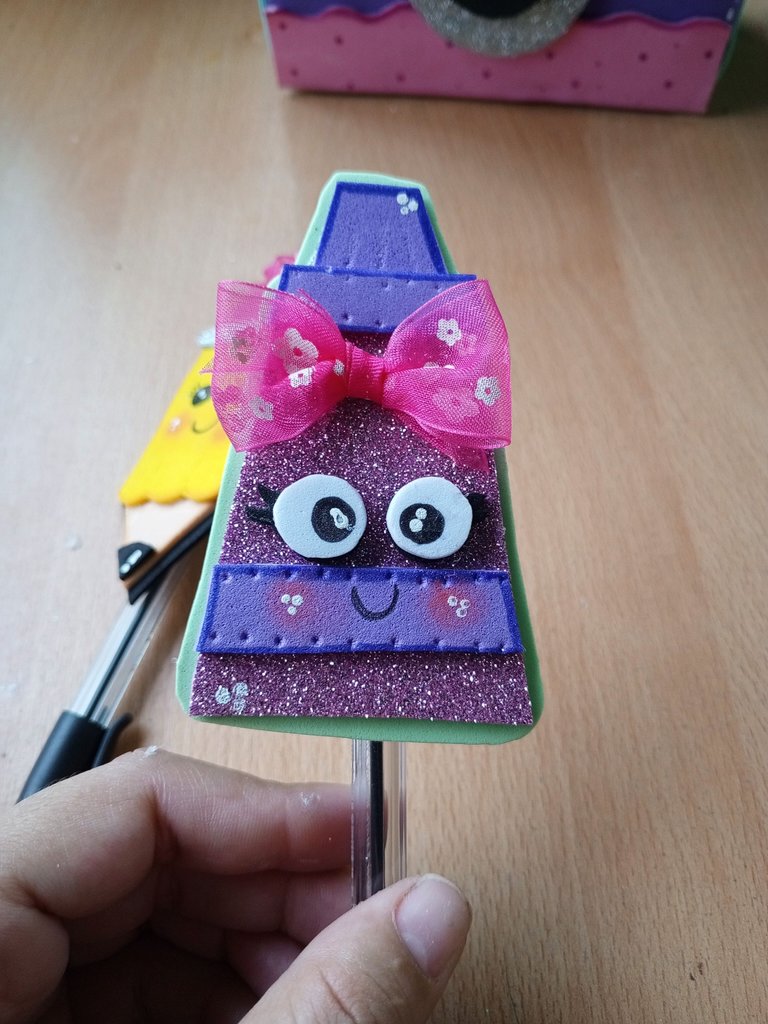
🩷 For the paint tube, I glued each piece in place and with the pointer I made some details in relief,then I helped me with the cap of a marker to make two circles in white foami, to which I then drew two black circles and glued on black foami to cut out and leave two spaces type tabs.

🩷 Pegué sobre foami verde claro y luego recorté dejando un pequeño borde.
🩷 I glued the eyes in place and also with blush I made the cheeks and with black marker I made the mouth. As with the pencil I also gave this tube of paint a little light using white cold paint, and as decoration I glued a ribbon bow.
🩷 I glued on light green foami and then cut out leaving a small border.

🩷 Repetí el proceso de pegar una tira por la parte trasera ya que como saben, esto sujetará al bolígrafo, culminando así estos lindos detalles✨
🩷 I repeated the process of gluing a strip on the back since, as you know, this will hold the pen, thus culminating these cute details✨.

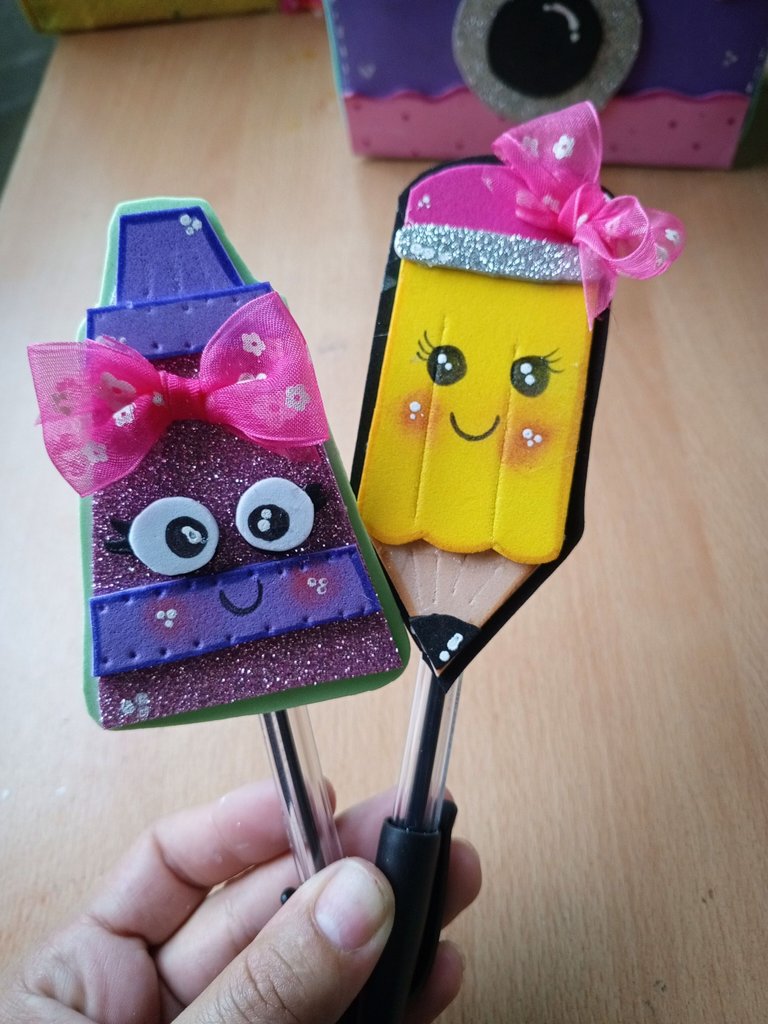
Resultado | Result✨
Son bastante sencillos de hacer, pero lo mejor que no dejas pasar en alto dar un obsequio a esos seres que están apoyando a tus niños en este camino además, como en mi caso que fue petición de mi princesa no estaba demás complacerla en darle un pequeño detalle a sus docentes en su día.
Sin más amigos, me despido y espero que esté post sea de su agrado ¡Hasta una próxima oportunidad!
They are quite simple to make, but the best thing is that you can give a gift to those people who are supporting your children on this path and also, as in my case it was my princess' request, it was not too much to please her in giving a little detail to her teachers on their day.
Without further ado friends, I say goodbye and I hope this post is to your liking See you next time!
📷Ediciones | Editing in Canva and Picstar
✨Traducciones | Translations in Deepl