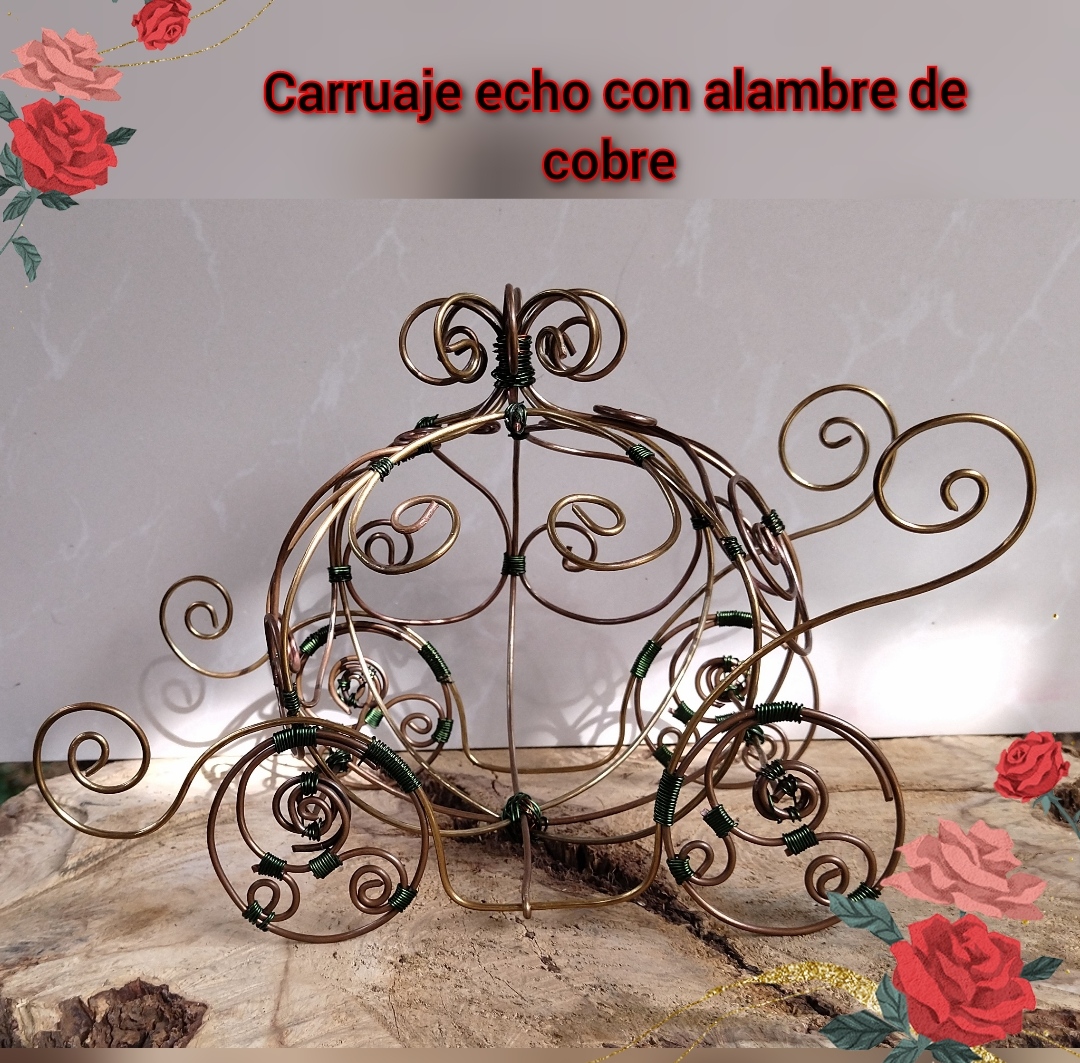
Carriage made of copper wire
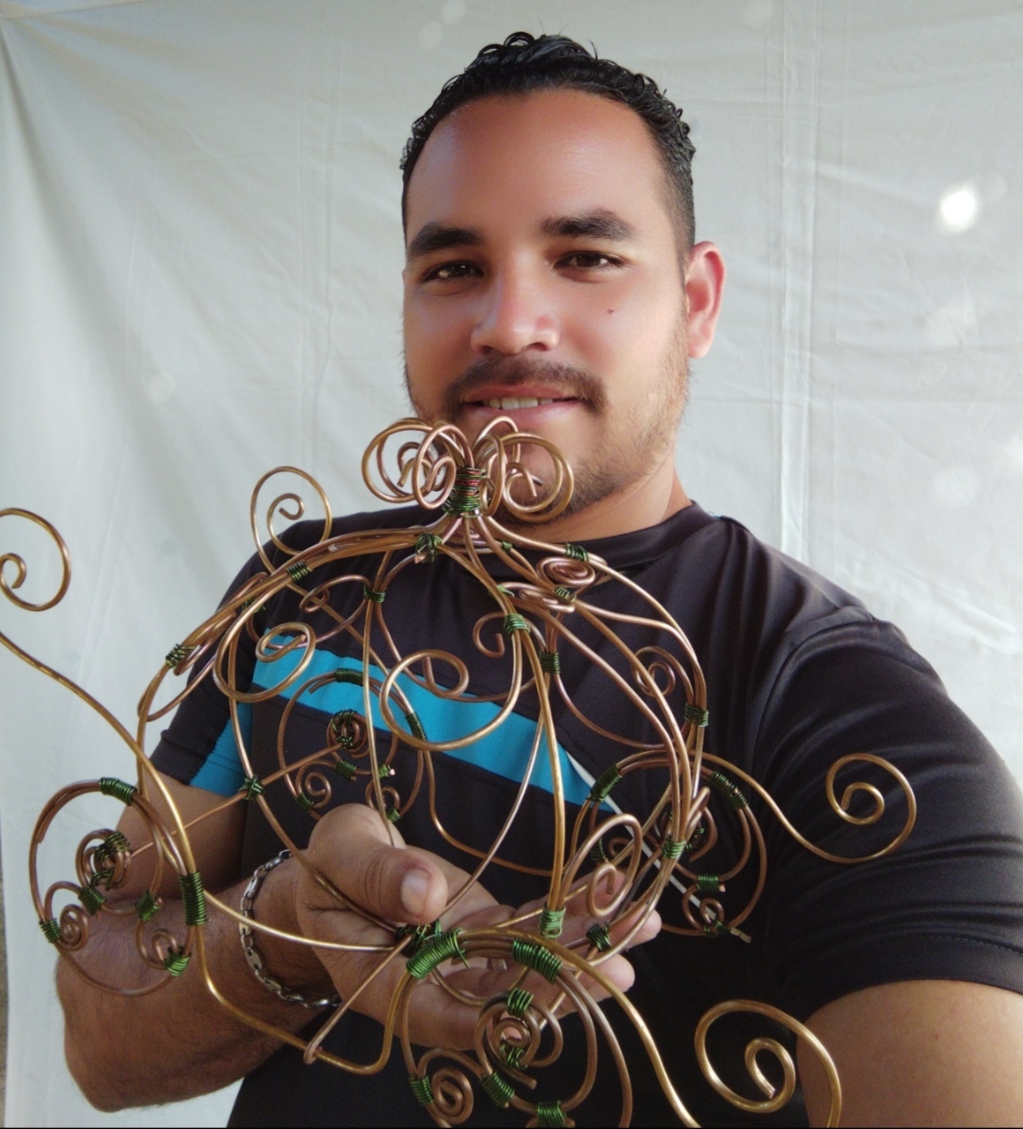
Feliz día para todos espero se encuentren bien el día de hoy quiero compartir con ustedes un hermoso carruaje echo con alambre de cobre, fue una idea muy buena con un poco de trabajo y paciencia lo logré tarde dos días más de lo debido pero fue solo para mejorarlo un poco espero les guste esta hecho con mucho cariño y amor.
Happy day to all I hope you are well today I want to share with you a beautiful carriage made with copper wire, it was a very good idea with a little work and patience I got it two days too late but It was just to improve it a bit. I hope you like it. It's made with a lot of care and love.
What do we need.
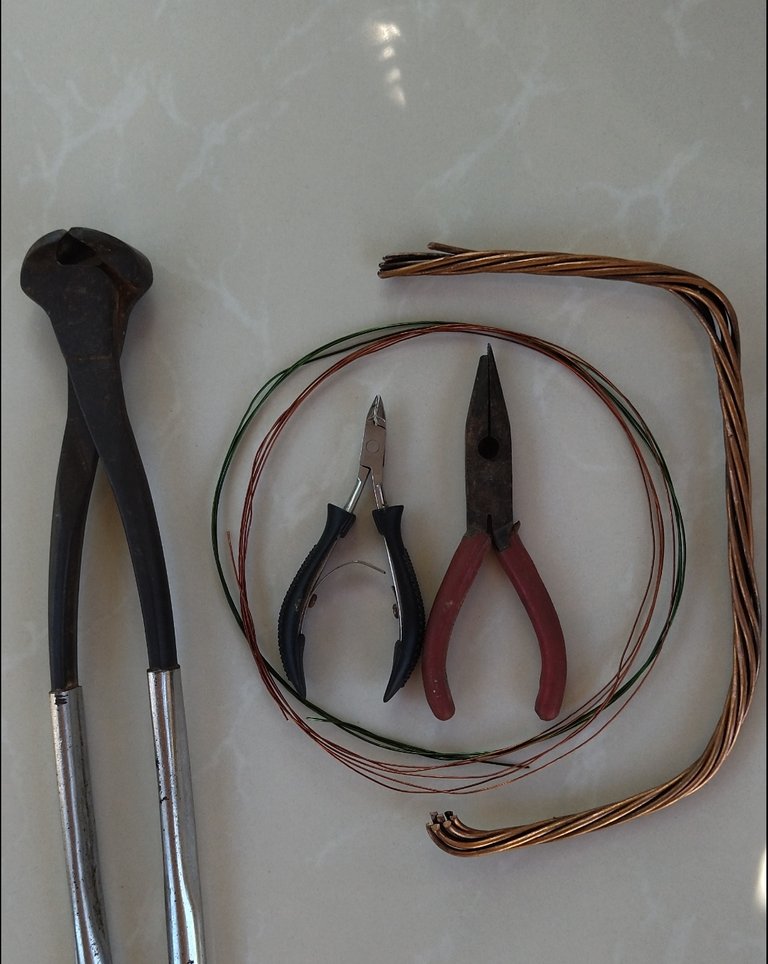
tenazas
alambre de cobre grueso y fino
- tongs
- coarse and fine copper wire
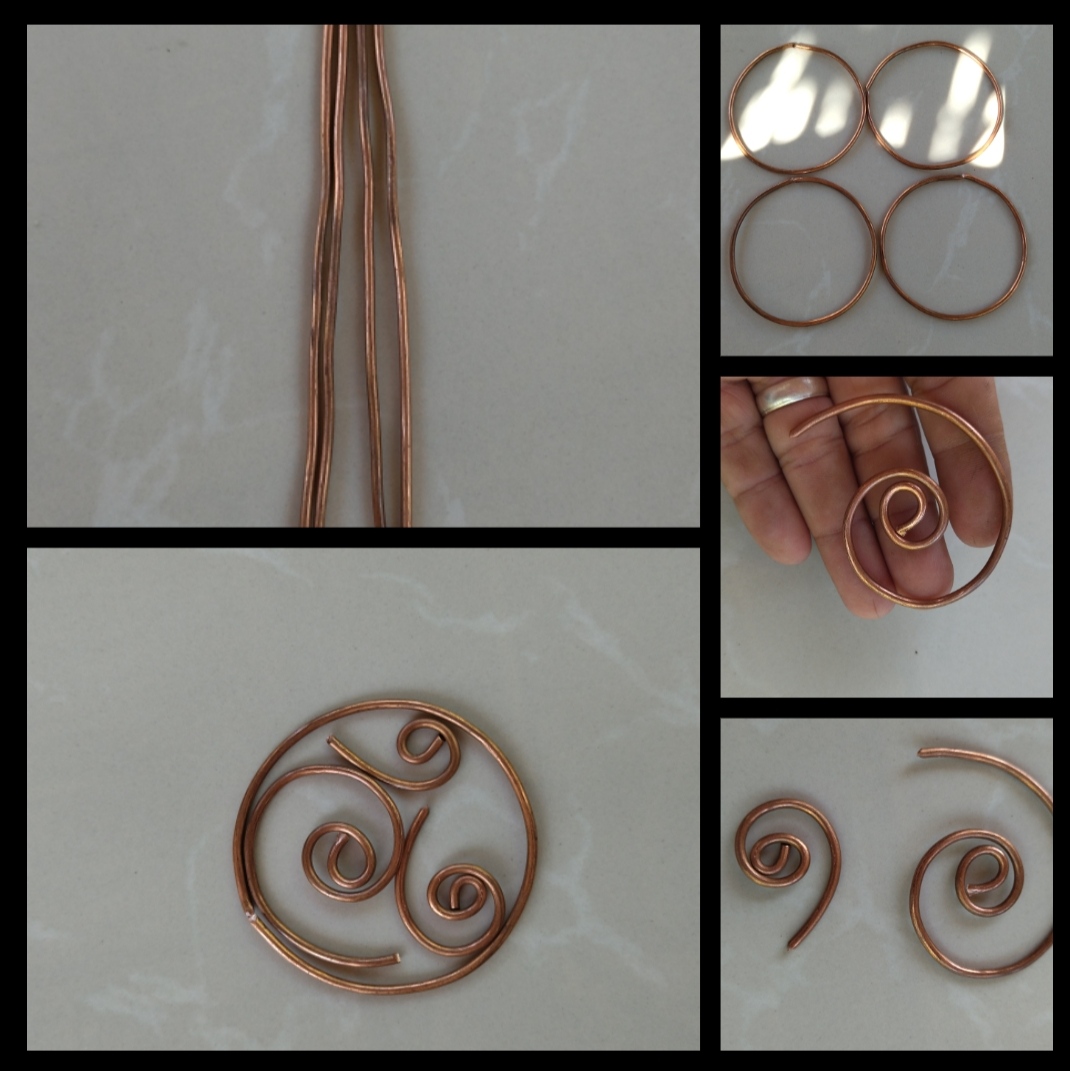
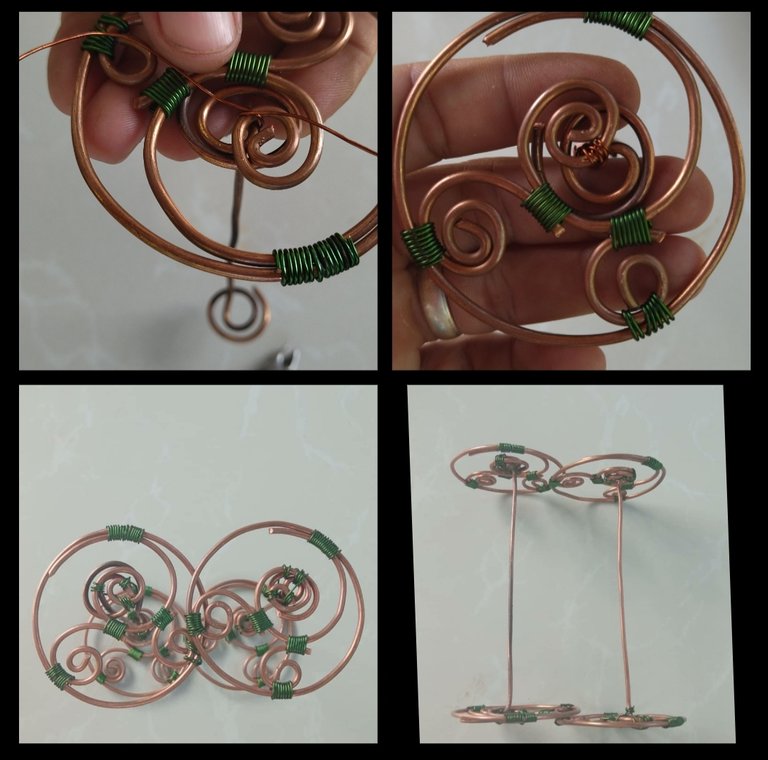
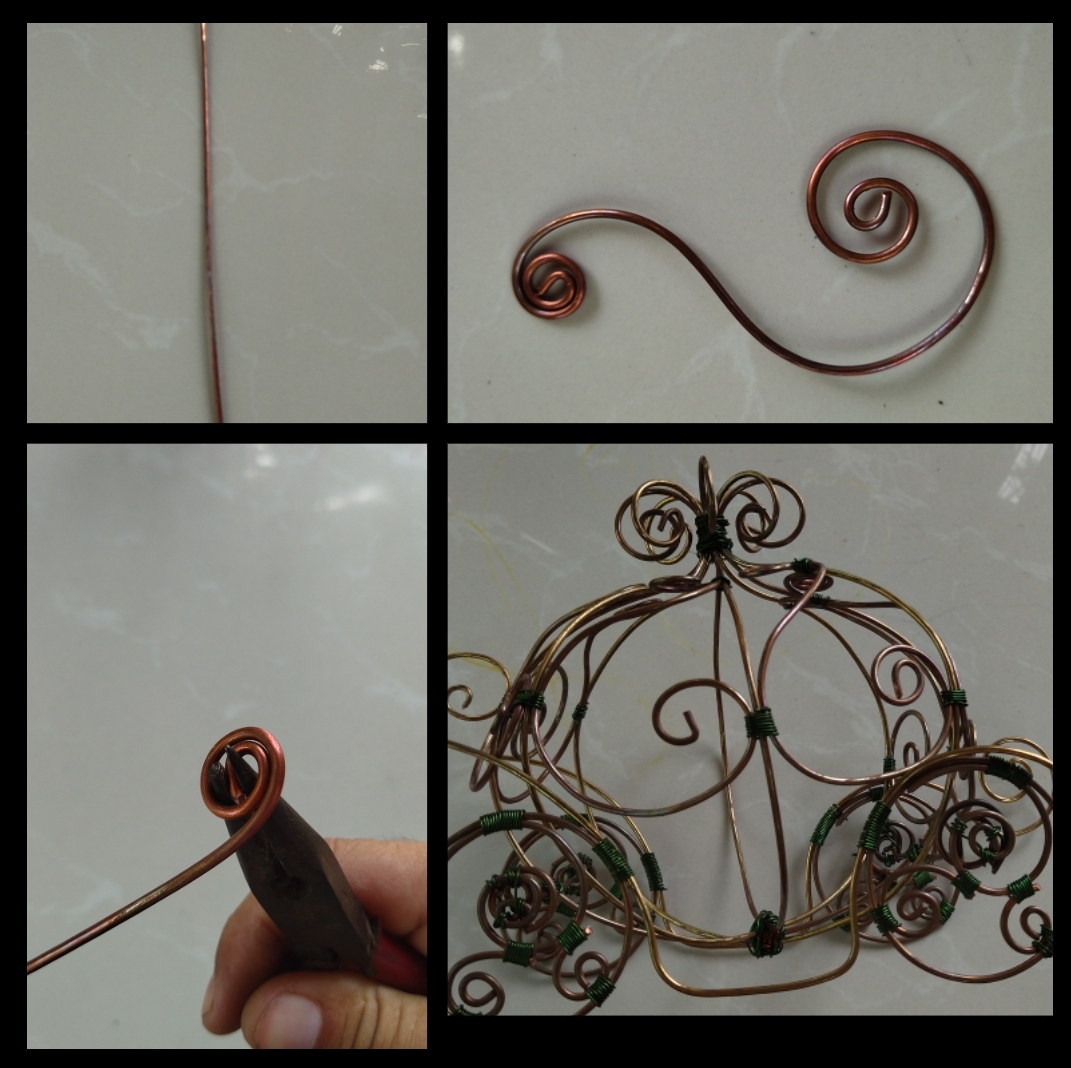
Paso 1: En este primer paso empezaremos con las ruedas, cortaremos cuatro troso de alambre del mismo tamaño doblaremos y le daremos forma redonda Terminado nuestros redondo haremos tres aspirar una grande,mediano y uno pequeño, ya teniendo todas las piezas las uniremos con nuestro alambre de cobre recordemos que son cuatro así que del mismo modo aremos las otras tres
Step 1: In this first step we will start with the wheels, we will cut four trisi of wire of the same size, we will fold and we will give it a round shape. with our copper wire let's remember that there are four of them so we will do the other three in the same way
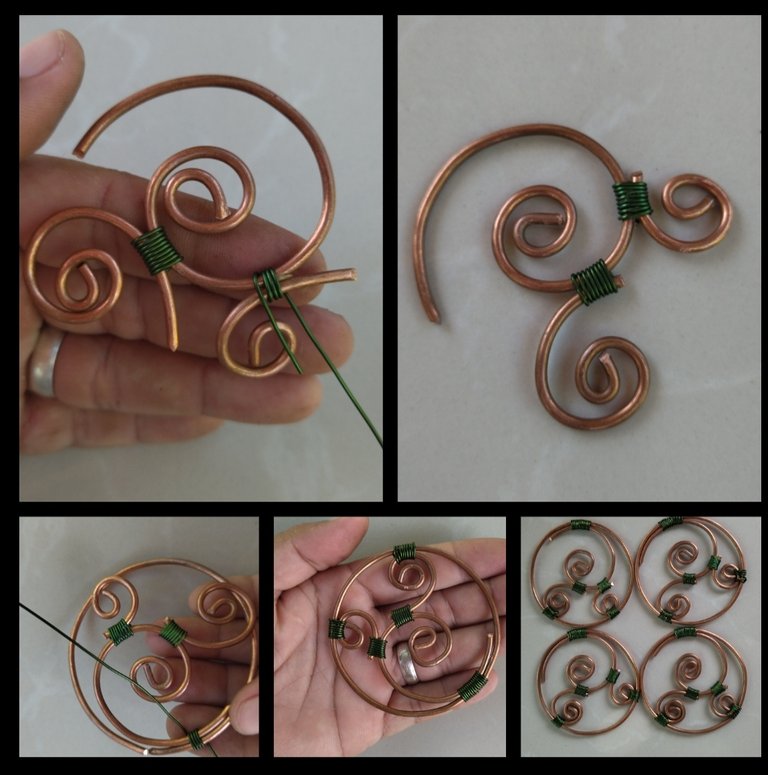
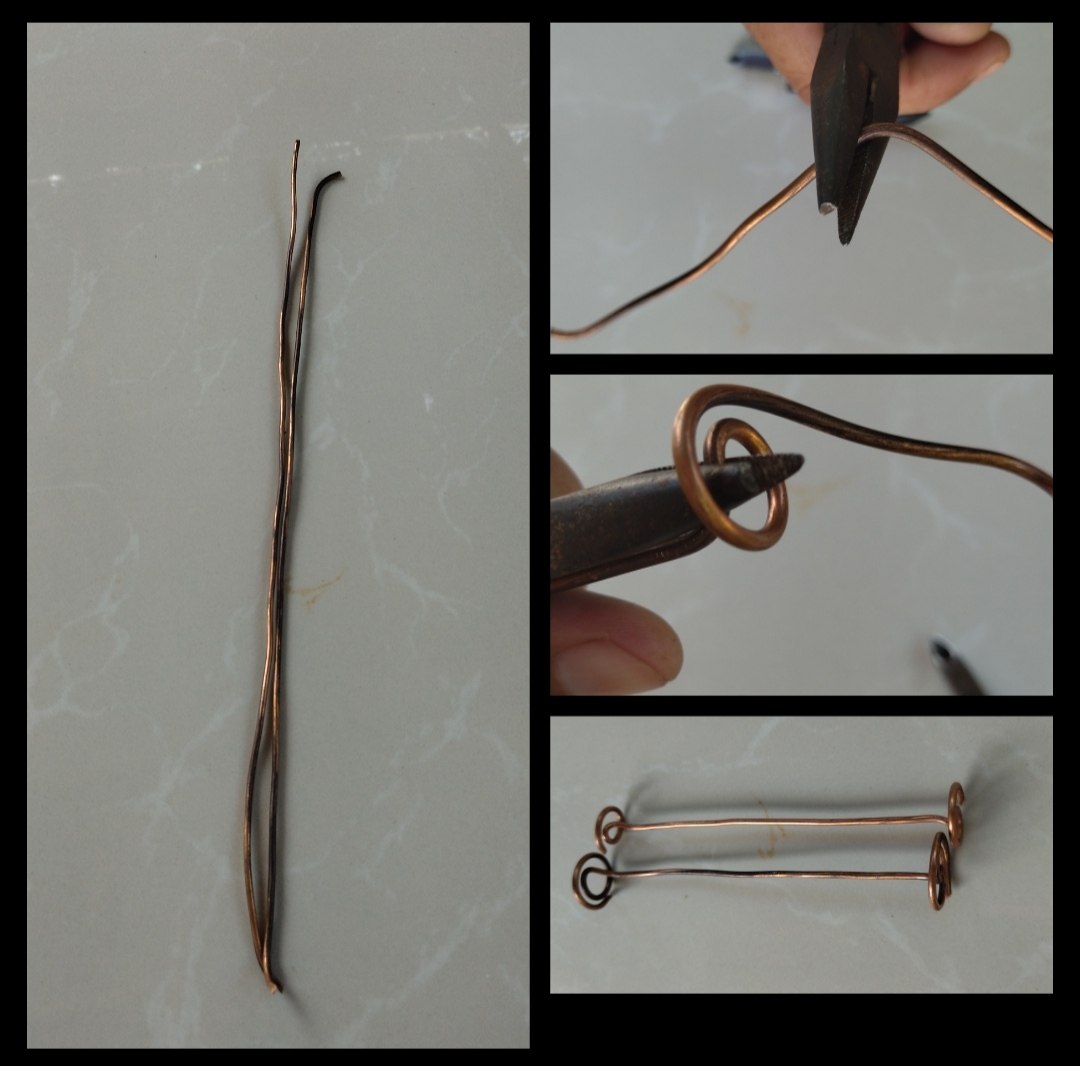
Paso 2: Cortaremos dos pesados de alambre para poder unir las ruedas pero antes doblaremos hacia un lado y le daremos vuelta en aspirar así aremos los cuatro lado listo nuestro dos trozo de alambre uniremos todas las ruedas con alambre verde así nos quedaran las ruedas listas.
Step 2: We will cut two heavy pieces of wire to be able to join the wheels but before we will bend to one side and we will turn it to vacuum so we will make the four sides ready our two piece of wire we will join all the wheels with green wire so we will have the wheels ready.
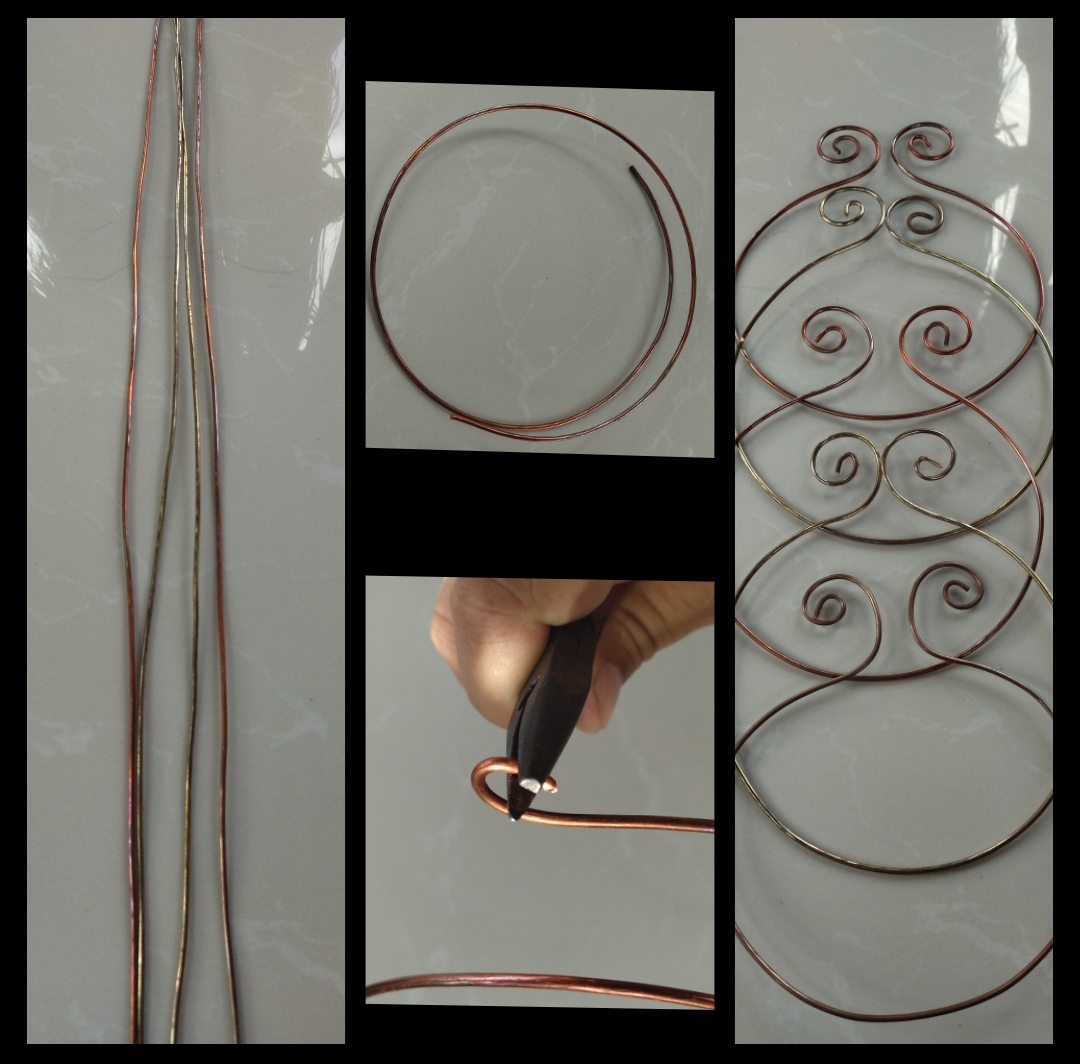
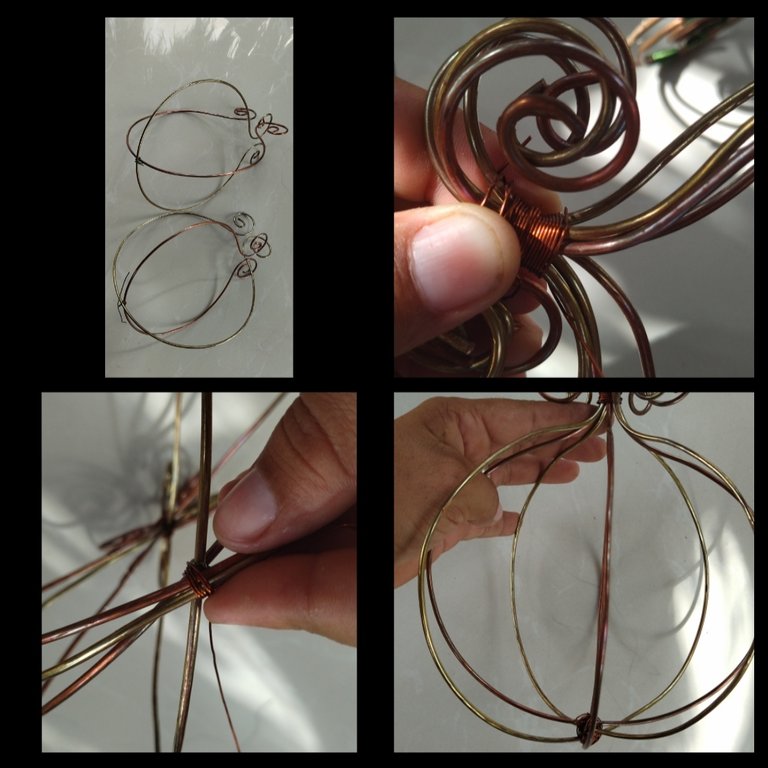
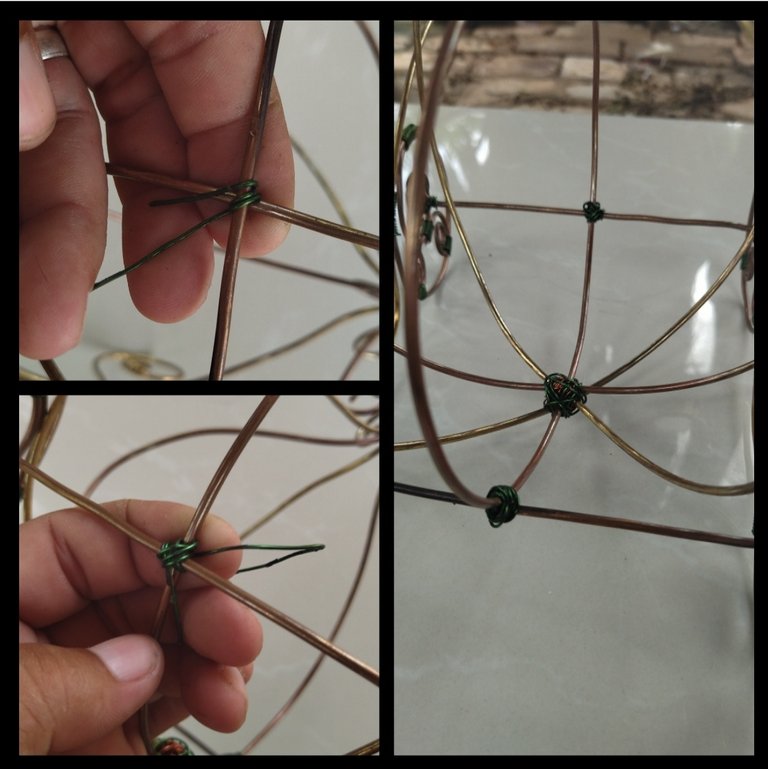
Paso 3: Cortaremos cuatro troso de alambre un poco largo después le daremos vuelta asta tener forma redonda los redondo lo podemos hacer utilizando algo redondo como un basó, después que te gamos los redondo le daremos vuelta en la punta, después que tengamos todo listo los uniremos atando los en la punta y en la parte de abajo así nos quedará una especie de globo con una coronita .
Step 3: We will cut four pieces of wire a little long, then we will turn them until they have a round shape, the round ones can be done using something round like a base, after we get the round ones, we will turn them at the tip, after we have everything ready we will unite them tying them at the top and at the bottom so we will have a kind of balloon with a crown.
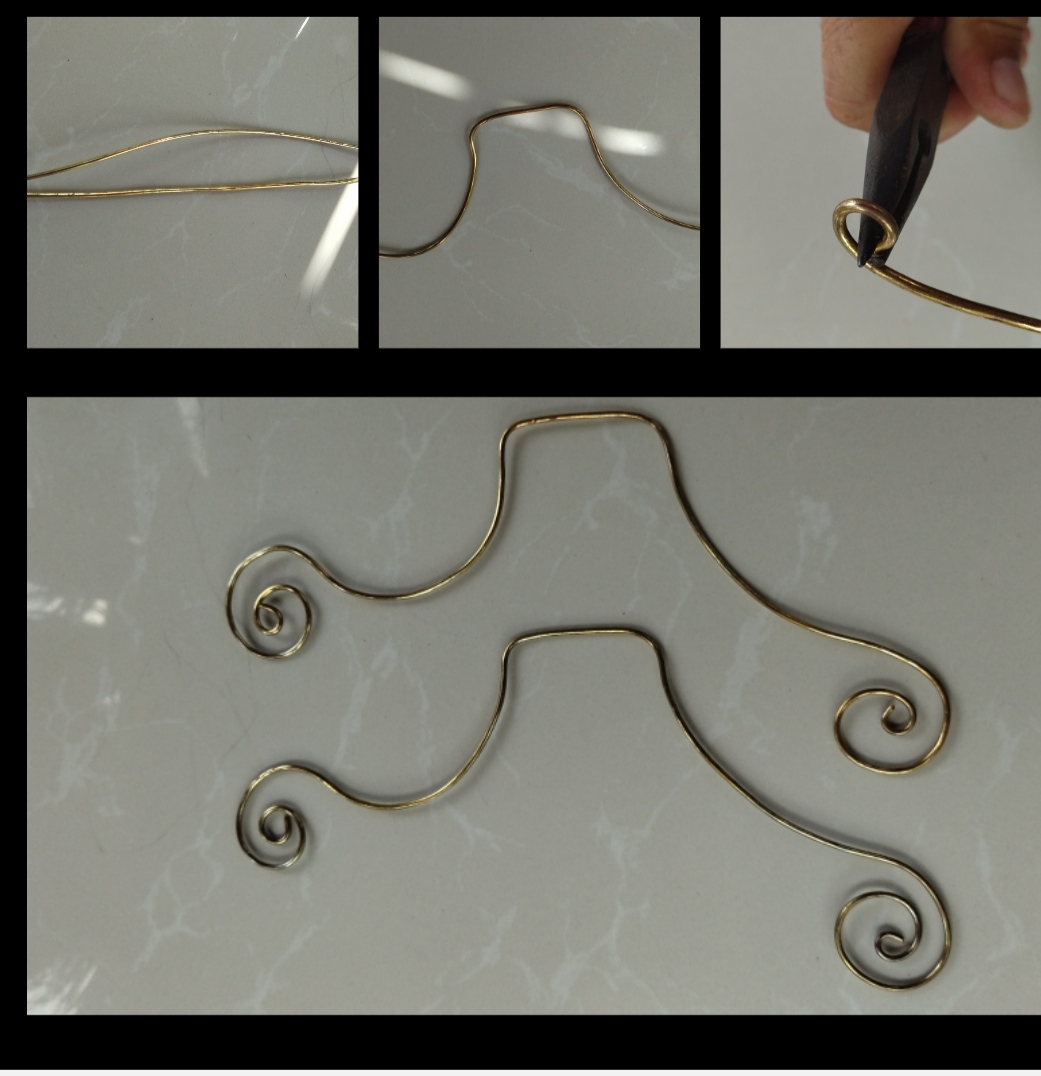
Paso 4: Cortaremos nuevamente dos troso de alambre largos y lo doblaremos como una U y después la forma que queramos yo la hice de esta forma.
Step 4: We will cut two long pieces of wire again and bend it like a U and then the signature that we want I made it this way.
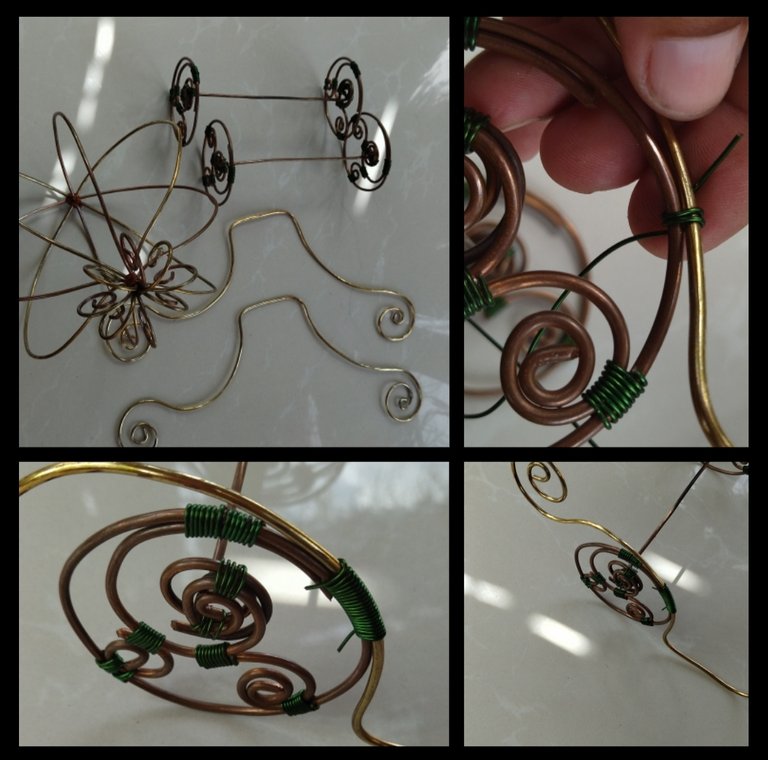
Paso 5: ya teniendo todos las piezas lista la empezaremos a unir, las dos parte que hicimos en el cuarto paso será para unir las dos piezas de la rueda para que nos quede el chasis por dar un ejemplo estas dos piezas las amaremos con nuestro alambre verde lo apretamos muy bien para que no se nos mueva mucho ya listo nuestro chasis le montaremos nuestra especie de globo y amaremos donde se pose el globo para que no se nos caiga.
Step 5: Once we have all the pieces ready, we will start joining them together. The two parts we did in the fourth step will be to join the two pieces of the wheel so that the chassis remains, for example, we will love these two pieces. With our green wire, we tighten it very well so that it does not move much. Once our chassis is ready, we will mount our kind of balloon and we will love where the balloon rests so that it does not fall.
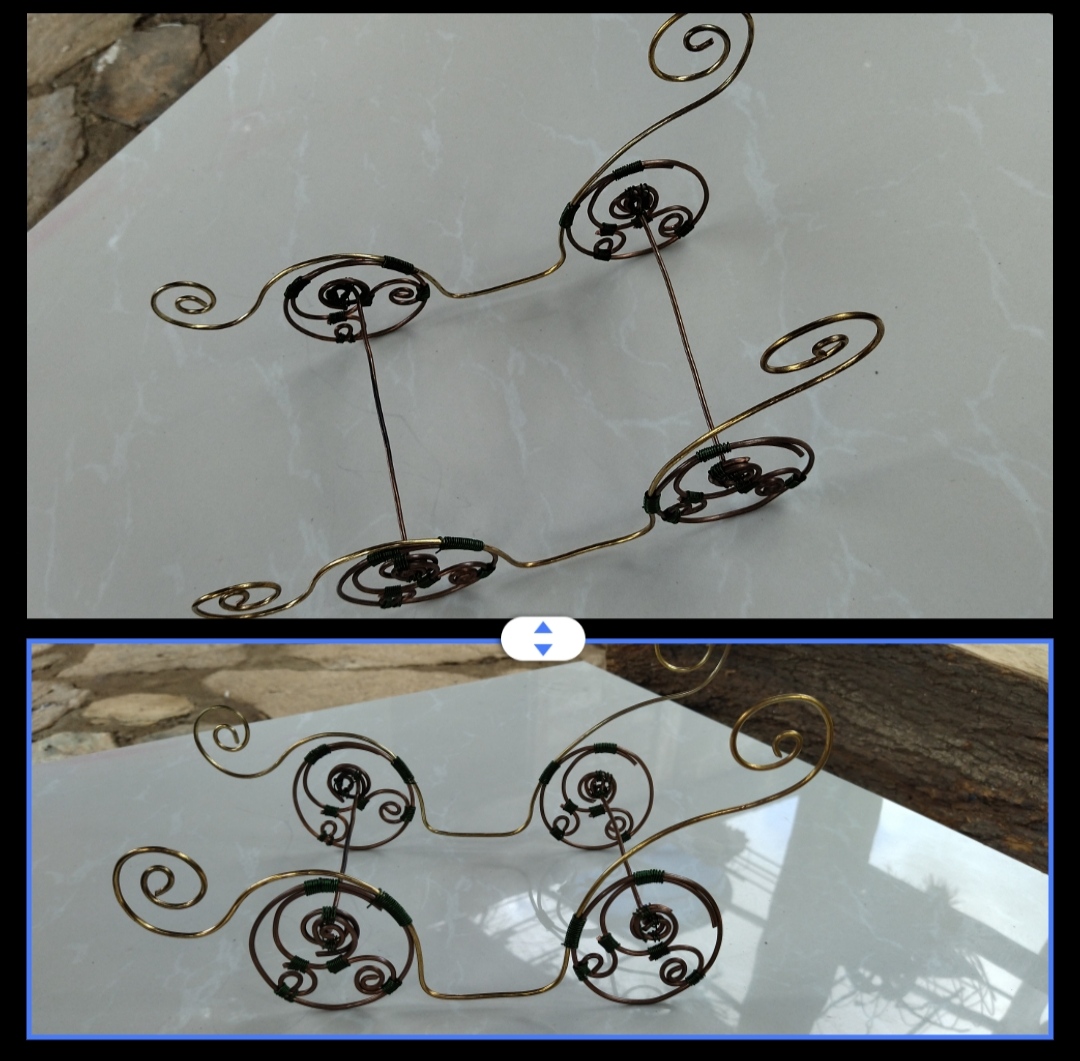
Paso 6: ya tenemos todo armado le daremos los últimos toques yo quise darle un poco más de emoción y dedicación le hice unas S para adornar por todo el alrededor de nuestro globo si ustedes quieren pueden pegarles piedritas y flores para darle un poco más de vista o también mariposas eso les quedará más bonito
Step 6: we already have everything set up we will give it the final touches I wanted to give it a little more emotion and dedication I made some S to decorate all around our globe if you want you can stick pebbles and flowers to give it a little more of sight or also butterflies that will be more beautiful
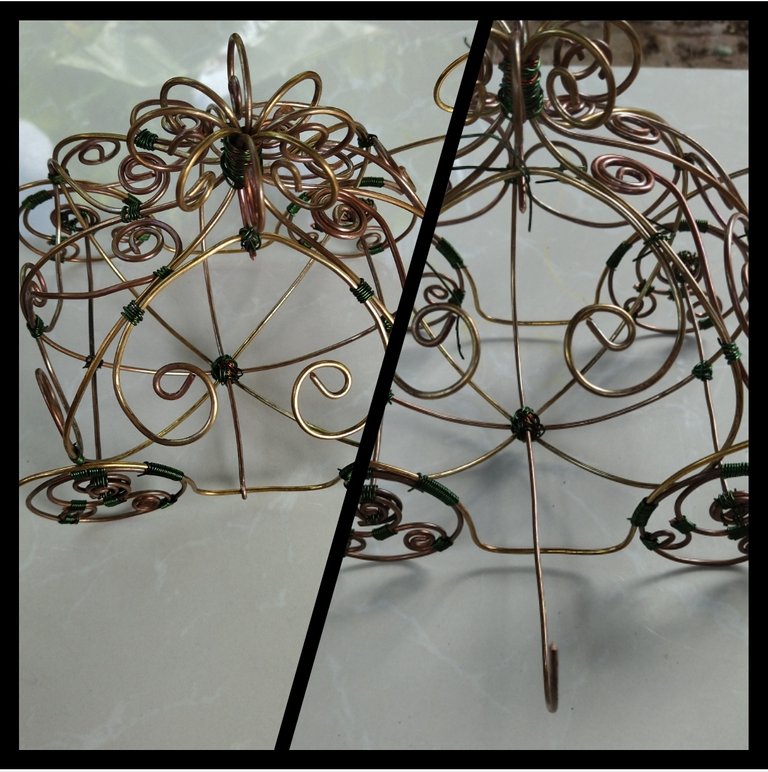
lista nuestro hermoso carruaje, espero que a las damas les guste, fue un gusto compartir con ustedes .
list our beautiful carriage, I hope the ladies like it, it was a pleasure to share it with you.
Todas las Fotos son de mi autoría y fueron tomadas con mi Celular Redmi 9T
All Photos are my authorship and were taken with my Redmi 9T Cellphone


