DIY: Creating an accessory for an artistic make-up

in #hive-1305602 years ago

photo_2023-04-07_20-31-28.jpg

Un saludo a todos, espero que estén teniendo una semana de descanso y relajación, hoy quiero compartir con ustedes un trabajo que hice con mis propias manos el día de hoy, la verdad creí que no iba a terminarlo nunca pero pude lograrlo a tiempo ya que quiero mañana hacer un maquillaje acompañado con este accesorio, esta vez quise decorar un cintillo utilizando una especie de alas, estas alas representan a los ángeles, pero en una versión opuesta pues hare un maquillaje de un Ángel oscuro, desde hace unos días tenía esto pendiente pues tengo muchísimas ganas de hacerlo pero he tenido muy poco tiempo libre, hoy por fin logre animarme y conseguir tiempo para hacerlo. Para realizar estas alas compre cartulina blanca, pues pensé que seria lo suficientemente fuerte para quedarse de pie, pero fue un error, por suerte pensé en una solución y logre que quedaran derechas las alas jaja.

Materiales:

  • Cartulina
  • Tijeras
  • Silicon caliente
  • Pinturas al frio
  • Pinceles
  • Lápiz
  • Cartón
  • Cintillo

Greetings to everyone, I hope you are having a week of rest and relaxation, today I want to share with you a work I did with my own hands today, the truth is I thought I was never going to finish it but I could do it in time because tomorrow I want to do a make up with this accessory, this time I wanted to decorate a headband using a kind of wings, these wings represent the angels, but in an opposite version because I will make a makeup of a dark Angel, since a few days ago I had this pending because I really want to do it but I have had very little free time, today I finally managed to cheer up and get time to do it.
To make these wings I bought white cardboard, because I thought it would be strong enough to stand, but it was a mistake, luckily I thought of a solution and I managed to get the wings straight haha.

Materials:

  • Cardboard
  • Scissors
  • Hot silicon
  • Cold paints
  • Brushes
  • Pencils
  • Cereal cardboard
  • Headband

Corazón banner (1).png

Proceso/Process

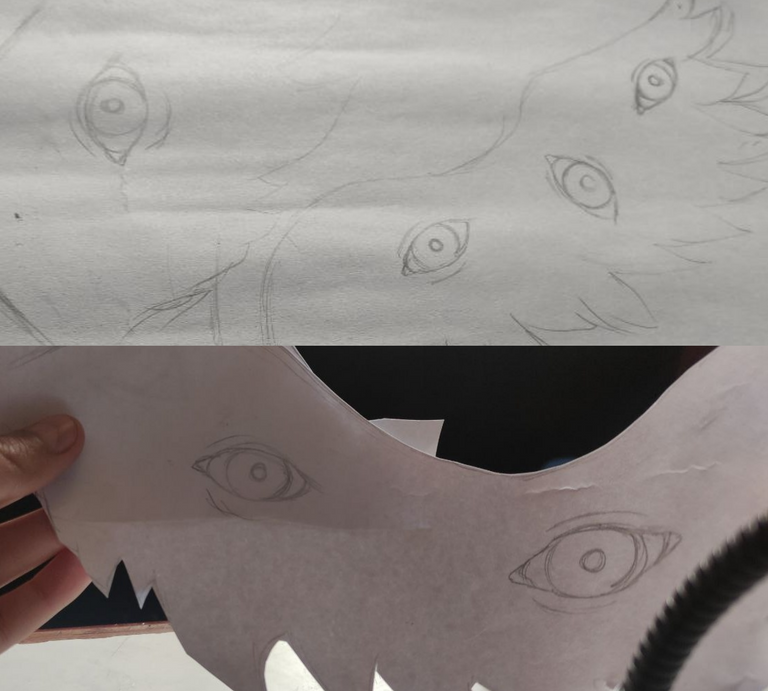
Una vez que tenía listos mis materiales en mesa, tomé la cartulina blanca y con un lápiz comencé a dibujar la forma de las alas, haciendo una pequeña una mediana y otra mas grande, me ayude un poco con el cintillo para medir al ojo de que tamaño quería las alas.

Once I had my materials ready on the table, I took the white cardboard and with a pencil I began to draw the shape of the wings, making a small one, a medium one and a bigger one, I helped myself a little with the headband to measure to the eye how big I wanted the wings to be.
1.jpg

Comencé a dibujar los ojos, para luego recortar las alas, después de recortarlas las utilice como plantilla para hacer las alas del lado izquierdo, igualmente las recorte y le dibuje los ojos.

I began to draw the eyes, then I cut out the wings, after cutting them out I used them as a template to make the wings on the left side, I also cut them out and drew the eyes.
2.png

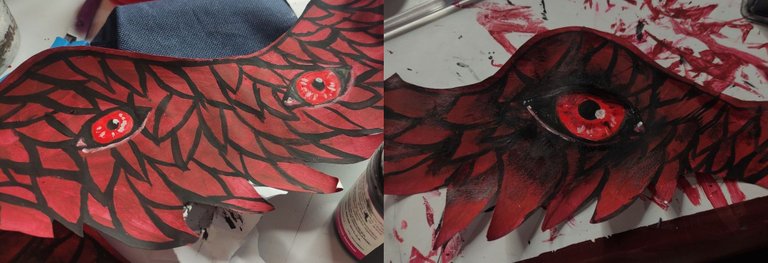
Para pintar utilice pinturas al frio, tengo una pintura al frio roja pero el rojo era demasiado feo y llamativo, asi que tomé un poco de pintura roja y la mezcle con una gota de azul dándole así un tono más oscuro, se veía bastante lindo, empecé a pintar cada ala rellenándola de rojo y luego dejándolas secar, con pintura negra tracé las líneas de las “plumas” y también delinee los ojos, rellene con negro la parte blanca de los ojos y pupilas, dejando el iris en blanco, para este punto no tenia mucha fe en como estaba quedando pues se veía bien feo jajaja, pero le di una oportunidad y confié en el proceso.

To paint I used cold paints, I have a red cold paint but the red was too ugly and flashy, so I took some red paint and mixed it with a drop of blue giving it a darker tone, it looked pretty nice, I started to paint each wing filling it with red and then letting it dry, with black paint I traced the lines of the "feathers" and also outlined the eyes, I filled with black the white part of the eyes and pupils, leaving the iris in white, at this point I didn't have much faith in how it was turning out because it looked pretty ugly lol, but I gave it a chance and trusted the process.
3.jpg

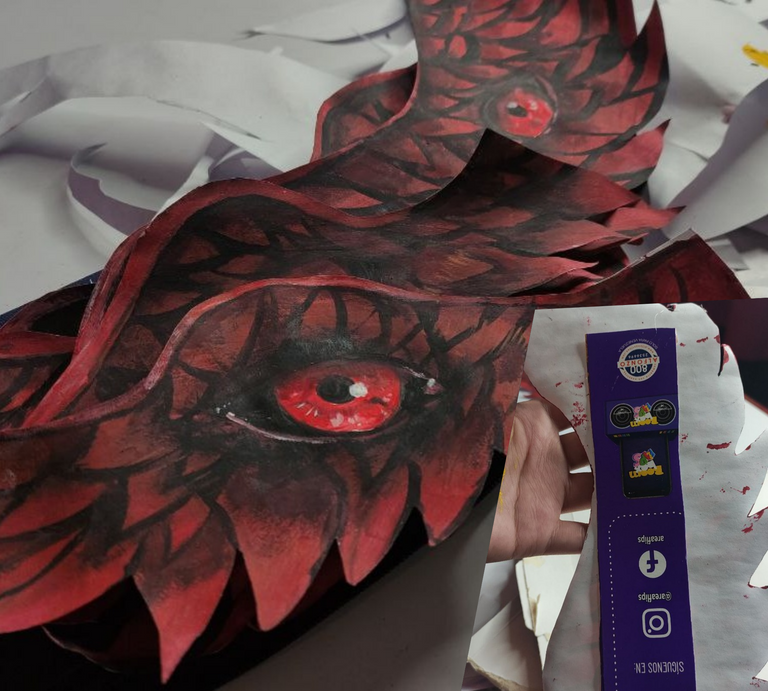
Rellene el iris con rojo, esta vez use el rojo directamente desde la pintura ya que quería un rojo mas llamativo, con pintura blanca añadí algunas iluminaciones al ojo, luego utilice un pincel en seco para comenzar a darle sombras con pintura negra, tomaba algo de pintura y dejaba el excedente en una hoja para luego pintar y darle este sombreado alrededor del ojo y debajo de cada pluma.

I filled the iris with red, this time I used the red directly from the paint as I wanted a more striking red, with white paint I added some highlights to the eye, then I used a dry brush to start shading it with black paint, I took some paint and left the excess on a sheet and then painted and gave it this shading around the eye and under each feather.
4.jpg

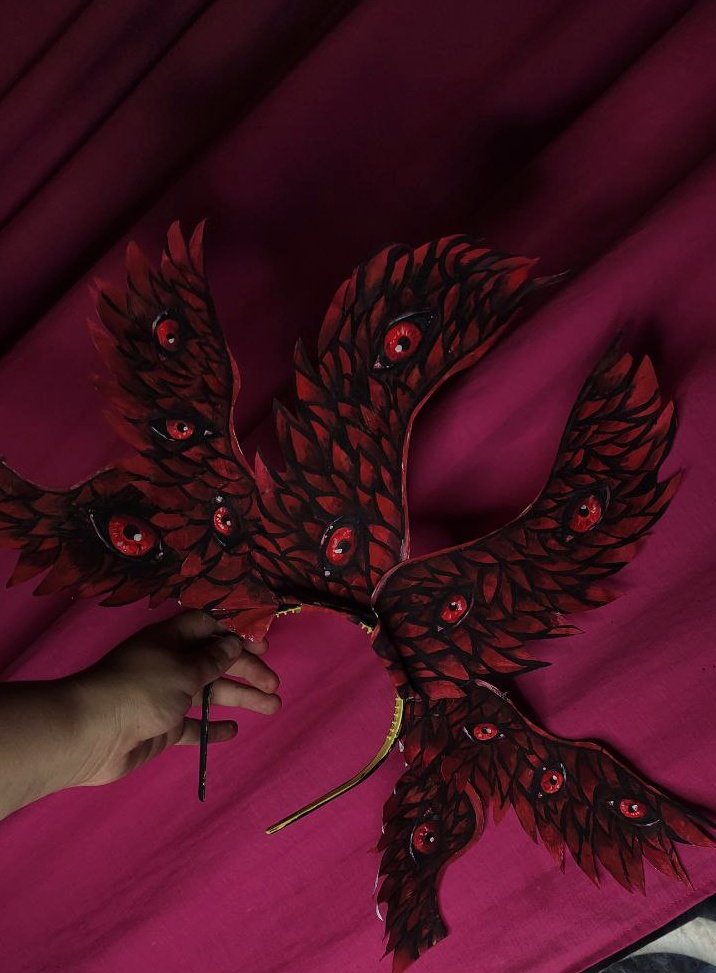
Hice todo este proceso en cada ala, esto me llevo muchísimo tiempo pero quería que quedara perfecto, durante todo este tiempo desde que empecé olvide que deje encendida la pistola de silicón, realmente creí que este trabajo me tomaría poco tiempo y la deje calentando, cuando recordé me di cuenta que ya se había acabado casi toda la barra la silicón, tuve que moverme muy rápido y pegar las alas con el poco de silicón que tenia pues ya no me quedan mas barritas jajaja, esta fue la parte mas estresante pues algunas alas quedaron fuera de lugar pero ya no podía hacer mucho, si la despegaba perdería silicón y además era muy probable que se estropearan, sin embargo no quedo tan mal, el problema fue cuando pegue todas las alas y me di cuenta que obviamente la cartulina blanca se había debilitado por toda la pintura, entonces fue cuando decidí improvisar y tome una caja de cereal, la recorte y comencé a pegar tiras detrás de las alas que ayudaran a estabilizarla y mantenerse derechas ¡Funciono muy bien!

I did all this process in each wing, this took me a lot of time but I wanted it to be perfect, during all this time since I started forgot that i leave the silicone gun on, I really thought that this job would take me little time and I left it heating, when I remembered I realized that had already finished almost all the silicone bar, I had to move very fast and glue the wings with the little silicone I had because I have no more sticks left hahaha, this was the most stressful part because some wings were out of place but I could not do much, if I peeled it off I would lose silicone and it was very likely that they would be damaged, however it was not so bad, the problem was when I glued all the wings and I realized that obviously the white cardboard had been weakened by all the paint, then I decided to improvise and took a cereal box, cut it and began to paste strips behind the wings to help stabilize it and keep it straight, it worked very well!
5.png

Aunque la parte derecha no quedo igual a la izquierda, estoy muy feliz de poder haber hecho este accesorio que estoy segurísima quedara genial con el maquillaje de mañana, es muy divertido poder crear con nuestras manos cosas a las que podemos sacarle provecho de alguna u otra forma, siempre digo que yo no sirvo para hacer cosas que tengan relación con manualidades por eso me siento bastante orgullosa cuando algo queda bien jaja. Espero que les haya gustado!

Although the right side does not look the same as the left, I'm very happy to have made this accessory that I'm sure will look great with tomorrow's makeup, it's fun to create with our hands things that we can take advantage of one way or another, I always say that I'm not good to do things that are related to crafts so I feel quite proud when something looks good haha.
I hope you liked it!
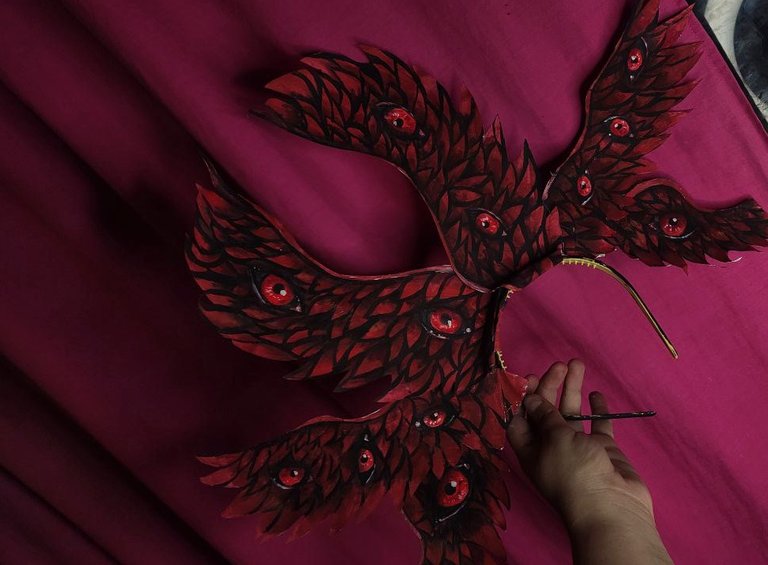
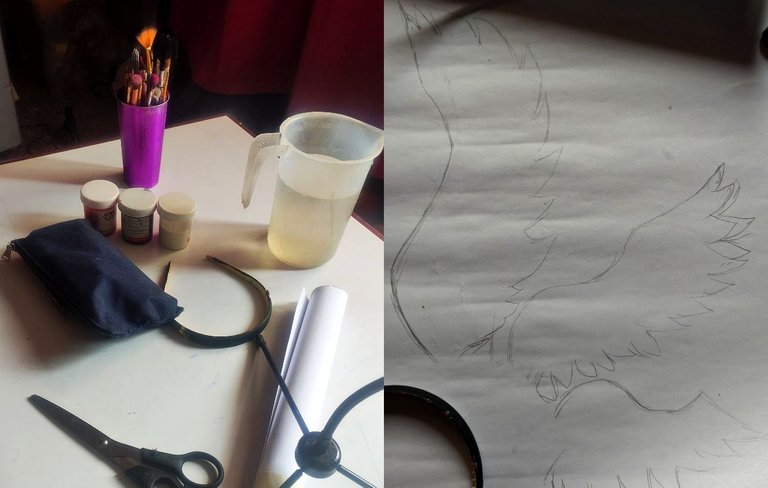
photo_2023-04-07_21-17-38.jpg

Sort:  

The finished product looked like 3D art. I like the details of the eyes! That's very creative of you to create such accessories. For sure the accessories look great in you.

Wow! thank you so much i really appreciate it

This is great. I forget how simple props can be some times. I always think they need to flawlessly constructed and incredibly detailed, but this reminds me that they can be made from almost anything, and at a very low cost, too!

Yes, sometimes I limit myself a lot thinking exactly the same thing, but there are really things that can be done very easily, even with recyclable materials 😁


The rewards earned on this comment will go directly to the people( @tere.alv ) sharing the post on Twitter as long as they are registered with @poshtoken. Sign up at https://hiveposh.com.

Por un momento pense eran reales los ojos, luego vi el paso a paso y eran pintados :o estan tan bien pintados que parecen reales 😍

Que bueno! me alegra saber que al menos dan esa impresion, te lo agradezco!! 🥰

Hermosa creatividad.....has hecho un gran trabajo @alexa.art

Gracias!!

Impresionante trabajo, ya quiero ver ese maquillaje acompañado de este accesorio.

Muchisimas gracias!! ya esta hecho ☺

so your doing biblical angel i guess the prop looks so good i love the eye details

Yep!! thank you so much ❤