English Version
English VersionWelcome to my Blog
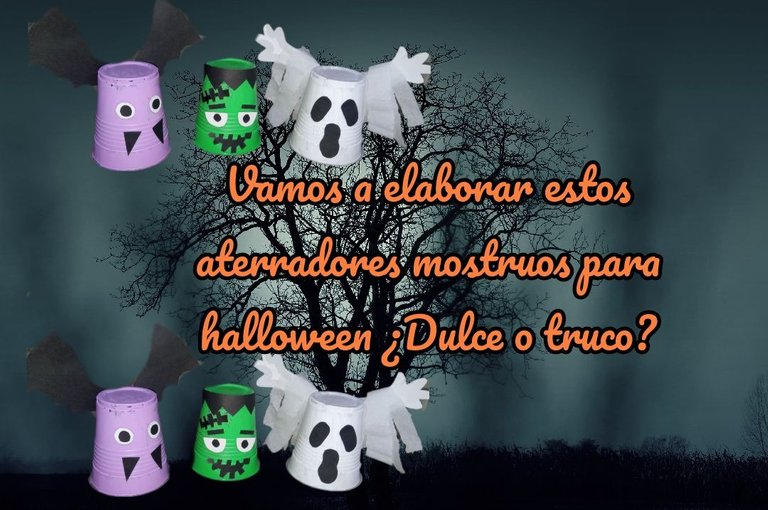
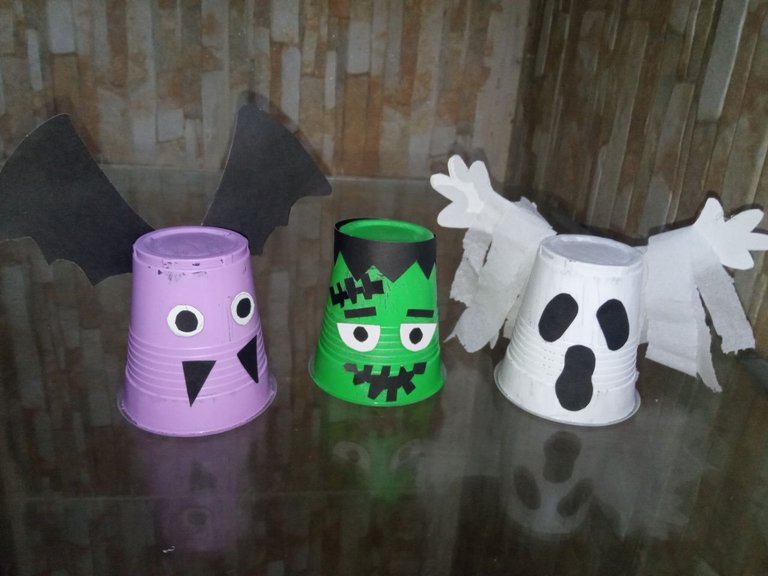
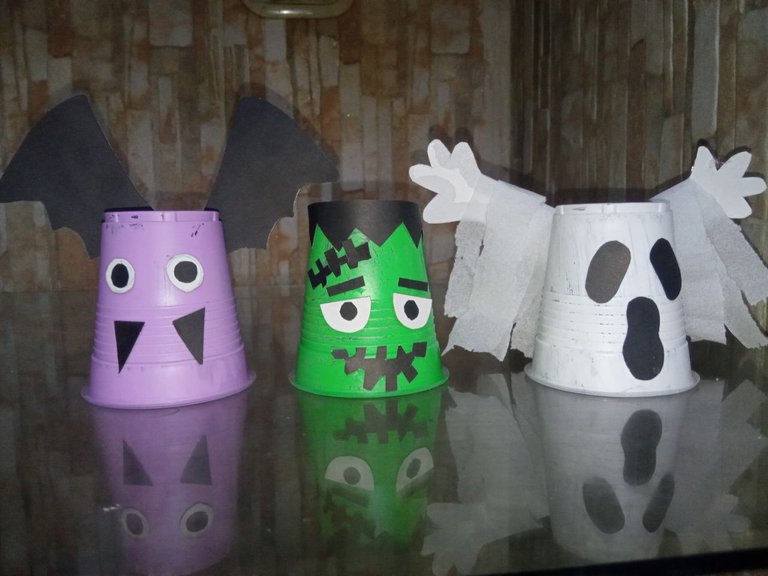
Welcome to my BlogYessssss... Greetings fellow #Hivediy crafters, I hope everyone here is doing well. Today is I'm in halloween mode and the truth is that the festivities are approaching and my decorations for this day were scarce, so it can not be, I am a witch who celebrate halloween and also light candles to my loved ones who have departed from this world, so that light illuminates their return home. It seems unbelievable, but I refused to make big expenses for these days in terms of decoration is required, the truth at home we are a little tight monetariamete, but that does not mean that I was going to let this holiday overlooked No sir! So, in order to appreciate the elements I had at home to make my crafts, I came out of my brilliant little head to create some scary monsters for Halloween and the end result was a combination of recycling and creativity. Trick or treat?
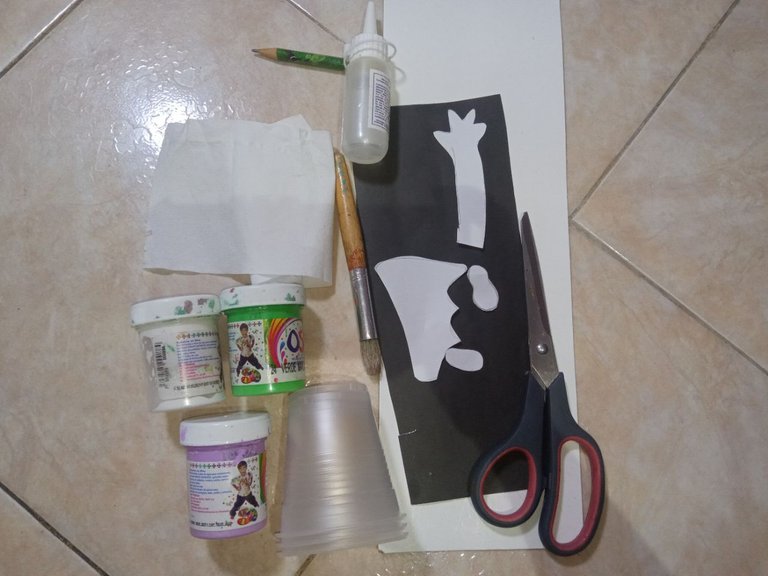
For this craft I wanted to combine something practical and simple to make, but with a great visual impact, the materials used are as follows:
✓ 3 disposable plastic cups.
✓ Black and white cardboard.
✓ Cold paints: white, purple, apple green.
✓ Cold silicone for gluing.
✓ Patterns for: arms, eyes, wings and mouth of the figures.
✓ A piece of toilet paper.
✓ Thick brush.
✓ Pencil.
✓ Scissors.
Let's get started:
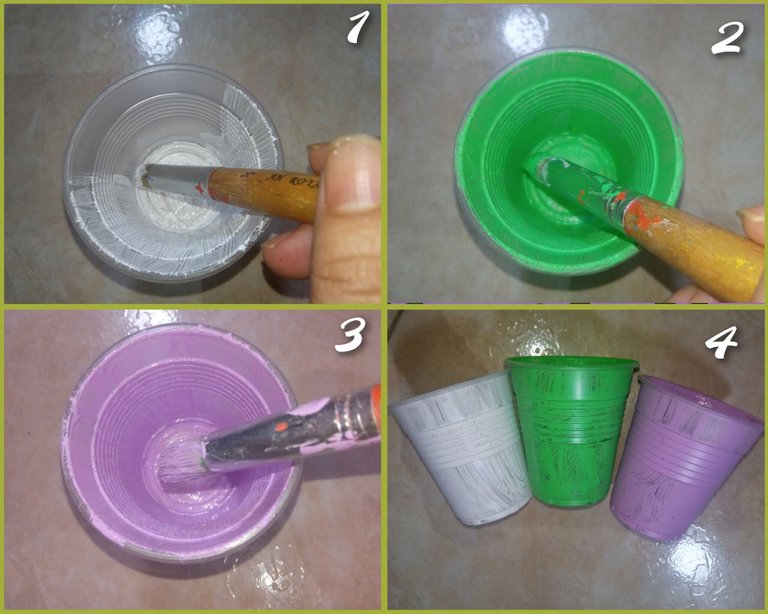
Take your three disposable cups and paint the inside with one of the chosen colors (white, green, purple) let dry and go over the paint.
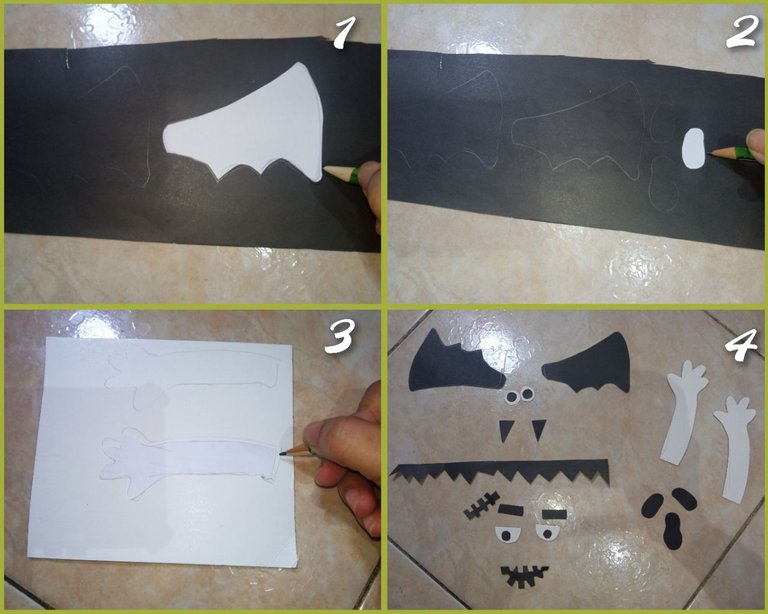
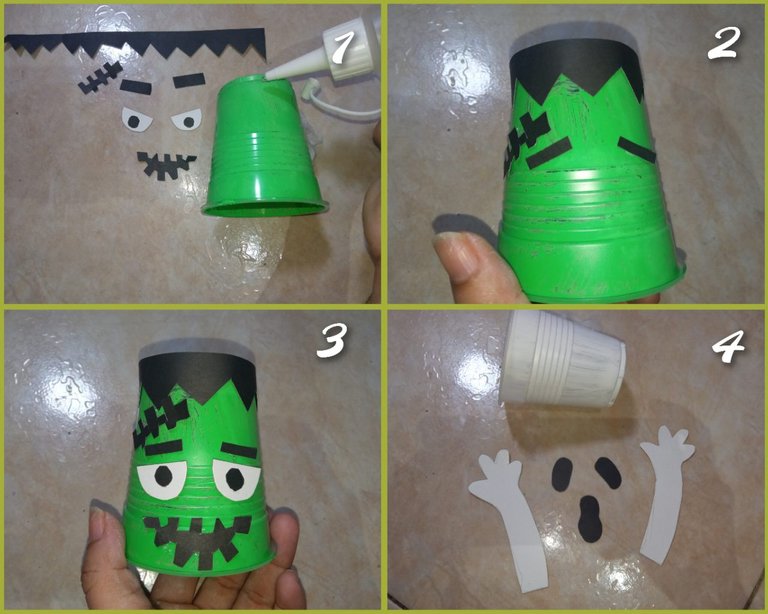
Now, take the patterns and transfer them onto the black and white cardstock. For the ghost's hands, trace on the white card stock and his eyes and mouth on the black card stock. For the bat, transfer the wings and fangs onto the black card stock and the eyes onto the white card stock. Cut out each piece of both figures with the scissors. Also, cut out the hair, eyes, mouth, eyebrows and forehead cutout of our Frankenstein from the black cardboard.
When you have all the pieces of the three monsters, we are going to glue each one of them where it corresponds with the cold silicone. I started by gluing the pieces of my Frankenstein on the glass that I painted green. Then continue with the ghost (and glue toilet paper on his arms to give him more texture) and then the vampire.
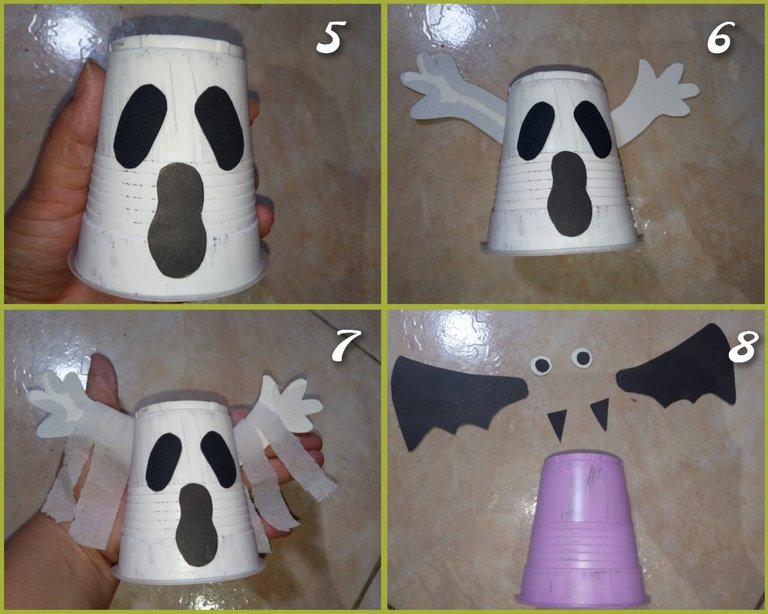
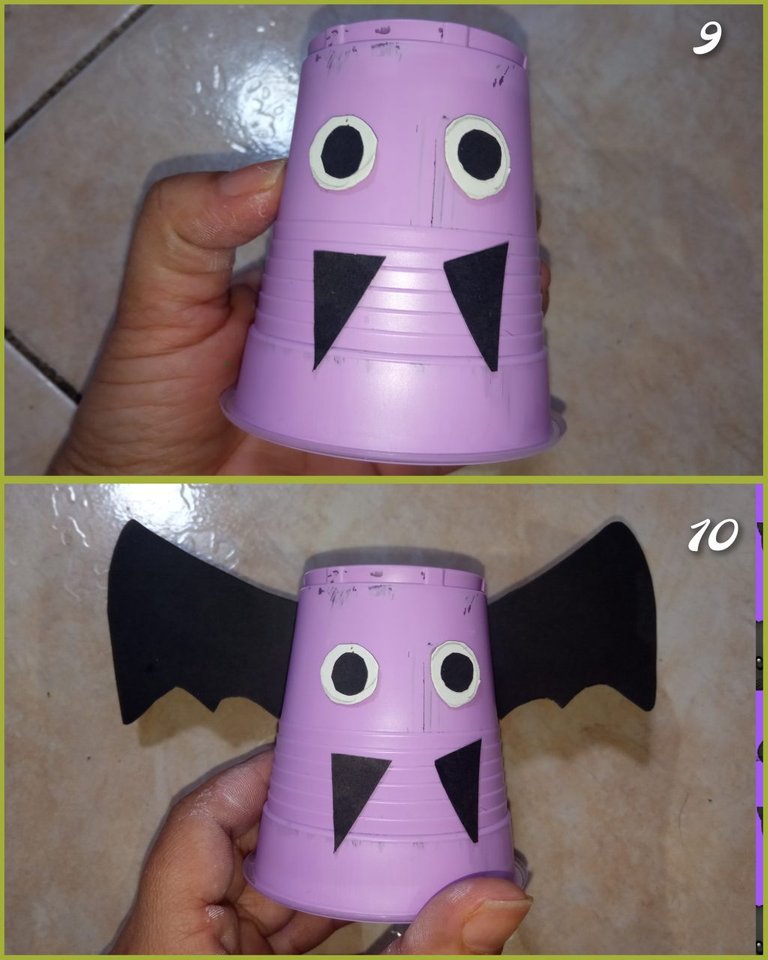
To finish, I adjusted the wings of my bat and put more toilet paper on my ghost. That's how I got these creepy creatures - Happy Halloween!

Versión Español
Bienvenidos a mi Blog
Vamos a elaborar estos aterradores mostruos para halloween ¿Dulce o truco?
Siii... Saludos amigos artesanos de #Hivediy, espero que todos por acá se encuentren bien. Hoy es estoy en modo halloween y es que la verdad se acercan las festividades y mis decoraciones para este día estaban escasas, así que no puede ser, yo soy una brujita que celebro halloween y también enciendo velas a mis seres amados que ya partieron de este mundo, para que luz ilumine su regreso a casa. Parece mentira, pero me negué a hacer grandes gastos para estos días en cuanto a decoración se requiere, la verdad en casa estamos algo apretaditos monetariamete, pero eso no significa que iba a dejar pasar esta festividad por alto ¡No señor!. Así que, en plan de apreciar los elementos que disponía en casa para hacer mis manualidades, salió de mi brillante cabecita crear unos aterradores mostruos para halloween y el resultado final fue una combinación entre reciclaje y creatividad. ¿Dulce o truco?
Para esta manualidad quise combinar algo práctico y sencillo de realizar, pero con un gran impacto visual, los materiales utilizados son los siguiente:
✓ 3 vasos plástico desechables.
✓ Cartulina colores blanco y negro.
✓ Pinturas al frío: blanco, violeta, verde manzana.
✓ Silicón frío para pegar.
✓ Patrones para: brazos, ojos, alasy boca de las figuras.
✓ Un pedacito de papel sanitario.
✓ Pincel grueso.
✓ Lápiz.
✓ Tijeras.
Vamos a comenzar:
Toma tus tres vasos desechables y pinta su interior con uno de los colores escogidos (blanco, verde, violeta) deja secar y repasa la pintura.
Ahora, toma los patrones y traspasa en las cartulinas negra y blanca. Para las manos del fantasma traspasa en el cartulina blanca y sus ojos y boca en la cartulina negra. Para el murciélago, traspasa las alas y los colmillos en la cartulina negra y los ojos en la blanca. Recorta cada pieza de ambas figuras con las tijeras. También, recorta en la cartulina negra el cabello, los ojos, la boca, las cejas y el corte de la frente de nuestro Frankenstein.
Cuando tengas todas las piezas de los tres mostruos, vamos a pegar cada uno de ellas dónde corresponde con el silicón frío. Yo comencé pegando las piezas de mi Frankenstein en el vaso que pinté de color verde. Luego continúe con el fantasma (y pegue en sus brazos papel sanitario para darle más textura) y seguidamente con el vampiro.
Para finalizar, ajusté las alas de mi murciélago y le coloqué más papel sanitario a mi fantasma. Así me quedaron estas escalofriantes criaturas. ¡Feliz halloween!.

Source Main Image Background// Fuente, Fondo de la imagen principal.
The Original text of @aksurevm89 // El texto Original de @aksurevm89
Xiaomi Redmi 9 Camera // Cámara Xiaomi Redmi 9
All photos are my property // Todas las fotos son de mi propiedad.
Text translated in Deepl free version. // Texto traducido en Deepl versión gratuita.
The collages were made with GridArt. // Los collage fueron realizado con GridArt.
Banner and text separator Made in background eraser // Banner y Separador de texto Realizado en background eraser.
