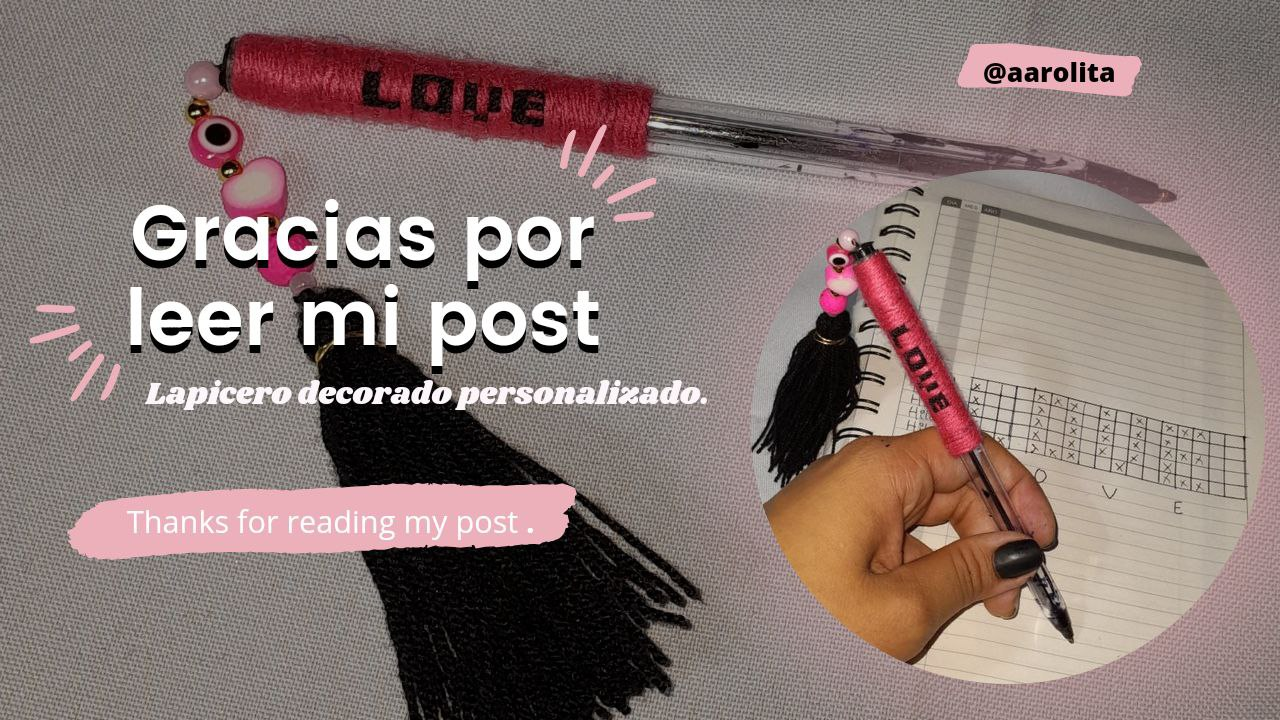
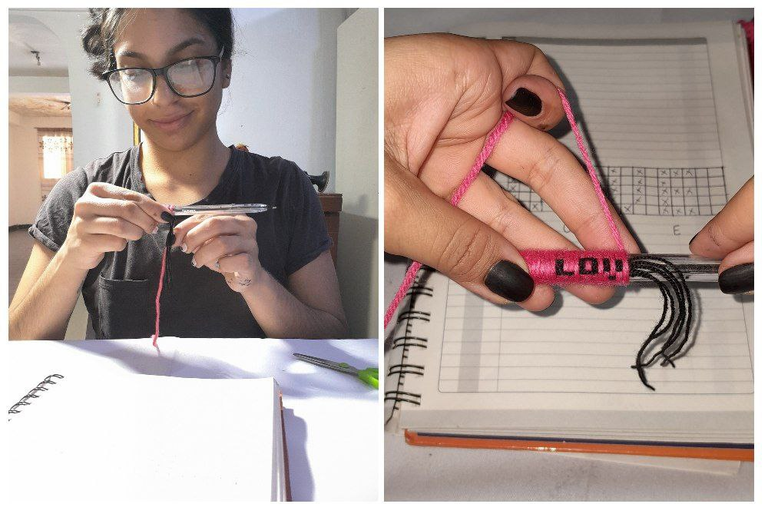
Hello hello, my beautiful people of the hive diy community. You don't know how excited I am today to show you the beautiful pencil case I decorated, the first time I've done this and the truth is that I loved it and I feel motivated to do more. It was extremely relaxing and easy to do. At first I was discouraged because I didn't have the material to make the letters with stones but I had the idea of weaving the word and it turned out beautiful, I loved it, I await your opinion, so without anything else to add I'll leave you with the step Step.
> Hola hola, mi gente hermosa de la comunidad de hive diy . No saben lo entusiasmada que vengo el día de hoy a enseñarles el hermoso lapicero que decore, primera vez que hago esto y la verdad es que me ha encantado y me siento motivada a hacer más. Fue algo sumamente relajante de hacer y sencillísimo. Al principio me desanime porque no tenía el material para hacer las letras con piedras pero se me ocurrió la idea de tejer la palabra y quedo hermoso, a mi me encanto, espero su opinión, así que sin nada más que agregar los dejo con el paso a paso.
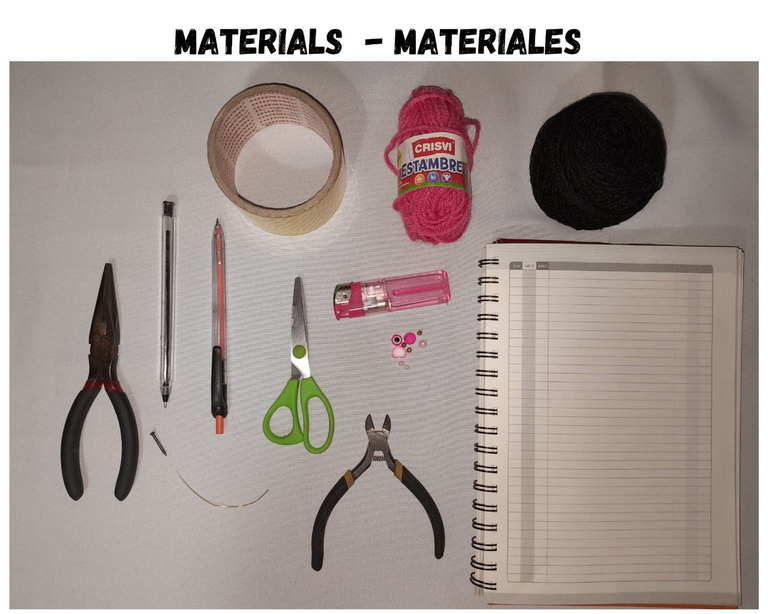
Materials:
- Pencil.
- Black thread.
- Pink stamen.
- Scotch tape.
- Scissors.
- Lighter.
- Wire.
- Colored basins.
- Gripper.
- Writing sheet.
- Ruler.
-Nail.
Materiales:
- Lapicero.
- Hilo negro.
- Estambre rosado.
- Cinta adhesiva.
- Tijera.
- Encendedor.
- Alambre.
- Cuencas de colores.
- Pinza.
- Hoja para escribir.
- Regla.
-Clavo.
Step by Step:
Paso a Paso:

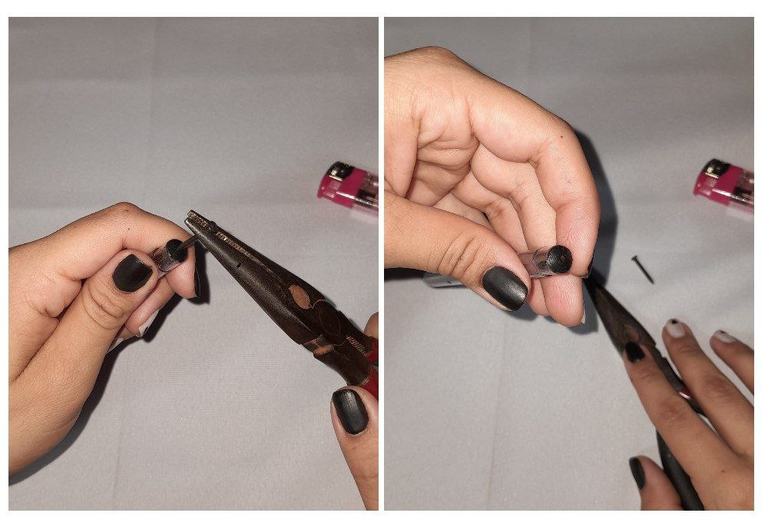
1.- Some pencils already come with a hole in the lid, but if not, I am going to explain an easy and simple way to do this. We are going to take a nail, a needle or something with a sharp tip, with tweezers and we are going to burn it a little with a lighter so that it warms up. We take it to the center of the lid and press, and it should pass without any problem.
1.- Algunos lapiceros ya vienen con un agujero en la tapa, pero de no ser así les voy a explicar una manera fácil y sencilla de hacer esto. Vamos a tomar un clavo, una aguja o algo con una punta filosa, con una pinza y la vamos a quemar un poco con un encendedor para que se caliente. Lo llevamos hasta el centro de la tapita y presionamos, y debería de pasar sin ningún problema.
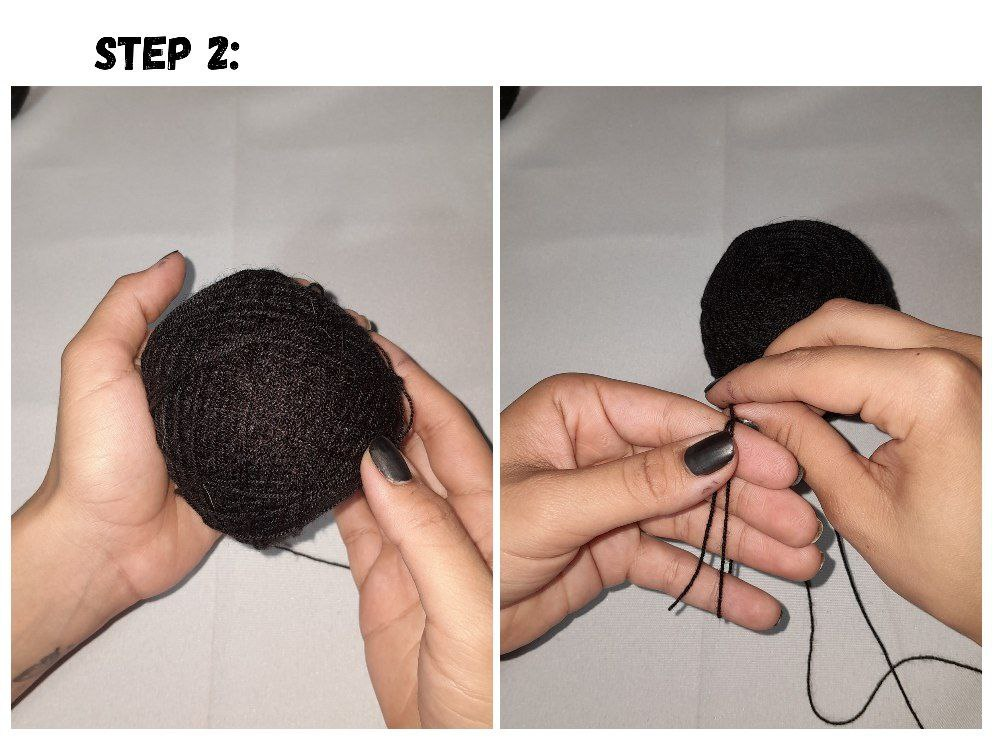
2.- Now, let's make the pendant. I'm going to take the ball of black yarn, I'm going to do it with knitting yarn but you can use any yarn, and I'm going to twist it over four of my fingers many times, at least 30 or 40 times so that it is very thick.
2.- Ahora sí, vamos a hacer el colgante. Voy a tomar el ovillo de hilo negro, yo voy a hacerlo con hilo para tejer pero se puede usar cualquier hilo, y voy a girar sobre cuatro de mis dedos muchas veces, por lo menos unas 30 o 40 veces para que quede bien gruesa.

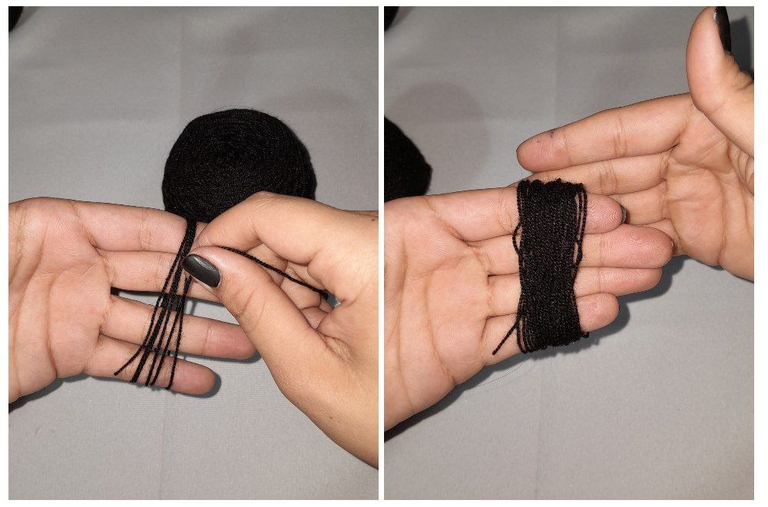
3.- Very carefully, I am going to remove the roll without it coming apart and cut the rest of the thread.
3.- Con mucho cuidado, voy a sacar el rollo sin que se desarme y corto el resto del hilo.
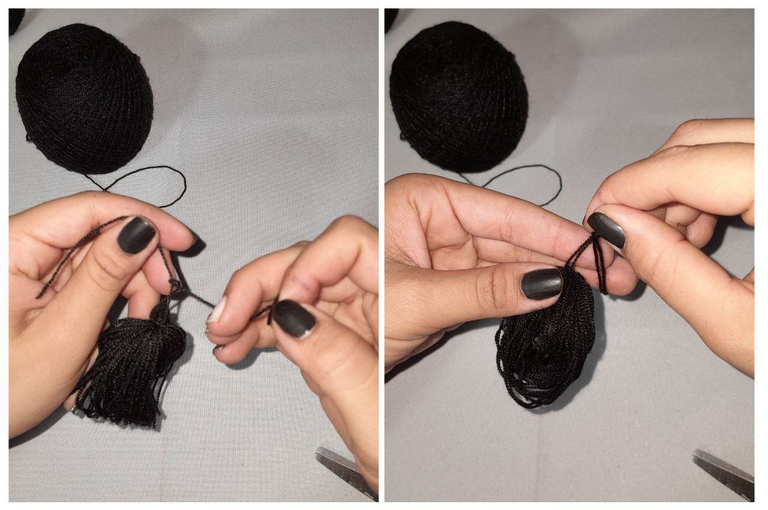
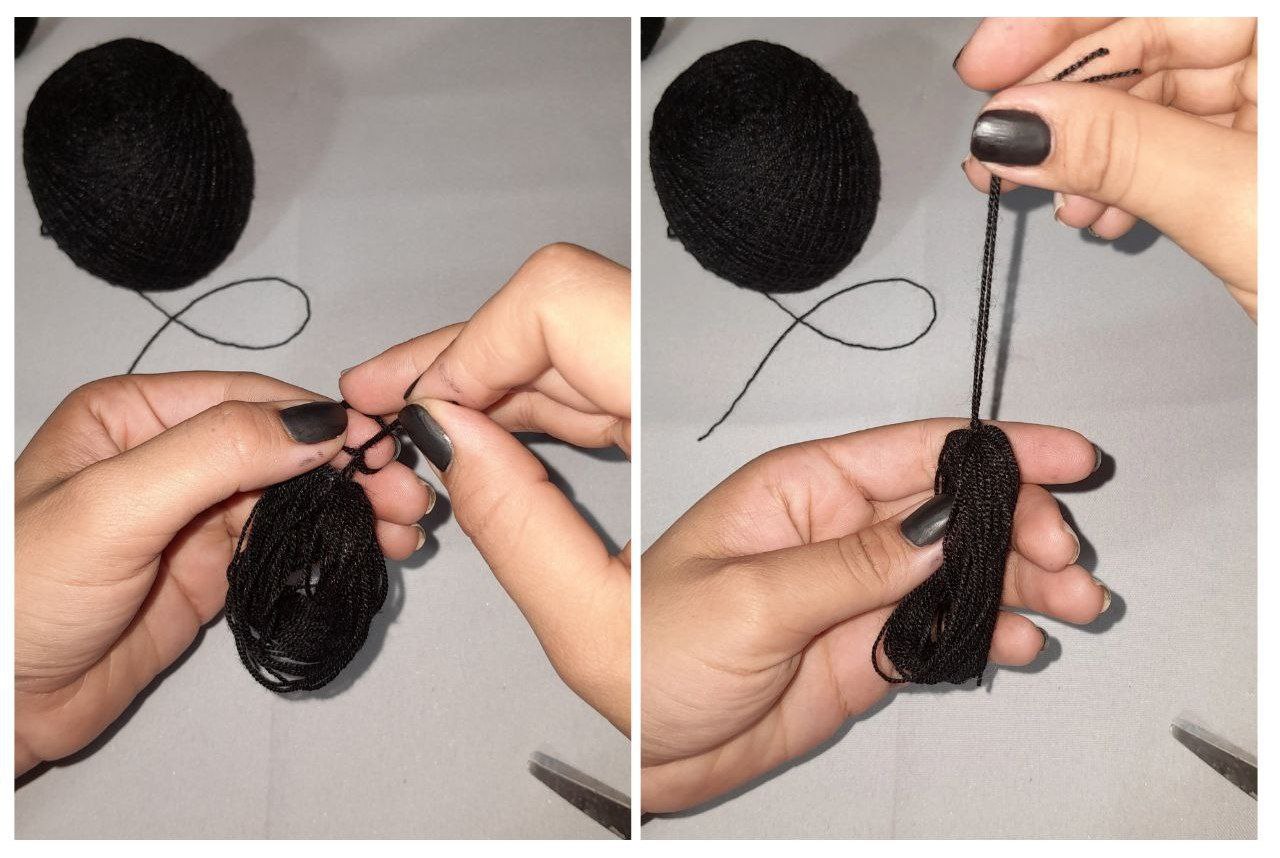
4.- Now I am going to take another 20 centimeter thread to pass through the center of the roll and I am going to tie several knots.
4.- Ahora voy a tomar otro hilo de 20 centímetros para pasarlo de por el centro del rollo y le voy a hacer varios nuditos.

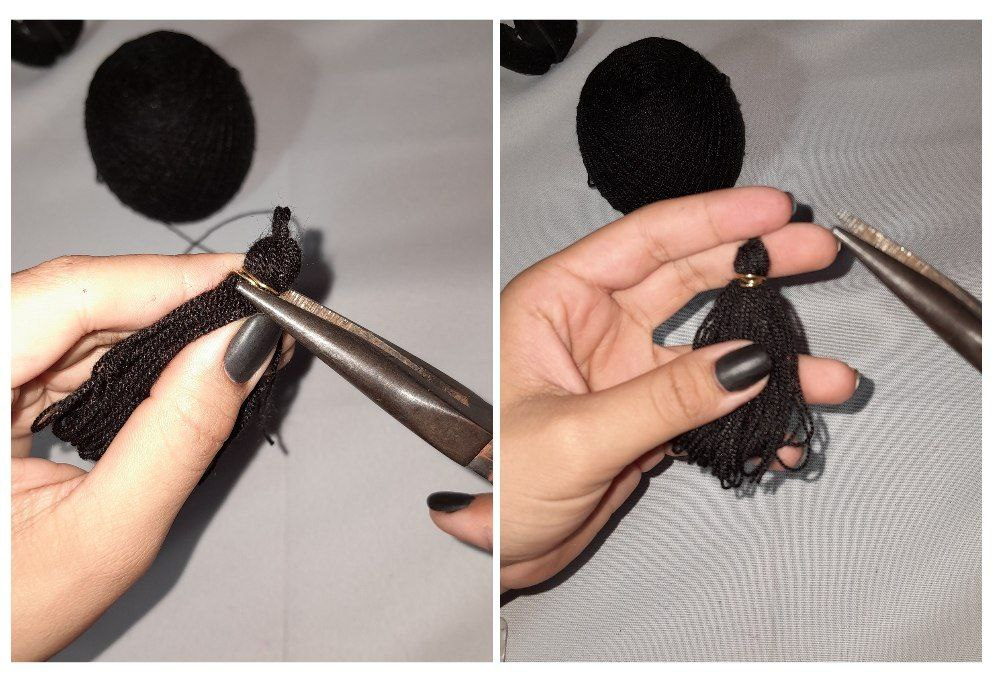
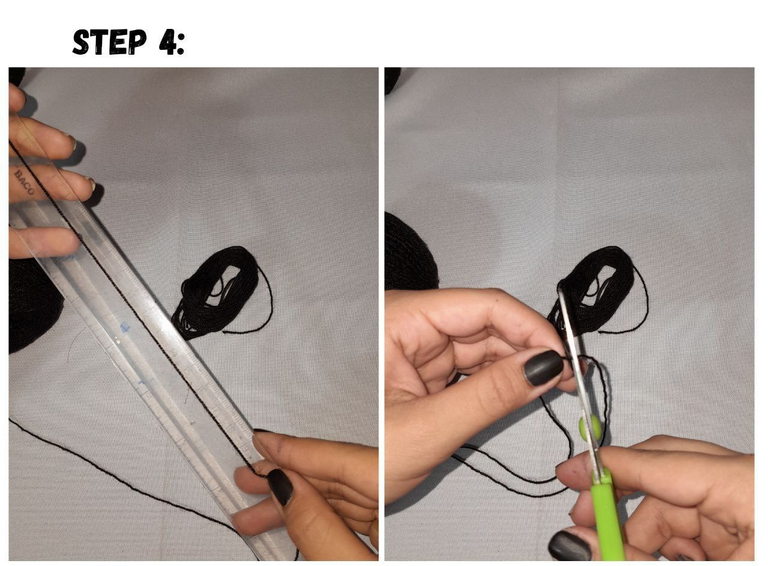
5.- Then I am going to take the piece of wire and begin to roll it with the help of the clamp around the roll, leaving a space at the top. If the wire is too long we can cut it, but the piece I had was the right size and it was not necessary.
5.- Luego voy a tomar el trozo de alambre y lo voy a comenzar a enrrollar con ayuda de la pinza alrededor del rollo dejando un espacio en la parte de arriba. De ser muy largo el alambre lo podemos cortar, pero el trozo que yo tenía era del tamaño justo y no fue necesario.
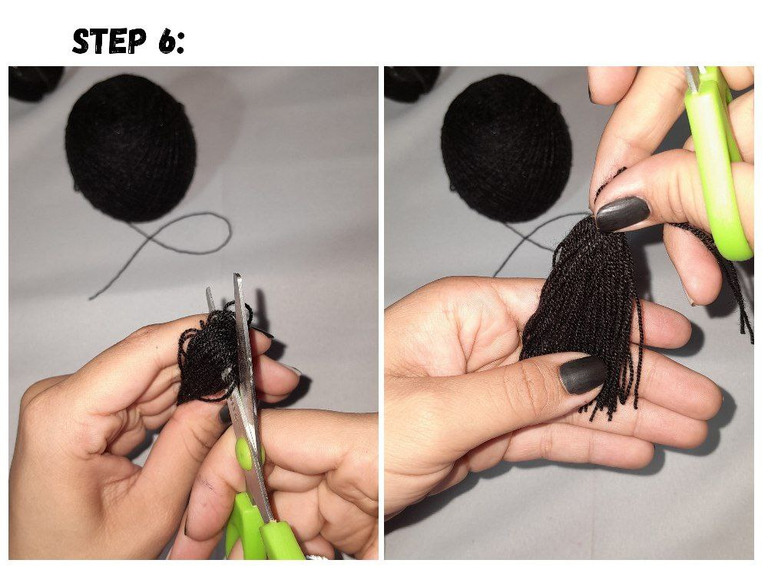
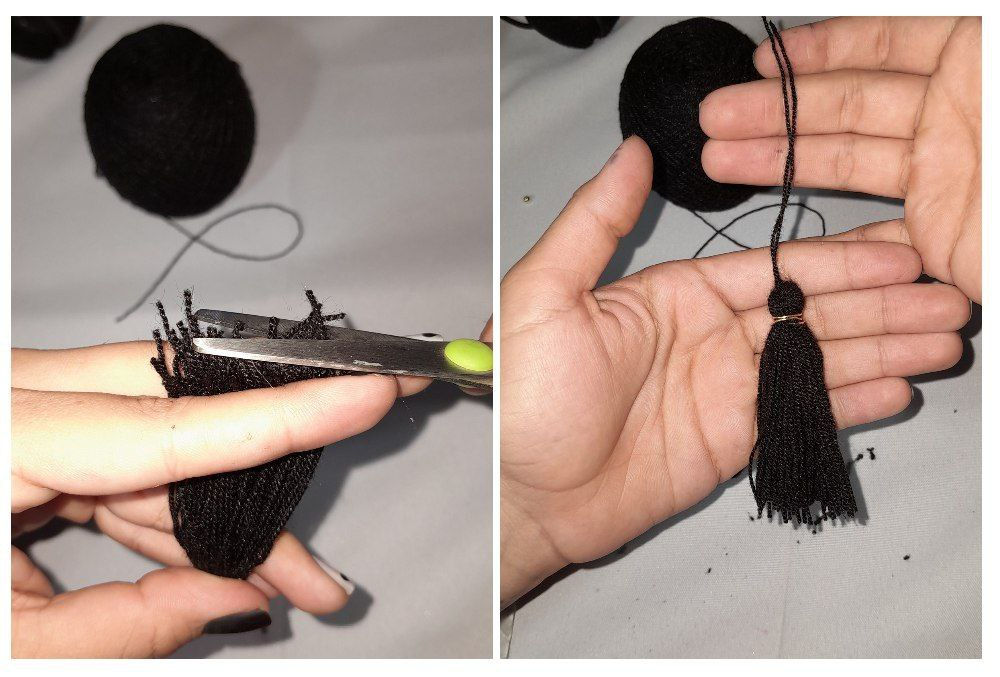
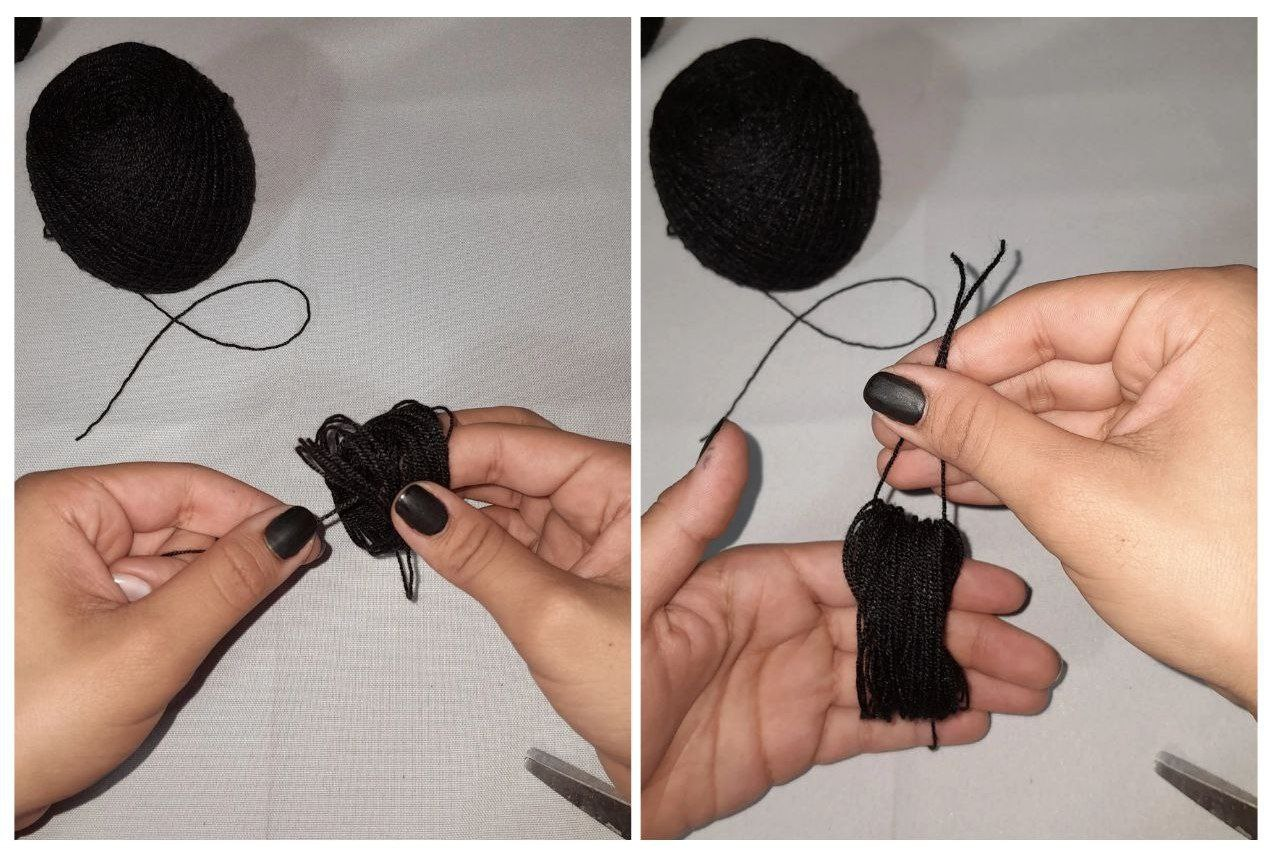
6- Once the tassel is formed we are going to cut the bottom part, we can measure with our fingers and cut so that it is evenly straight and we have the tassel ready now we just need to put the decoration.
6- Una vez ya se forme la borla vamos a cortar la parte de abajo, podemos medir con los dedos y cortar para que quede parejo recto y ya tenemos lista la borla ahora simplemente falta poner la decoración.
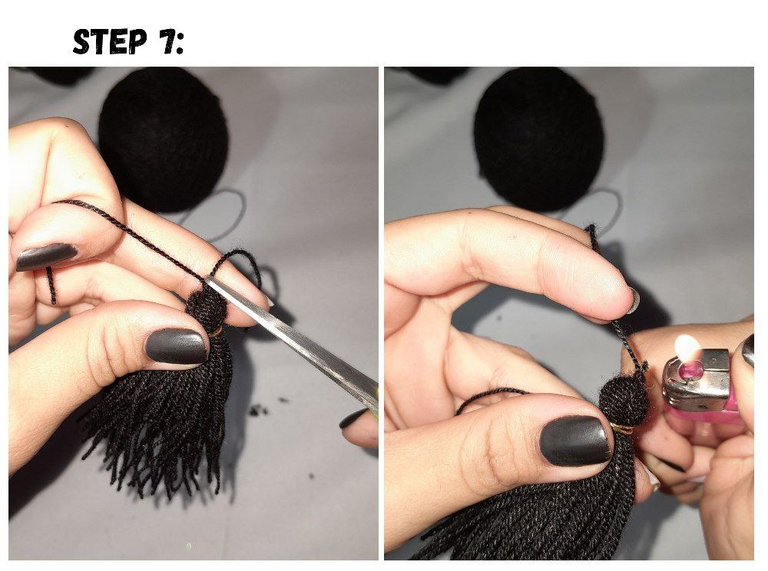
7.- I am going to cut one of the threads of the pendant to be able to insert the sockets, and I burn it so that it remains fixed and does not come apart.
7.- Voy a cortar uno de los hilos del colgante para poder introducir las cuencas, y lo quemo para que quede fijo y no se desarme.
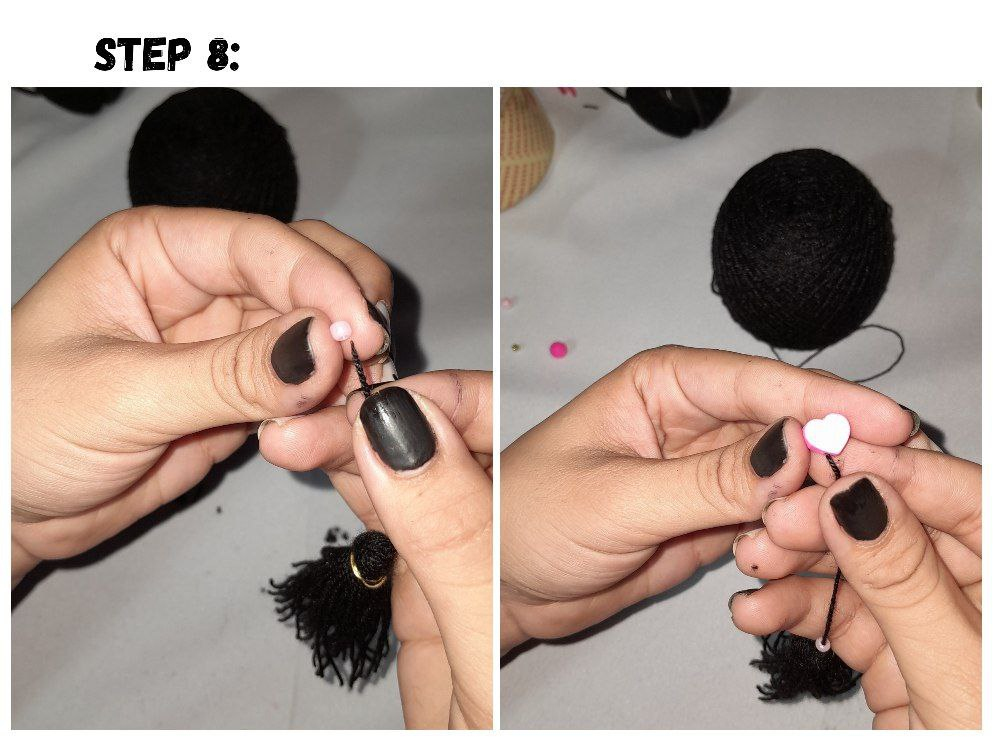
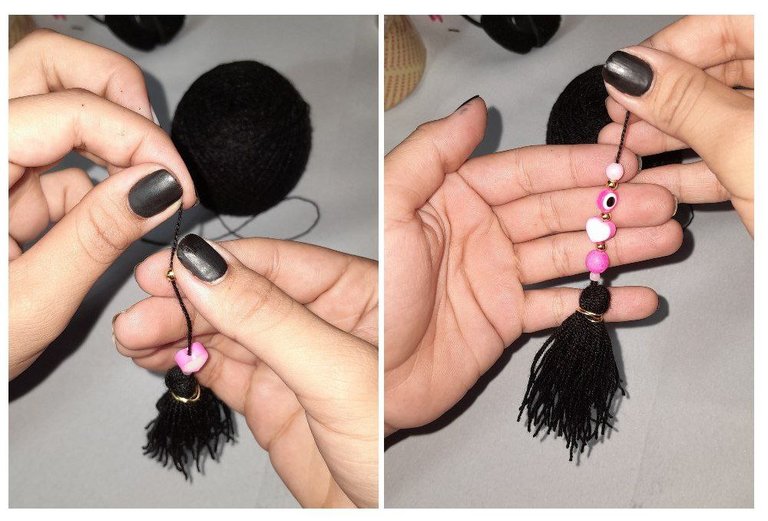
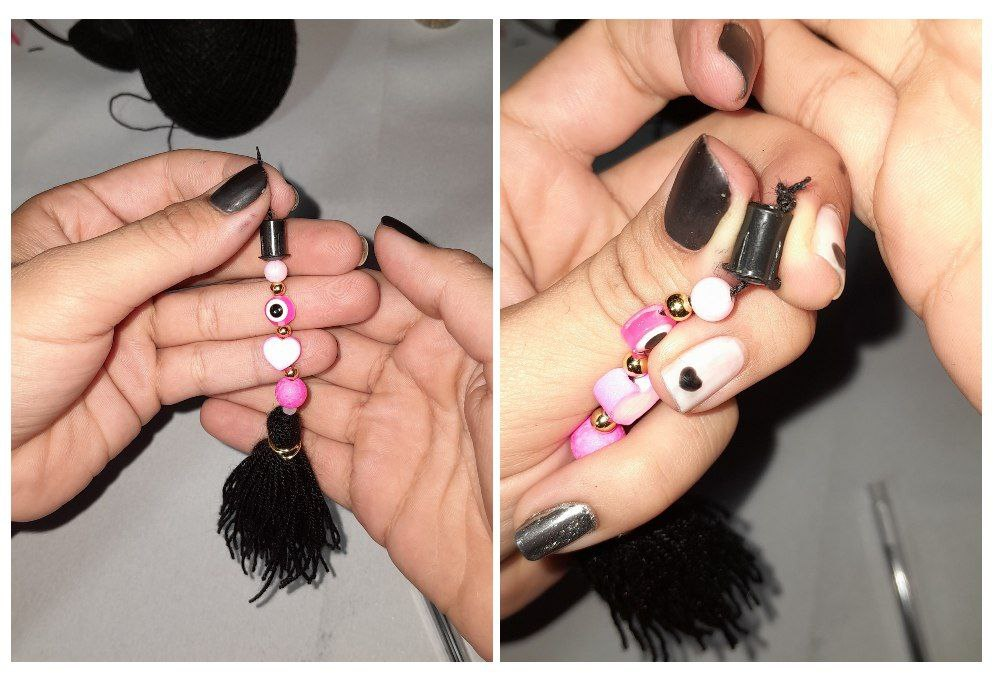
8- And it is time to introduce the decoration, I am going to use a heart, a Turkish eye, some pearls and some golden Balinese beads. It can be done like this or simpler.
8- Y es momento de introducir la decoración, yo voy a usar un corazón, un ojo turco, unas perlitas y unos cuentos balines dorados. Se puede hacer así o más sencillo.
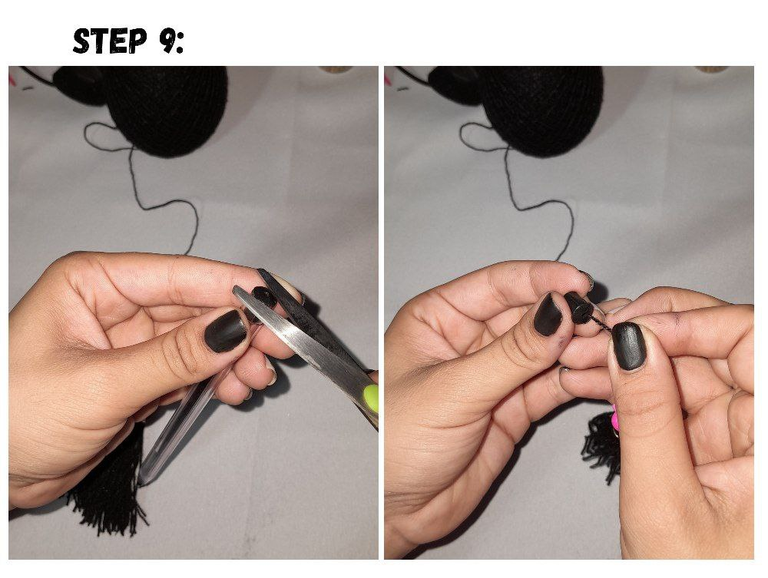
9.- To apply it to the cap we have to remove it from the pencil, I did it with the help of scissors. Now I'm simply going to insert the thread into the hole in the lid, from the outside in. And we will make a knot so that it doesn't come off, the amount of thread left over was very little so I only tied one knot but I recommend making several to make sure it doesn't come off or you can put a little glue on it. .
9.- Para aplicarlo en la tapita tenemos que sacarla del lapicero, yo lo hice con ayuda de la tijera. Ahora simplemente voy a introducir el hilo en el agujero de la tapa, de afuera hacia adentro. Y haremos un nudo para que no se salga, la cantidad que me sobro de hilo fue muy poca por lo que solo le hice un nudo pero les recomiendo hacer varios para asegurarse de que no se vaya a salir o le pueden poner un poco de pegamento.
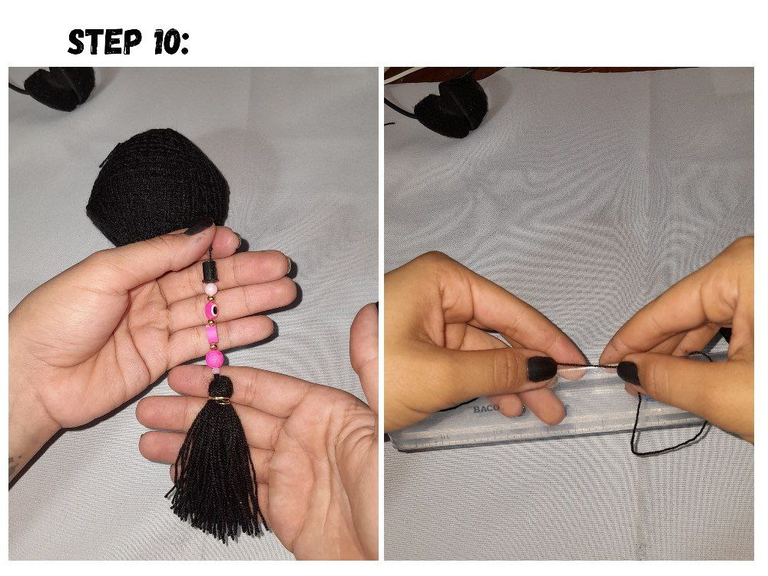
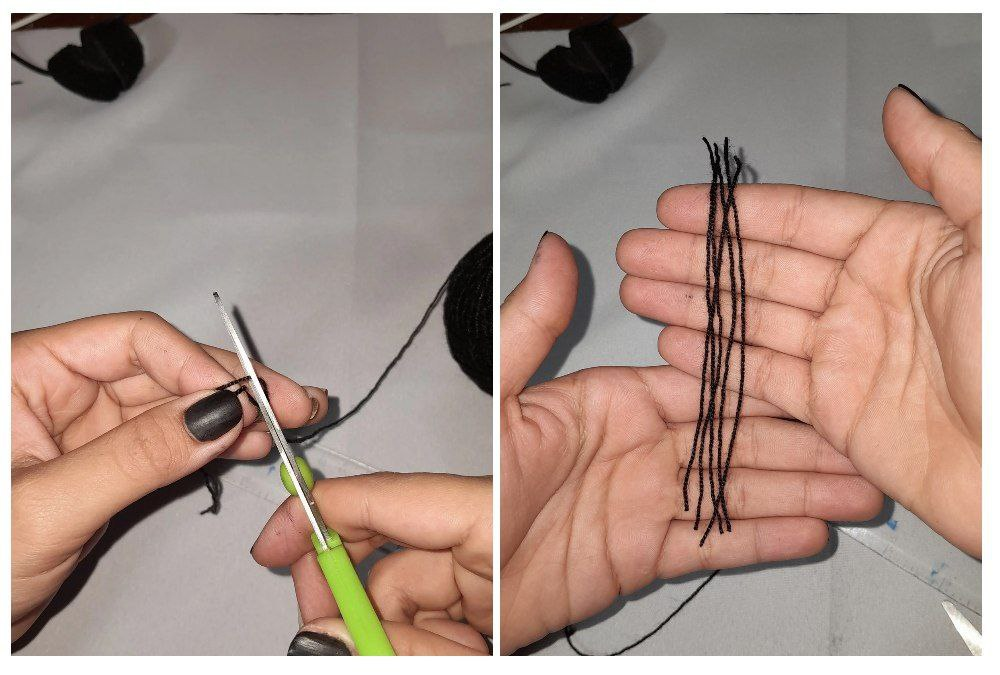
10.-Once the lid pendant is ready, we will move on to decorate the pencil case. I will start by cutting 5 10cm threads.
10.-Una vez listo el colgante de la tapa pasaremos a decorar el lapicero. Comenzaré cortando 5 hilos de 10cm.
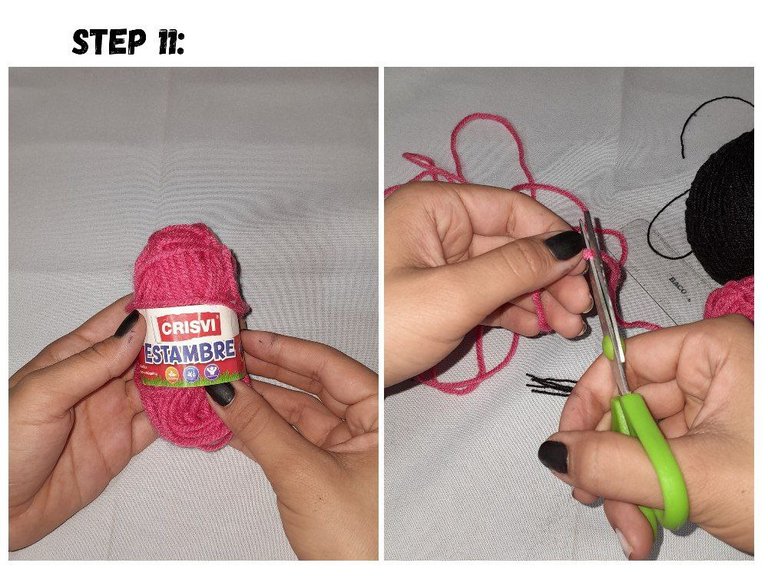
11.- I am going to take the pink yarn and cut a good amount since we don't know how much we will need, I cut 2 meters.
11.- Voy a tomar el estambre rosado y cortaré una buena cantidad ya que no sabemos cuanto vamos a necesitar, yo corté 2 metros.
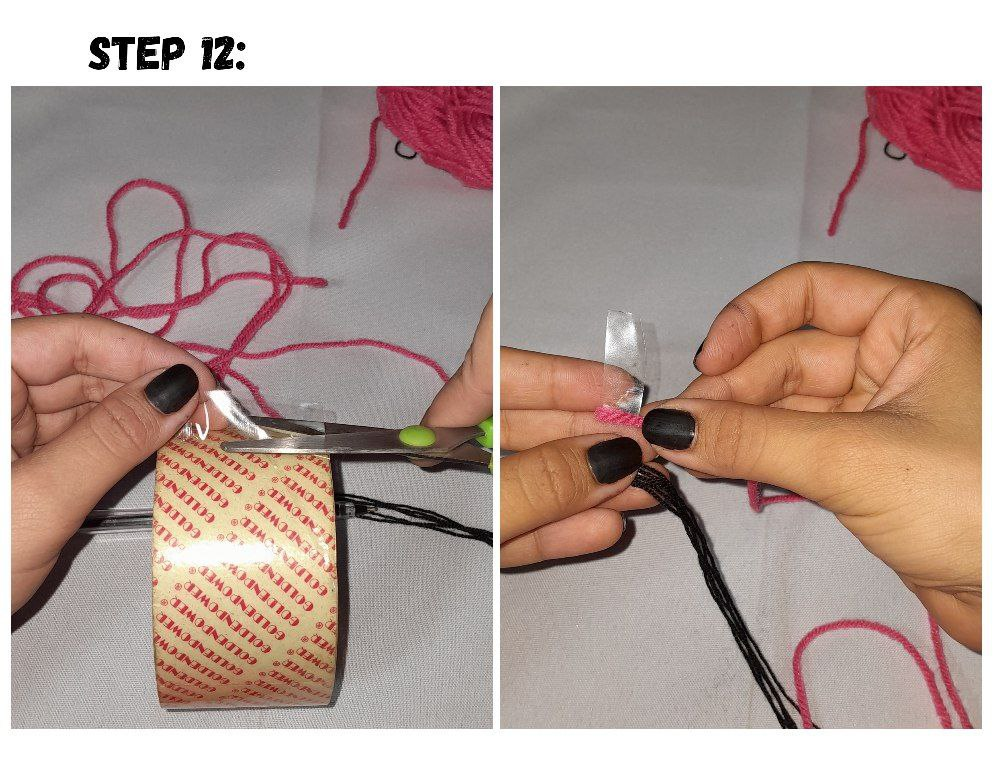
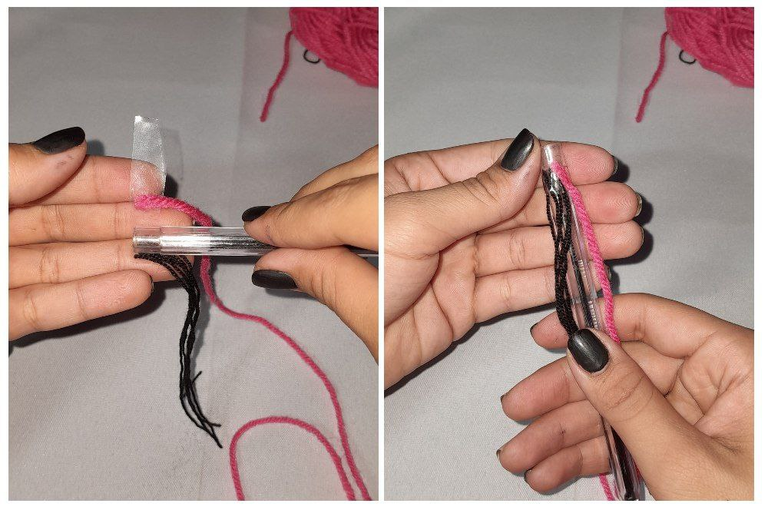
12.- I will take a small piece of adhesive tape and stick the tips of the five black threads and the pink yarn, and place it on the tip of the pencil.
12.- Tomaré un pequeño pedazo de cinta adhesiva y pegaré la punta de los cinco hilos negros y el estambre rosado, y lo coloco en la punta del lapicero.
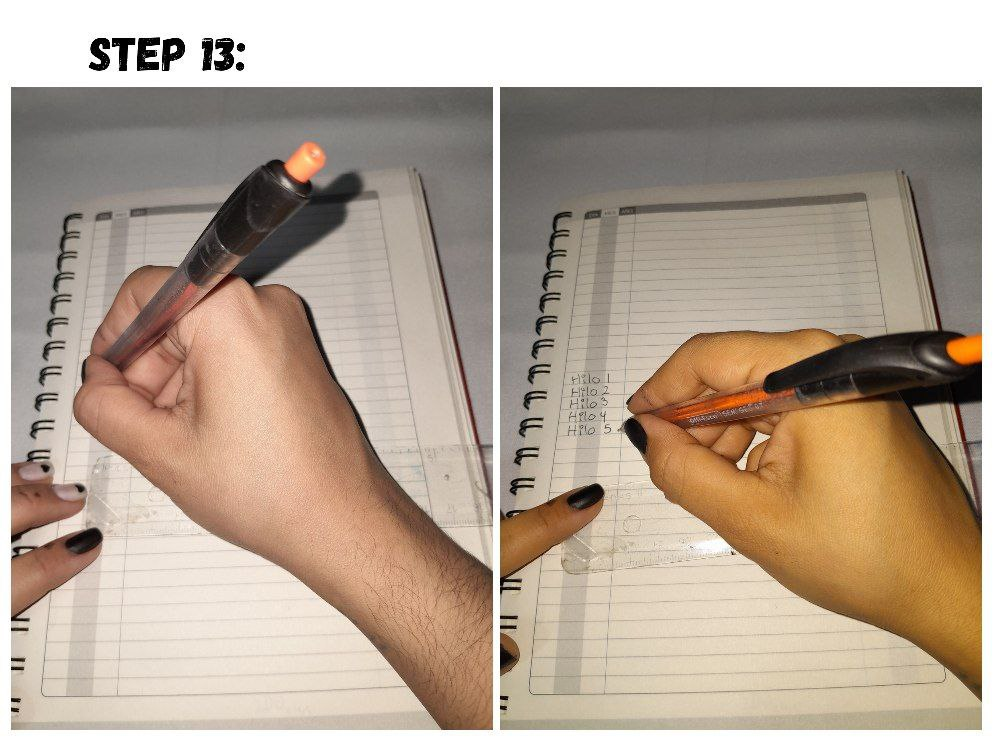
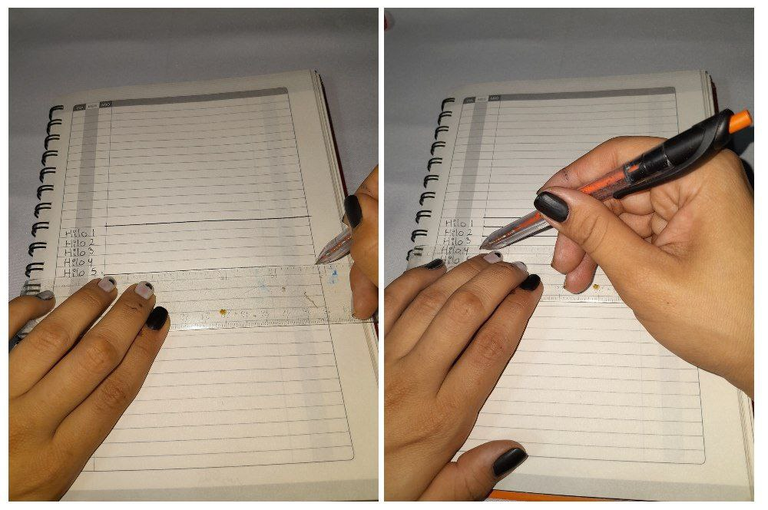
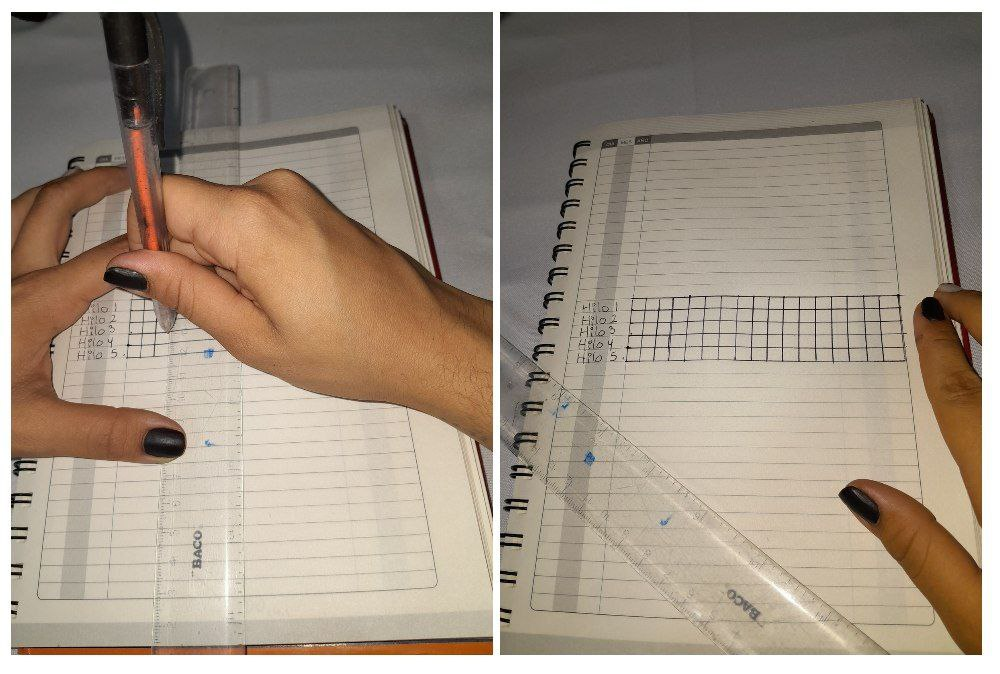
13.- To make the letters it is necessary to make a pattern to guide us, so I grabbed a notebook and made a chart with lines and 18 columns of tape.
13.- Para hacer las letras es necesario realizar un patrón para guiarnos, por lo que agarre un cuaderno e hice un cuadro con cinta líneas y 18 columnas.
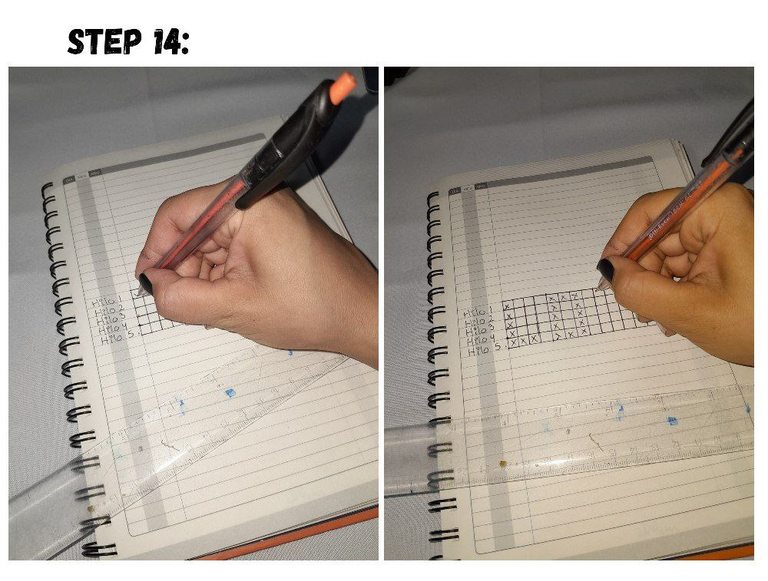
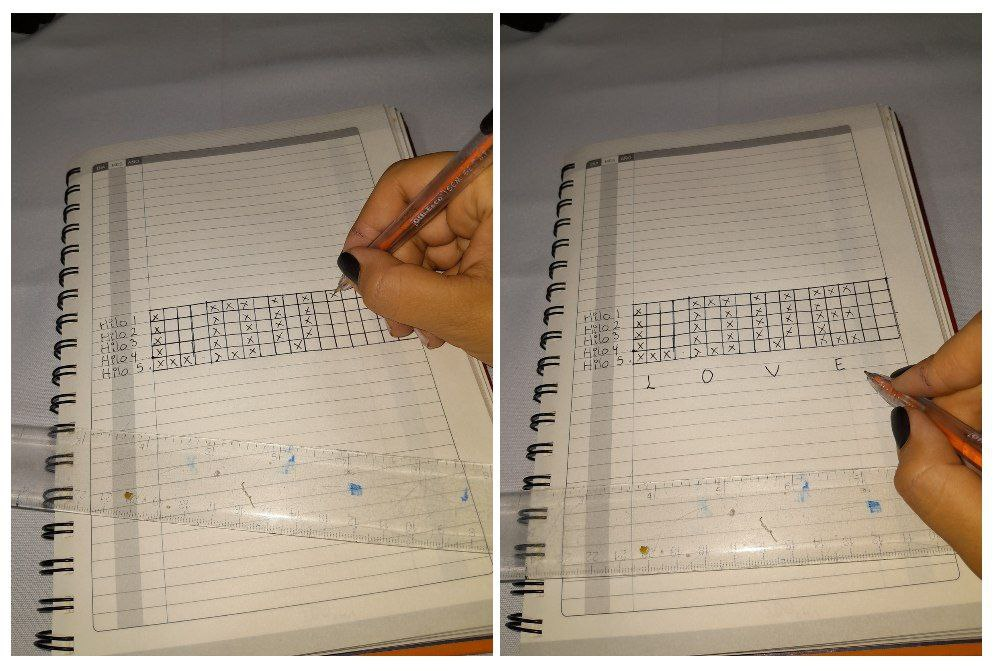
14.- I am going to mark an "x" in each square, depending on the letter I write down.
14.- Voy a ir marcando en cada cuadrito una "x", según la letra que vaya anotando.
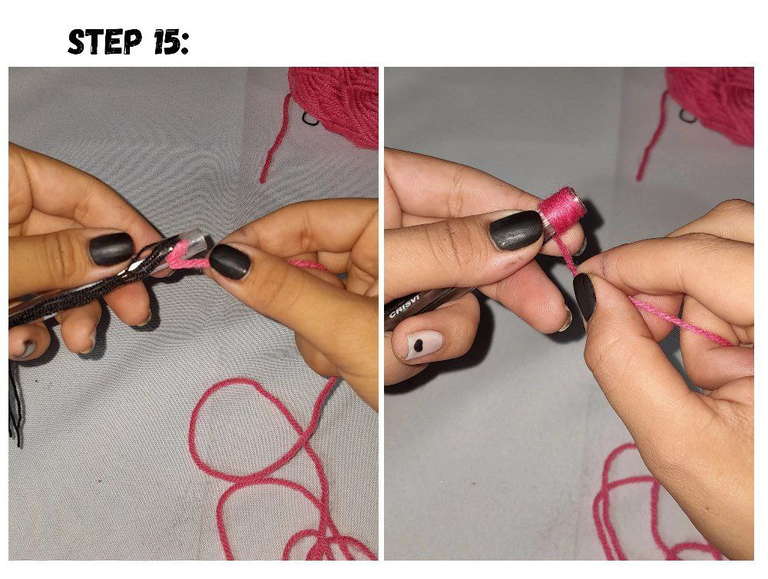
15.- Now, it's time to start twirling the pink yarn around the pencil.
15.- Ahora si, es momento de comenzar a darle vueltas al estambre rosado alrededor del lapicero.
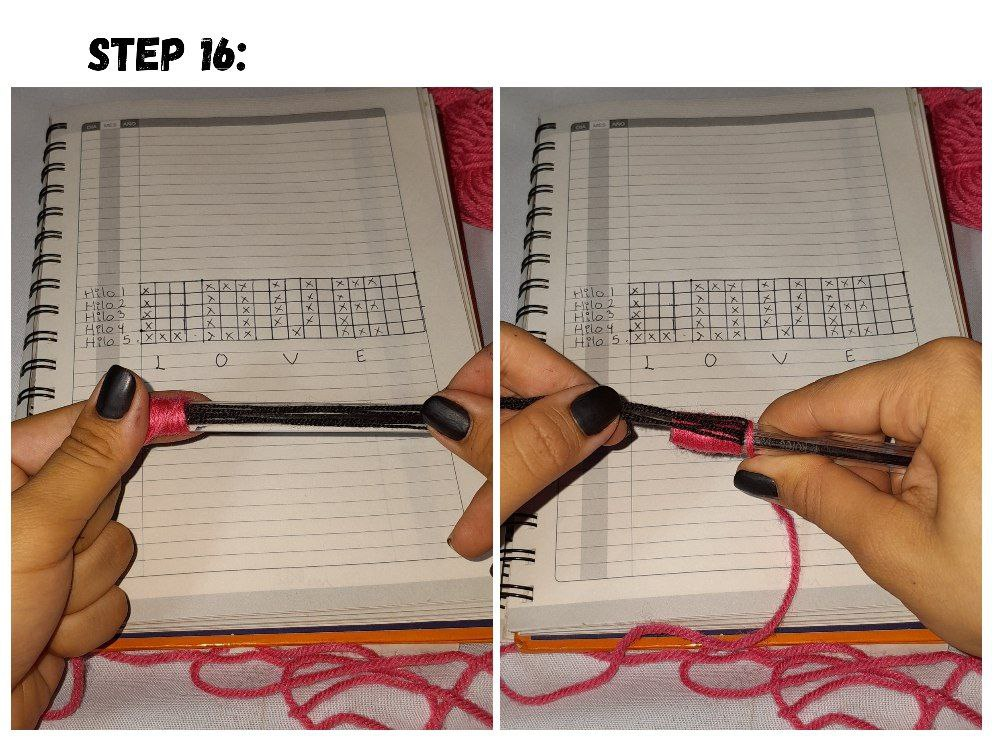
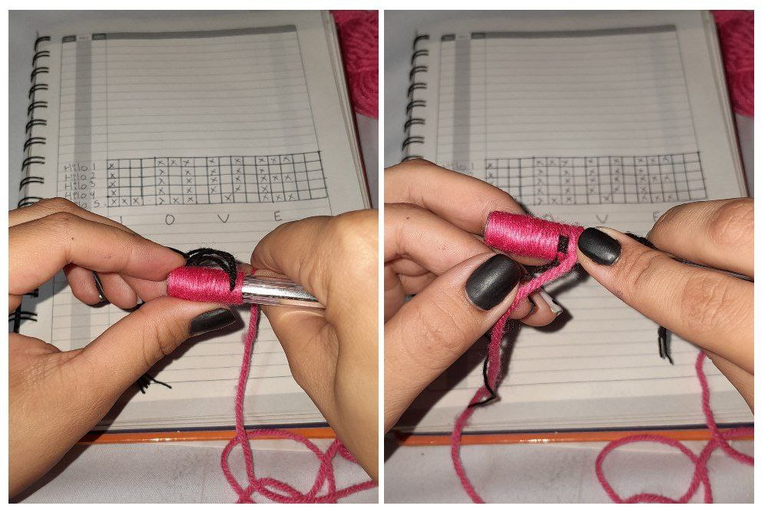
16.- After turning some beads, reaching the point where we want to place the name, we are going to take the five threads and weave the design. The first letter I marked was "L" so first I took the five threads and placed them on the left and, turning the pink yarn underneath, I returned them to the right side, leaving only thread number 5, or the last one, on the left side and I wrap it twice with the yarn over the other four threads.
16.- Después de unas cuentas vueltas llegar al punto en donde queramos colocar el nombre vamos a tomar los cinco hilos y a tejer el diseño. La primera letra que marque fue la "L" por lo que primero tomé los cinco hilos y lo puse a la izquierda y dando una vuelta del estambre rosado por debajo, los devuelvo al lado derecho dejando solo el hilo número 5, o el último, del lado izquierdo y le doy dos vueltas con el estambre por encima de los otro cuatro hilos.
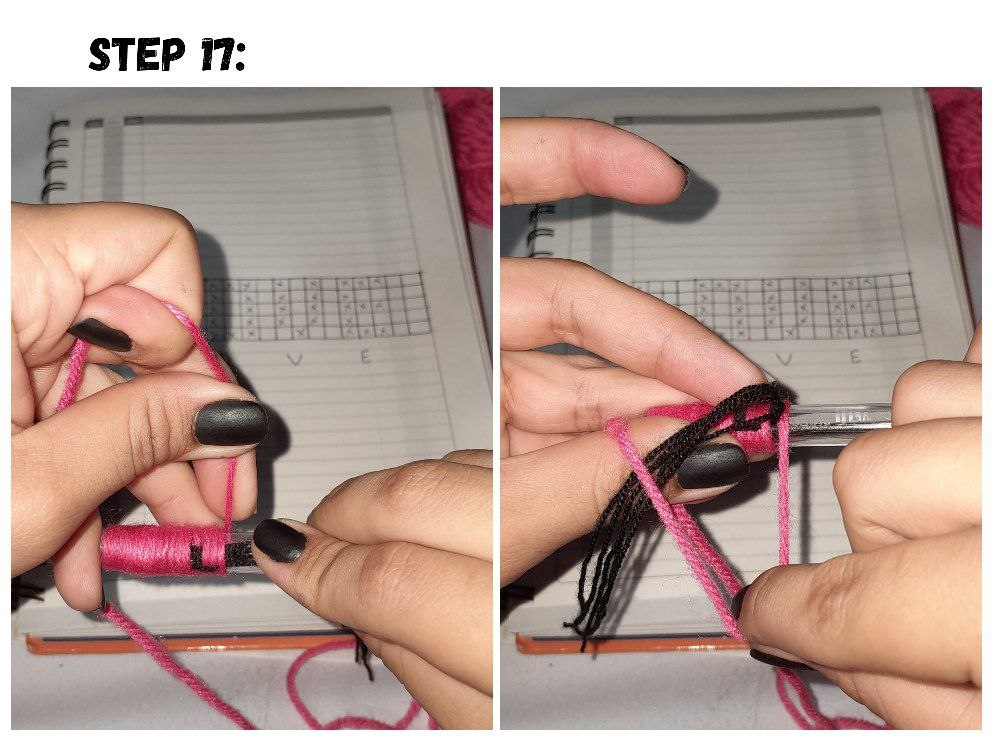

17.- Once the "L" is ready, we place the five stamens on the right side again and I turn them around with the stamen, leaving a space to start making the "O". This is simpler, in the first round I leave the five threads above the yarn, then I will leave the first and last thread on the left side and I leave the other three below the yarn, for the third round I place the five threads above again of the yarn and that's it, I pass the yarn over everyone again to leave space for the next letter.
17.- Una vez lista la "L" colocamos de nuevo los cinco estambres del lado derecho y les doy una vuelta con el estambre dejando un espacio para comenzar a hacer la "O". Esta es más sencilla, en la primera vuelta dejo los cinco hilos por encima del estambre, luego dejaré el primero y último hilo del lado izquierdo y los otros tres los dejo por debajo del estambre, para la tercera vuelta coloco nuevamente los cinco hilo por encima del estambre y listo, vuelvo a pasar el estambre por encima de todos para dejar el espacio para la siguiente letra.

18.- Then we make the "V" in the same way following the pattern.
18.- Luego hacemos la "V" de la misma forma siguiendo el patrón.

19.- We finish with the letter E and wind it again a little to secure the black threads.
19.- Finalizamos con la letra E y enrollamos nuevamente un poco para asegurar los hilos negros.
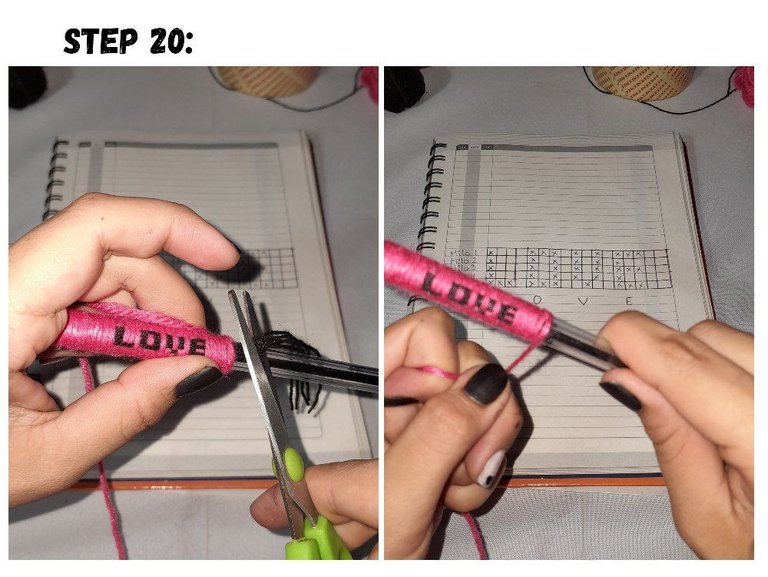
20.- I am going to cut the rest of the black threads and we continue winding.
20.- Voy a cortar el resto de los hilos negros y continuamos enrollando.
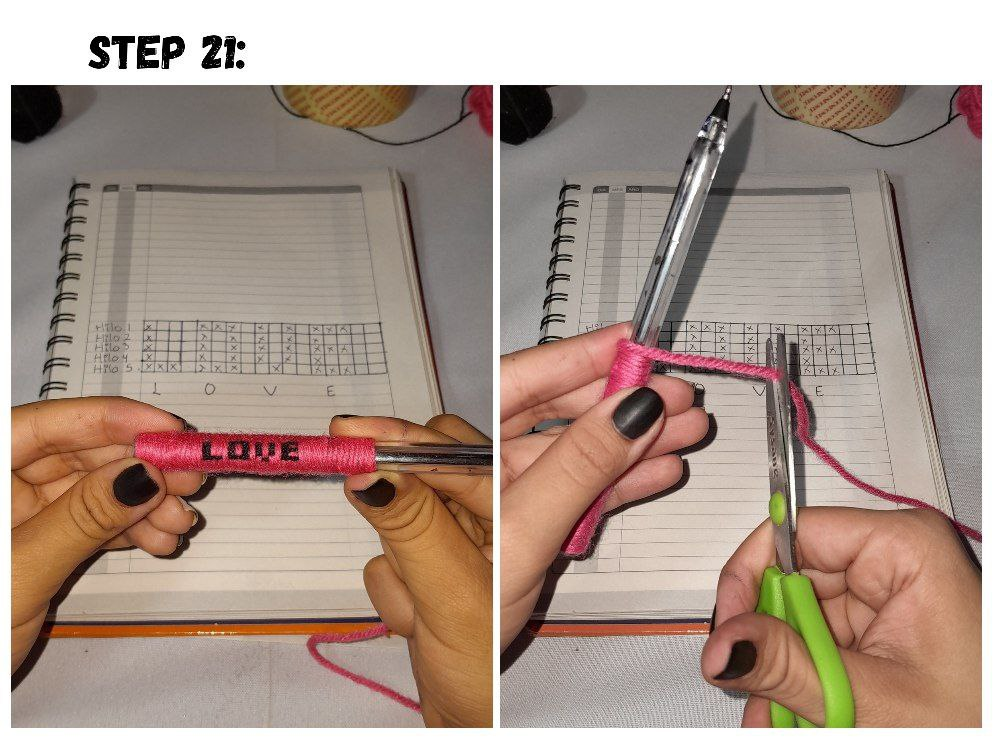

21.- Once we finish winding, we are going to cut the excess thread and I am going to put it through the middle of the last turn of the thread and adjust it.
21.- Una vez terminamos de enrollar vamos a cortar el hilo sobrante y lo voy a meter por el medio de la última vuelta del hilo y lo ajusto.
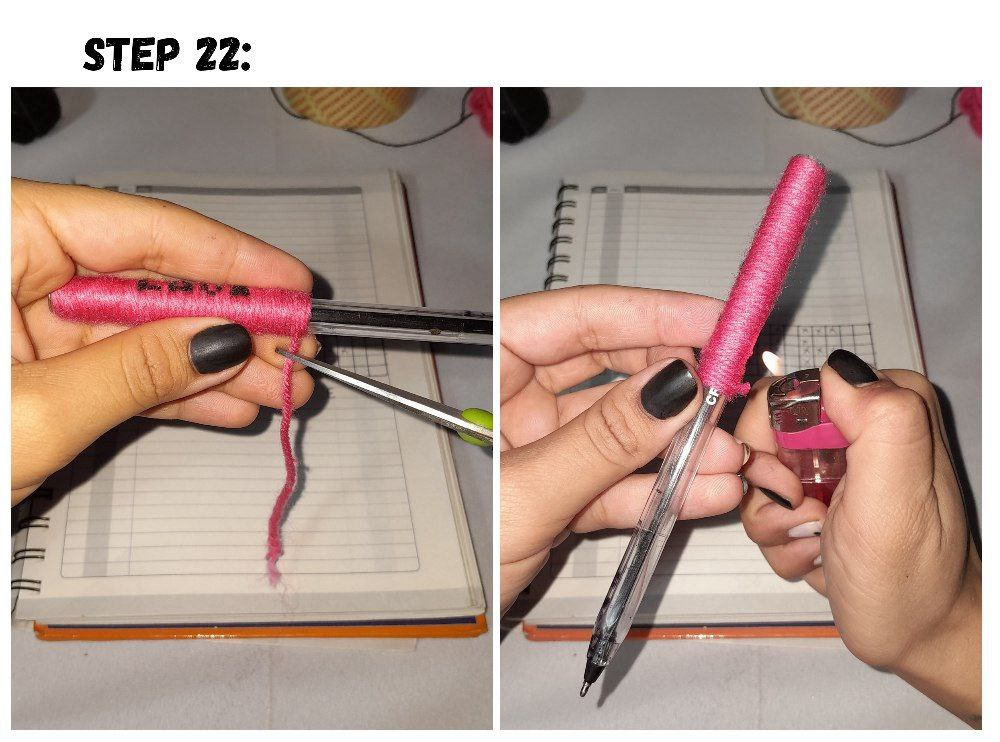

22.- I cut the excess thread and burn it to glue it and ensure that it does not come off.
22.- Corto el exceso de hilo y lo quemo para pegarlo y asegurar que no se salga.
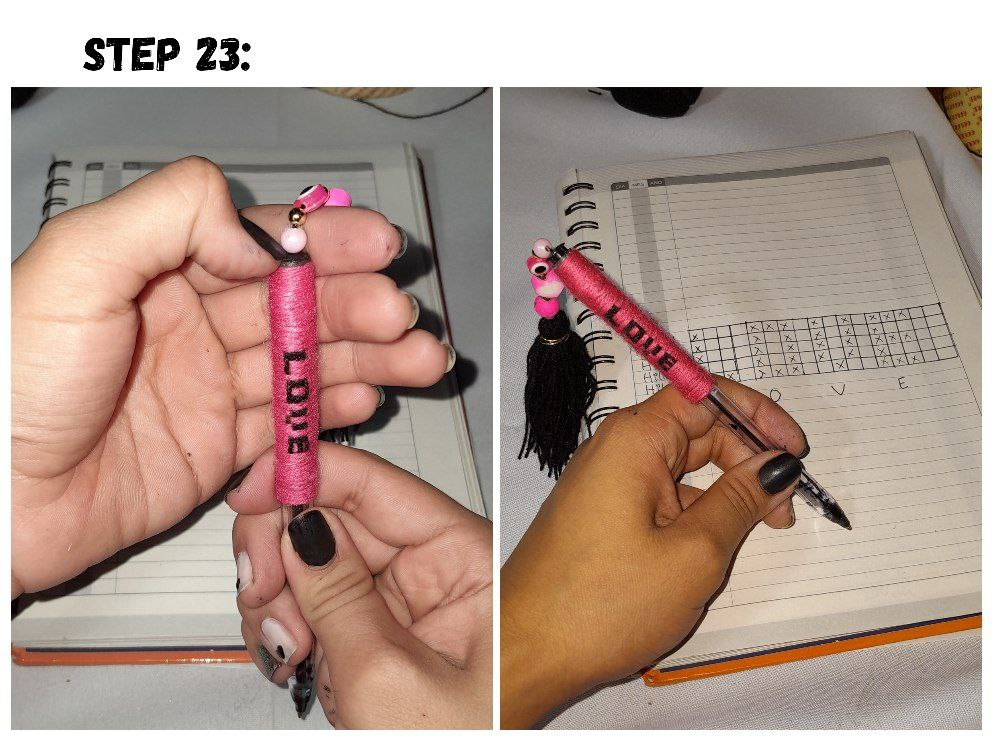
23.- The last step is to place the lid with the pendant and it is done, this is how we finish this pen.
23.- El último paso es colocarle la tapa con el colgante y ya está hecho, así terminamos este lapicero.
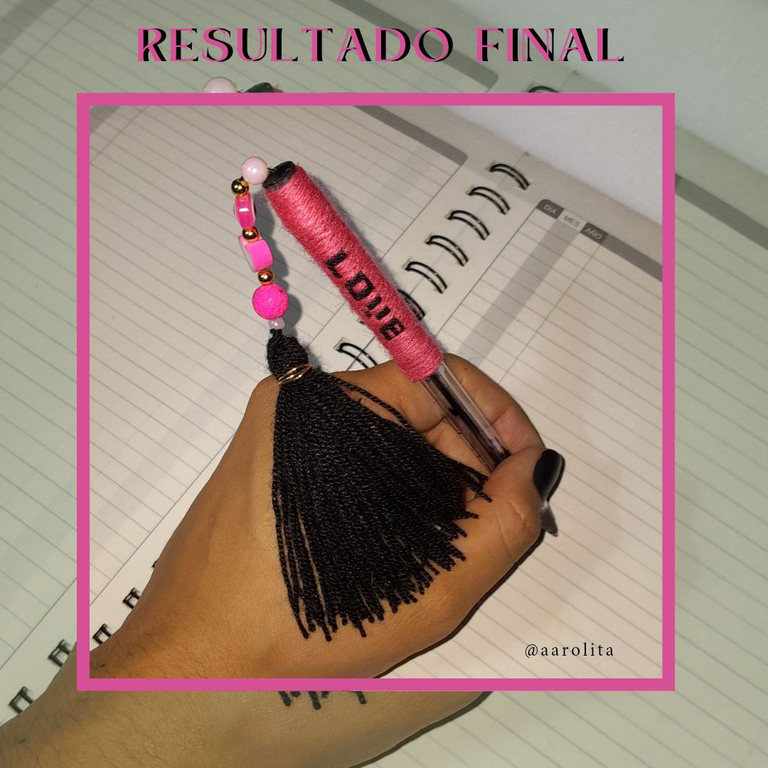
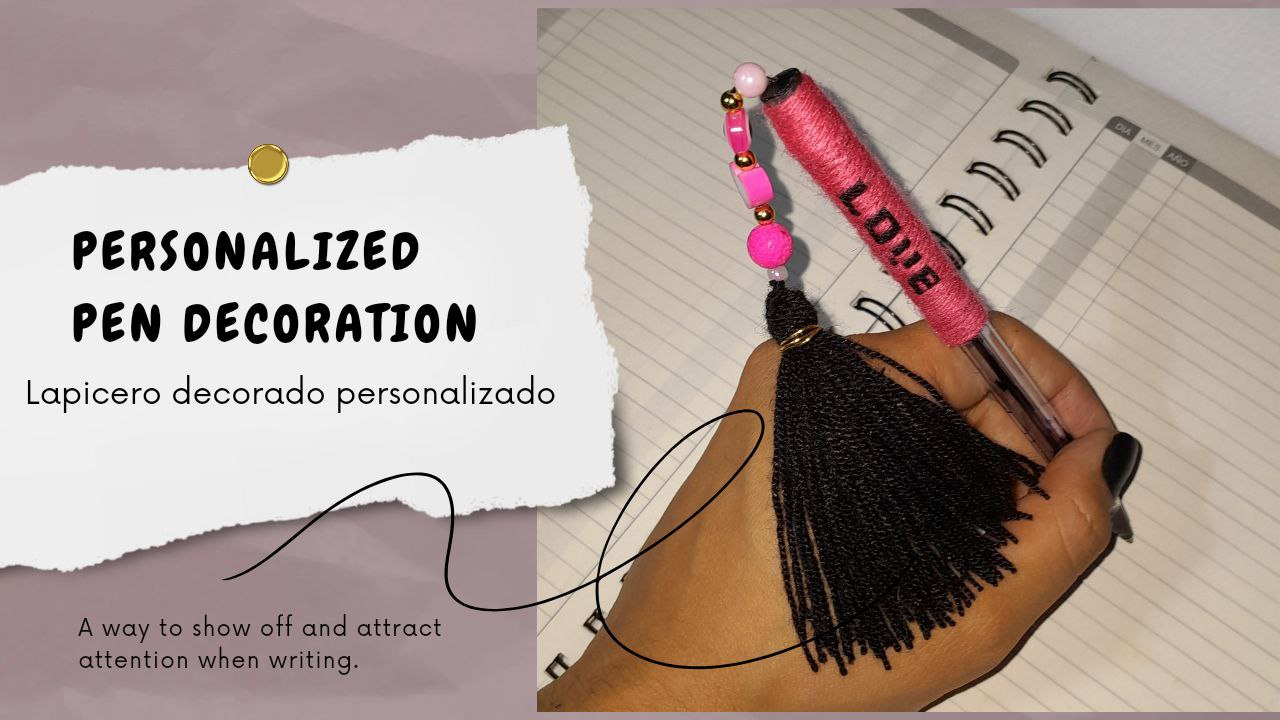
And that's how beautiful it turned out, we only have to write with this beauty.
Y así de hermoso quedó, solo nos queda escribir con esta belleza.
All photos were taken by me from my Samsung a14 phone, edited in canva. All text was translated in Google Translate.