At home, from a very young age, I was taught the habit of repairing and reusing any object that came our way.
Chairs, tables, antique furniture. Anything that seemed ready to be thrown away could be restored with no problem.
That taught me to rediscover the beauty in anything that was in bad shape and give it a new life.
That's why I consider myself a heavy recycler. I get a very special thrill when I can recover something that was destined for the trash.
I tell you that, since I am in Argentina, I have been finding a lot of discarded furniture in the trash and that they are pieces that with a little love can still be useful.
This time I want to show you the transformation I made of a 3-seater bench that I found lying on the street, next to a garbage container.

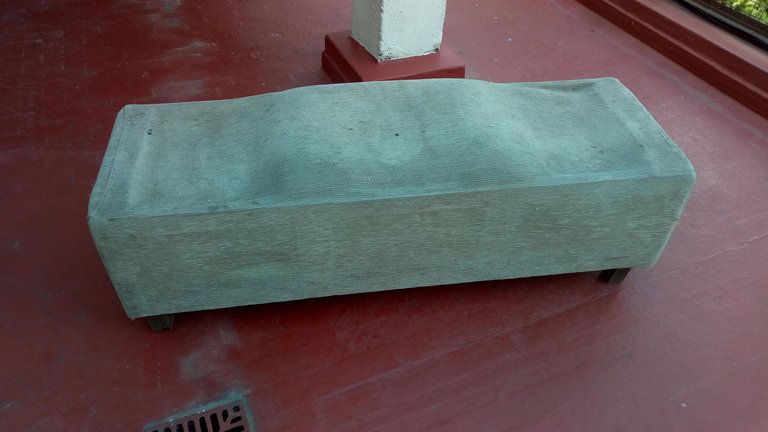
As you can see in the first image, the bench had a very dirty fabric and the seats were sagging from use.
You could see that it had been very useful in the place where it was, but surely it was no longer comfortable and that's why it was thrown into the street.
However, I could see its inner beauty, so I decided to take it with me and guarantee it a better future.
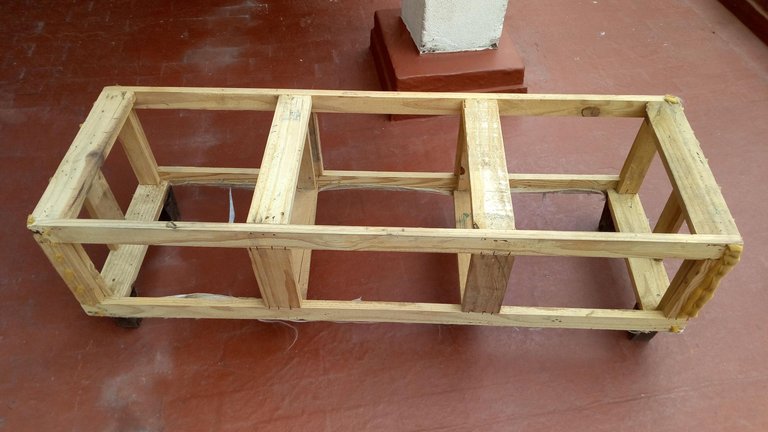
The first thing I did was to remove the fabric and upholstery, which were really unusable, and give the wooden structure a good wash.
Fortunately the bench was stable and it was not necessary to nail or glue the joints.
So I set about making the corresponding cosmetic improvements.
To redo the seats, there were two options, to make a braid with tape or to place a board.

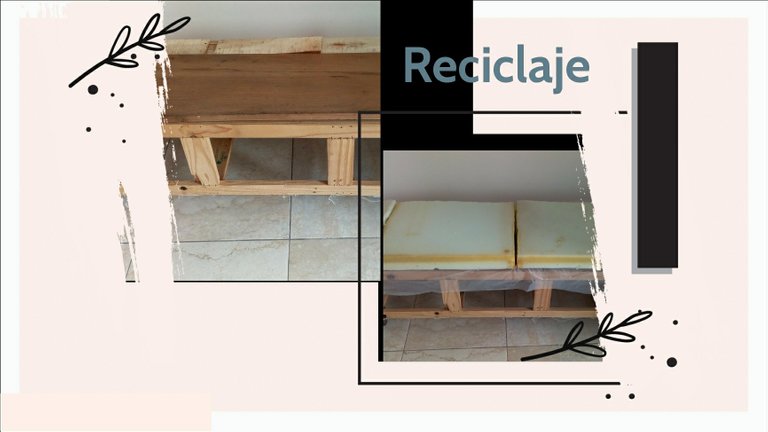
I opted for the second option since I found a piece of door in a corner that fit, as you can see in the photo.
A few days later, I found the cushion of a sofa and I can't describe the emotion I felt because I just got something that was perfect for this project.
I took the stuffing from the cushion and divided it into two parts and used it to quilt the bench, placing it on top of the wooden board.

As I was so excited about this restoration I was doing, I was telling everyone I knew and a friend gave me a very nice printed fabric that I could put on top as a final touch.
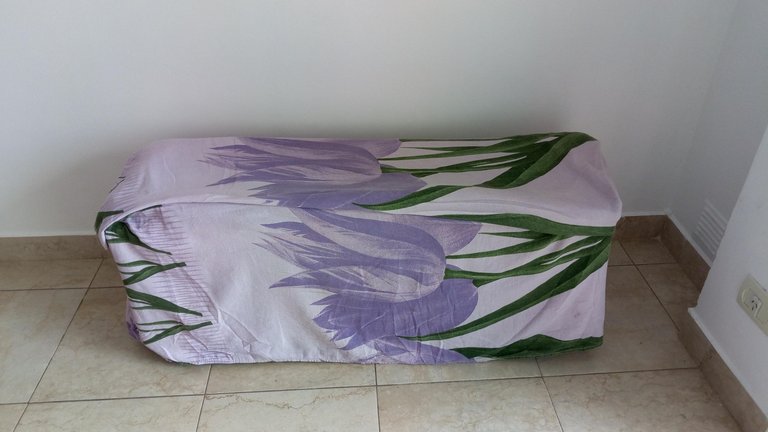
And in this last picture I show you how my beloved bench looks like nowadays at the moment.

After 2 years there are many books, chats and cups of tea that I have taken in his lap.
I recently made a cover for it with waterproof fabric, also recycled, that looked spectacular.
Do you want to know how was the process of making the cover? And where did I get that fabric for recycling? Then don't miss the next post, where I'll explain another recycling trick.

Translated with www.DeepL.com/Translator (free version)
Ahora, la versión en español

En mí casa, desde muy pequeña, me inculcaron el hábito de reparar y reutilizar cualquier objeto que se nos cruzaba por delante.
Sillas, mesas, muebles antiguos. Cualquier cosa que parecía lista para tirar a la basura lo podíamos restaurar sin problemas.
Eso me enseñó a redescubrir la belleza en cualquier cosa que esta en mal estado y darle una nueva vida.
Por eso es que me considero una recicladora empedernida. Me invade una emoción muy especial cuando puedo recuperar algo que estaba destinado a la basura.
Les cuento que, desde que estoy en Argentina, he ido encontrando gran cantidad de muebles descartados en la basura y que son piezas que con un poco de amor pueden seguir siendo útiles.
En esta oportunidad quiero mostrarles la transformación que hice de un banco de 3 plazas que me encontré tirado en la calle, al lado de un contenedor de basura.

Cómo verán en la primera imagen, el banco tenía la tela muy sucia y los asientos hundidos por el uso.
Se notaba que había sido muy útil en el lugar donde estaba, pero seguramente ya no era cómodo y por eso lo lanzaron a la calle.
Sin embargo, yo pude ver su belleza interior me dispuse a llevarlo conmigo y garantizarle un mejor futuro.

Lo primero que hice fue quitarle la tela y el acolchado, que de verdad ya estaban inservibles y darle una buena lavada a la estructura de madera.
Afortunadamente el banco estaba estable y no fue necesario colocarle clavos ni encolar las junturas.
Así que me dispuse a hacerle sus mejoras cosméticas correspondientes.

Para rehacer los asientos habían dos opciones, hacer un trenzado con cinta o colocar una tabla.
Y yo opté por la segunda opción puesto que me encontré en una esquina un pedazo de puerta que le quedó a la medida, tal como lo pueden ver en la foto.
Días después, hallé el almohadón de un sofá y no les puedo describir la emoción que sentí porque justo conseguí algo que me venía perfecto para este proyecto.
El relleno del almohadón y lo dividí en dos partes y lo usé para acolchar el banco, poniéndolo encima de la tabla de madera.

Como yo estaba tan entusiasmada con esta restauración que estaba realizando, le fui contando a todos mis conocidos y una amiga me regaló una tela estampada muy bonita que le pude poner arriba como toque final.
Y en esta última foto les muestro cómo se encuentra mi querido banco actualmente.

Después de 2 años son muchos los libros, charlas y tazas de té que he tomado en su regazo.
Recientemente le hice una funda con tela impermeable, también reciclada que quedó espectacular.
Quieres saber cómo fue el proceso de confección de la funda? Y, de dónde obtuve esa tela para reciclar? Pues entonces no te pierdas el próximo post, donde explicaré otro truco de reciclaje.
