¡Hola comunidad de Hive!
Hello Hive community!

Hola queridos amantes de la costura, espero su día vaya genial🤗 Hoy les traigo otro encargo que tuve por parte de mi primo Yilbert y se trata de un short hecho con tela de mono en color rojo, la elaboración de este short es súper sencilla en una hora lo tuve listo (claro solo la costura, si tarde un poco más en picarlo) pero si es muy fácil de elaborar. Si más que decir acá te dejo mi paso a paso.
Hello dear sewing lovers, I hope your day is going great🤗 Today I bring you another order that I had from my cousin Yilbert and it is a short made with monkey fabric in red, the development of this short is super simple in an hour I had it ready (of course only the sewing, if it took a little longer to chop it) but it is very easy to develop. If more to say here I leave you my step by step.
Necesitaremos || We will need
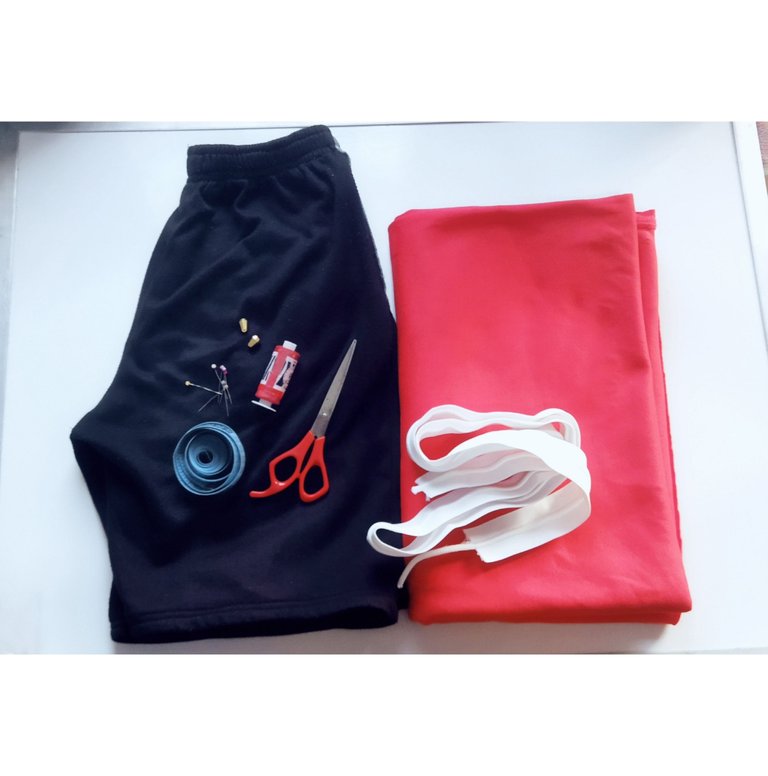
- Tela de mono
- Hilo a tono
- Elástica
- Pantalón modelo
- Tijera
- Lápiz
- Cinta métrica
- Alfileres
- Aguja y máquina de coser
- Monkey fabric
- Matching thread
- Elastic
- Model pants
- Scissors
- Pencil
- Tape measure
- Pins
- Needle and sewing machine
Paso 1 || Step 1
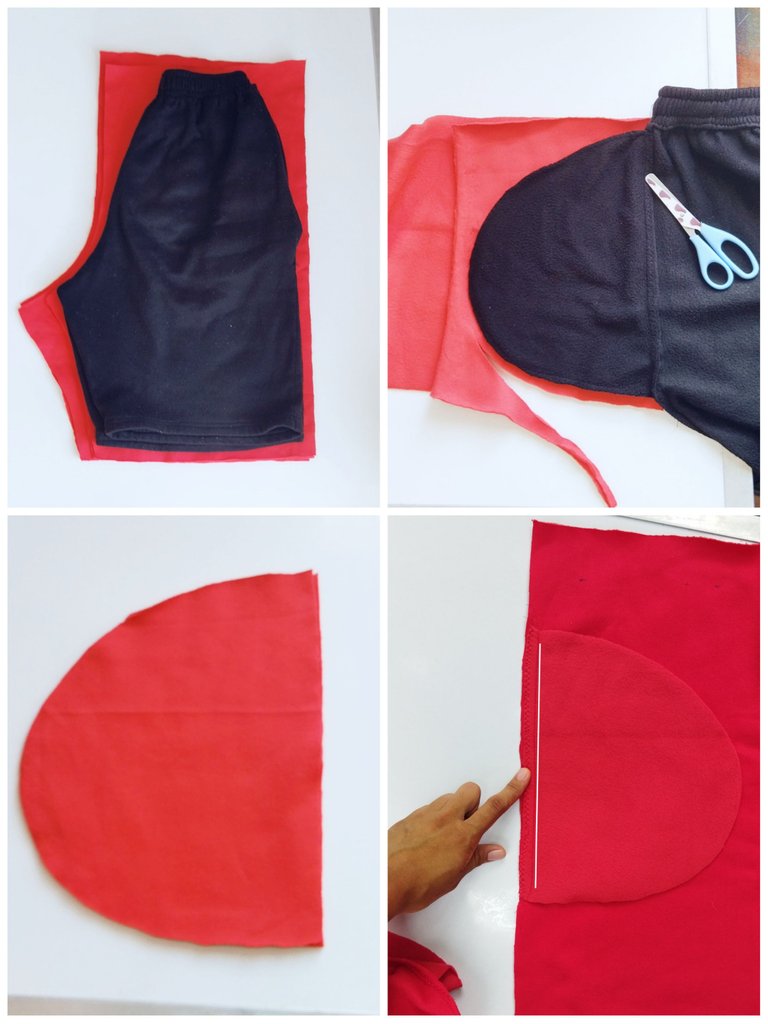
El primer paso es colocar el pantalón modelo sobre la tela, cortamos la parte delantera teniendo en cuenta que debemos agregar 1 o 2 cm de margen de costura, también en la parte de la pretina cortamos 5 cm más alto, de la misma manera cortamos la parte trasera, cortamos lo bolsillos necesitamos dos piezas para cada bolsillo.
👀 ¡¡¡OJO!!!👀 Cuando cortemos las piezas traseras debemos de tener en cuenta que el tiro trasero es más largo.
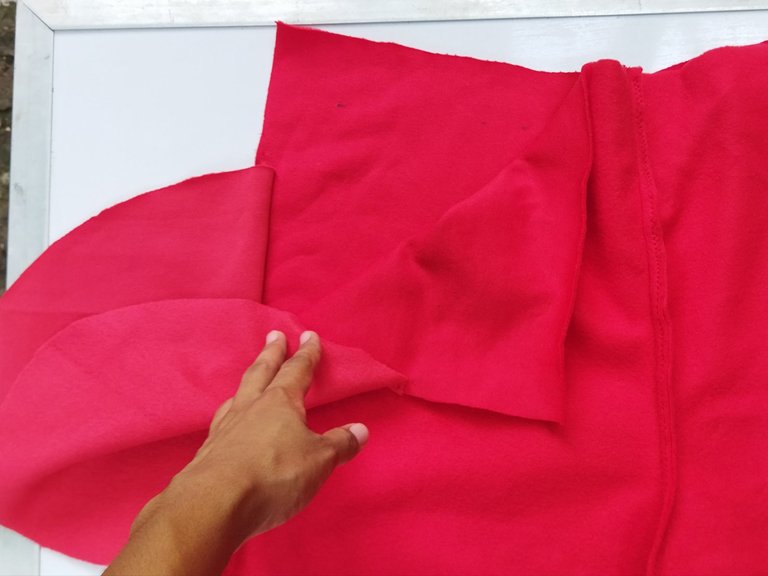
Comenzamos a coser, coloqué las piezas de los bolsillos a 12 cm debajo del contorno de la cintura, enfrentando los derechos, bolsillos y laterales del short, en la imagen te muestro ☝️☝️☝️
The first step is to place the model pants on the fabric, we cut the front part taking into account that we must add 1 or 2 cm of seam allowance, also in the waistband part we cut 5 cm higher, in the same way we cut the back part, we cut the pockets we need two pieces for each pocket.
When we cut the back pieces we must take into account that the back seam is longer.
We start sewing, I placed the pocket pieces at 12 cm below the waist contour, facing the right sides, pockets and sides of the shorts, in the image I show you ☝️☝️☝️☝️
Paso 2 || Step 2
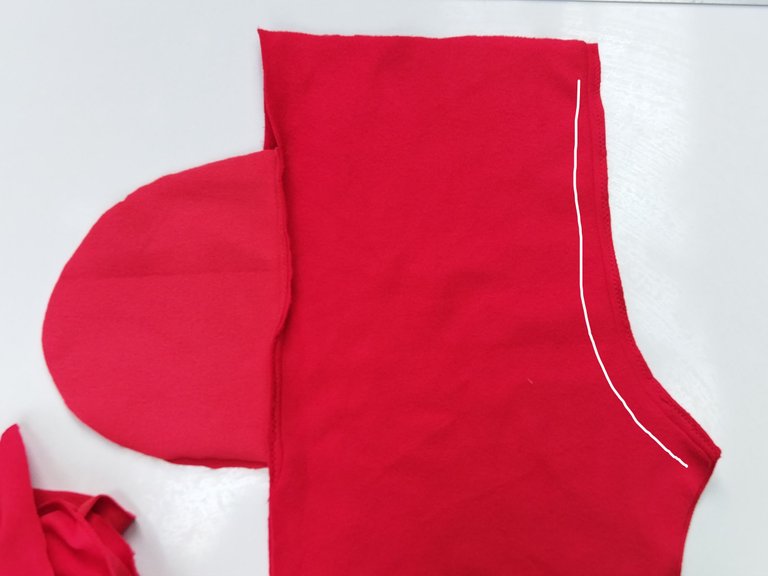

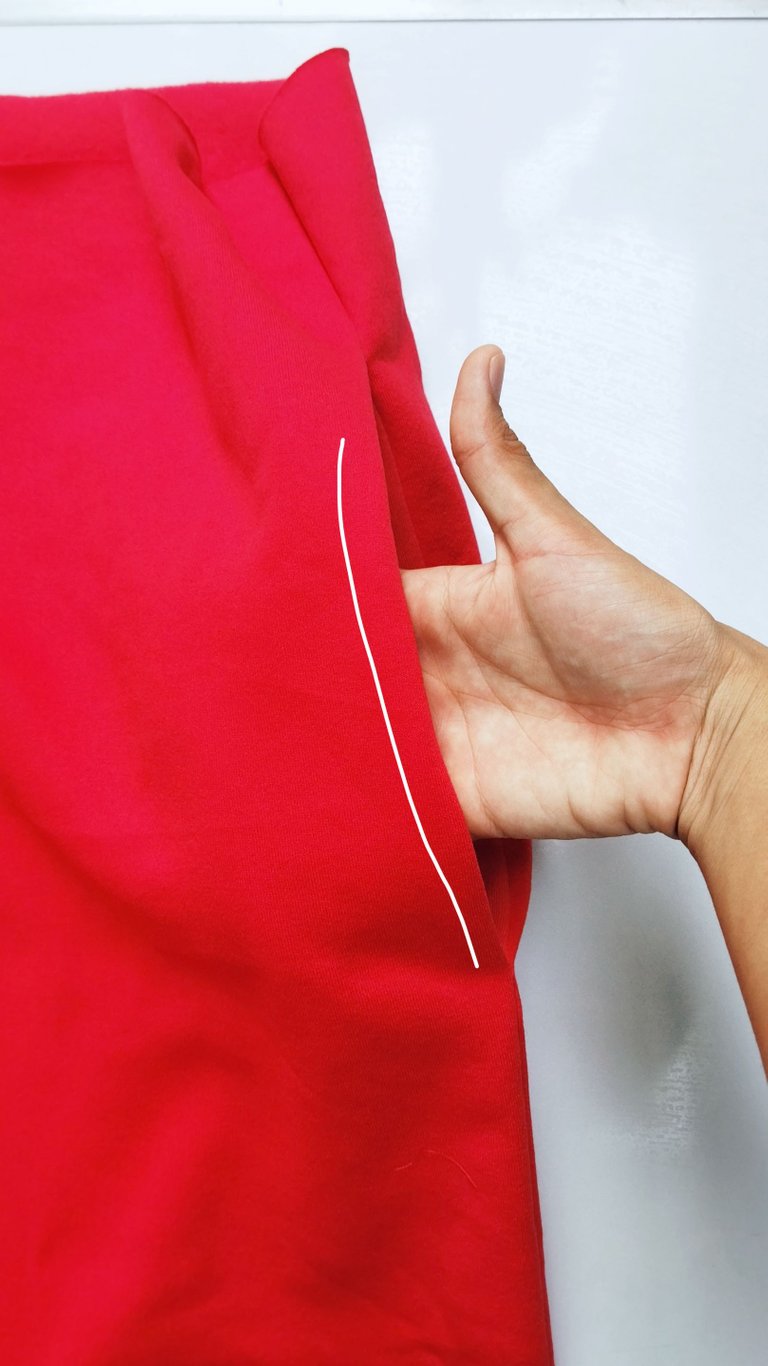
Unimos los tiros y cosemos con costura recta, luego de tener los tiros cosidos enfrentamos los derechos de las dos piezas, delantera y trasera y vamos a coser dejando 1cm de margen, dejamos abierta la parte del bolsillo.
We join the straps and sew with straight seam, after having the straps sewn we face the right sides of the two pieces, front and back, and we sew leaving 1cm of seam allowance, leaving the pocket part open.
Paso 3 || Step 3
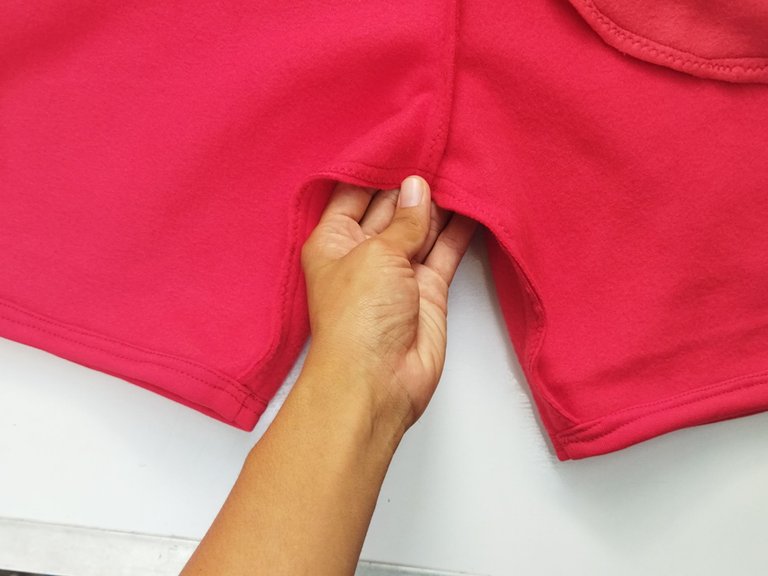
Unimos la entrepierna y cosemos con costura recta, rematamos con zigzag, para el ruedo de las piernas hice un doblez hacia la parte interna y pase costura por todo el borde.
We join the crotch and sew with a straight seam, we finish with zigzag, for the hem of the legs I made a fold towards the inner part and sew all around the edge.
Paso 4 || Step 4
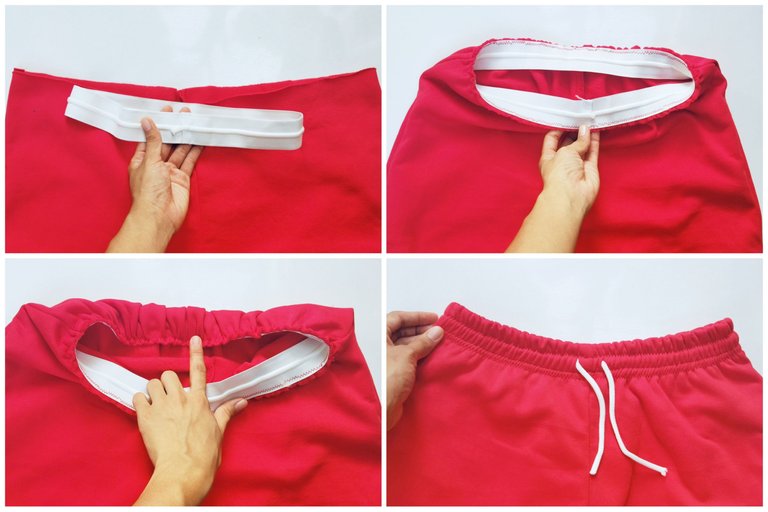
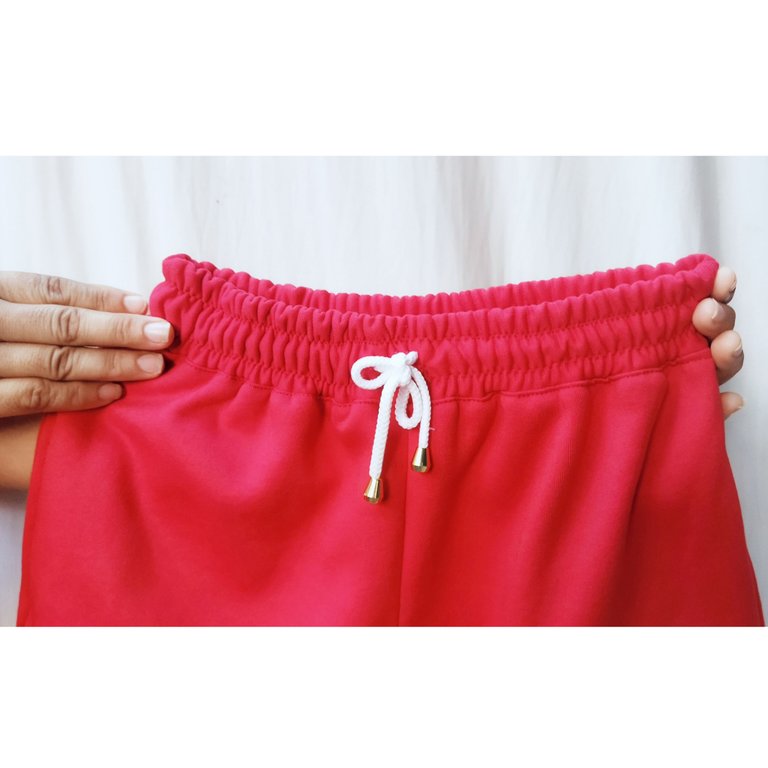
Para la pretina cortamos la elástica y empatamos haciendo un círculo, seguidamente comenzamos a pegar la elástica con costura en zigzag por todo el contorno de la cintura, primero cosí hacia la orilla para luego doblar hacía adentro y rematar con zigzag (podemos hacer una costura decorativa osea pasar varias veces la costura en zigzag por la pretina) Hice los ojales y saque las tiras, estás tiras ya vienen dentro de la pretina.
Por último coloqué un accesorio al final del cordón que cuelga de la pretina.
For the waistband we cut the elastic and tied it in a circle, then we started to glue the elastic with zigzag stitching all around the waistband, first I sewed towards the edge and then folded inwards and finished with zigzag (we can make a decorative stitching, that is to say, pass several times the zigzag stitching through the waistband) I made the buttonholes and took out the strips, these strips are already inside the waistband.
Finally I placed an accessory at the end of the drawstring that hangs from the waistband.
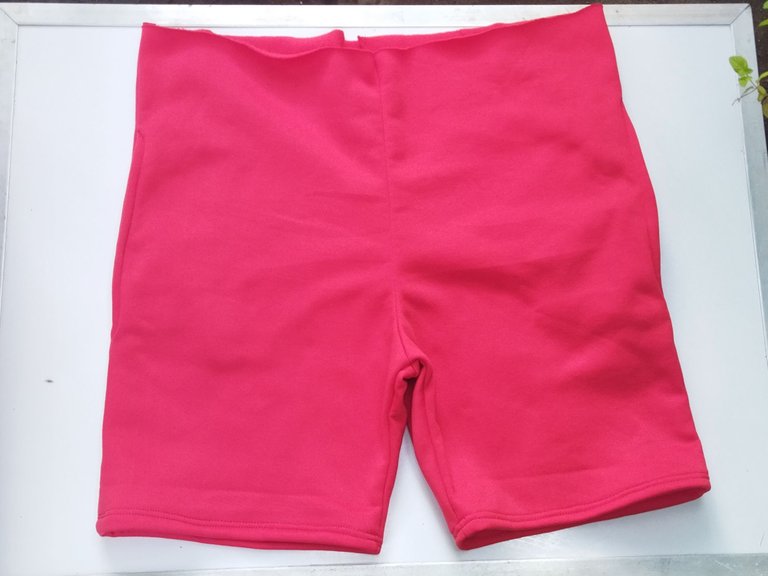
Resultado final.
Final result.
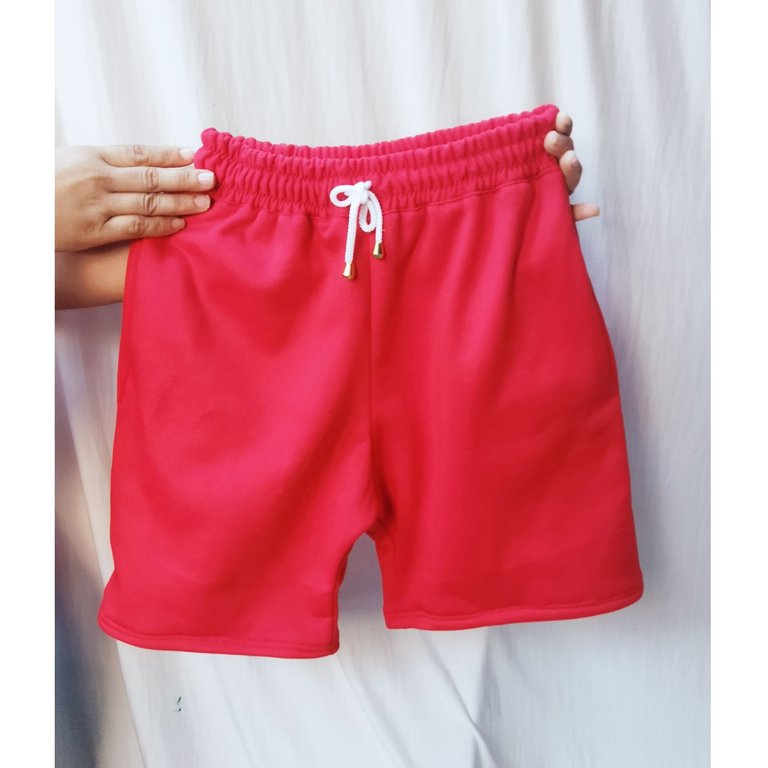
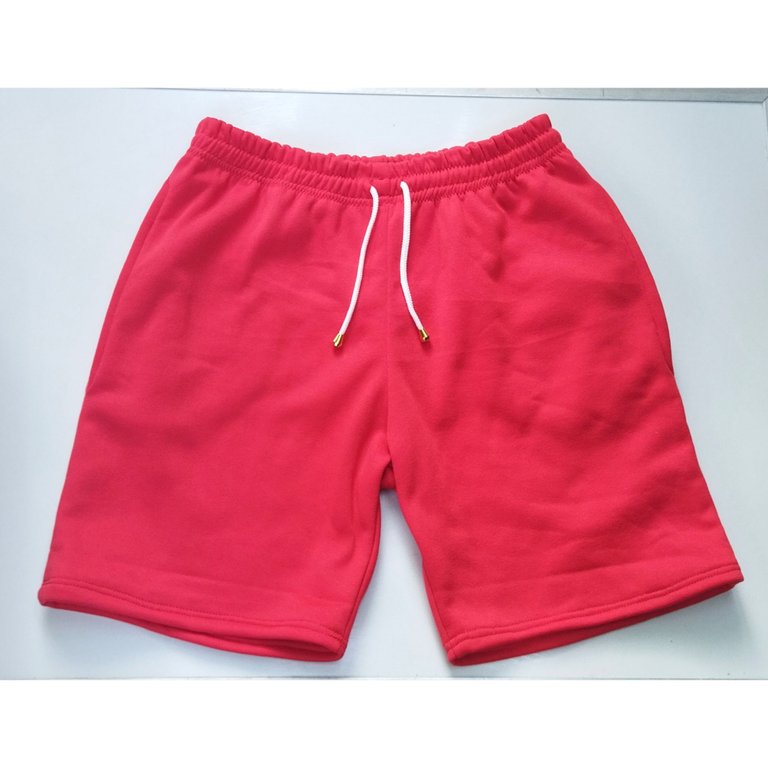
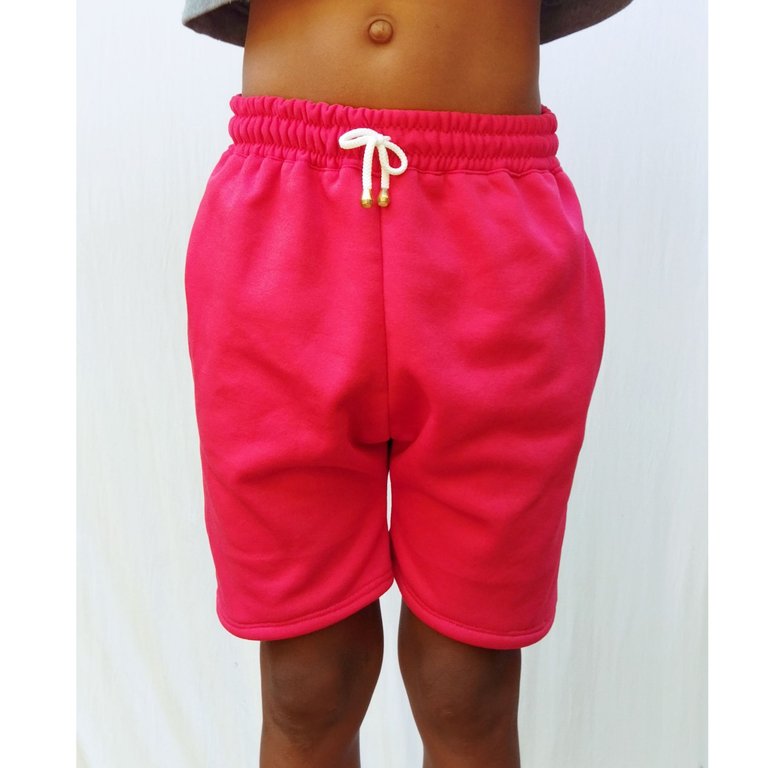
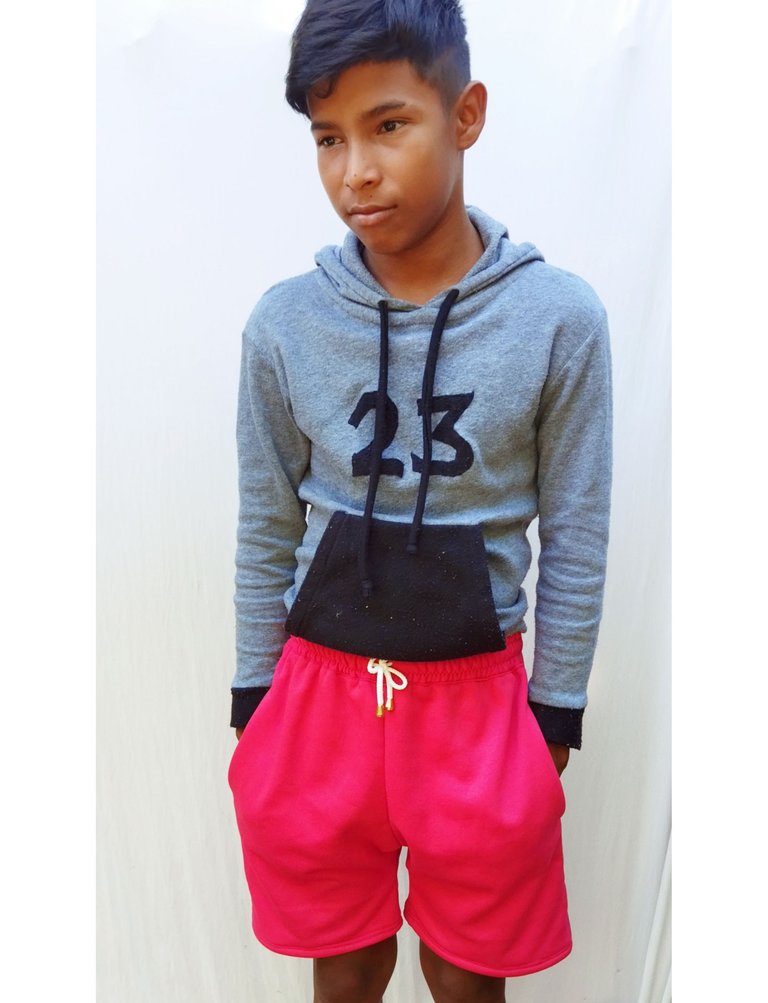
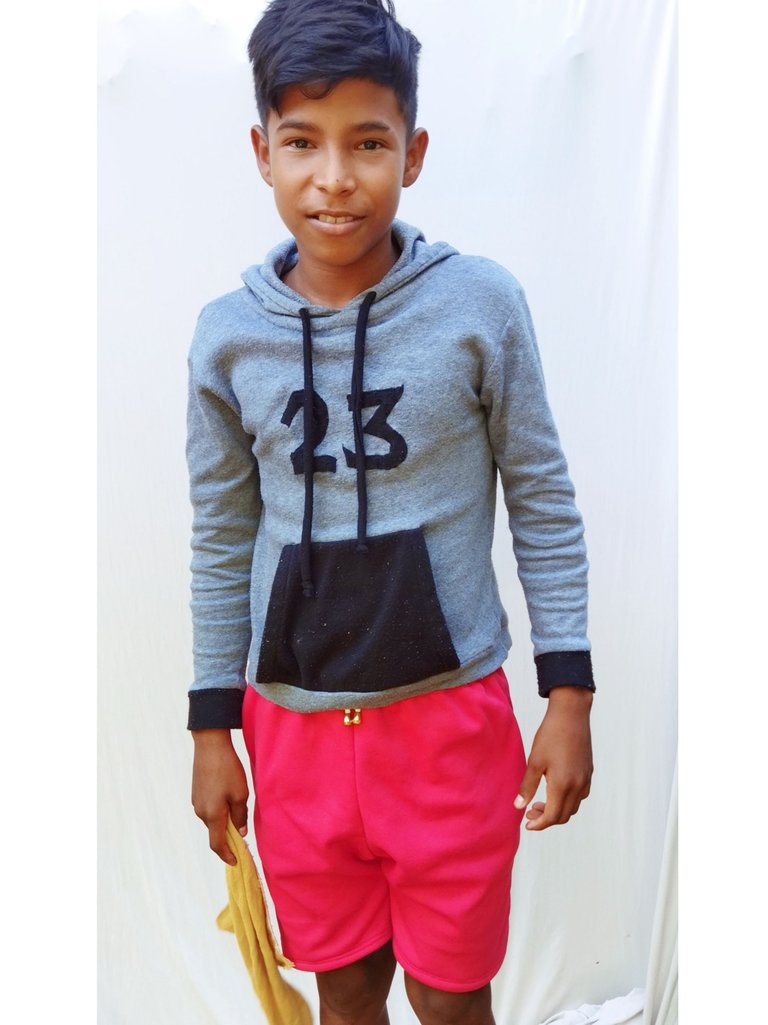
El resultado final es este espectacular short y mi primo no dudo dos veces en probarselo, espero se animen a realizarlo. Hasta aquí este tutorial 😁😁 Gracias por leer mi post, saludos 🤗🤗🤗
The final result is this spectacular short and my cousin did not hesitate twice to try it, I hope you are encouraged to make it. So far this tutorial 😁😁 Thank you for reading my post, greetings 🤗🤗🤗🤗🤗
All images are my property / Todas las imágenes son de mi propiedad
Camera: Xiaomi Redmi 9T.
Translation: Deepl.com