
I have to confess I’m a recycling freak.
I love giving new life to what others consider junk. Especially when it comes to clothing.
It is very widespread that textile waste is a major pollution problem in this modern world.
Thousands of tons of clothes are discarded every year. And that’s something that worries me a lot.
Mainly because I come from a home education where reuse was always practically a norm.
Also how people who know me know that I like to do these jobs because they give me many clothes which I can remodel or reuse fabrics.
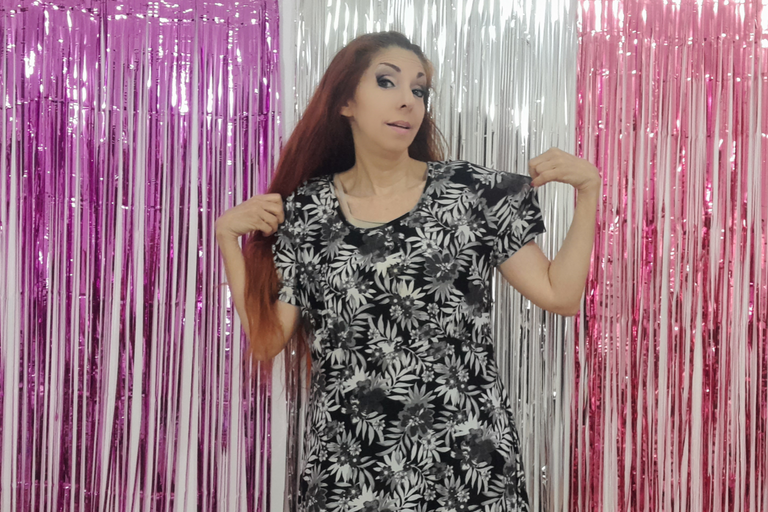
That is why on this occasion I want to share the reuse I made with a classic style dress and how I transform it into a modern and daring model.
Let’s start
The first thing I did was put the dress on and when I looked in the mirror begin to detail what possibilities I would have to remodel it.
Appreciating how big I was, I happened to use the opening of the neck to pass it under my arm and thus make a dress with only one shoulder.

At least, with this action I had already solved the first part of the style that I was going to print to the dress.
Now, it was necessary to work on adjusting the size.
I cut off the leftover sleeve and proceeded to open the dress all over that side.
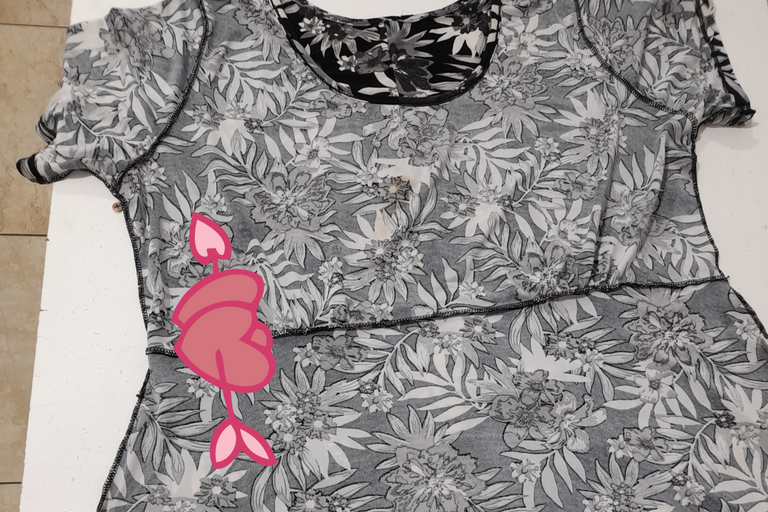
I then adjusted the old neck opening to my chest contour with a seam that would prove to be temporary, as with the next fit, this first seam would be removed.
But I’ll show you this detail later.
The second step was to put the dress back on the wrong side and adjust to my torso contour, from the base of the armpit to the waist.
I pinpointed that new line of fit, stitched it.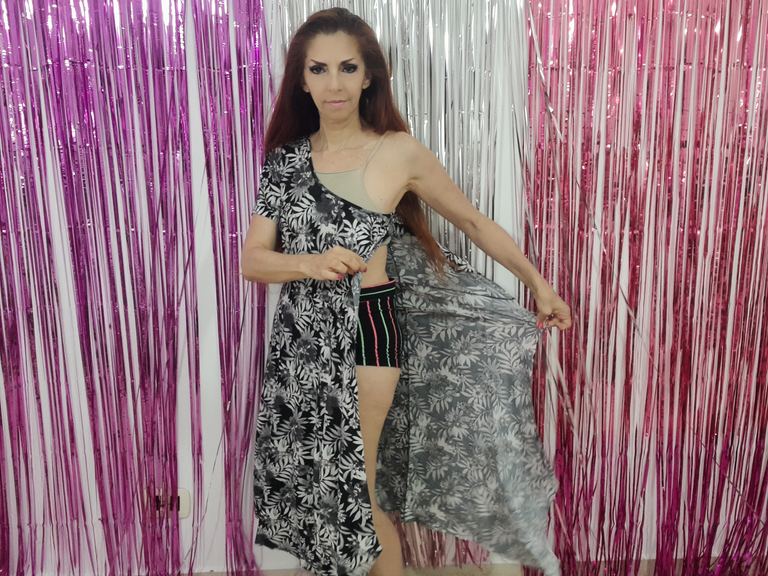
And it’s at this point that the sewing that I previously did was eliminated.
After doing this fitting seam to the torso, I cut the excess fabric.
When I put the dress back on, I noticed that I could take advantage of the opening in the leg, and with it I could give this dress an even more modern touch.
So I took some black ribbons and placed them on three specific points of the leg, so that the fall of the bottom of the dress could be shown and also kept intact.
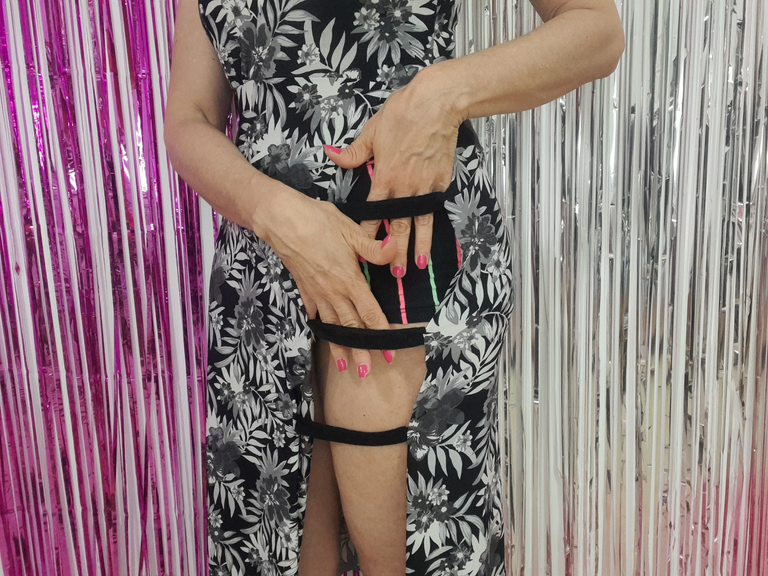
The tapes are hand stitched but can also be fixed with the machine.
I tried it again and was immediately satisfied with the result.
Finally, I cut the excess fabric on the skirt.
As a finishing touch, I decided to remove the other sleeve, to make it a little cooler.
And that’s how my new dress got ready in less than an hour.

This is a very simple transformation with very few seams, which even if you don’t have a machine, you could do it by hand without a problem.
I was very happy with the result and I was able to premiere a nice model for a party this season.
Besides having the satisfaction of contributing with the recycling of textiles.
I have made a short video with the most important parts of the process of carrying out this work, so you can look in more detail.
I hope you like it and enjoy it as much as I do.
And I’d like you to tell me if you also do textile recycling.
Photography and videos of my property and/or with permission to publish and broadcast.
Apps: IntroMaker/VideoMaker/ StotyMaker
Production, photograph, recording, photo and video editing, voiceover, designs & makeup: @yllendiva
Location: in my apartment (which is my own home recording studio)
Equipment: Samsung A21s cameraTranslator: free version of reverso.net
Original text by @yllentv
AHORA EN ESPAÑOL

Tengo que confesar que soy una fanática del reciclaje.
Me encanta darle nueva vida a lo que otros consideran basura. Sobre todo cuando de prendas de vestir se trata.
Es algo muy difundido que los desechos textiles son un gran problema de contaminación en este mundo moderno.
Miles de toneladas ver ropa es desechada cada año. Y eso es algo que a mí me preocupa mucho.
Sobretodo porque vengo de una educación hogareña dónde la reutilización fue siempre prácticamente una norma.
Además cómo las personas que me conocen saben que me gusta hacer estos trabajos pues me obsequian muchísimas prendas las cuales puedo remodelar o reutilizar las telas.

Es por ello que en esta oportunidad quiero compartirles la reutilización que hice con un vestido de estilo clásico y cómo lo transforme en un modelo moderno y osado.
Comencemos
Lo primero que hice fue ponerme el vestido y al mirarme en el espejo comenzar a detallar qué posibilidades tendría para remodelarlo.
Apreciando lo grande que me quedaba, se me ocurrió utilizar la abertura del cuello para pasarlo por debajo de mi brazo y así hacer un vestido con un solo hombro.

Al menos, ya con esta acción había resuelto la primera parte del estilo que iba a imprimirle al vestido.
Ahora, era necesario trabajar en el ajuste de la talla.
Corté la manga sobrante y procedí a abrir el vestido por todo ese lateral.

A continuación, ajusté la antigua abertura de cuello a mi contorno de pecho con una costura que resultaría ser provisional, ya que con el siguiente ajuste, esta primera costura quedaría eliminada.
Pero más adelante les mostraré este detalle.
El segundo paso fue colocarme de nuevo el vestido por el lado del revés y ajustar a mi contorno de torso, desde la base de la axila hasta la cintura.
A esa nueva línea de ajuste la marqué con alfileres,y le realice una costura.

Y es en este momento donde la costura que previamente hice, quedó eliminada.
Después de hacer esta costura de ajuste al torso, corté el excedente de tela.
Al colocarme nuevamente el vestido, noté que podía aprovechar la abertura en la pierna, y con ello podría darle a este vestido un toque aún más moderno.
Así que tomé unas cintas negras y las coloque en tres puntos específicos de la pierna, de manera que se puediera mostrar y también se mantuviera intacta la caída de la parte inferior del vestido.
Las cintas las uni con puntadas a mano pero también se pueden fijar con la máquina.
Volví a probarmelo y de inmediato quedé satisfecha con el resultado.
Para terminar, corté el exceso de tela en la falda.
Cómo toque final, decidí eliminar la otra manga, para hacerlo un poco más fresco.
Y así es cómo quedó listo mi nuevo vestido en menos de una hora.

Esta es una transformación muy sencilla y con muy pocas costuras, que incluso, si no tienes una máquina, podrías hacerlo a mano sin problema.
Yo quedé muy feliz con el resultado y pude estrenar un lindo modelo para una fiesta de esta temporada.
Además de tener la satisfacción de contribuir con el reciclaje de textiles.
He realizado un corto video con las partes mas importantes del proceso de realización de este trabajo, para que puedas mirar con más detalle.
Espero que te guste y lo disfrutes tanto como yo.
Y me gustaría que me cuentes si tú también realizas reciclaje de textiles.
Fotografía y videos de mi propiedad y/o con permiso de publicación y difusión.
Apps: IntroMaker/VideoMaker/ StotyMaker
Producción, grabación, fotografía, edición de foto y video, voz en off, diseños & makeup: @yllendiva
Locación: en mi depto (que es mi propio estudio de grabación domestico)
Equipo: cámara Samsung A21s
Texto original de @yllentv
▶️ 3Speak


