Hello, needleworkers! I’m here with a new project. I finally decided to crochet a sweater, and also use a design from a pixel grid. I’m excited to show you what I’ve done!
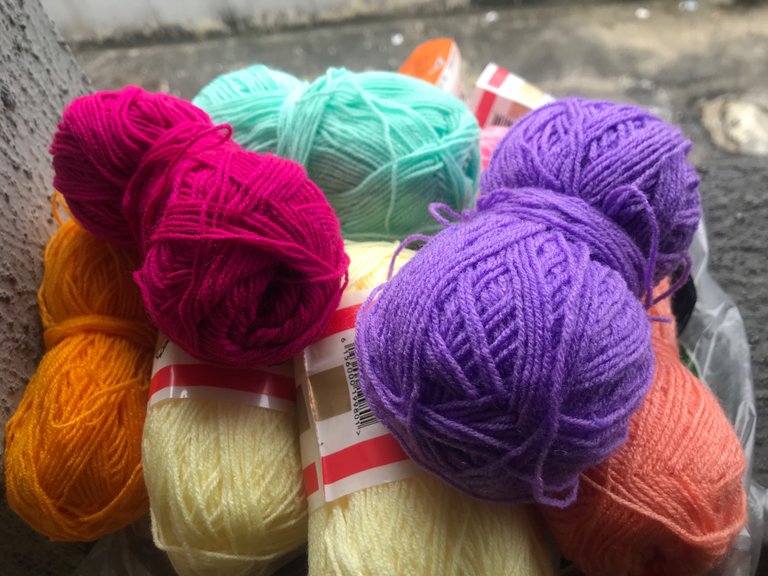
My first plan was to use a picture of three cute bears I have on my phone, but when I put it in a grid, it wasn’t showing the details in the size I wanted it to be. I was disappointed, but luckily, I stumbled on a cute pixel grid pattern that said HAVE A GOOD DAY with the two Os in the GOOD represented by two smileys and a flower on both sides of the A. The design was really pretty and the colour combination exactly fit what I wanted. ASAP, I sent my yarn plug the picture so I could know if she had the colours I needed. I was lucky; she did. The next day, I had my pack of yarn and was ready to go!
The pattern wasn’t the measurement of my project, so I counted the rows and columns and worked out how to situate it in the middle of my piece. I subtracted the number of rows from the total number of rows of my piece and then divided what I had left by two. I would crochet that number of rows in my background colour before starting the first row of the design, and after crocheting the last row, I would still go ahead and end it by crocheting the same number of rows in my background colour. I did the same with the columns. All these were done after doing a swatch and calculations.
I began with a chain of 120 derived from calculations done using my swatch. Then I proceeded to do 5 rows of my background colour. In the next row, I began working with a tapestry and intarsia crochet, tapestry crochet with the background colour and intarsia crochet with the other colour I was starting with.
If you don’t know what tapestry crochet and intarsia are, they are both techniques used for colour work in crochet. While tapestry crochet involves carrying along the strands not being used at the moment and crocheting over them with the working strand at the back of the piece, intarsia involves letting the strands hang down till you need to use them. You let them hang because in intarsia, you work with a block of a particular colour.
Back to the process, I introduced lilac first because I was crocheting from the bottom to the top. I was going to spell DAY. My hook size was 3mm and I was using two strands of yarn. For my stitch, I was going with the simple half double crochet stitch, but I was inserting the hook below where you would normally so it gave it a different look.
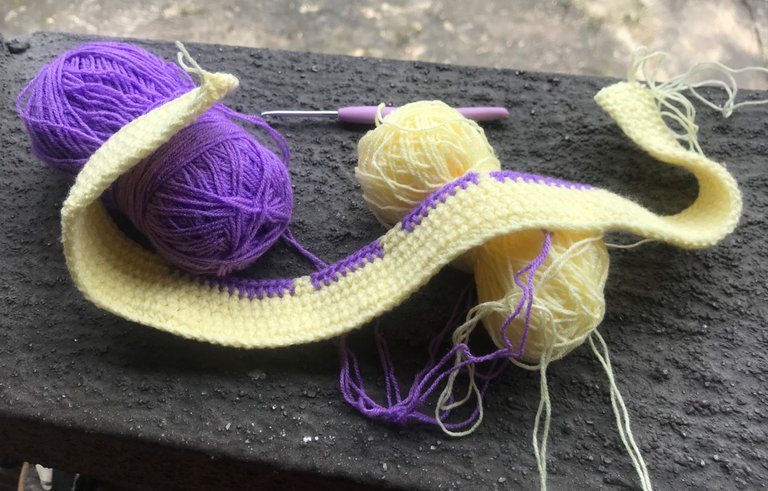
At this point, it was still pretty easy because I was working with just two colours. It didn’t take me so much time. I was done soon.
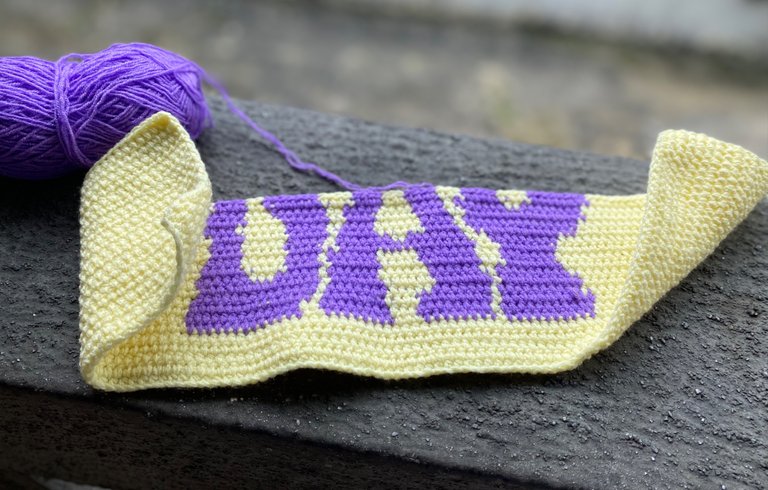
Before I completed DAY and dropped the lilac, I’d already begun the GOOD so I’d introduced three more colours — salmon, black, and yellow. At this point, I was slower. I didn’t even pick up the piece for two days.
When I finally completed GOOD, I’d introduced the pink for the flower, orange for inside the flower, and turquoise for A.
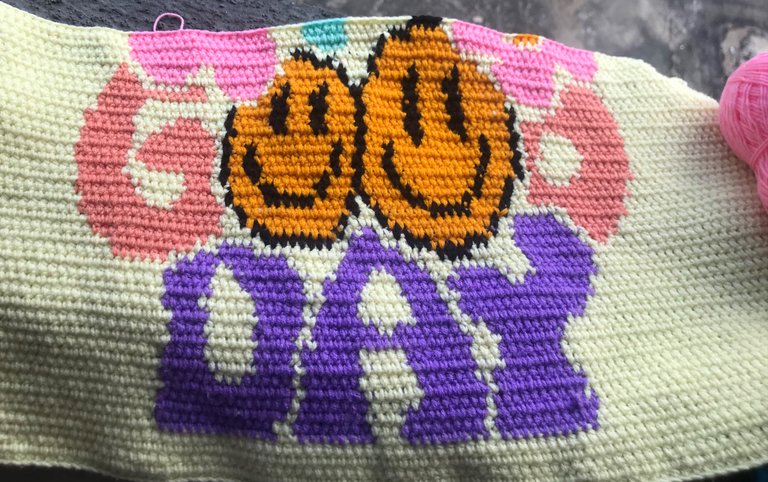
I’d just finished the most stressful part where I’d been working with 5 colours. The number of strands reduced by just one, I rushed through A because I’d spend so much time on GOOD.
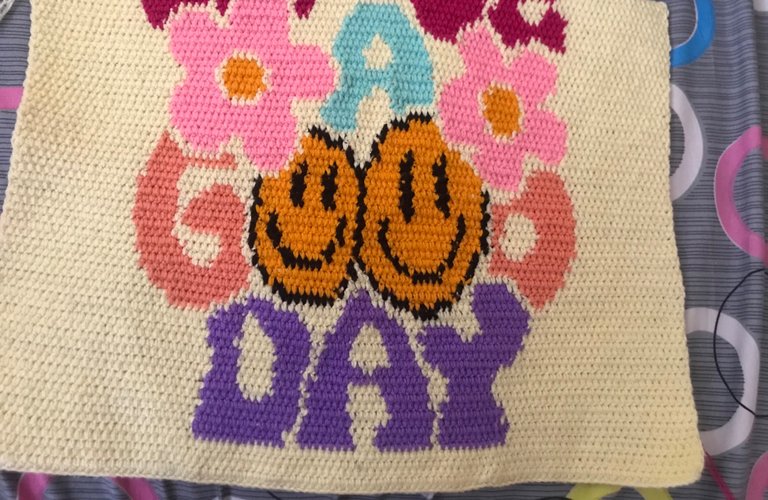
When I finally got to HAVE, dark pink, I was overjoyed because I knew that I was almost done with the front panel. This part was the fastest part. When I did the last row, I finished off the panel with five rows in the background colour, cream, just like how I began.
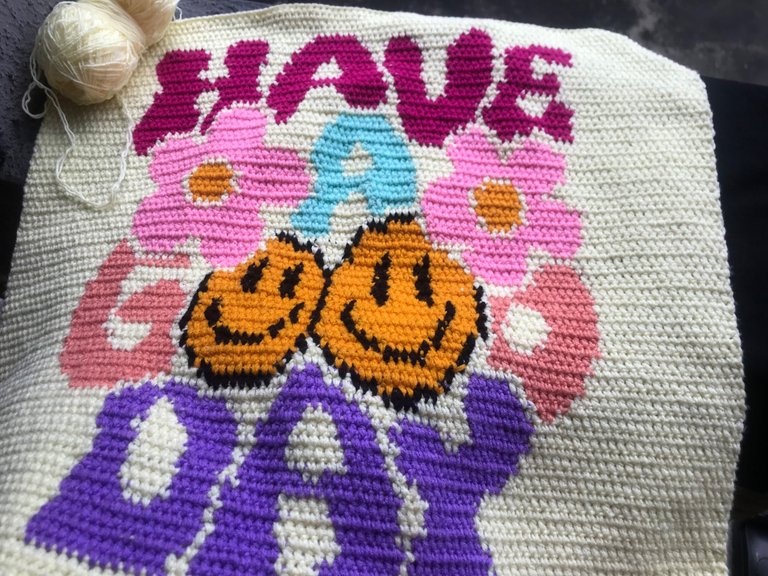
I completed the front panel by crocheting the neckline. After three weeks, I had completed my front panel. The relief! It came out pretty nice and I knew that it’d take less than half the time to finish the back panel since it was plain.
To say this project stressed me is an understatement. I frogged countless times, especially for the first half of the piece. I’d reach the end of a row and see that I have more stitches than I’m supposed to have at the end. I’d have to frog some stitches, checking where I’d made the mistake. Sometimes, I’d frog from the first colour or the entire row. I could be found looking frustrated those times.
Things changed towards the end though because I began to follow each stitch with what I have on the row below,checking after each colour to make sure I put the last stitch in the particular stitch it’s meant to sit on.
If you’ve tried doing colour work with a pixel grid, let me know your experience in the comment section.
How’s my WIP looking, guys? Are you as excited as I am to see the complete sweater? Well, I’m working on it already. See you when I’m all done!