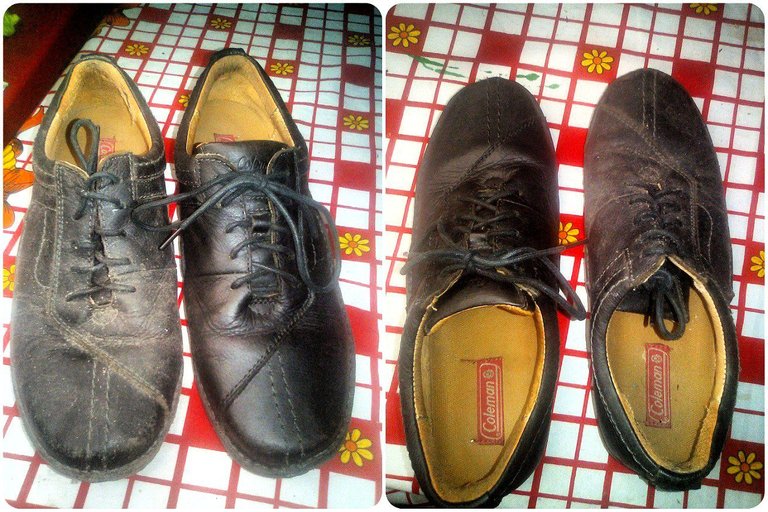
Hola, hoy voy a estar mostrando como restauré un zapato de cuero, que tenia guardado en un armario, aunque está algo viejo y golpeado, aun tiene mucho que dar.
Como ven y la imagen, hay una diferencia enorme y no solo en color, sino tambien en calidad, ya que me tomé el tiempo de coserlo. Si, coserlo. Y como siempre, sin tener las herramientas adecuadas y sin haberlo hecho nunca en mi vida, intentando demostrar, que quien quiere, puede hacerlo.
Hello, today I am going to be showing how I restored a leather shoe, which I had stored in a closet, although it is somewhat old and beaten, it still has a lot to give.
As you can see and the image, there is a huge difference and not only in color, but also in quality, since I took the time to sew it. Yes, sew it. And as always, without having the right tools and without ever having done it in my life, trying to show that whoever wants to can do it.
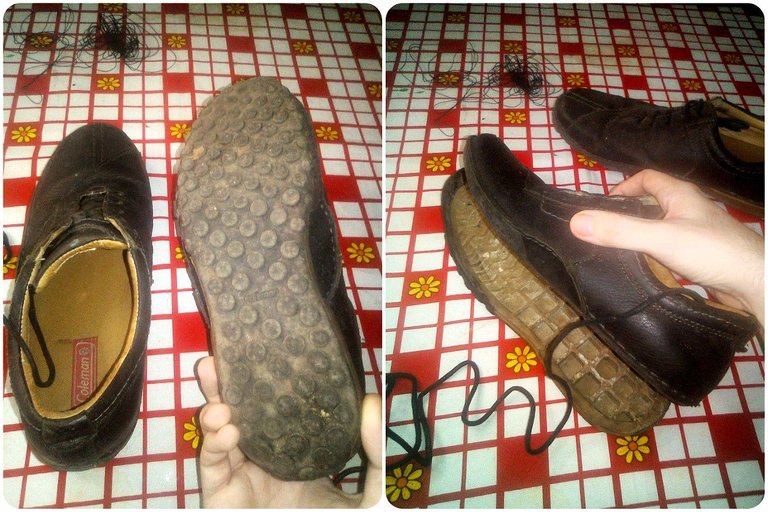
A pesar de que se veían bastante bien y realmente son muy fuertes, el problema es ese, que son muy fuertes. Mas concretamente la suela, es muy poco elástica, lo que hace que al no usarlos en mucho tiempo, se secara la pega y bueno.. se despegaron nada mas ponermelos.
Even though they look pretty good and they are really very strong, the problem is that they are very strong. More specifically, the sole is very inelastic, which means that when you don't use them for a long time, the glue dries up and, well... they came off as soon as I put them on.
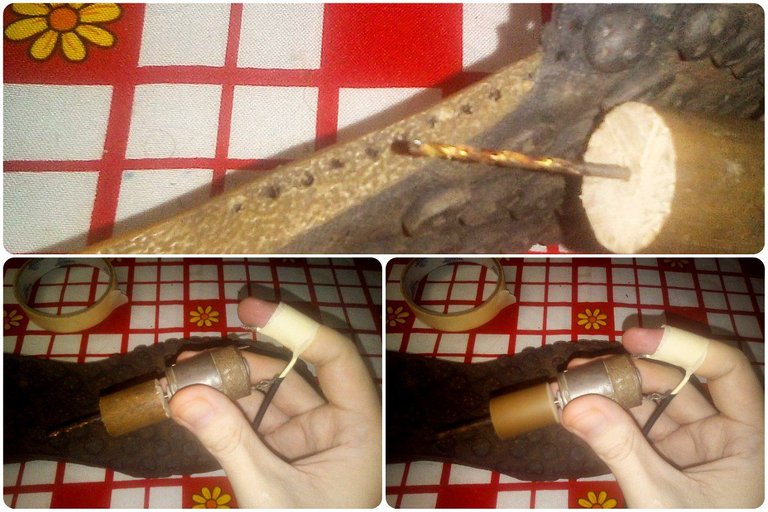
Y aquí es donde viene mi ingenio o astucia para hacer las cosas. Como dije, yo no tengo las herramientas necesarias para hacer esto, entonces pensé que para sufrir menos con mi aguja normal, podía hacerle agujeros a todo lo largo de la suela y asi no solo seria mas fácil penetrar con la aguja, sino que ya tendría marcado por donde iba a pasar.
Entonces, agarré un motor de 12 voltios que tenia de un carro a control remoto. (Ya estaba roto). Y luego agarré un trozo de palo de escoba, al cual le hice un agujero en otro el medio para meter una broca para madera, entre mas fina mejor, ya que solo seria para hacer un agujero guía.
No tenia ganas de inventarme un pedal, asi que solo me amarré el cable al dedo con cinta y fuí haciendo agujeros en todo el contorno
And this is where my ingenuity or cleverness comes in to get things done. As I said, I don't have the necessary tools to do this, so I thought that in order to suffer less with my normal needle, I could make holes all along the sole and that way it would not only be easier to penetrate with the needle, but I would already have marked where he was going to pass.
So, I grabbed a 12 volt motor that I had from a remote control car. (It was already broken). And then I grabbed a piece of broomstick, to which I made a hole in the middle to put a drill bit for wood, the finer the better, since it would only be to make a pilot hole.
I didn't feel like inventing a pedal, so I just tied the cable to my finger with tape and made holes all around.
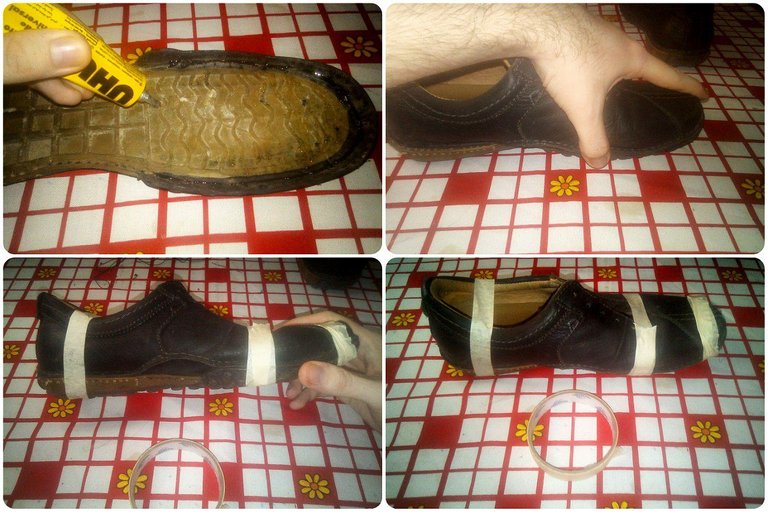
Si bien iba a coserlo, no quería sonidos raros al caminar, asi que igualmente agregué pega en el medio y bueno, no quería pasar horas sosteniendo el zapato hasta que se pegara, asi que lo sujeté con cinta. Mi nueva amiga, la cinta de papel 😊
While I was going to sew it on, I didn't want any weird sounds when walking so I still added glue in the middle and well, I didn't want to spend hours holding the shoe until it was glued on so I taped it up. My new friend, the paper tape 😊
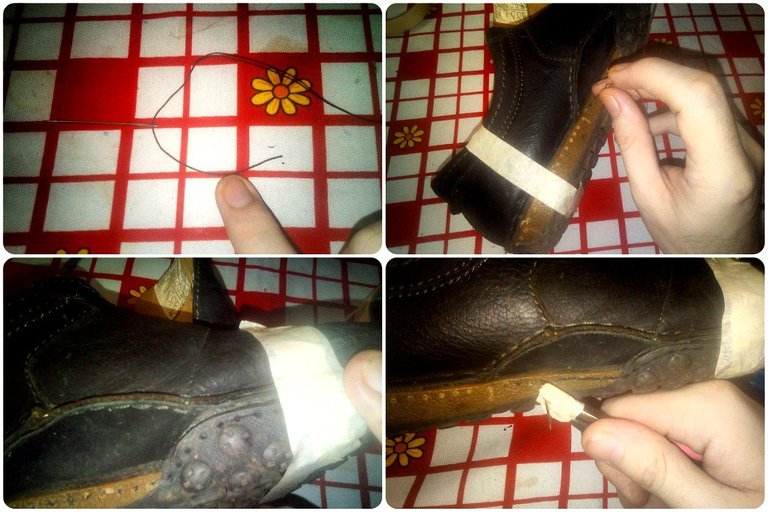
Ahora, llegó la hora de sufrir.. ESTABA MUY DURO. No se si se me hizo complejo por no tener herramientas, aunque de igual forma, ofrezco mis respetos a los zapateros de esta comunidad, tengo las manos rotas y solo hice un zapato.
A pesar del duro trabajo, debo admitir que fue.. no quiero decir fácil, porque no lo es, aunque si diré que no deja fe ser una costura común y corriente, asi que luego de un rato, entiendes como es el proceso y solo es cuestión de aguantar el dolor y apoyarte de todo lo que consigas, como yo, que utilicé unas pinzas para jalar la aguja.
Now, it's time to suffer... IT WAS VERY HARD. I don't know if it was complex for me because I didn't have any tools, although in the same way, I offer my respects to the shoemakers of this community, my hands are broken and I only made one shoe.
Despite the hard work, I must admit that it was... I don't want to say easy, because it isn't, although I will say that it doesn't leave faith to be an ordinary seam, so after a while, you understand what the process is like and just it's a matter of enduring the pain and supporting yourself with everything you can, like me, who used tweezers to pull the needle.
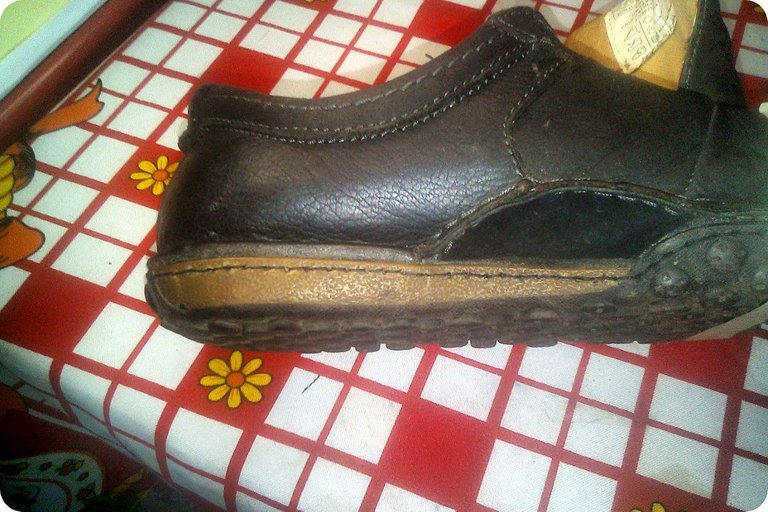
Luego de exactamente 4 horas (Que es el tiempo que me propuse invertir en esto), ya había terminado todo el contorno y para mi sorpresa, quedó muy bien jaja
Osea, una vez pagué por éste trabajo y las costuras quedaron menos rectas, asi que si. Estoy feliz 😊
Aunque, si logran ver en la imagen, el cuero tambien necesitaba cariño..
After exactly 4 hours (which is the time I planned to invest in this), I had already finished the entire contour and to my surprise, it turned out very well haha
I mean, once I paid for this work and the seams were less straight, so yes. I'm happy 😊
Although, if you can see in the image, the leather also needed care..
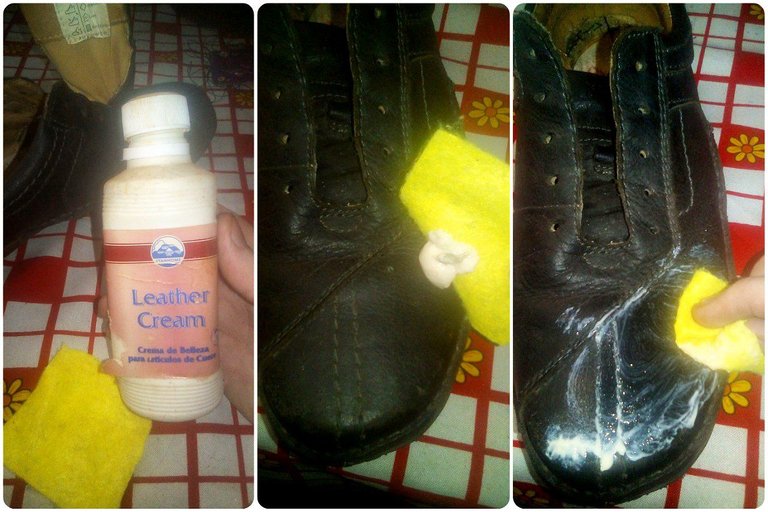
Por suerte, tengo esto. Un embellecedor de cuero, ésto no es mas que una crema hidratante, básicamente. Y su aplicación es bastante simple, colocarlo sobre el artículo de cuero y masajear sin parar.
Aconsejo añadir un poco, masajear 5 minutos, dejar reposar para que absorba bien y luego añadir otra poco y masajear nuevamente, asi el cuero quedará casi como nuevo. Digo "casi", porque es la realidad, las grietas grandes no las quita, aunque si hace que se vean negras y no opacas
Luckily I have this. A leather trim, this is nothing more than a moisturizer, basically. And its application is quite simple, place it on the leather article and massage without stopping.
I recommend adding a little, massaging for 5 minutes, letting it rest so that it absorbs well and then adding a little more and massaging again, so the leather will be almost like new. I say "almost", because it is the reality, the large cracks do not remove them, although it does make them look black and not opaque
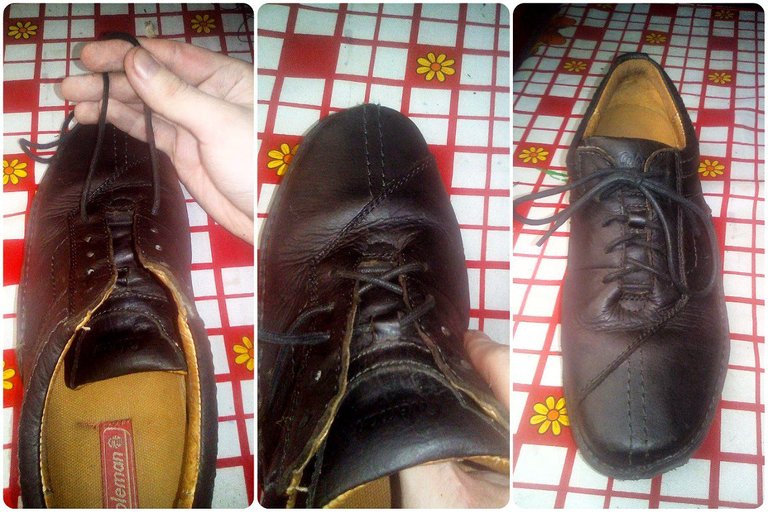
Por último, solo me faltaba colocarle las trenzas y listo. Super orgulloso del resultado que conseguí. Como dije desde el inicio, es primera vez que lo hago y si sentí que iba a arruinarlo, la verdad jaja
Finalmente, recomiendo a todos qué prueben hacerlo en casa, denle una nueva vida a zapatos o sandalias viejas y mas si son de buenos materiales, como es el caso.
Un abrazo para todos los que llegaron hasta ésta parte del post, saludos 😊
Finally, I just needed to put the braids on it and that's it. Super proud of the result I got. As I said from the beginning, it is the first time that I do it and if I felt that I was going to ruin it, the truth haha
Finally, I recommend everyone to try to do it at home, give a new life to old shoes or sandals and more if they are made of good materials, as is the case.
A hug for all those who reached this part of the post, greetings 😊
