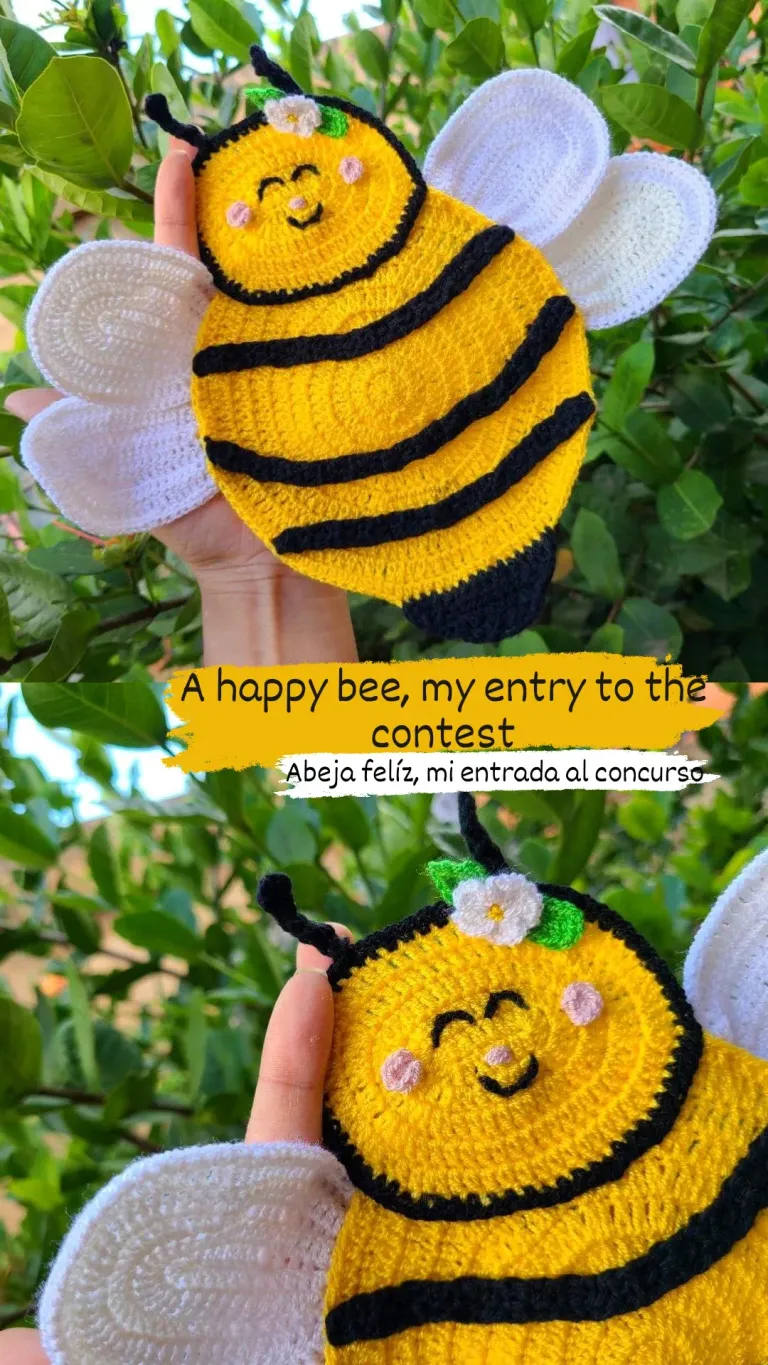
Happy and blessed Monday 🧡 once again I present to you the tutorial which I hope you like, as we all know there is a contest which closes today and trying to get a design that I will like, time ran out, in reality I chose several reasons related to the contest but sometimes I am picky about what I want so I decided on this beautiful happy and crochet bee 🐝🧡 .
Feliz y bendecido lunes 🧡 una vez más les presento el tutorial el cual espero les agrade, como todos sabemos hay un concurso el cual cierra hoy y tratando de conseguir un diseño que me agradará el tiempo se me agotó, en realidad elegí varios motivos relacionados con el concurso pero a veces soy exigente con lo que quiero así que me decidí por esta hermosa abeja felíz y crochetera 🐝🧡🧶.
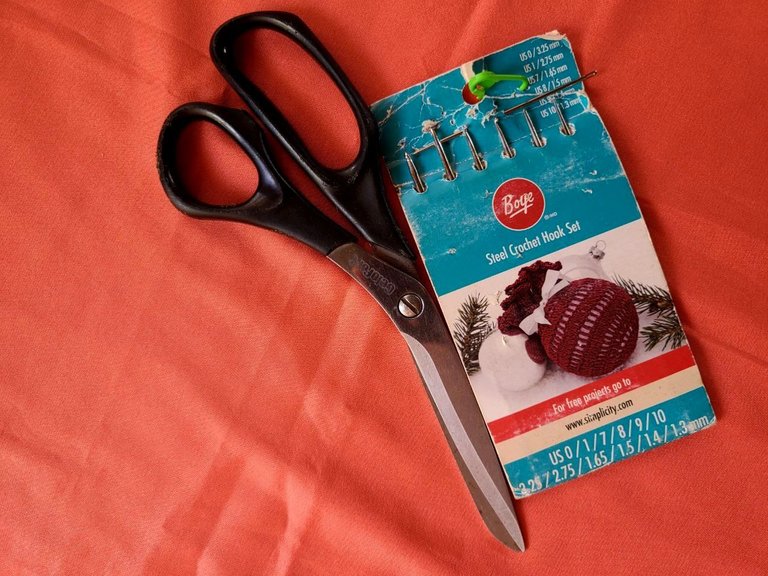
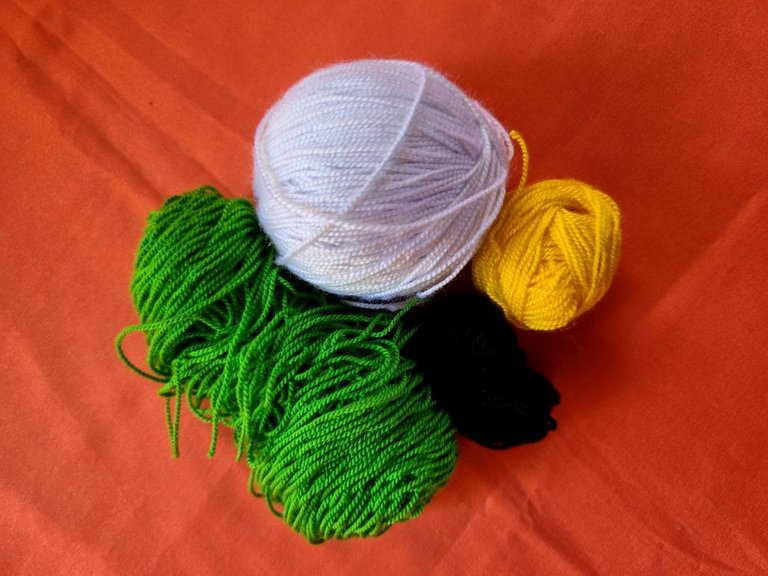
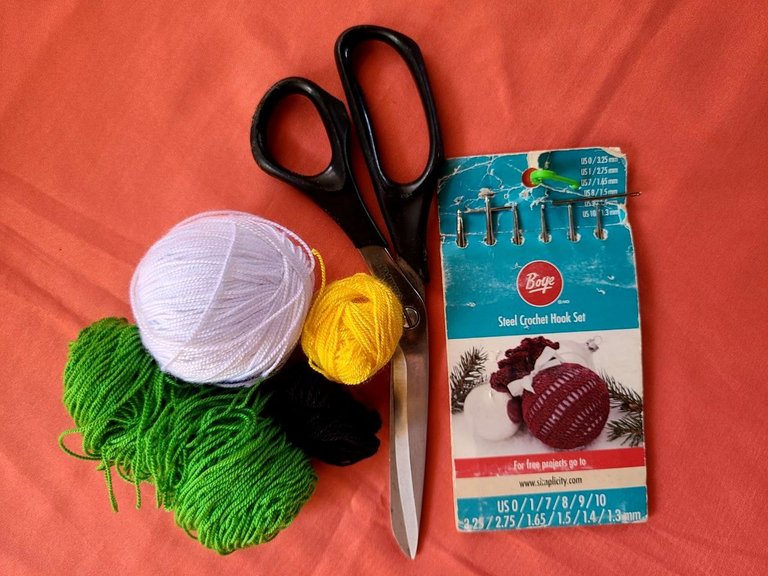
🧶 Materials to use:
✓Crochet threads: yellow, black, white, Christmas green and pink.
✓Crochet hook number 5
✓Sewing needle
✓Scissors
🧶 Points to use:
✓Elongated high points.
✓Normal high points.
✓Medium high points.
✓Low points.
✓Slided stitch.
🧶 Materiales a utilizar:
✓Hilos de crochet: amarillo, negro,blanco, verde navidad y rosa.
✓Aguja de crochet número 5
✓Aguja de coser
✓Tijeras
🧶 Puntos a utilizar:
✓Puntos altos alargados.
✓Puntos altos normales.
✓Puntos medio altos.
✓Puntos bajos.
✓Punto deslizado.
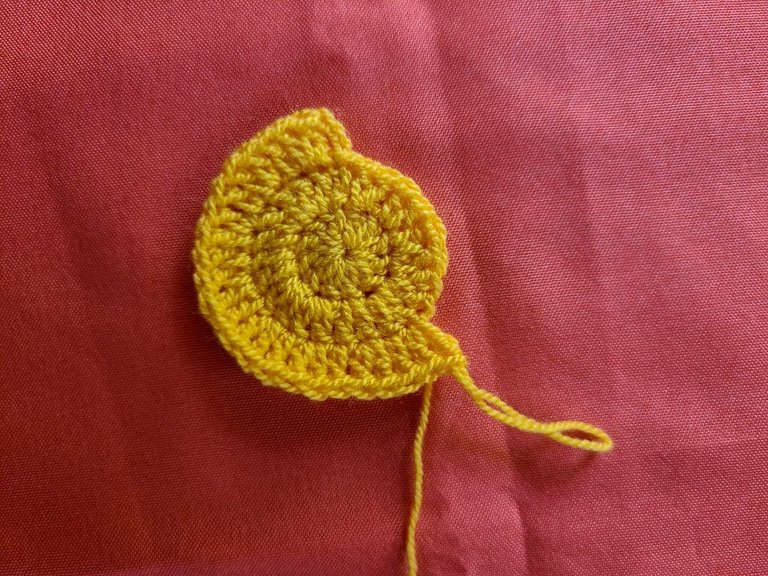
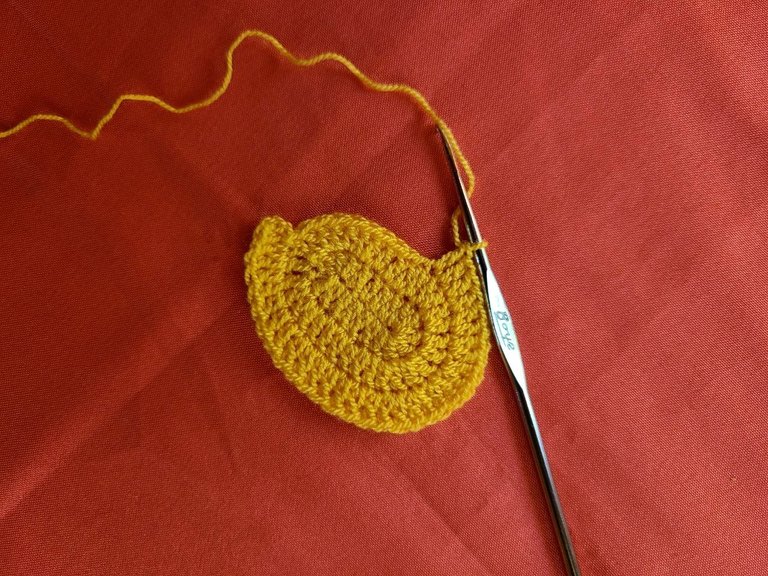
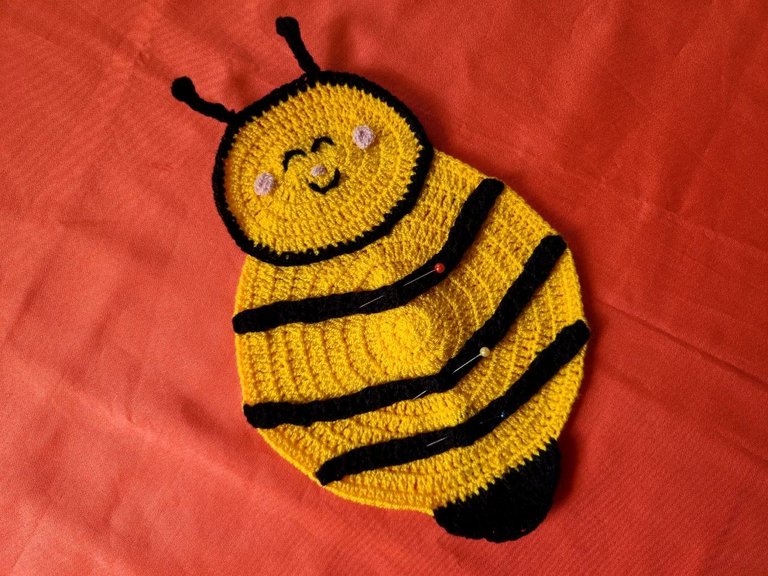
🧶 Step 1: We start using the yellow thread to form the body of the bee.
Row 1: We make a magic ring and inside we make 12 normal double crochets.
Row 2: the entire row is made with increases (24).
Row 3: 1 normal double crochet, followed by an increase (36).
Row 4: 2 elongated double crochets, followed by an increase (48).
Row 5: 3 elongated double crochets, followed by an increase (60).
Row 6: 4 elongated double crochets, followed by an increase (72).
Row 7: 5 elongated double crochets, followed by an increase (84).
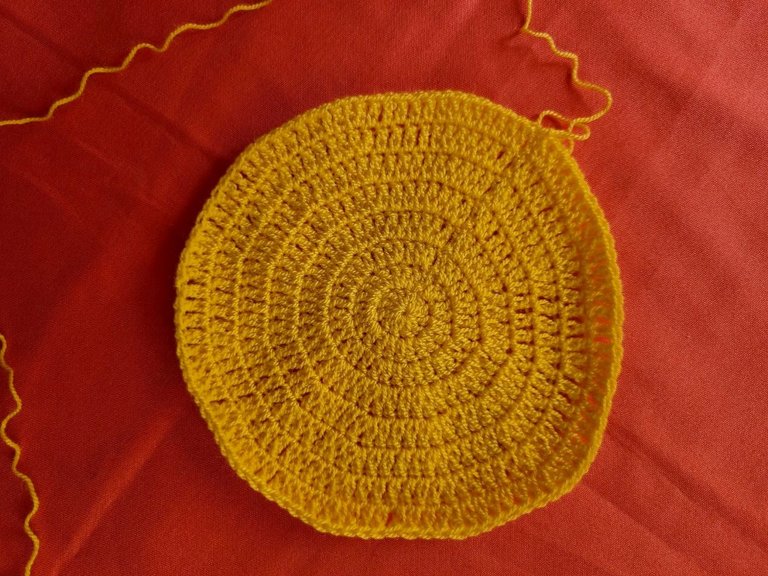
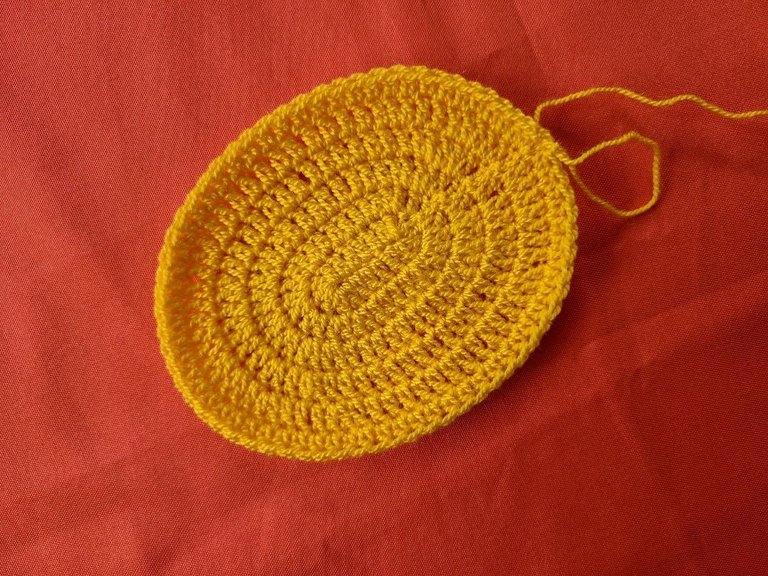
Row 8: 6 elongated double crochets, followed by 1 increase, (96).
**Row 9: The entire row is the same as the previous one. (112).
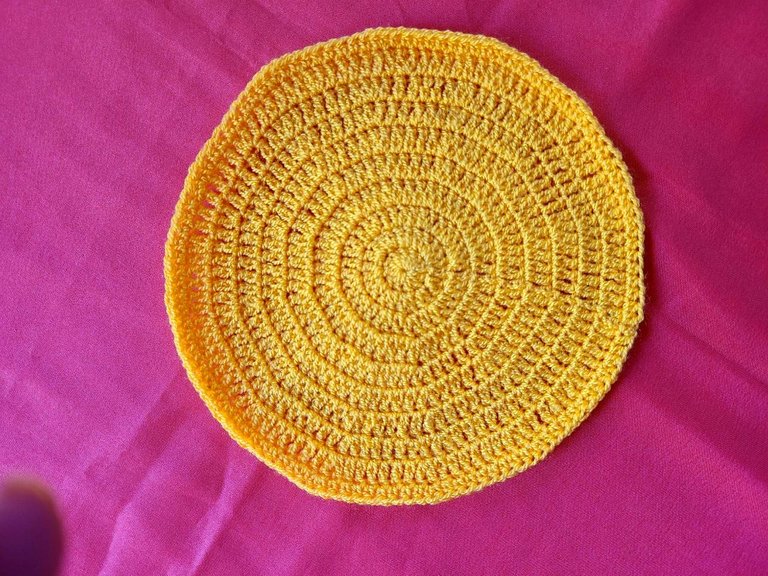
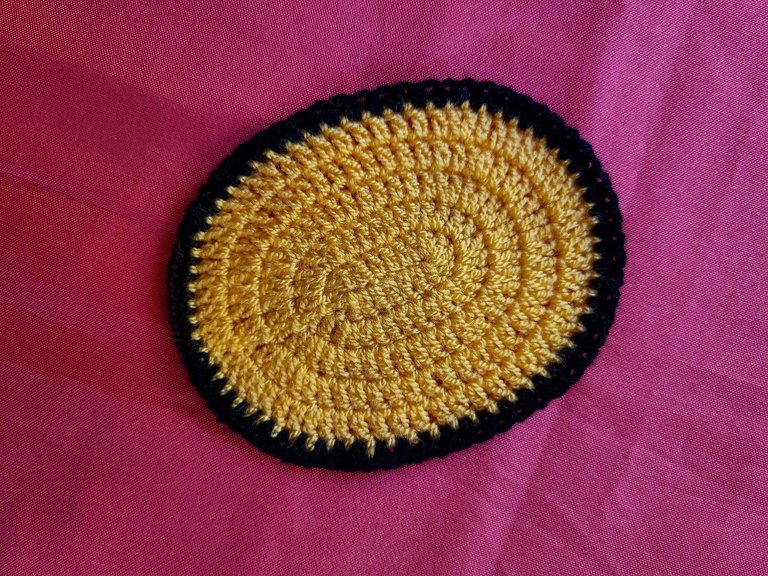
Row 10: Border the entire outline of the motif with half-high crochets.
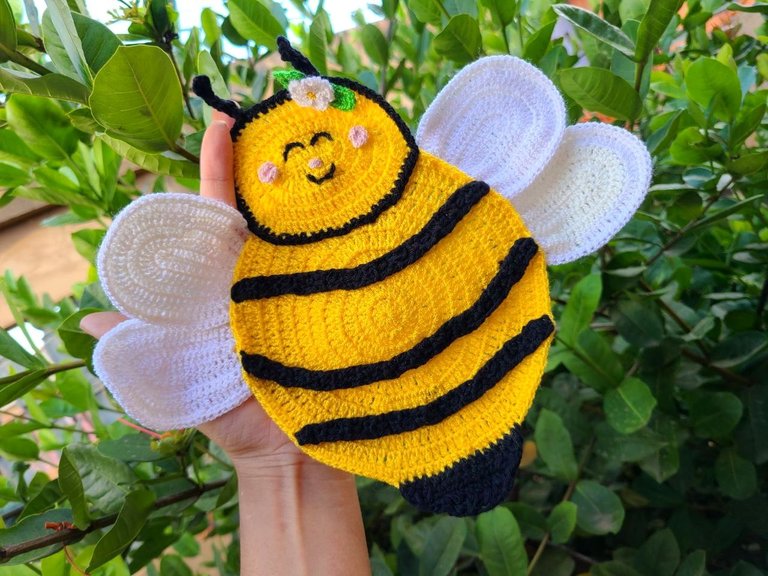
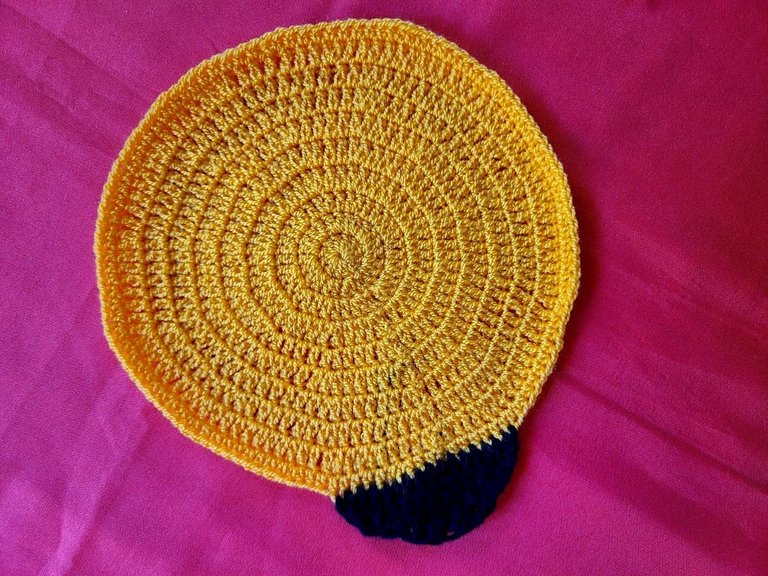
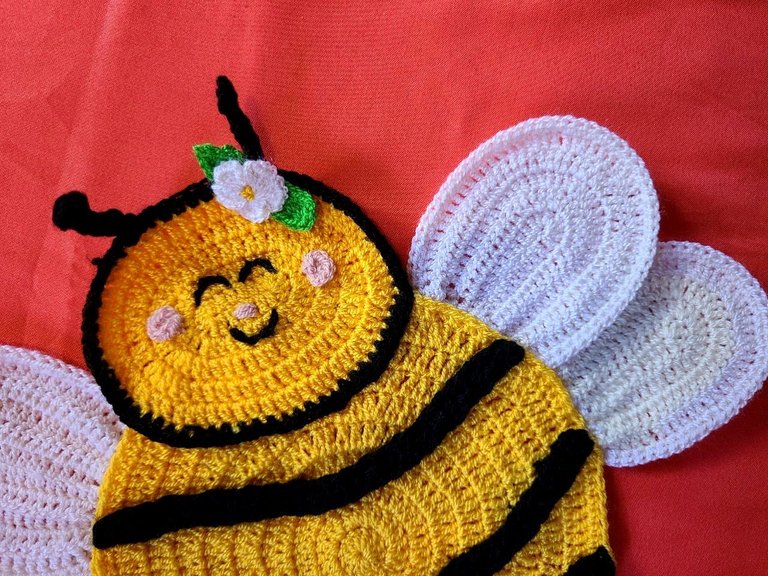
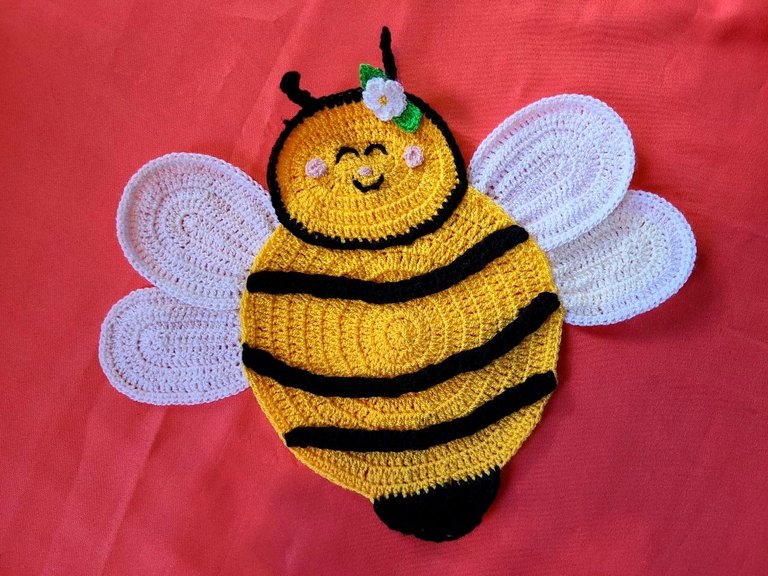
To decorate the body we make some rows of 2 half-high stitches and we adapt them to the design in this case 3, for the tail we cast 15 stitches in black and we decrease until it gives it the desired shape.
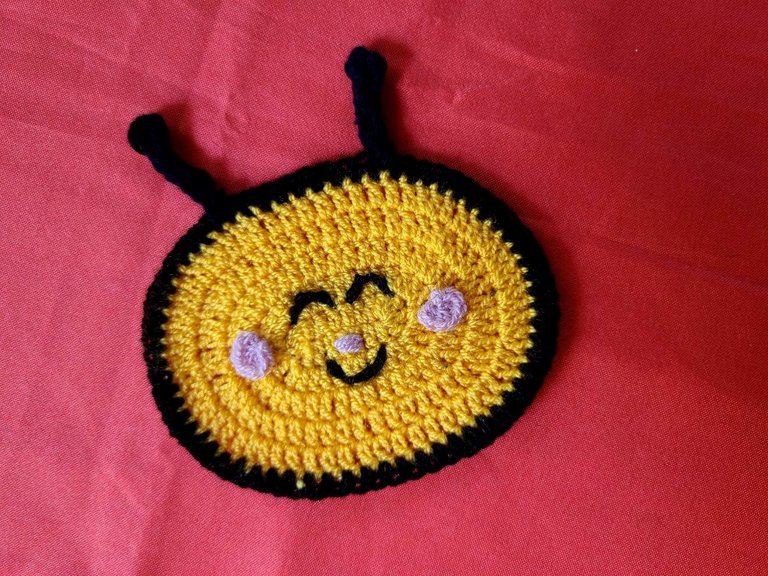
🧶 Step 2: We continue working with yellow thread to form the head of the bee.
Row 1: We cast 6 chains and on this we make: 3 normal double crochets together, 4 normal double crochets, 6 normal double crochets, 4 normal double crochets and 3 normal double crochets together.
Row 2: 3 normal double crochet increases, 4 normal double crochet increases, 6 normal double crochet increases, 4 normal double crochet increases and 3 normal double crochet increases.
Row 3: 3 normal double crochet increases, 10 normal double crochet increases, 6 normal double crochet increases, 10 normal double crochet increases and 3 normal double crochet increases.
Row 4: 1 normal double crochet increase, 1 normal double crochet, 1 normal double crochet increase, 2 normal double crochets, 1 increase, 1 normal double crochet, 1 normal double crochet increase, 14 double crochets normal, and we repeat the whole row in reverse until finishing.
Row 5: 1 normal double crochet, 1 normal double crochet increase, 1 normal double crochet, 1 normal double crochet increase, 3 normal double crochet, 1 normal double crochet increase, 1 normal double crochet,1 increase in normal double crochets, 12 normal double crochets, and we follow the sequence in reverse until finishing the row.
Row 6: Here we will use the black thread and the entire row is worked in half-high stitches.
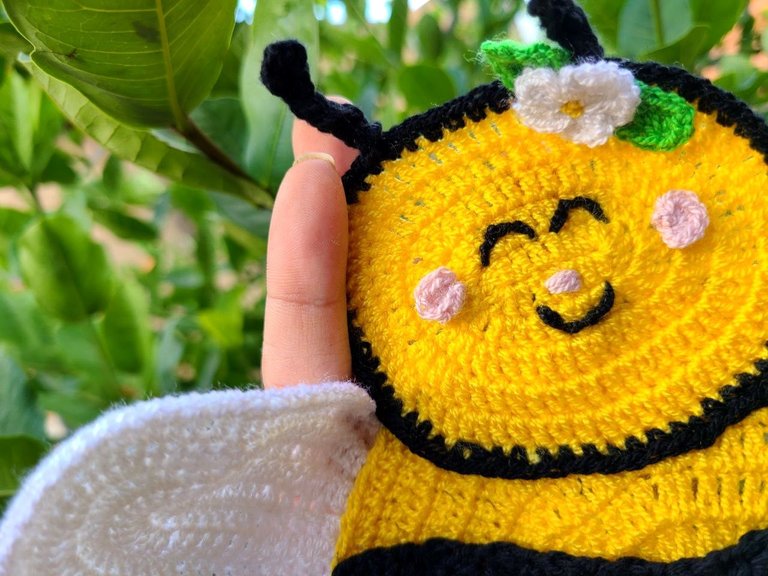
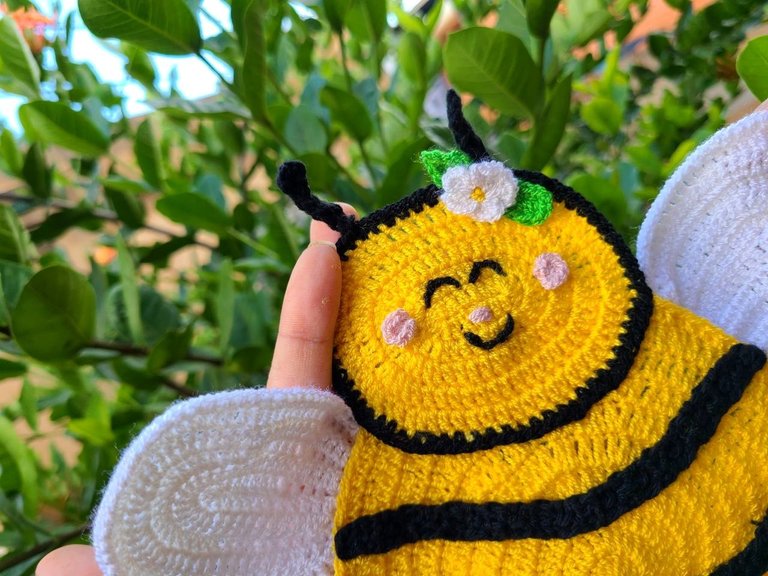
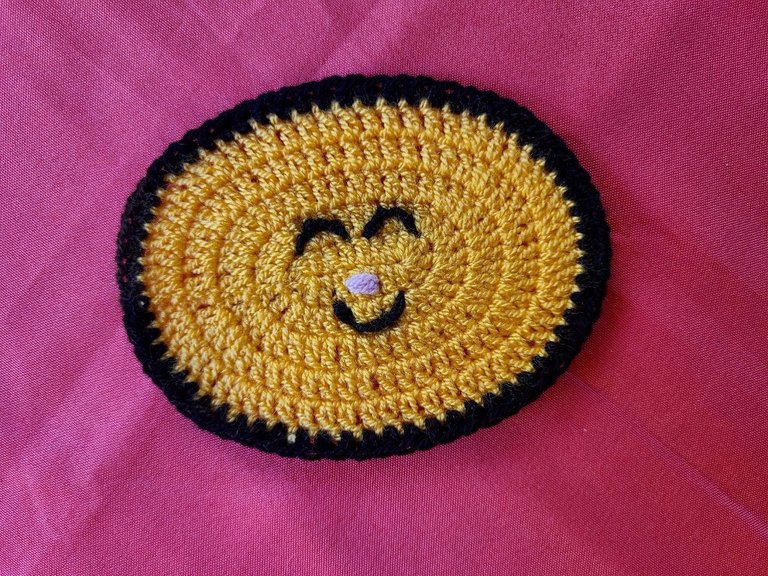
When finishing the head we proceed to embroider the eyes, nose, mouth and cheeks, we also make some antennas in black, to decorate we make a mini flower and place it on one of the antennas.
🧶 Paso 1: Comenzamos usando el hilo amarillo, para formar el cuerpo de la abeja.
Fila 1: Hacemos un anillo mágico y dentro hacemos 12 puntos altos normales.
Fila 2: toda la fila esta hecha con aumentos (24).
Fila 3: 1 punto alto normal, seguido de un aumento (36).
Fila 4: 2 puntos altos alargados, seguidos de un aumento (48).
Fila 5: 3 puntos altos alargados, seguidos de un aumento (60).
Fila 6: 4 puntos altos alargados, seguidos de un aumento (72).
Fila 7: 5 puntos altos alargados, seguidos de un aumento (84).
Fila 8: 6 puntos altos alargados, seguido de 1 aumento, (96).
**Fila 9: Toda la fila igual a la anterior. (112).
Fila 10: Bordear todo el contorno del motivo con puntos medios altos.
Para decorar el cuerpo hacemos unas filas de 2 puntos medio alto y las adecuamos al diseño en este caso 3, para la colita montamos 15 puntos en color negro y vamos disminuyendo hasta darle la forma deseada.
🧶 Paso 2: Seguimos trabajando con hilo amarillo para formar la cabeza de la abeja.
Fila 1: Montamos 6 cadenas y sobre esta hacemos: 3 puntos altos normales juntos, 4 puntos altos normales, 6 puntos altos normales, 4 puntos altos normales y 3 puntos altos normales juntos.
Fila 2: 3 aumentos de puntos altos normales, 4 puntos altos normales, 6 aumentos de puntos altos normales, 4 puntos altos normales y 3 aumentos de puntos altos normales.
Fila 3: 3 aumentos de puntos altos normales, 10 puntos altos normales, 6 aumentos de puntos altos normales, 10 puntos altos normales y 3 aumentos de puntos altos normales.
Fila 4: 1 aumento de puntos altos normales, 1 punto alto normal, 1 aumento de puntos altos normales, 2 puntos altos normales, 1 aumento, 1 punto alto normal, 1 aumento de puntos altos normales, 14 puntos altos normales, y repetimos roda la fils en reversa hasta finalizar.
Fila 5: 1 punto alto normal, 1 aumento de puntos altos normales, 1 punto alto normal, 1 aumento de puntos altos normales, 3 puntos altos normales, 1 aumento de puntos altos normales, 1 punto alto normal,1 aumento de puntos altos normales, 12 puntos altos normales, y seguimos la secuencia en reversa hasta terminar la fila.
Fila 6: Acá usaremos el hilo negro y toda la fila esta trabajada en puntos medio altos.
Al finalizar la cabeza procedemos a bordar los ojos, la nariz, la boca y las mejillas, igualmente realizamos unas antenas en color negro, para decorar hacemos una mini flor y se la colocamos en una de las antenas.
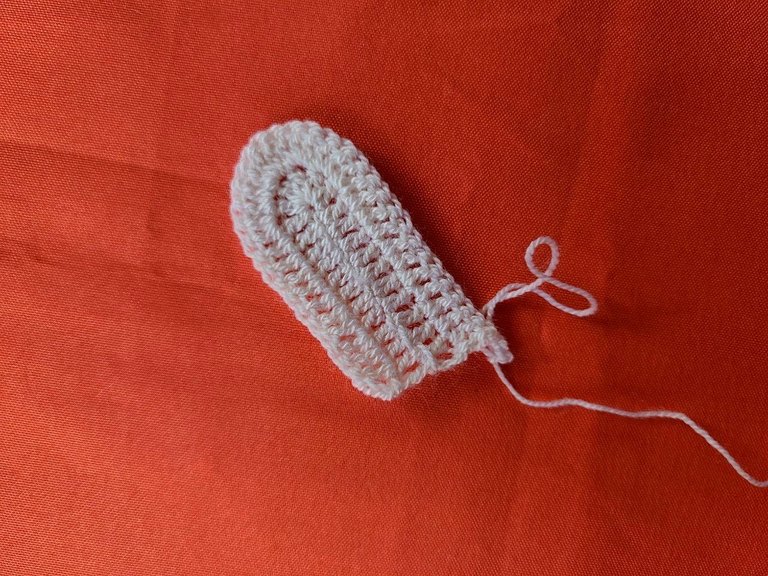
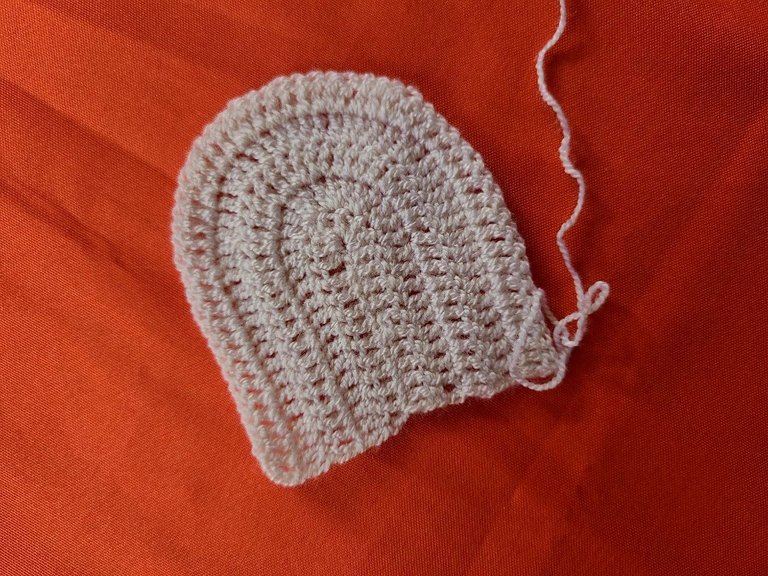
🧶 Step 3: This step is in white, to form the wings.
Row 1: We make 12 chains and make over these: 11 normal double crochets, 6 normal double crochets together, some we return over the previous 11 stitches with 11 normal double crochets.
Row 2: 11 normal double crochets, 2 increases, 3 normal double crochets together, 3 normal double crochets together, 2 increases and 12 normal double crochets.
Row 3: 11 normal double crochet, 1 increase, 1 normal double crochet, 1 increase, 1 normal double crochet, 2 increases, 1 normal double crochet, 1 increase, 1 normal double crochet, 1 increase, 11 stitches normal heights.
Row 4: 18 normal double crochets, 1 increase, 1 normal double crochet, 1 increase, 1 normal double crochet, 2 increases, 1 normal double crochet, 1 increase, 1 normal double crochet, 1 increase 18 double crochets normal.
Row 5: 18 normal double crochets, 1 increase, 3 normal double crochets, 1 increase, 4 normal double crochets, 1 increase, 3 normal double crochets, 1 increase, 18 normal double crochets.
Row 6: All in half double crochets.
The large wings are worked in 6 rows, the small wings are worked in 5 rows.
🧶 Paso 3: Este paso es en color blanco, para formar las alas.
Fila 1: Montamos 12 cadenas y realizamos sobre estos: 11 puntos altos normales, 6 puntos altos normales juntos, unos devolvemos sobre los 11 puntos anteriores con 11 puntos altos normales.
Fila 2: 11 puntos altos normales, 2 aumentos, 3 puntos altos normales juntos, 3 puntos altos normales juntos, 2 aumentos y 12 puntos altos normales.
Fila 3: 11 puntos altos normales, 1 aumento, 1 punto alto normal, 1 aumento, 1 punto alto normal, 2 aumentos, 1 punto alto normal, 1 aumento, 1 punto alto normal, 1 aumento, 11 puntos altos normales.
Fila 4: 18 puntos altos normales, 1 aumento, 1 punto alto normal, 1 aumento, 1 punto alto normal, 2 aumento, 1 punto alto normal, 1 aumento, 1 punto alto normal, 1 aumento 18 puntos altos normales.
Fila 5: 18 puntos altos normales, 1 aumento, 3 puntos altos normales, 1 aumento, 4 puntos altos normales, 1 aumento, 3 puntos altos normales, 1 aumento, 18 puntos altos normales.
Fila 6: Toda en puntos medios altos.
Las alas grandes se trabajan en 6 filas, las alas pequeñas se trabajan en 5 filas.
Dear friends, here I am leaving you a new tutorial with its step by step to share, as we all know today the contest closes, where we will share all the possible ideas to decorate and equip a kitchen.
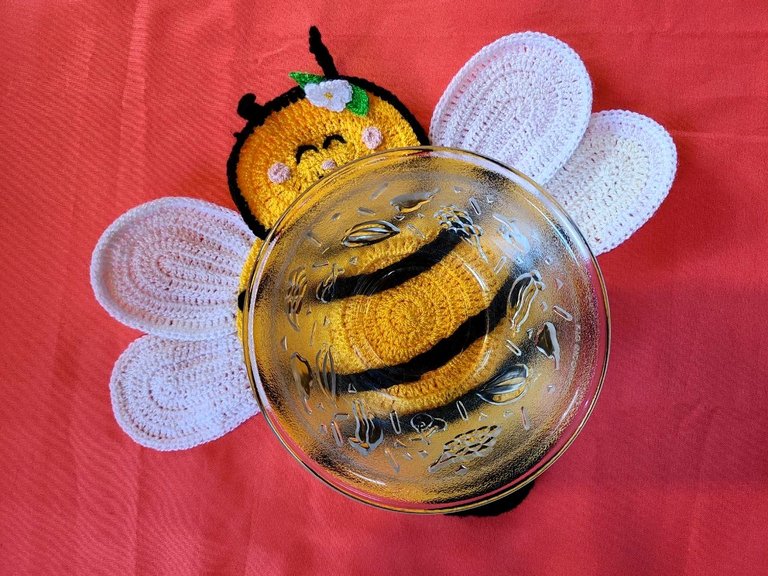
My project is based on an individual which can be used in different ways, it is a beautiful bee. I particularly made it to give a gift to my eldest daughter, who is redecorating her kitchen and I think it will be very useful and at the same time helps her decorate her environment.
Thank you so much for the attention you give to my publications, that makes me feel very proud and useful, knowing that someone is taking my knowledge into consideration and also knowing that through this means I can help someone who needs it.
Good luck to all the contestants, I have seen some of the projects and they all seem very good to me. I have not been able to see them in depth but I liked them. Let's continue sharing and demonstrating our capabilities and skills, Hugs to all. 🙏🏻❤️
Estimados amigos acá les estoy dejando un nuevo tutorial con su paso a paso para compartir, como todos sabemos hoy se cierra el concurso, dónde compartiremos todas las posibles ideas para decorar y equipar una cocina.
Mi proyecto está basado en un individual el cual puede ser usado en diferentes formas se trata de una hermosa abeja. Yo particularmente lo hice para hacerle un regalo a mi hija mayor, la cual está redecorando su cocina y pienso que le dará mucha utilidad y a la vez la ayuda a decorar su ambiente.
Gracias mil por la atención que le dan a mis publicaciones, eso me hace sentir muy orgullosa y útil, saber que alguien está tomando en consideración mis conocimientos y además saber que por este medio puedo ayudar a alguien que lo necesite.
Muy buena suerte a todas las concursantes, he visto algunos de los proyectos y todos me parecen muy buenos no los he podido ver a profundidad pero me han gustado. Sigamos compartiendo y demostrando nuestras capacidades y habilidades, Abrazos a todos. 🙏🏻❤️
