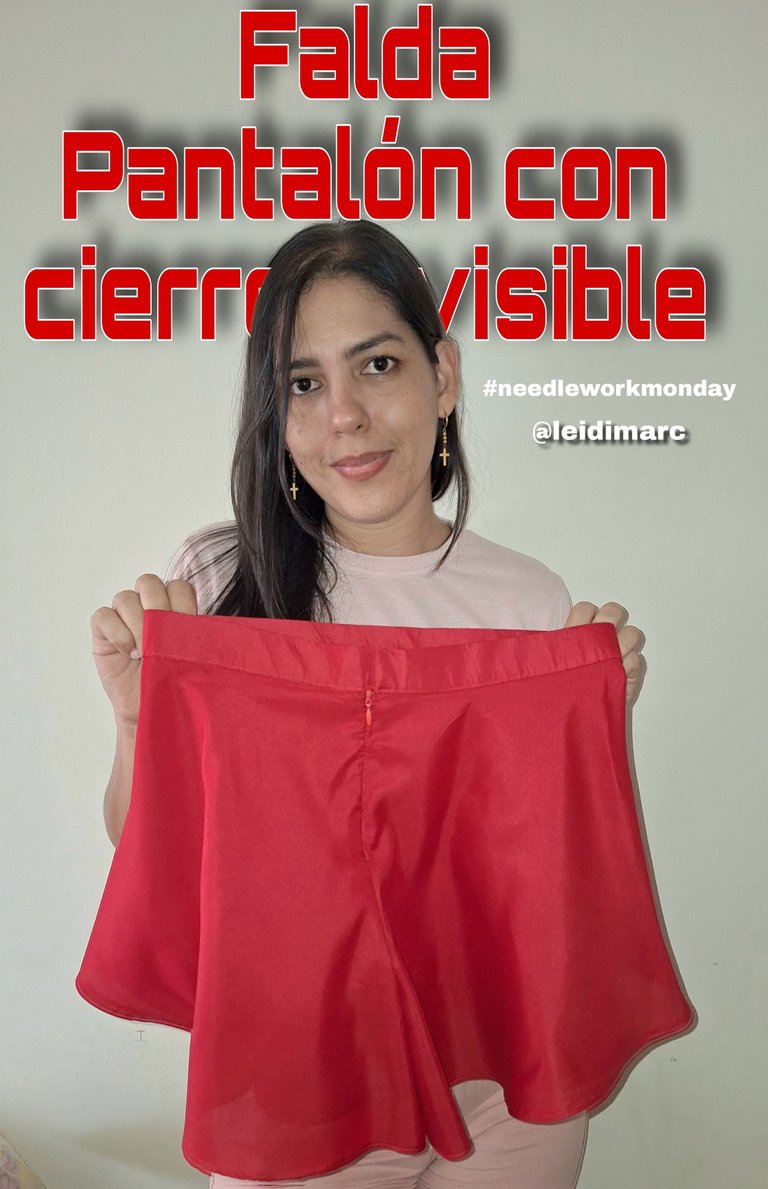
Saludos y bendiciones mis queridos amigos de @needleworkmonday, es un gusto para mí visitarlos en esta semana que espero que sea de muchas alegrías, prosperidad y mucha creatividad. El día de hoy les vengo a mostrar y a comentar como fue que estuve haciendo esta falda pantalón con cierre invisible y cuáles fueron los desafíos que se presentaron en esta costura, puesto que como ya les he dicho varias veces, cada vez que me enfrento a un nuevo proyecto siempre hay alguna dificultad en el camino, pero lo bueno es que de una u otra manera siempre lo resuelvo haciendo algo bien hecho.
Siempre me han gustado los desafíos y recuerdo que cuando fui hacer mi primera camisa del curso de costura que estaba realizando, hice una camisa con bastante dificultad y una de ella era colocarle el cierre, tuve mis pequeños tropiezos, pero lo logré esta vez hice esta prenda que trae cierre, pero el que es de forma invisible que no se nota por la parte frontal de la prenda.
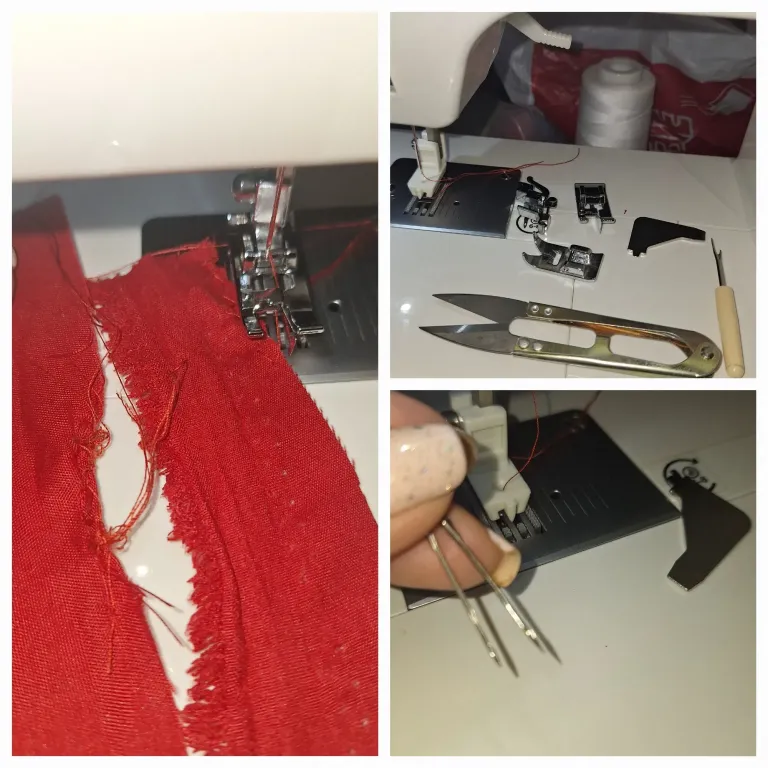
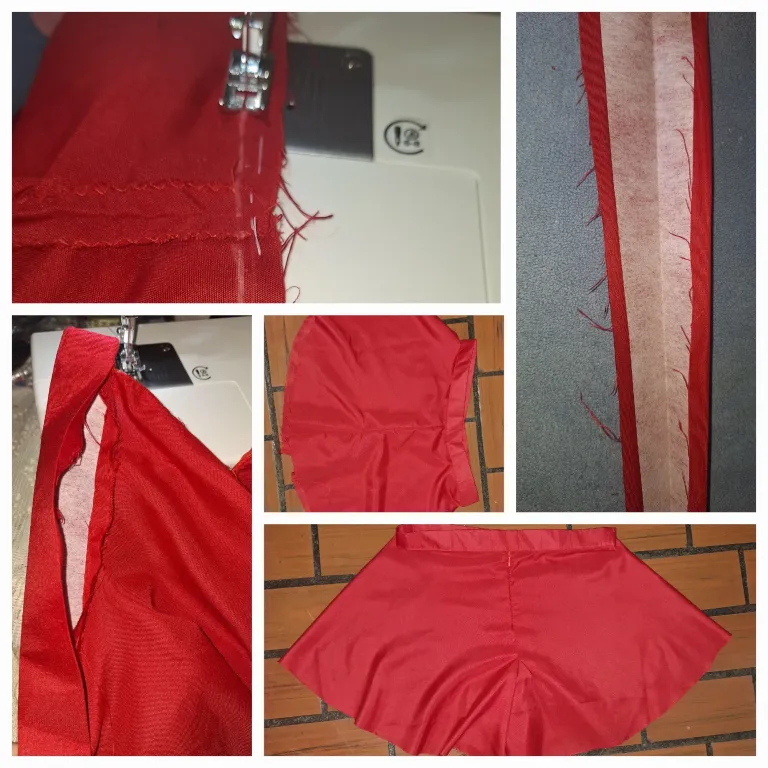
Para esto no hace mucho les estuve contando que había comprado unos prensatelas entre ellos los que más quería utilizar era el de falso overlock y el de cierre invisible, les cuento primero que el de falso overlock lo quise utilizar por ahí lo verán en algunas de las fotografías, pero no resultó de verdad que no lo intenté mucho, a la primera no le vi que hiciera el acabado que yo estaba buscando, eso es una tarea que la estaré practicando próximamente.
Luego como tampoco sabía utilizar el prensatelas de cierre invisible y la tela que estoy utilizando no es de muy buena calidad, puesto que esa la tenía por ahí para otro proyecto y la quise utilizar para este para ir probando los patrones y luego hacerlo en una mejor tela.
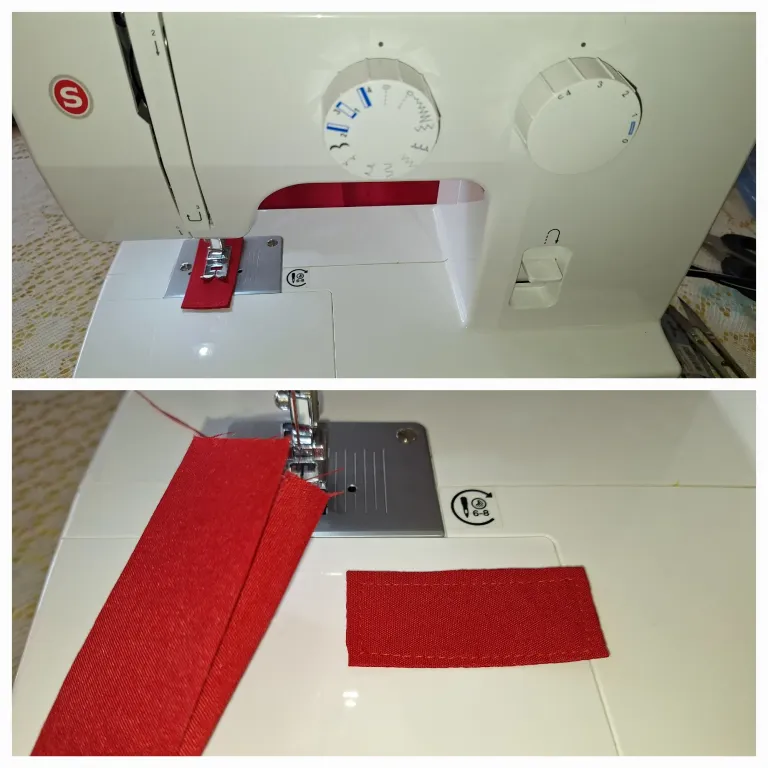
Entonces no me quise arriesgar a echar a perder la tela que se utilizaría para hacer la falda pantalón, hice doble trabajo para poder practicar con el prensatelas nuevo, podrán ver las pruebas que gracias a Dios resultaron muy bien, aunque debo decirles que el percance que tuve con este prensatelas fue que no había colocado bien los dientes del cierre y en eso se me partió una aguja, mi primera aguja partida, algo que me sirvió para poder saber cambiar la aguja a mi nueva máquina.
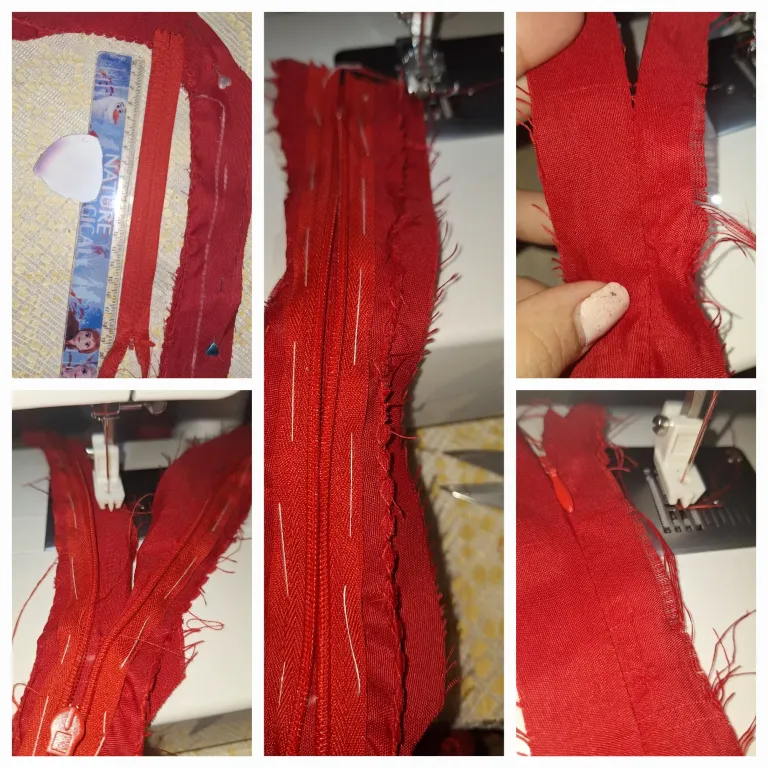
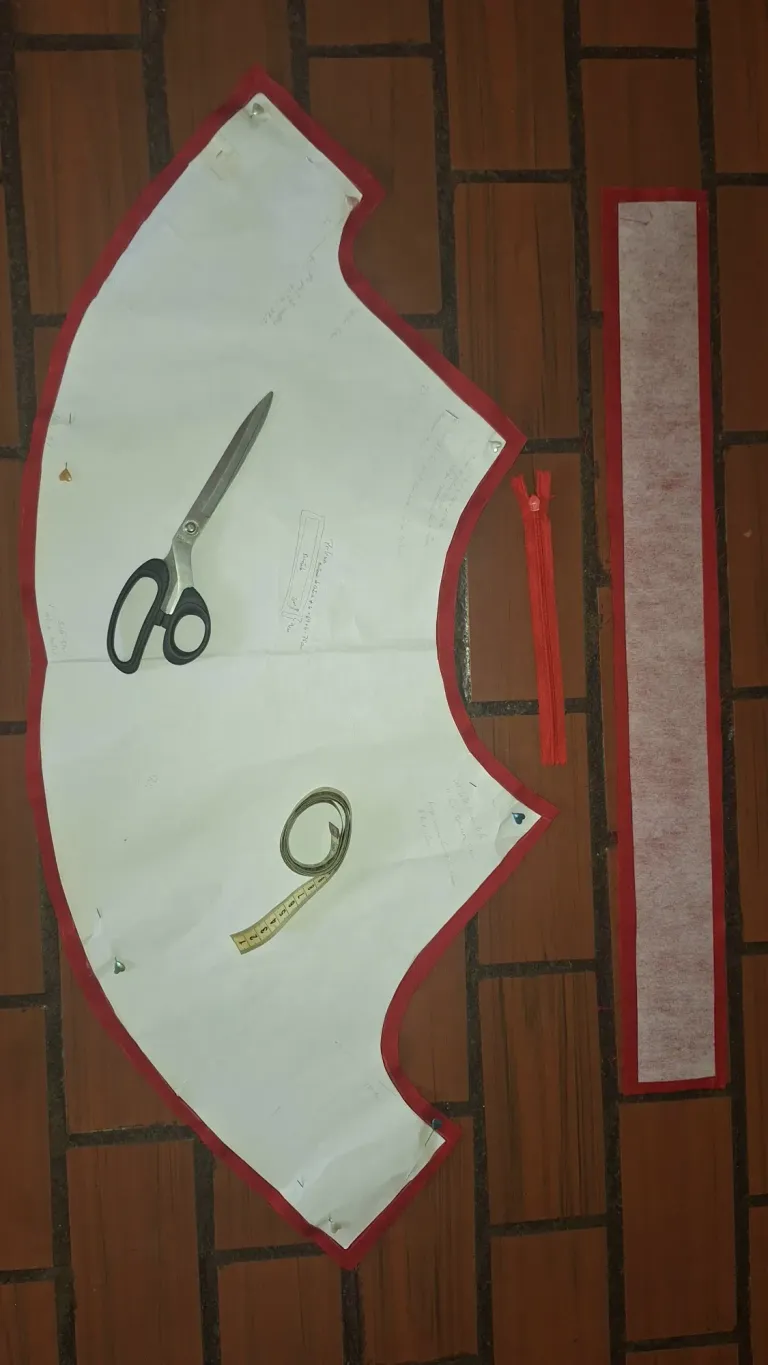
Una vez que ya había aprobado el prensatelas que ya se había colocar el cierre, me dispuse a hacer mi falda pantalón qué es para mi princesa Ariana. Por supuesto le tomé las medidas, hice el patrón, corte las telas de las piezas y vino el segundo desafío o tercero no sé qué lugar va que fue la pretina, la hice tres veces o sea corte tres veces la franja de tela y la franja de pelón por diferentes razones, la cuestión fue que hice tres veces, a la tercera fue la vencida y ni tanto porque al colocarlo en la prenda creo que me quedó casi que justa, je, je, je.
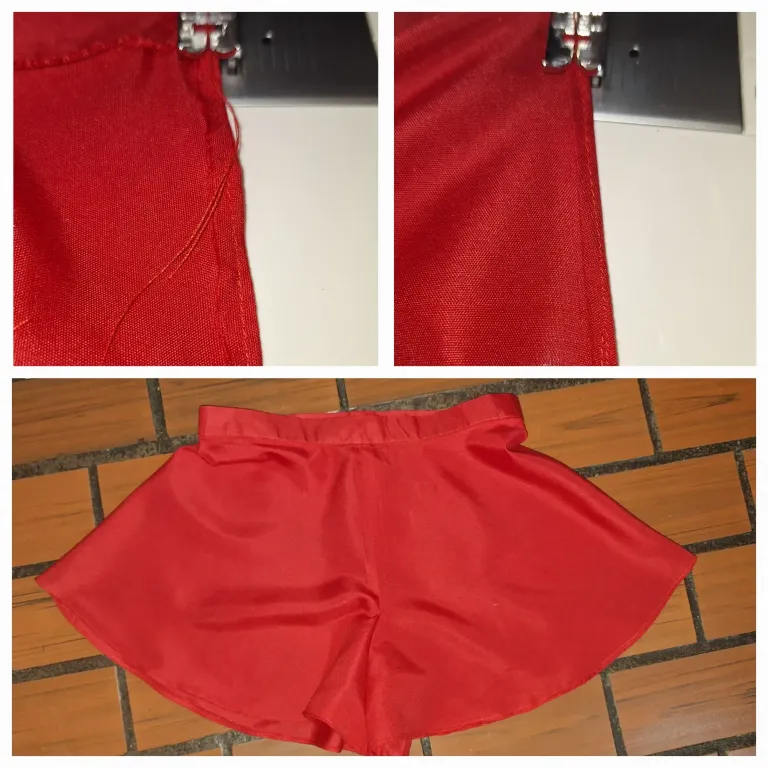
Luego que ya tenía el patrón, la pretina lista, empecé a armar la falda pantalón, lo primero que hice fue pasar zigzag por los costados, ya que el falso overlock no me funciono y así tener un mejor acabado la prenda. Ahora si coloque el cierre, luego cerrar el otro costado, seguí con la parte de abajo para colocar la pretina que también tuve que descoserla porque me había quedado un lado más arriba que el otro y cosas feas a mí no me gustan, así que también lo tuve que de coser y volver a hacer.
Para finalizar estuve haciendo el ruedo que como es circular, tuve que hacerlo en dos tandas, primero doblé para hacerle un pequeño ruedo y luego volví a doblar y volví a coser para hacerle el acabado final, quedó bien, sé que para la próxima me quedará mucho mejor, pero corriendo lejos se ve bello.
Con los trozos de telas que había hecho las pretinas me sobraron dos de ahí le hice una pieza para el prensatelas de mi máquina, podrán ver que es un cuadrado rojo que me quedó cambiadísimo con mi máquina para que no le entre polvo al área de la bobina, algo que me recomendaron que siempre le colocara un trozo de tela debajo del prensatelas y yo estaba pendiente de hacer algo bonito para que siempre estuviera ahí con mi máquina y este me cayó como anillo al dedo porque le quedó perfecto y Supercombinado para mi máquina que espero que me dure para toda la vida.
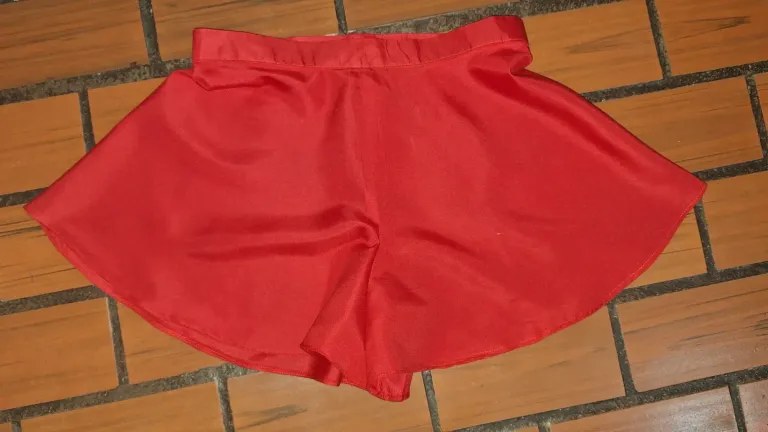
Bueno, amigos, esto ha sido toda mi experiencia elaborando este pantalón, tipo falda, por ahí pueden ver algunas fotos que le tomé a mi princesa Arianna cómo le quedaba la creación de su madre, como les dije no es una tela muy fina, sin embargo, se le ve bien y ya les estaré haciendo otro con una tela muchísimo mejor, que caiga más y también se los estaré mostrando. Ah también le voy a hacer un top que le haga conjunto a esta falda y ahí sí, mi princesa le estará modelando este bonito conjunto que le estoy realizando con mucho cariño.
Bueno, amigos, otra vez me despido, siempre hablo mucho verdad es que tengo tantas cosas que contarles. Muchas gracias por visitar mi blog y leer todas las cosas que vengo contarles, los quiero besos.

Skirt Pants with invisible zipper
Greetings and blessings my dear friends of @needleworkmonday, it is a pleasure for me to visit you in this week that I hope will be of many joys, prosperity and lots of creativity. Today I come to show you and comment on how I was making this skirt with invisible zipper and what were the challenges that were presented in this sewing, since as I have told you several times, every time I face a new project there is always some difficulty along the way, but the good thing is that one way or another I always solve it by doing something well done.
I have always liked challenges and I remember when I was making my first shirt of the sewing course I was doing, I made a shirt with a lot of difficulty and one of them was to place the zipper, I had my little stumbles, but I made it this time I made this garment that has a zipper, but the one that is invisible and not noticeable on the front of the garment.
For this not long ago I was telling you that I had bought some presser feet among them the ones I most wanted to use were the false overlock and the invisible zipper, I tell you first that I wanted to use the false overlock, you will see it in some of the pictures, but it did not really work, I did not try much, at first I did not see that it made the finish I was looking for, that is a task that I will be practicing soon.
Then I didn't know how to use the invisible presser foot and the fabric I'm using is not of very good quality, since I had it for another project and I wanted to use it for this one to test the patterns and then make it in a better fabric.
So I didn't want to risk ruining the fabric that would be used to make the skirt, I did double work to practice with the new presser foot, you can see the tests that thank God turned out very well, although I must tell you that the mishap I had with this presser foot was that I had not placed the teeth of the clasp properly and that's when a needle broke, my first broken needle, something that helped me to know how to change the needle to my new machine.
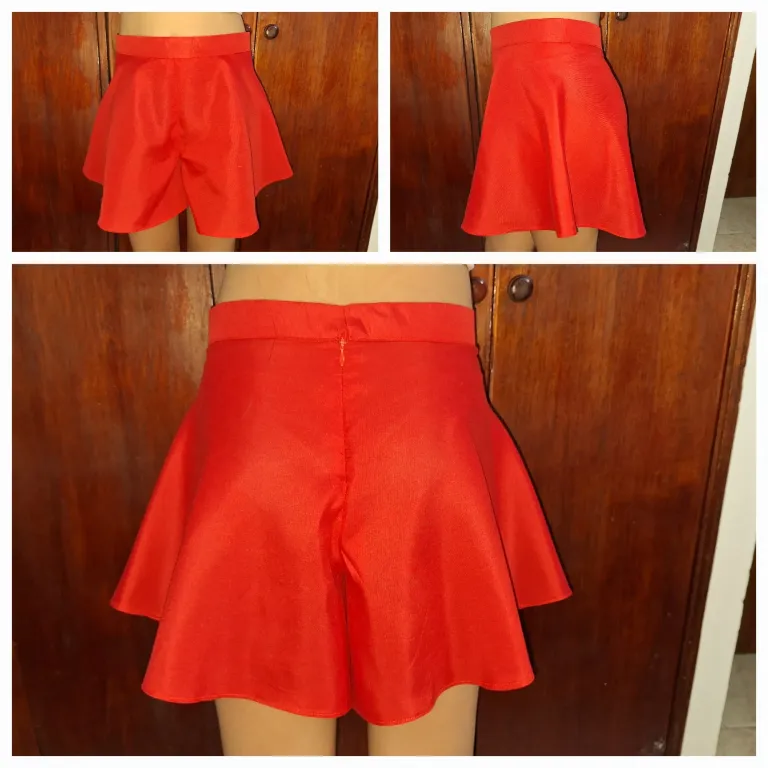
Once I had already approved the presser foot that had already placed the zipper, I set out to make my skirt, which is for my princess Ariana. Of course I took the measurements, made the pattern, cut the fabrics of the pieces and came the second challenge or third I do not know what place it goes that was the waistband, I did it three times or cut three times the strip of fabric and the strip of fur for different reasons, the question was that I did three times, the third time was the charm and not so much because when I placed it in the garment I think it was almost just right, heh, heh, heh, heh.
After I had the pattern and the waistband ready, I started to assemble the skirt, the first thing I did was to zigzag the sides, since the false overlock didn't work for me, so I could have a better finished garment. Now I placed the zipper, then close the other side, I continued with the bottom to place the waistband that I also had to unpick it because I had left one side higher than the other and I don't like ugly things, so I also had to sew it and redo it.
To finish I was making the hem, as it is circular, I had to do it in two batches, first I folded to make a small hem and then I folded again and sewed again to make the final finish, it looked good, I know that for the next one it will be much better, but running away it looks beautiful.
With the pieces of fabric that I had made the waistbands I had two left over from there I made a piece for the presser foot of my machine, you can see that it is a red square that I left changed with my machine so that dust does not enter the area of the bobbin, something that I was recommended to always place a piece of fabric under the presser foot and I was pending to do something nice to always be there with my machine and this fell like a glove because it was perfect and Supercombinado for my machine that I hope will last me for life.
Well, friends, this has been all my experience making these pants, skirt type, you can see some pictures I took of my princess Arianna how her mother's creation looked on her, as I told you it is not a very fine fabric, however, it looks good and I will be making another one with a much better fabric, that will fit more and I will also be showing them to you. Oh, I am also going to make a top to go with this skirt and there, my princess will be modeling this beautiful outfit that I am making with much love.
Well, friends, once again I say goodbye, I always talk too much, I have so many things to tell you. Thank you very much for visiting my blog and reading all the things I come to tell you, I love you kisses.

Mi blog es familiar, de mi día a día, en donde puedo subir fotos de niños u otras personas de mi entorno, NO autorizo a usar mis fotografías sin mi autorización.
My blog is a family blog, of my daily life, where I can upload photos of children or other people around me, I do NOT authorize you to use my photos without my authorization.
Fotos tomadas por | Photos taken by @leidimarc
Dispositivo | Device | Samsung Galaxy A54
Fotos editadas en: |Photos edited in | App Picsart/ Canva
Separadores hechos en | Separators made in | App Picsart / Canva
Traducción con | Translation with| DeepL
For the best experience view this post on Liketu
