La sensación de experimentar nuevas cosas en las manualidades es algo muy grato y de satisfacción, además de entretenido. Hace un par de días, estuve buscando alguna utilidad para un trozo de madera que había guardado hace un tiempo atrás. Este trozo de madera había quedado de un gavetero que se deterioró todo. Partiendo de la necesidad de darle una nueva vida a la madera, me tropecé con la idea de formar un cuadro con detalles tejidos, me incliné por una combinación de elementos entre estambre escolar, hojas y flores reales, además de pintura.
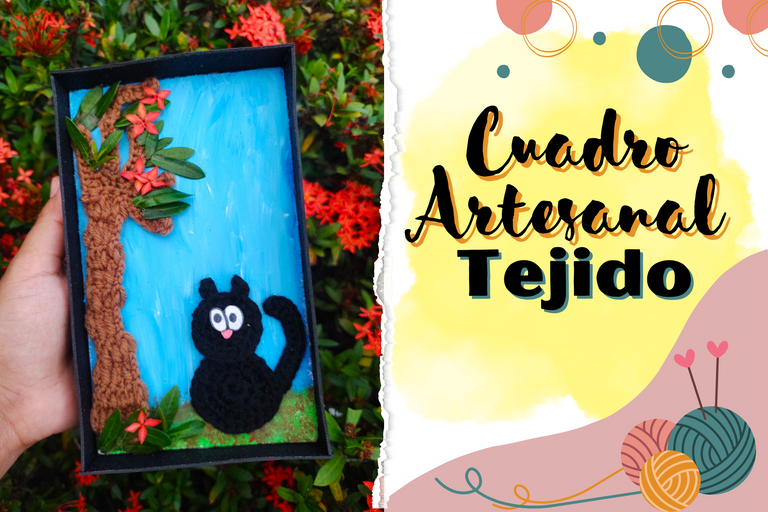
Este lindo cuadro artesanal lo he colocado en mi área de trabajo a modo de decoración. En casa tengo un pequeño espacio especial para mis materiales de manualidades y es donde me siento a dibujar, pintar o similares. Este espacio lo decoro con mis propias creaciones, creo que es una de las cosas que le da más "calor, energía y buena vibra".
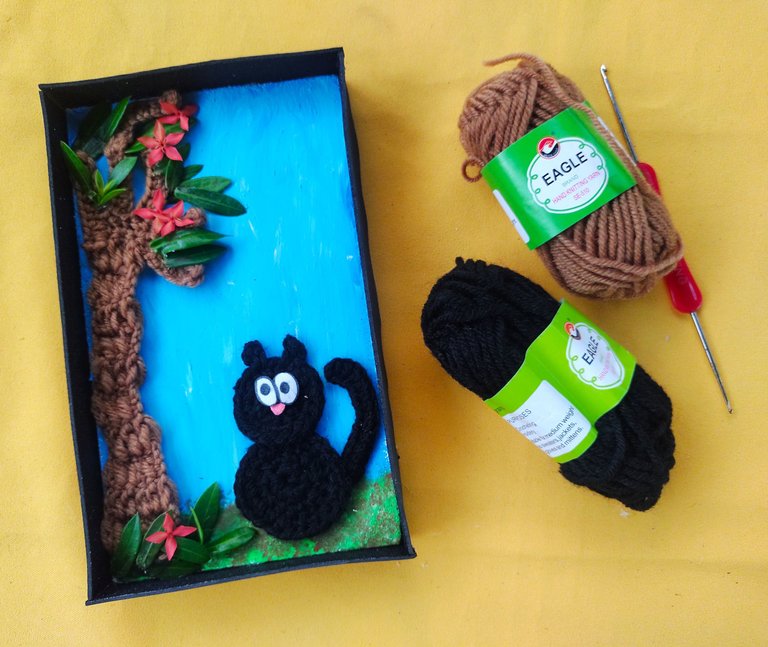
Sobre el Cuadro:
Amo los gatos, sinceramente me encantan por sus colores, su elegancia al contornear el caminar y sus ojos. Por ello, para mi cuadro he elegido elaborar un gato negro (siempre he querido uno), que está bajo un árbol con flores. Este contexto de descanso, acompañado de un cielo azul me inspira paz y tranquilidad.
Como les comenté anteriormente, el cuadro es una combinación artesanal de elementos que incluyen pintura, elementos reales como hojas y flores, además de un árbol tejido con varetas y un gato armado de círculos con una cola encantadora hecha en base a punto medio.
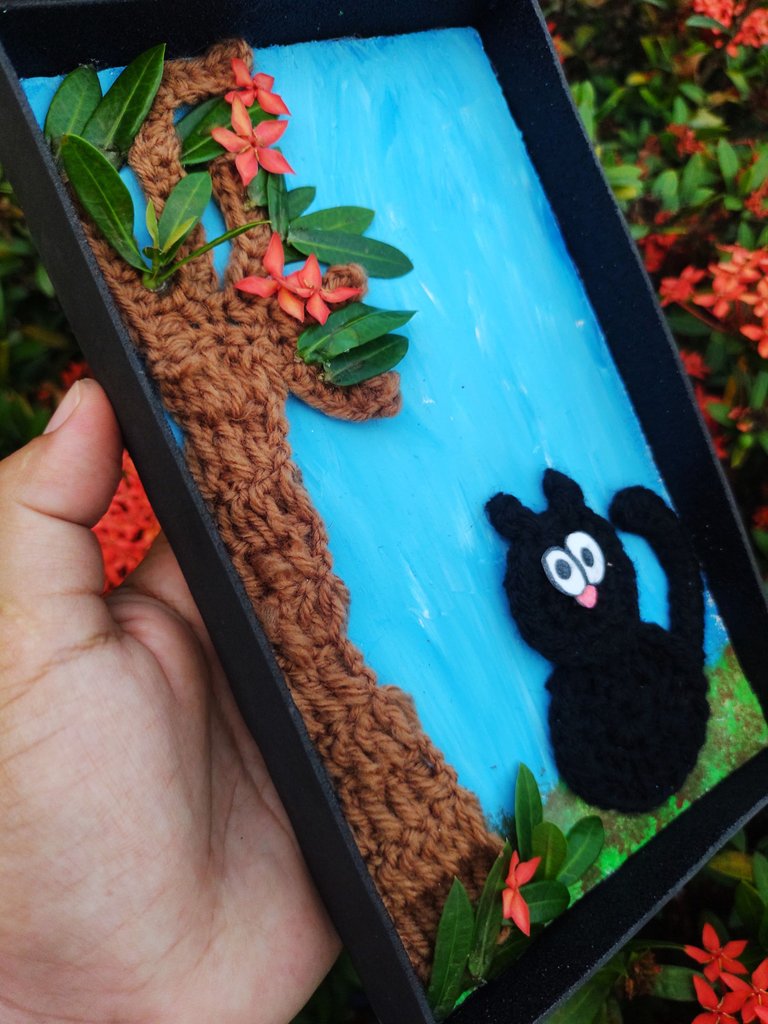
Materiales
- Estambre escolar de color negro y marrón.
- Rectángulo de madera.
- Pinturas al frío de color blanco, azul, marrón y verde.
- Foami blanco para detalles, ojos y nariz. Foami Negro para los bordes del rectángulo o marco.
- Marcadores, rosa y negro.
- Hojas y flores a gusto.
- Aguja para tejer - Tijeras - Pincel.
- Silicon en barra/pistola.
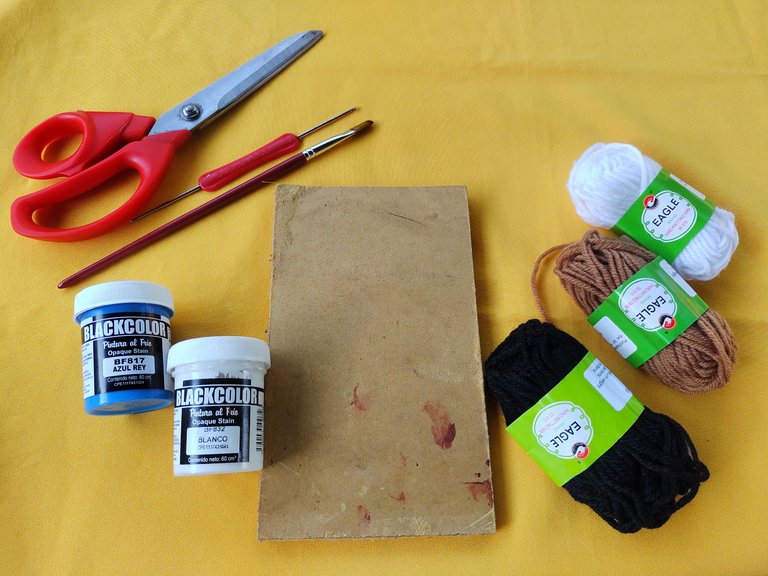
Pasos de Elaboración
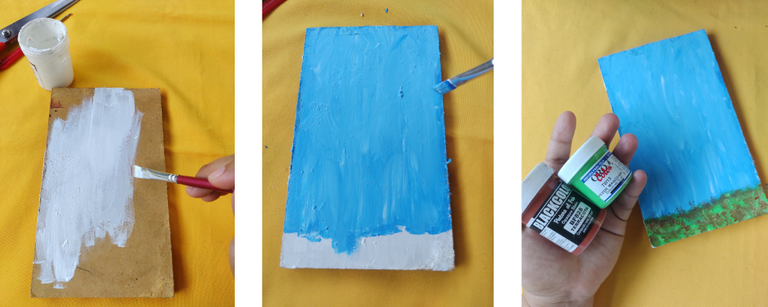
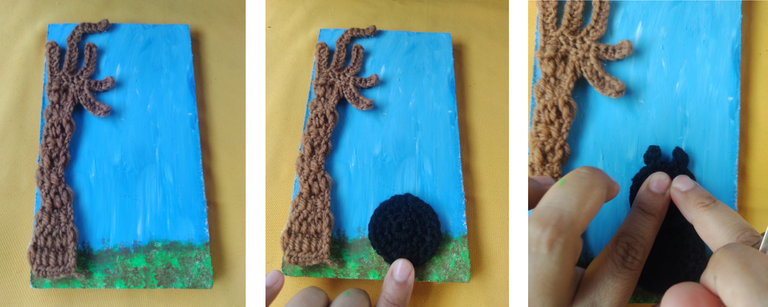
- Iniciamos ambientando lo que es la madera, le daremos color con una capa de blanco. Después agregamos un poco de azul que mezclaremos en la parte superior. Para la parte del suelo, usaremos verde y marrón, haciendo toques alternados entre ambos colores. Dejaremos secar la pintura, mientras tanto iremos tejiendo y armando los demás detalles.
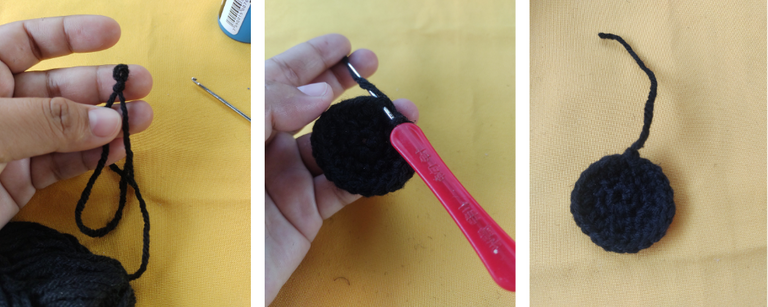
- Para formar el gato, lo haremos a partir de dos círculos tejidos. Iniciando con un lazo fijo o mágico, dependiendo de cual sea de tu elección. Montamos 8 cadenetas de base y sobre estos montamos un punto medio en cada uno, en un par de las mismas haremos doble punto, alternando. Uno de los círculos debe ser más grande que el otro, porque uno será para el cuerpo y el otro para la cabeza. El círculo de la cabeza llevará en la parte superior un punto de 3 cadenetas de altura, acompañada de una vareta para formar una oreja. Repetimos el proceso con la otra oreja.
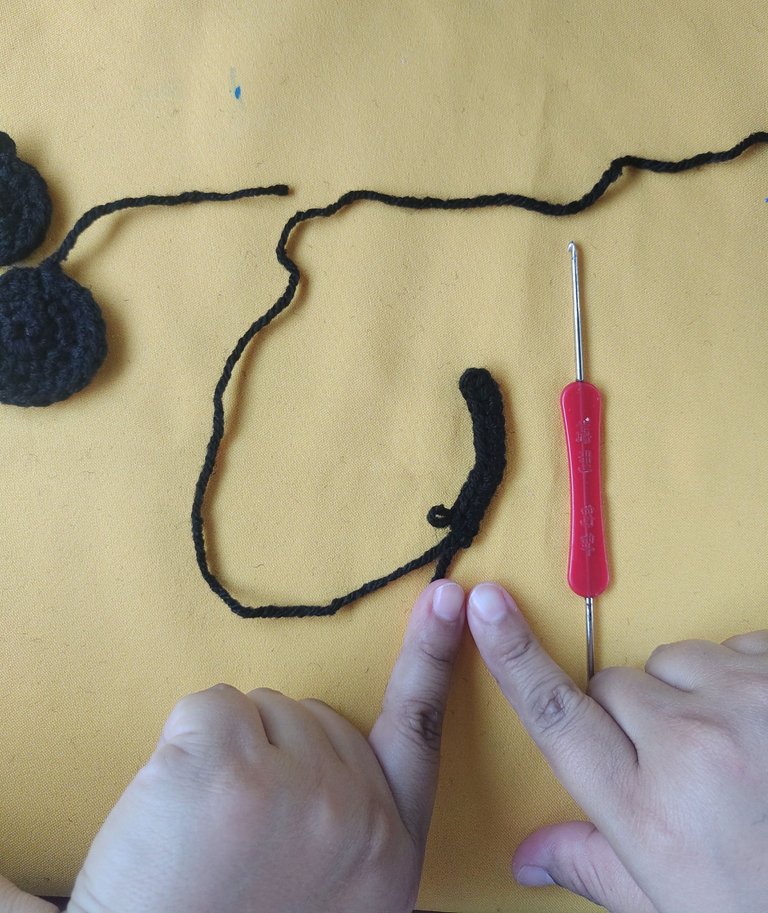
- Para la cola, realice 13 cadenetas a las cuales les monté punto medio sobre cada una.
- Ahora continuamos con el árbol, el tronco y ramas son una combinación de cadenetas, varetas y puntos medios. Iniciamos en la base haciendo unas 6 cadenetas a las cuales le montamos medio punto. Al llegar a la ultima cadeneta, damos 3 de altura seguido de varetas, repetimos el proceso hasta que tome la altura deseada. Las ramas las iniciamos con cadenetas que irán rellenas de puntos medios que van de regreso al inicio del tronco, donde unimos con un punto de cierre. Así proseguimos hasta formar la cantidad de ramas y el largo a gusto. Cuando he terminado el tronco, he fijado con silicon sobre la madera.
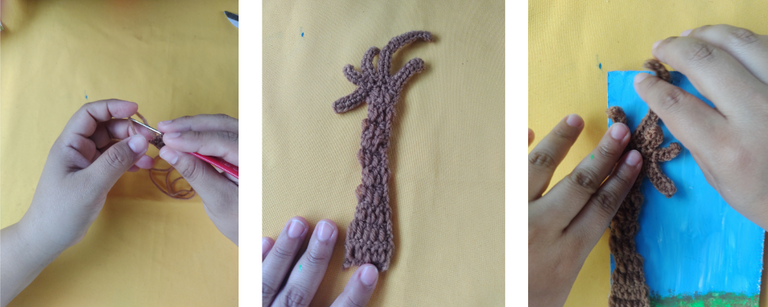
- Después de haber fijado el árbol, pasaremos a posicionar y armar el gato. Fijaremos también con silicon.
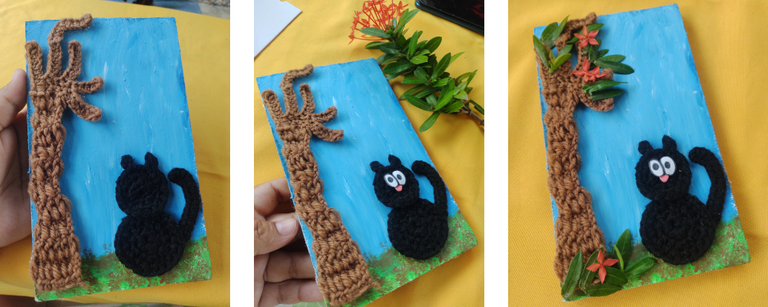
- Seguimos con las hojas y flores, ordenamos a gusto, fijando con silicon.
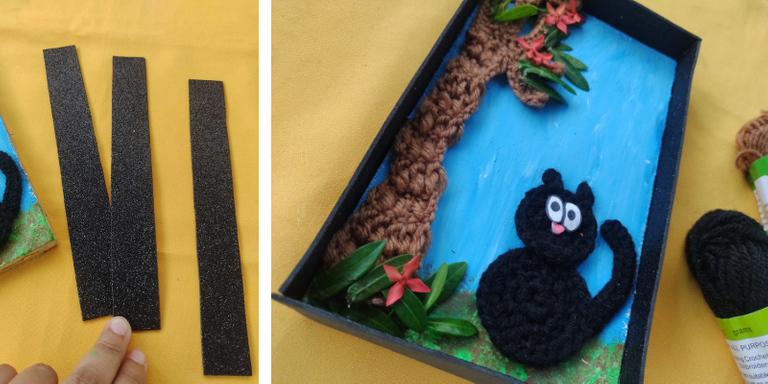
- Por último cortamos unos listones de foami, que colocaremos alrededor de la madera para formar una especie de marco. Fijamos con silicon.
Fotos Finales (resultado)
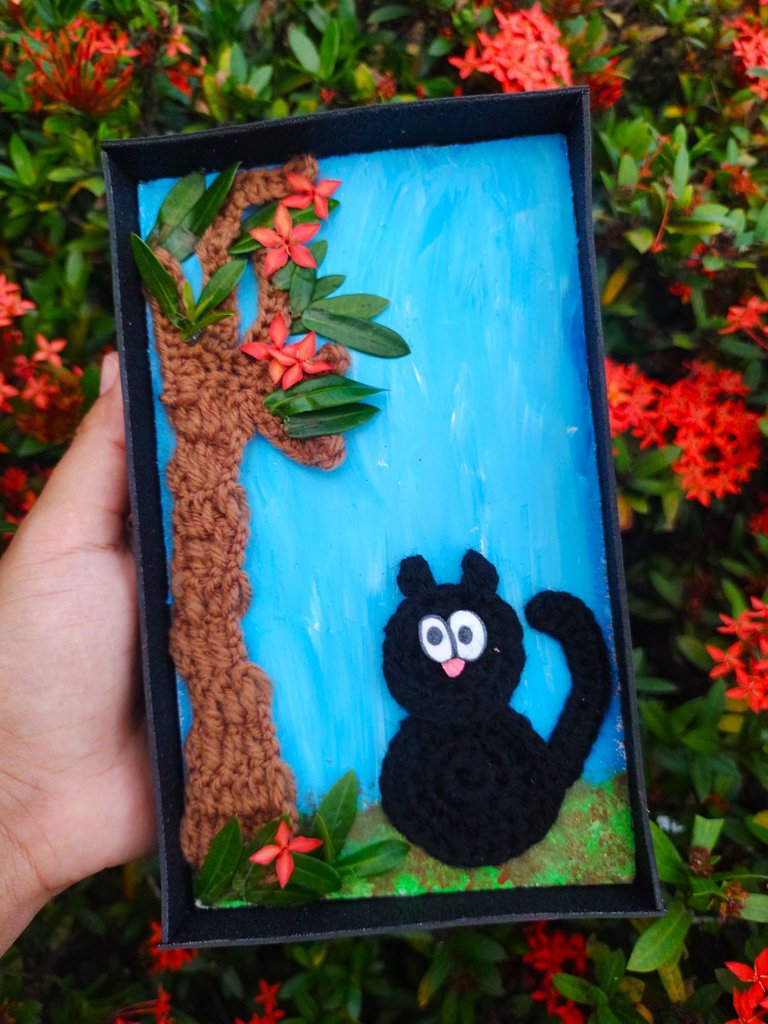
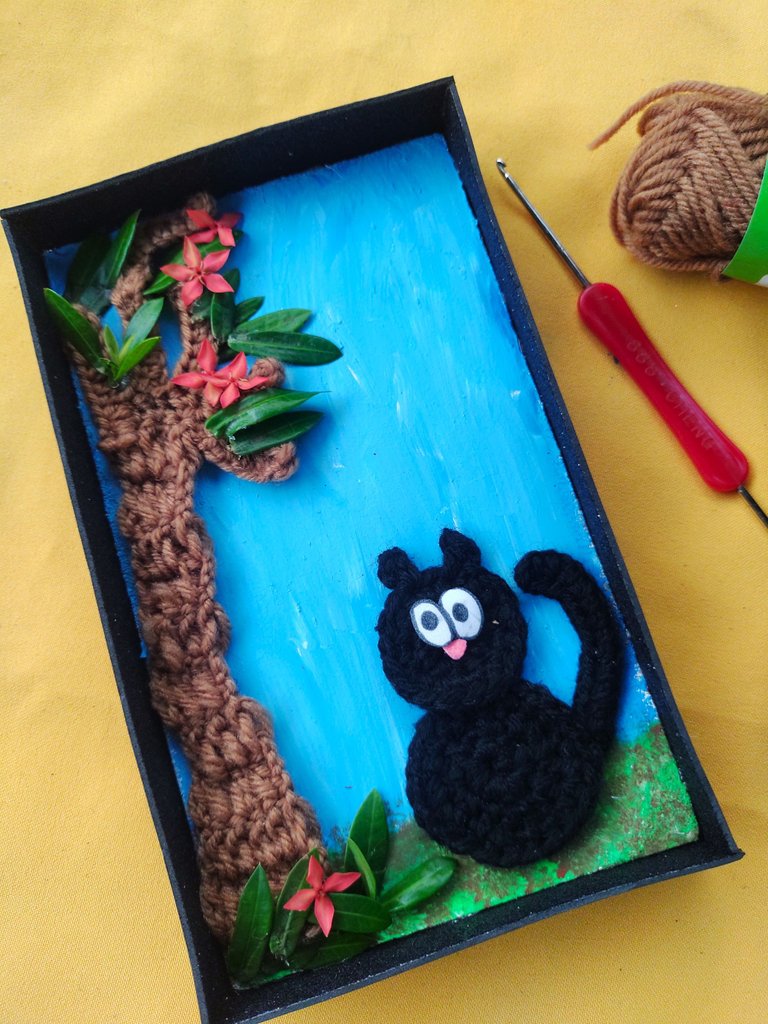
Este proyecto fue bastante entretenido de realizar, además de que la combinación de materiales es una de las cosas más llamativas de la composición. En cuanto al árbol, me gustó mucho el resultado de los puntos en como simulan ser las fisuras del tronco, cool!

Imágenes de las instrucciones editadas en Canva Pro.
Traducción: Google Traductor.
Textos y fotos de mi autoría/ contenido original.

[ENGLISH]
The feeling of experiencing new things in crafts is something very pleasant and satisfying, as well as entertaining. A couple of days ago, I was looking for some use for a piece of wood that I had saved a while ago. This piece of wood was left from a dresser that deteriorated all over. Starting from the need to give a new life to wood, I stumbled upon the idea of creating a painting with woven details, I leaned towards a combination of elements between school yarn, leaves and real flowers, as well as paint.

I have placed this beautiful handmade painting in my work area as a decoration. At home I have a small special space for my craft materials and it is where I sit to draw, paint or similar. I decorate this space with my own creations, I think it's one of the things that gives it the most "heat, energy and good vibes".

About the Picture:
I love cats, I honestly love them for their colors, their elegance when walking and their eyes. For this reason, for my painting I have chosen to create a black cat (I have always wanted one), which is under a tree with flowers. This context of rest, accompanied by a blue sky inspires me peace and tranquility.
As I mentioned before, the painting is a handmade combination of elements that include paint, real elements such as leaves and flowers, as well as a tree woven with double crochet and a cat armed with circles with a charming tail made on the basis of a medium point.

Materials
- Black and brown school yarn.
- Wooden box.
- Cold paints in white, blue, brown and green.
- White foami for details, eyes and nose. Black foami for the edges of the rectangle or frame.
- Markers, pink and black.
- Leaves and flowers to taste.
- Knitting needle - Scissors - Brush.
- Silicon in bar/gun.

Crafting Steps
- We start by setting what the wood is, we will give it color with a layer of white. Then we add a bit of blue that we will mix on top. For the ground part, we will use green and brown, making alternate touches between both colors. We will let the paint dry, meanwhile we will weave and assemble the other details.

- To form the cat, we will do it from two woven circles. Starting with a fixed or magical loop, depending on which is your choice. We assemble 8 base chains and on these we assemble a half point in each one, in a couple of them we will double stitch, alternating. One of the circles should be bigger than the other, because one will be for the body and the other for the head. The circle of the head will have a 3-chain stitch in the upper part, accompanied by a double crochet to form an ear. We repeat the process with the other ear.

- For the tail, make 13 chains to which I mounted a midpoint on each one.

- Now we continue with the tree, the trunk and branches are a combination of chains, double crochet and midpoints. We start at the base making about 6 chains to which we mount half a stitch. When we reach the last chain, we give 3 height followed by double crochet, we repeat the process until it takes the desired height. We start the branches with chains that will be filled with half stitches that go back to the beginning of the trunk, where we join with a closing stitch. We continue like this until we form the number of branches and the length to our liking. When I have finished the trunk, I have fixed it with silicone on the wood.

- After having fixed the tree, we will move on to position and assemble the jack. We will also fix with silicone.

- We continue with the leaves and flowers, order as we like, fixing with silicone.

- Finally we cut some foam strips, which we will place around the wood to form a kind of frame. We fixed with silicone.

Final Photos (result)


This project was quite entertaining to do, in addition to the fact that the combination of materials is one of the most striking things about the composition. As for the tree, I really liked the result of the dots in how they simulate the cracks in the trunk, cool!

Instruction Images edited in Canva Pro.
Translation: Google Translator.
Texts and photos of my authorship / original content.


