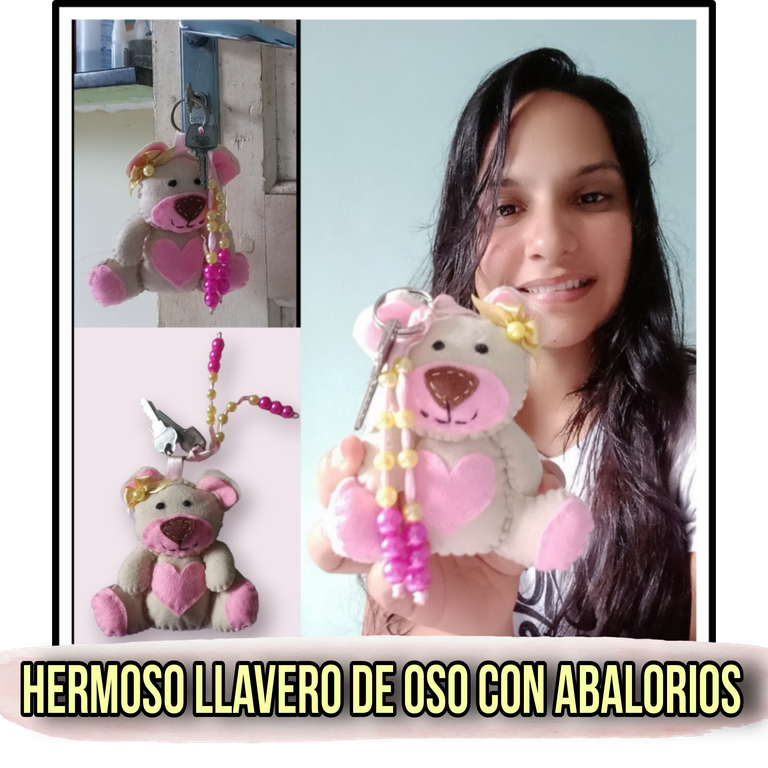
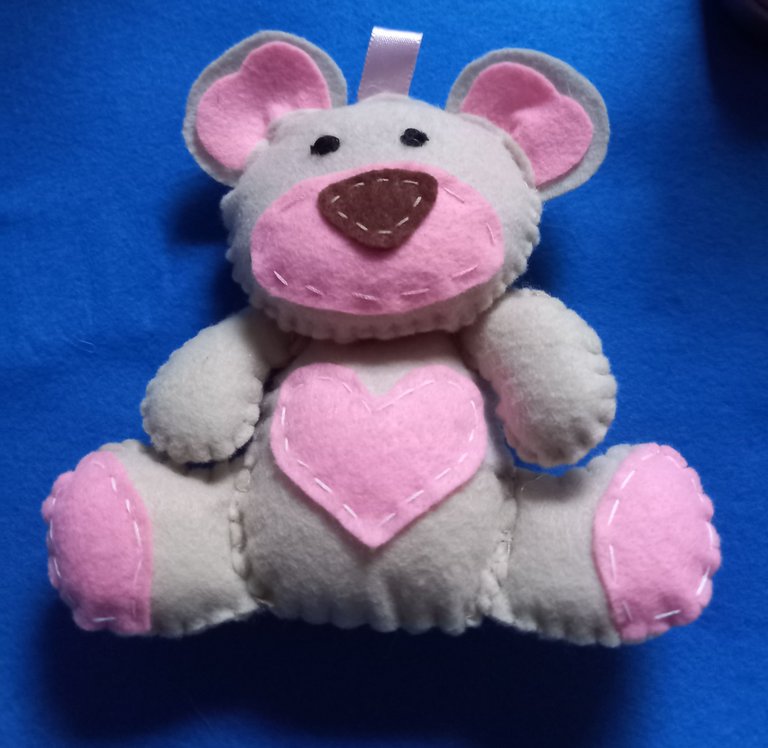
Hola apreciada colmena de #Needleworkmonday es un gusto poder saludarlos y desearles un bendecido día. La mayoría de mis publicaciones están basadas en proyectos que han nacido de una necesidad, es decir, que los hago porque me hacen falta en ese momento, como por ejemplo, las prendas que he hecho para el gym, blusas, vestidos y shorts que tengo en mi closet o llevo en mi maleta cuando viajo; todas éstas las uso y otras he obsequiado y de hecho, de eso se trata el querer hacer algo, para darle uso, así como es el proyecto de hoy, Un Hermoso Llavero de Oso y abalorios colgantes", ésta idea nace porque, cuando me entregaron las llaves del mini departamento donde vivo, me di cuenta que éstas eran pequeñas en comparación a las llaves de las puertas de mi casa en Venezuela, por tal motivo, pensé que eran fáciles de extraviarse, como me sucedió hace unos días, si hubiese tenido el llavero la ubiese ubicado más rapido, ya que un llavero llama más rapido la atención por los colores, así que me puse manos a la obra y confeccioné éste llavero, eso si, lo hice grandecito para no perder las llaves de vista ☺️.
Hello dear #Needleworkmonday hive, it's a pleasure to greet you and wish you a blessed day. Most of my publications are based on projects that have been born out of necessity, that is, I make them because I need them at that moment, for example, the clothes I have made for the gym, blouses, dresses and shorts that I have in my closet or I take in my suitcase when I travel; all of these I use and others I have given away and in fact, that's what it's all about, wanting to make something, to use it, as is today's project, A beautiful bear keychain and hanging beads ", this idea was born because, when I was given the keys to the mini apartment where I live, I realized that they were small compared to the keys of the doors of my house in Venezuela, for that reason, I thought they were easy to get lost, as it happened to me a few days ago, if I had had the key ring I would have found them faster, because a key ring calls attention faster because of the colors, so I got down to work and made this key ring, I made it big so I wouldn't lose sight of the keys ☺️.

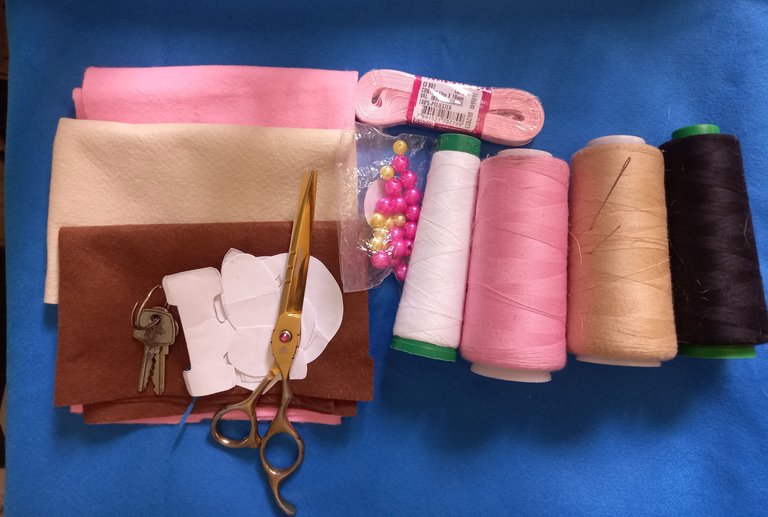
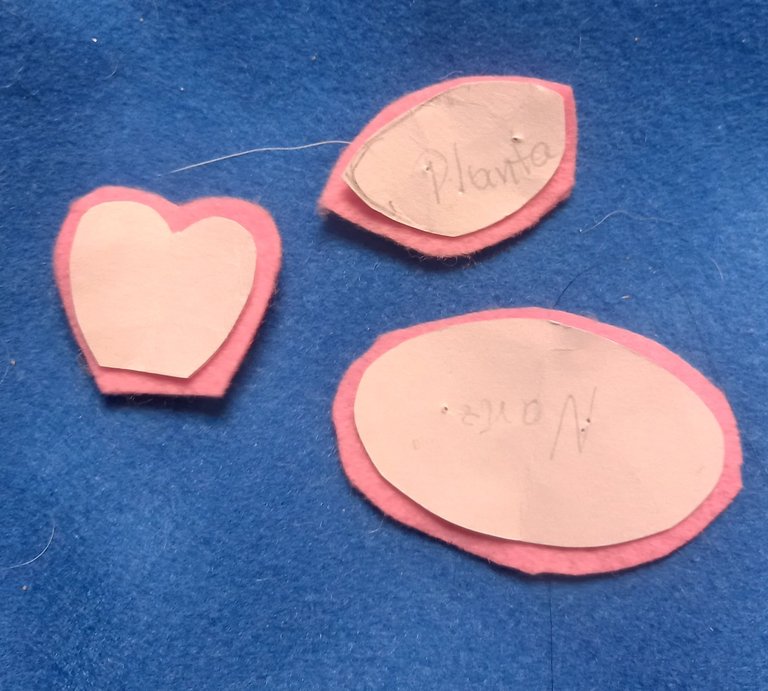
- Fieltro rosado, marrón, beige.
- Parrones del oso.
- Relleno.
- Cinta razo de 1cm de ancho rosada y dorada.
- Perlas plásticas doradas y rosadas.
- Hilo de coser, rosado, beige, negro y blanco.
- Agujas.
- Llaves con aros.
- Tijeras.
- Pink, brown, beige felt.
- Bear browns.
- Stuffing.
- 1 cm wide pink and gold ribbon.
- Pink and gold plastic beads.
- Sewing thread, pink, beige, black and white.
- Needles.
- Keys with rings.
- Scissors.

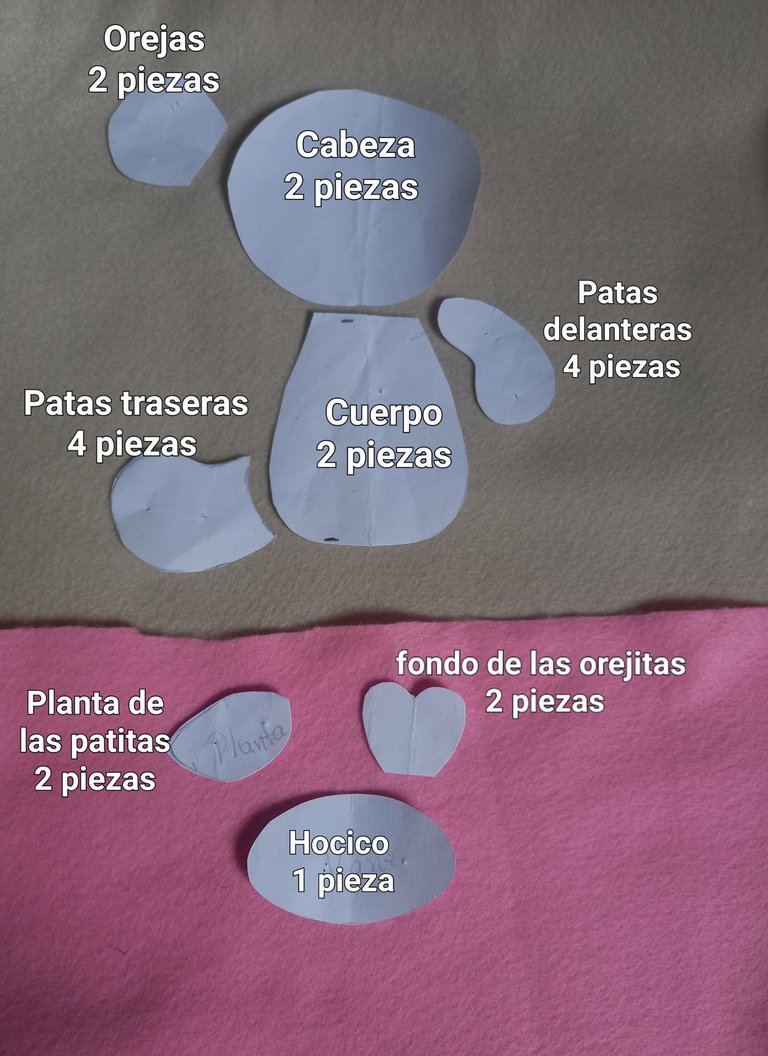
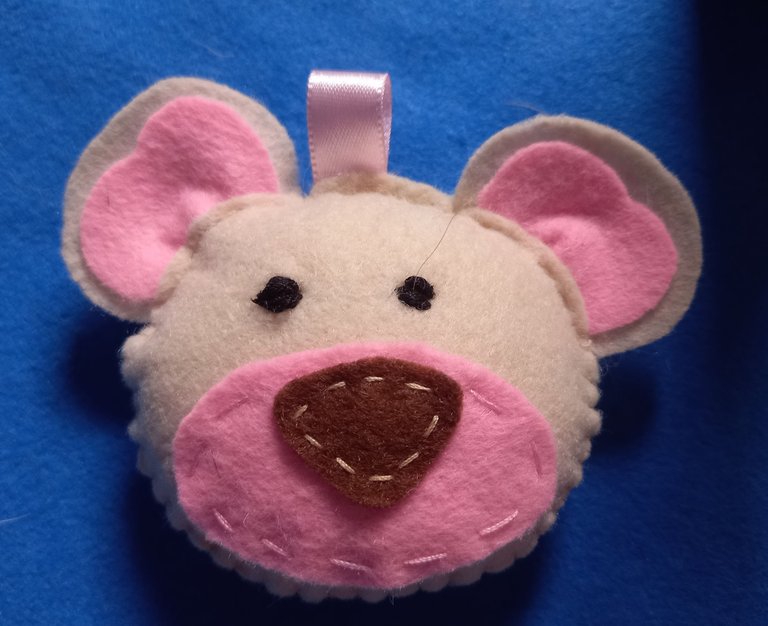
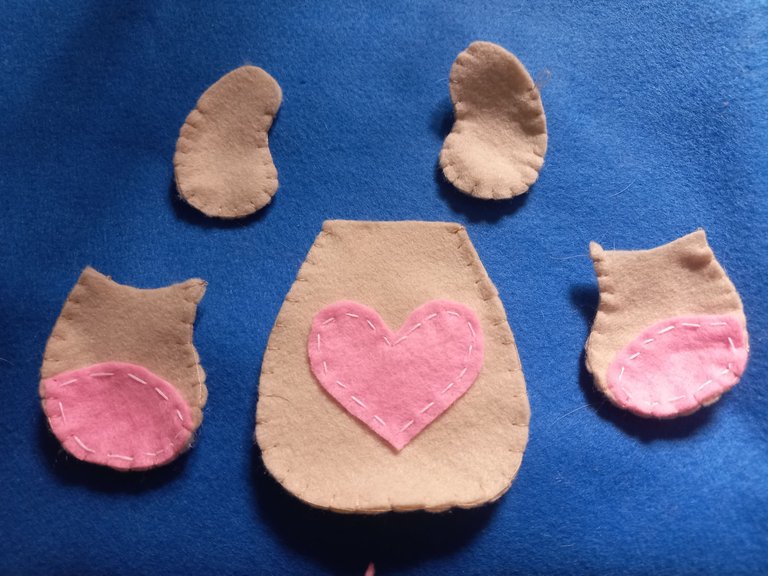
Para la confección de este llavero lo primero que hice fue colocar los patrones del oso sobre el fieltro según el color que corresponda a cada pieza, en éste caso, para el cuerpo utilicé fieltro beige, para la parte de adentro de la oreja utilicé fieltro rosado, para las plantitas de las patitas utilicé fieltro Rosado y para el hocico utilicé fieltro rosado también.
To make this keychain the first thing I did was to place the patterns of the bear on the felt according to the color that corresponds to each piece, in this case, for the body I used beige felt, for the inside of the ear I used pink felt, for the little plants of the paws I used pink felt and for the muzzle I also used pink felt.
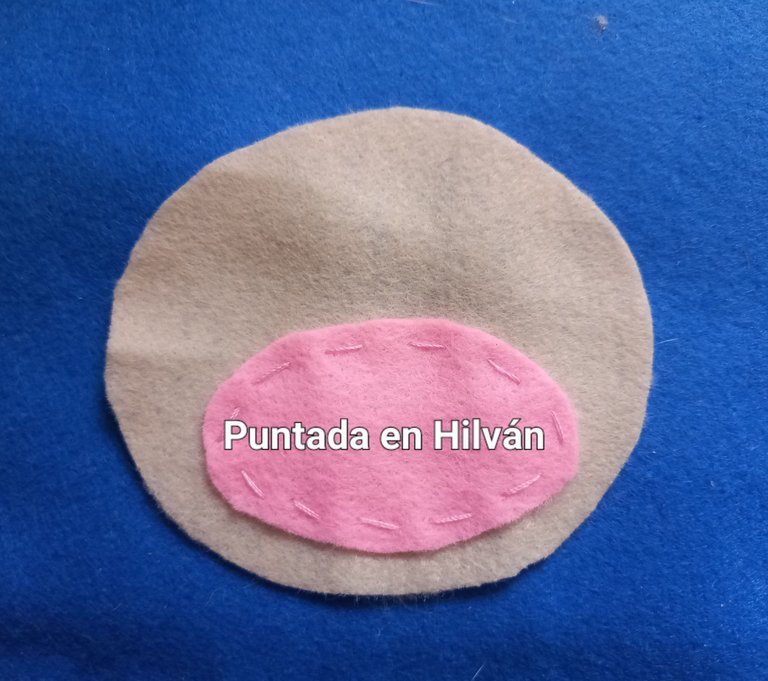
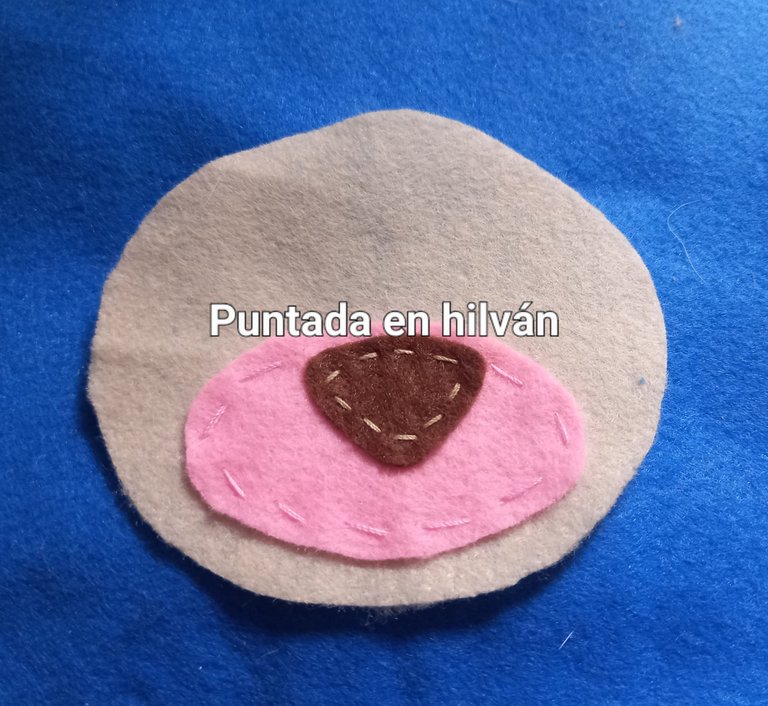
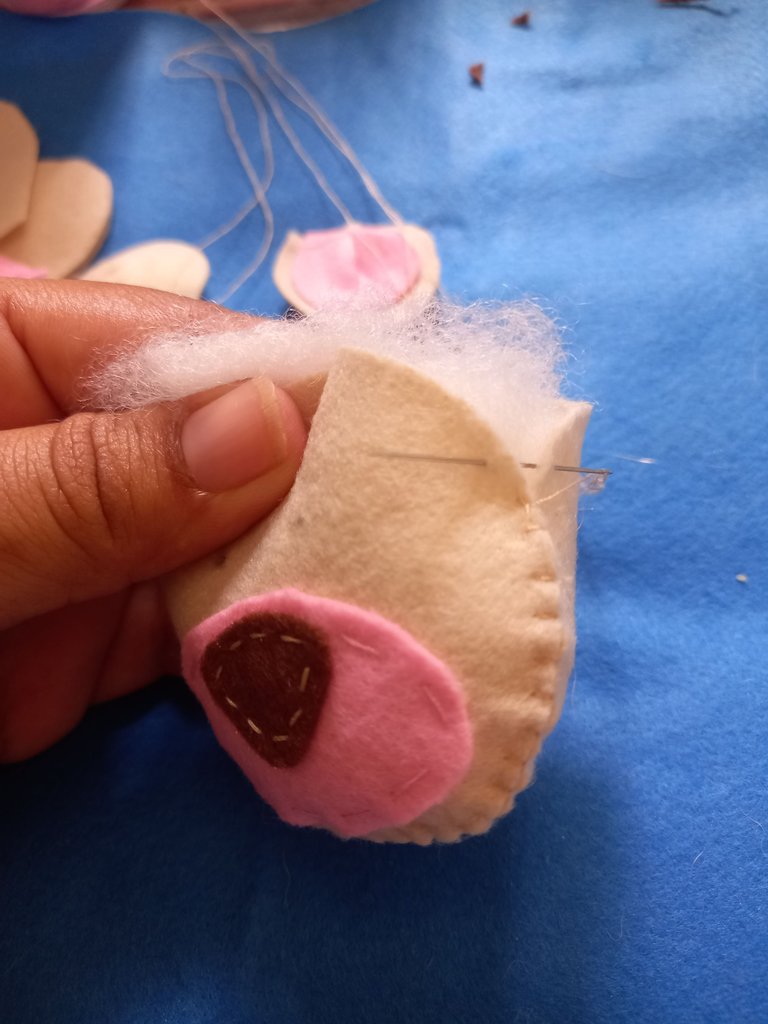
Luego de sacar mis patrones procedí a armar todo el oso, para esto, primero comencé por la cabeza, pegando en una de las dos piezas el hocico y sobre el hocico la nariz, es importante destacar que la costura para pegar el hocico y la nariz fue una puntada en hilvan.
After taking out my patterns I proceeded to assemble the whole bear, for this, first I started with the head, gluing in one of the two pieces the snout and on the snout the nose, it is important to note that the seam to glue the snout and nose was a basting stitch.
Después que pegué el hocico y la nariz en la cabeza, procedí a unir las dos piezas de la cabeza, cosiendo solo la mitad de abajo. El tipo de puntada que realicé para unir la mitad de la cabeza fue una puntada de festón.
After I glued the snout and nose onto the head, I proceeded to join the two pieces of the head, sewing only the bottom half together. The type of stitching I did to join the head half was a scallop stitch.
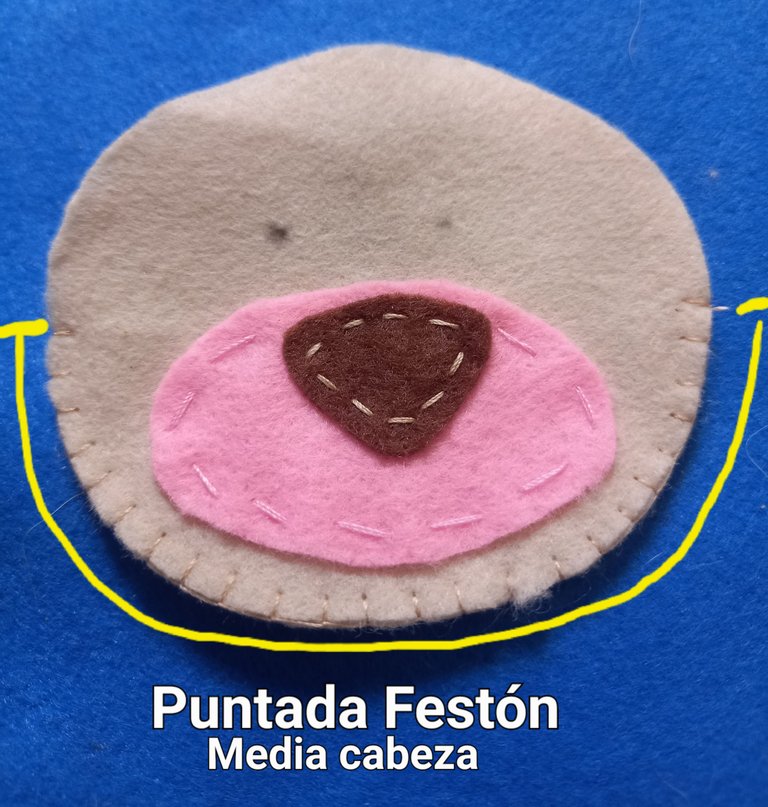
La otra mitad de la cabeza que deje sin costura fue para introducir el relleno.
The other half of the head that I left unstitched was to insert the stuffing.
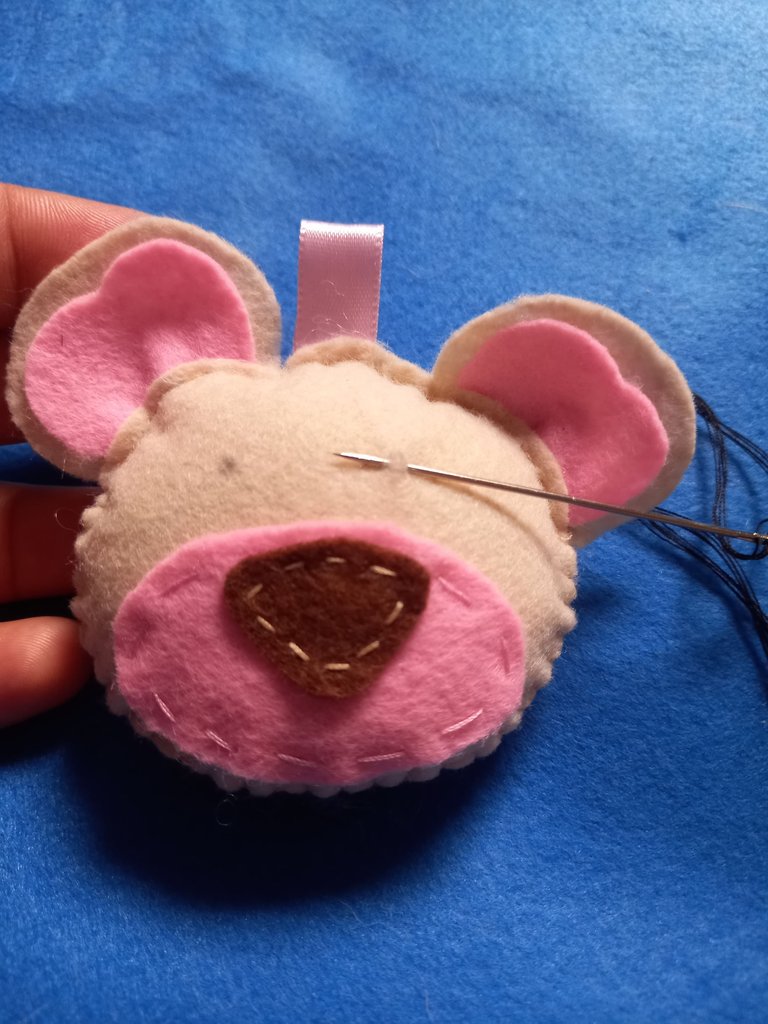
Una vez que terminé de introducir el relleno de la cabeza, tomé las cuatro piezas que conforman a la oreja, colocando la pieza rosada encima de cada una de las piezas de color beige y las cosí por la parte de adentro de las orillas superiores de la cabeza, antes de llegar al centro de la cabeza y oegar la otra oreja del oso, coloqué por la orilla una cinta de 5 cm de largo, la cual doblé por la mitad para realizar la pestaña por donde se va a colgar la llave. Para éste proceso, utilicé un pespunte normal.
Once I finished inserting the stuffing of the head, I took the four pieces that make up the ear, placing the pink piece on top of each of the beige pieces and sewed them on the inside of the upper edges of the head, before reaching the center of the head and attaching the other ear of the bear, I placed a 5 cm long ribbon along the edge, which I folded in half to make the tab where the key will be hung. For this process, I used a normal backstitch.
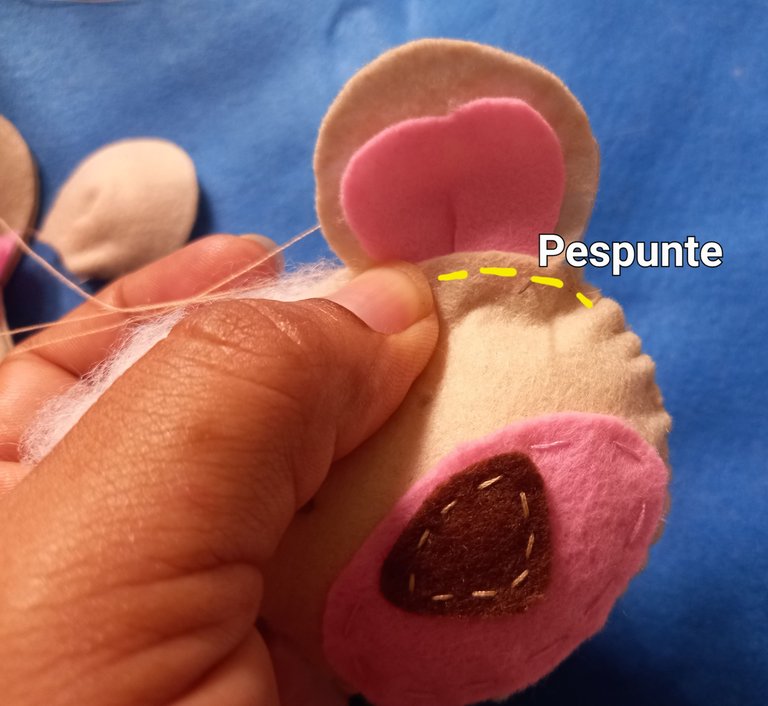

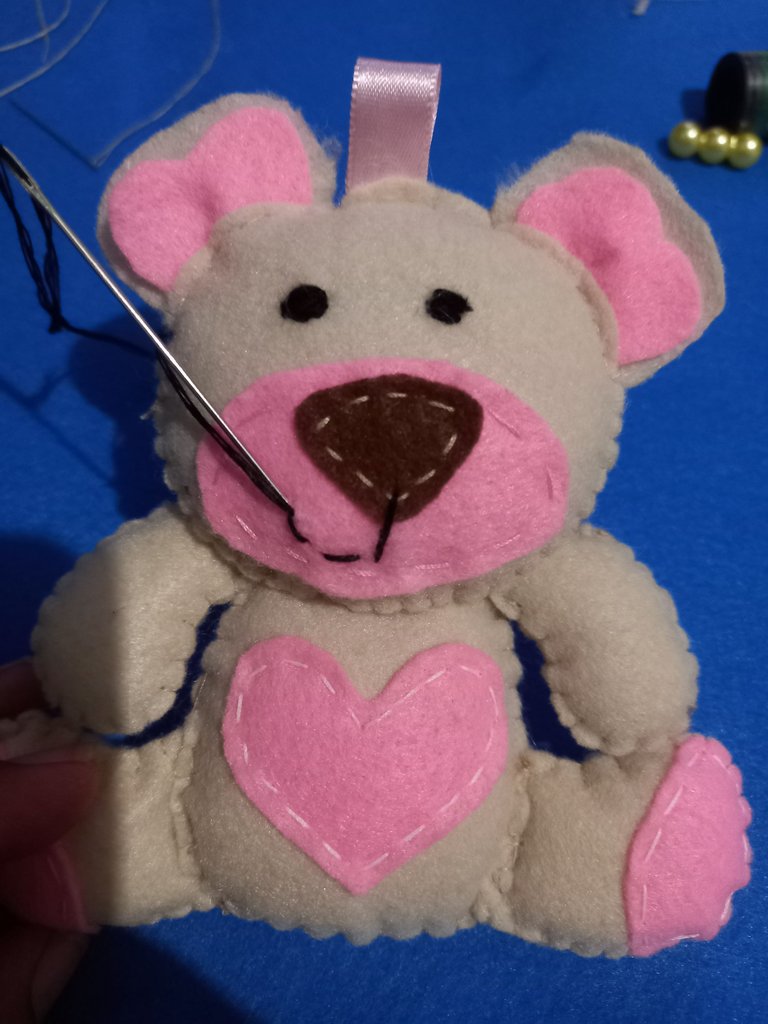
Para hacer los ojitos del oso, utilicé una aguja punta roma para bordar mediana, con hilo triple negro y bordé en el punto que marqué hasta formar los ojitos.
To make the bear's eyes, I used a medium blunt-pointed embroidery needle with black triple thread and embroidered in the stitch I marked until the eyes were formed.

Una vez que terminé de armar la cabeza del Osito, procedí a unir las dos piezas del cuerpo, las piezas de cada patita delantera y las dos piezas de la patita trasera. Todas las costuras para la unión de éstas, las realicé con puntada de festón. Seguidamente las rellené.Es importante mencionar que para pegar la plantita de la pata trasera solo hice una puntada en hilván.
Once I finished assembling the head of the Teddy Bear, I proceeded to join the two pieces of the body, the pieces of each front paw and the two pieces of the back paw. All the seams to join them together were made with scallop stitch. It is important to mention that I only made a single basting stitch to glue the little plant of the back leg.
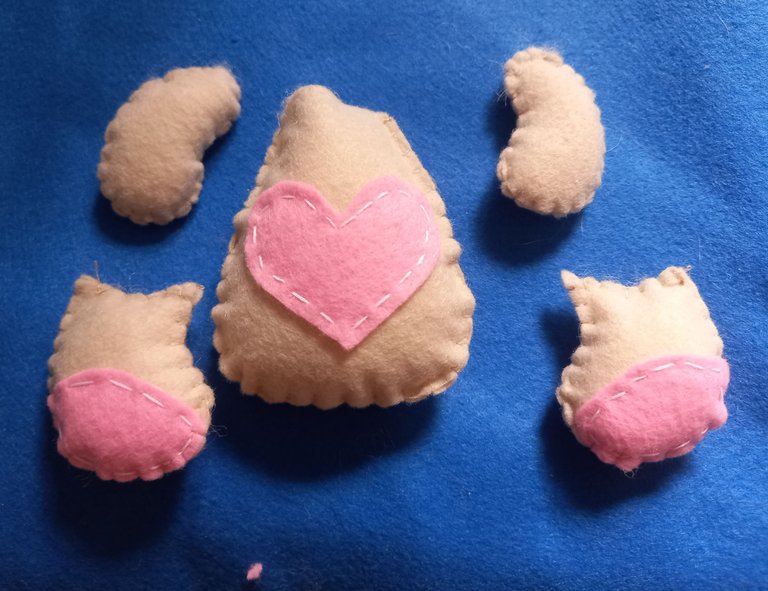
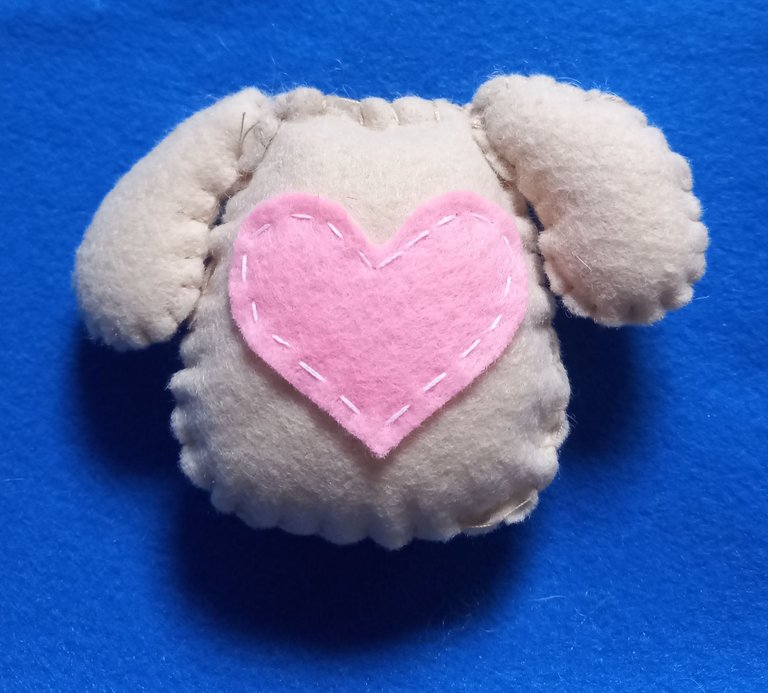
Después que terminé de rellenar y armar todas las partes del Osito, procedí a unir cada una de éstas, comenzando primeramente, pegando las patas delanteras de la esquinas superiores del cuerpo, luego de eso pegué la cabeza por el frente del cuerpo y las patas traseras, las pegué en las orillas inferiores de la parte de atrás del cuerpo.
After I finished stuffing and assembling all the parts of the Teddy Bear, I proceeded to glue each of them together, starting first by gluing the front legs to the upper corners of the body, then I glued the head to the front of the body and the back legs to the lower edges of the back of the body.

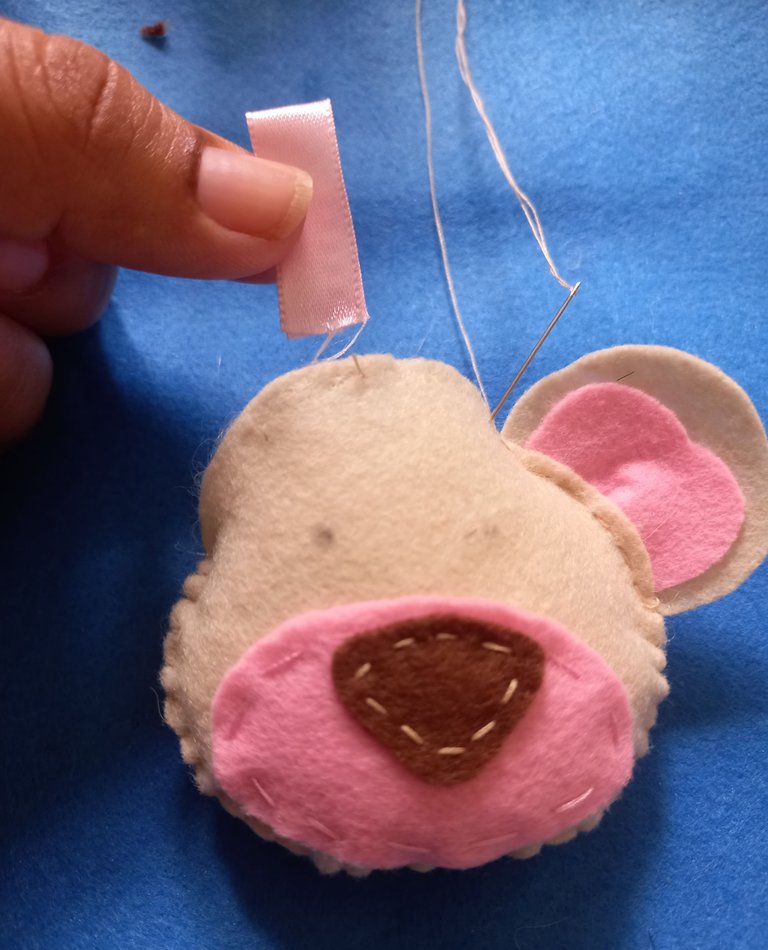
Para terminar el osito, le hice la figura de la boca sobre el hocico con un pespunte y coloqué un pequeño lacito en una de sus orejitas.
To finish the bear, I made the shape of the mouth on the muzzle with a stitch and placed a small bow on one of his ears.
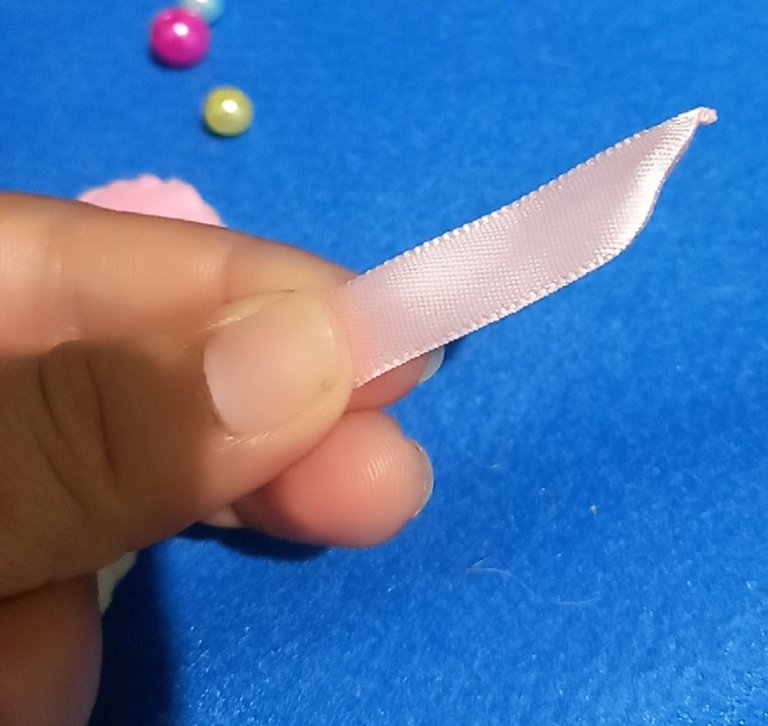
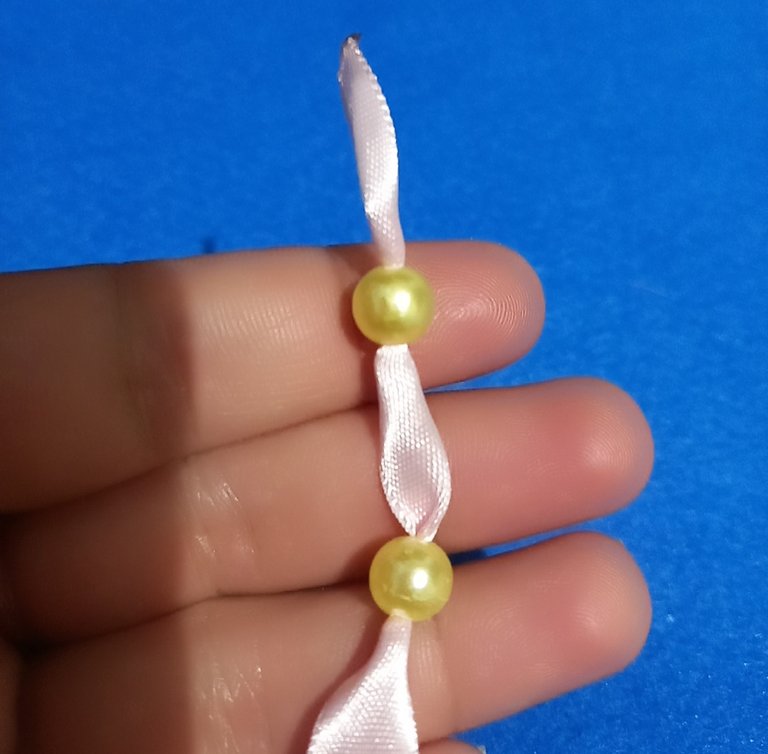
Con la cinta rosada y perlas doradas y fucsia, realicé el colgante, para esto, hice un corte el diagonal a la cinta de 12 cm de largo en cada punta e introduje cuatro perlas doradas primero y luego tres frucsia en cada extremo.
With the pink ribbon and golden and fuchsia pearls, I made the pendant, for this, I made a diagonal cut to the ribbon of 12 cm long in each pint and introduced four golden pearls first and then three fuchsia pearls at each end.
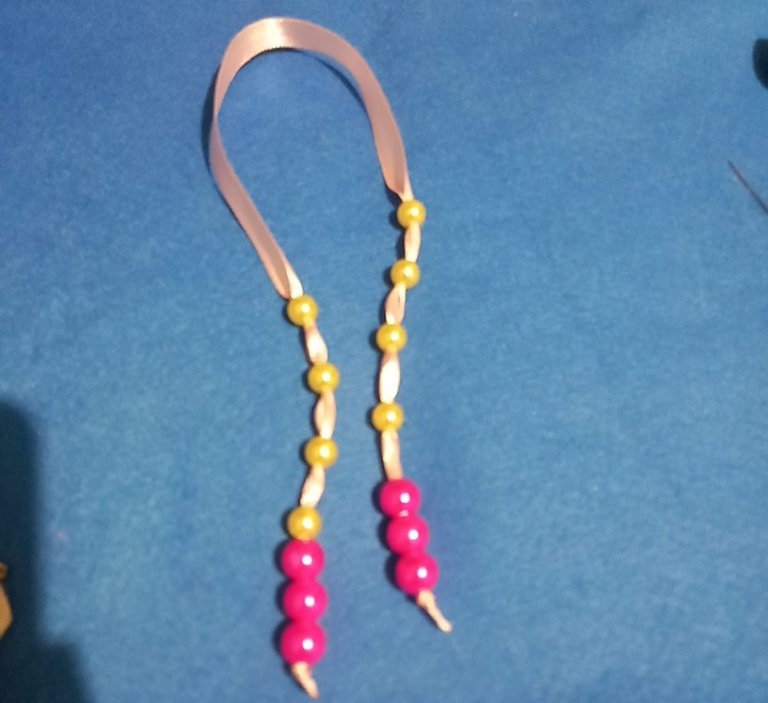
Finalmente, introduje el aro por la cinta del osito y amarré la cinta con las perlas del aro.
Finally, I threaded the hoop through the teddy bear ribbon and tied the ribbon with the beads in the hoop.
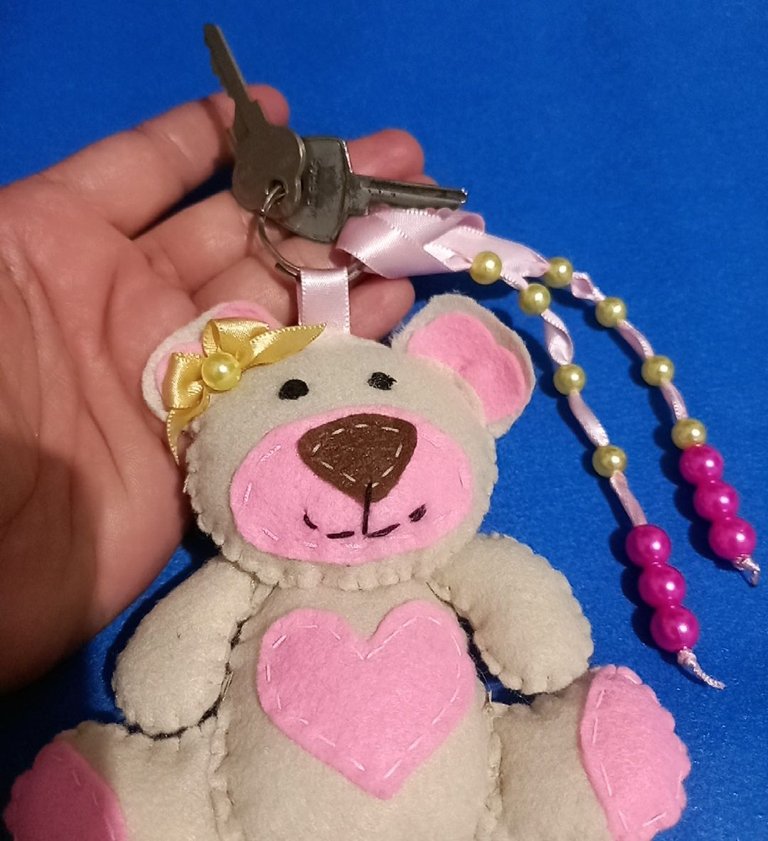

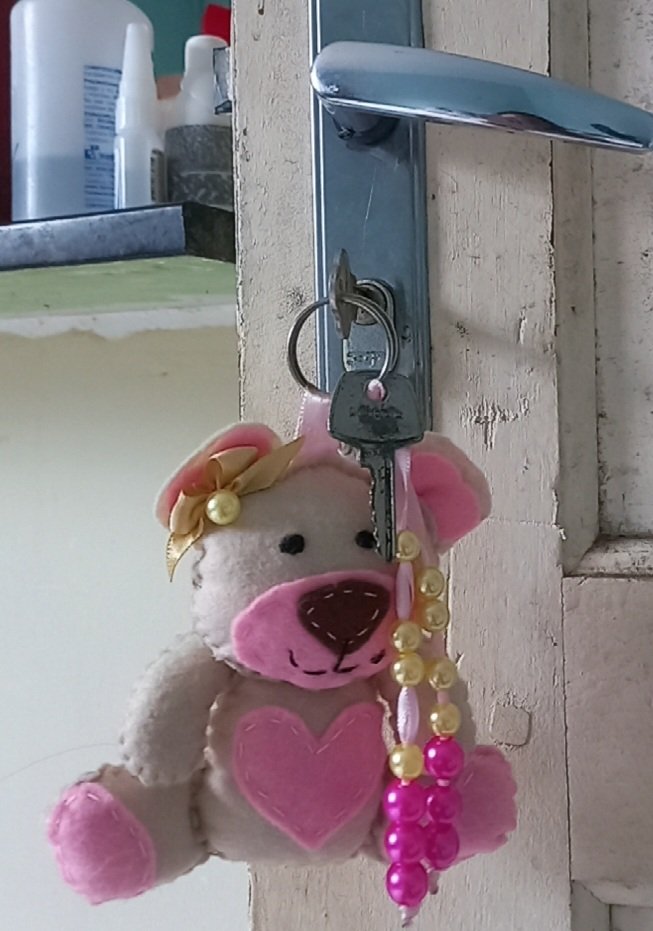
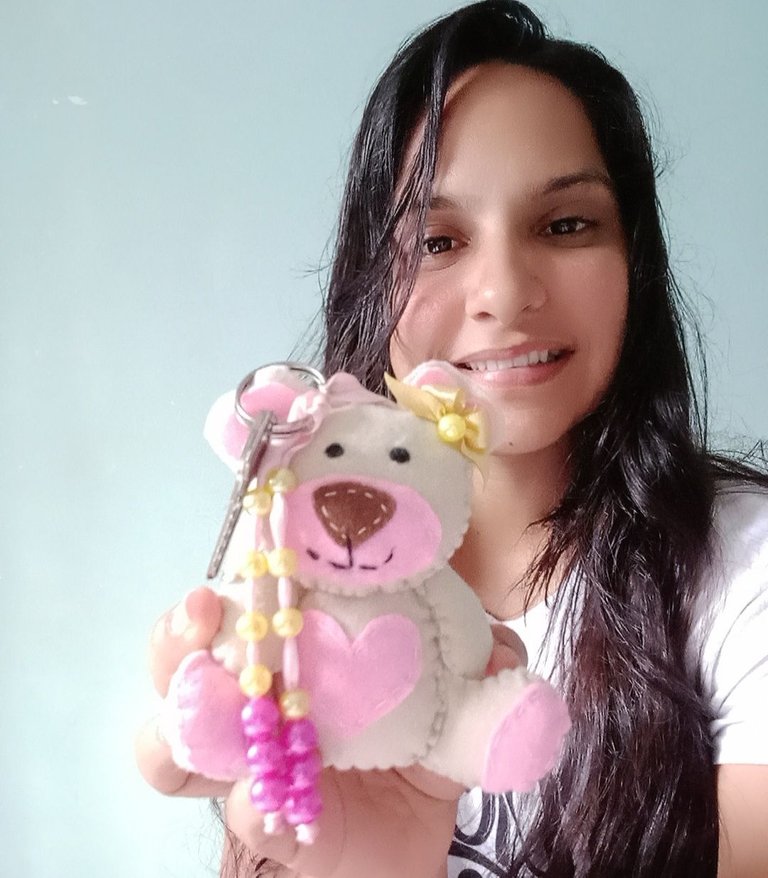
Espero te haya gustado el resultado de éste hermoso tutorial, una idea muy fácil de realizar y además lo puedes colgar en tu cartera o mochila. Saludos y bendiciones amigos de la comena 🙏🏻😊.
I hope you liked the result of this beautiful tutorial, a very easy idea to make and you can also hang it on your purse or backpack. Greetings and blessings friends of the 🙏🏻😊.
