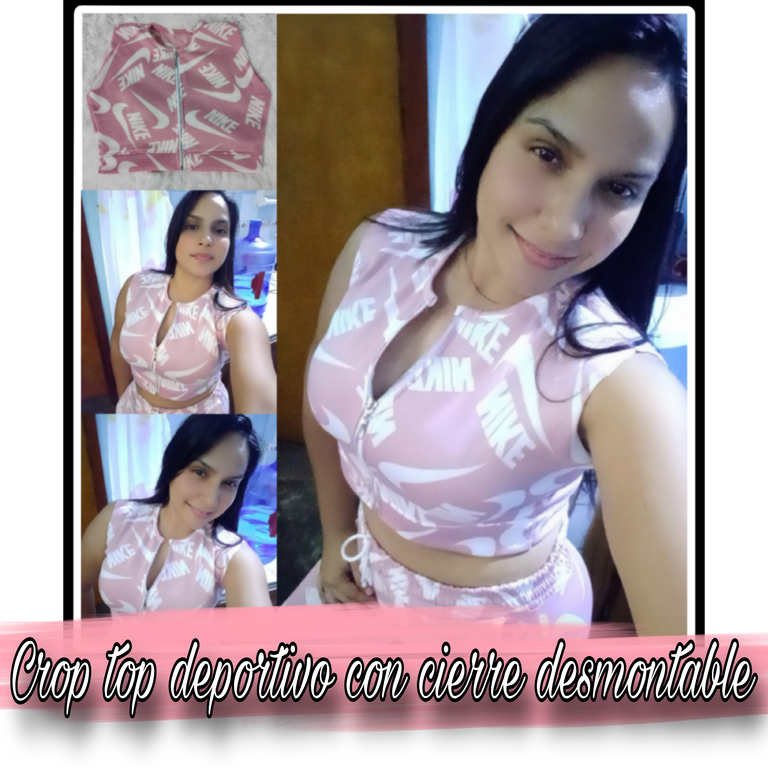
Hola, hola mis muy apreciados amigos de ésta creativa colmena #Needleworkmonday,les saluda una vez más su amiga @kathelopez77, deseándoles un grandioso día lleno de bendiciones y mucho éxito. Algunas semanas atrás compartí con ustedes la confección de un mono o buzo deportivo, para comenzar mis entrenamientos en el gym, pero le faltaba otra prenda para combinarlo, así que compré medio metro de la misma tela de mono estampado y realicé un top deportivo con cierre desmontable, para usarlo cerrado o abierto con un straple debajo, es decir, realicé la pieza que faltaba para completar el conjunto deportivo. Aquí les muestro como lo hice.
Hello, hello my dear friends of this creative hive #Needleworkmonday, greetings once again from your friend @kathelopez77, wishing you a great day full of blessings and success. A few weeks ago I shared with you the making of a jumpsuit or sports overalls, to start my workouts at the gym, but it lacked another garment to combine it, so I bought half a meter of the same printed jumpsuit fabric and made a sports top with detachable closure, to use it closed or open with a straple underneath, that is, I made the missing piece to complete the sports outfit. Here I show you how I did it.

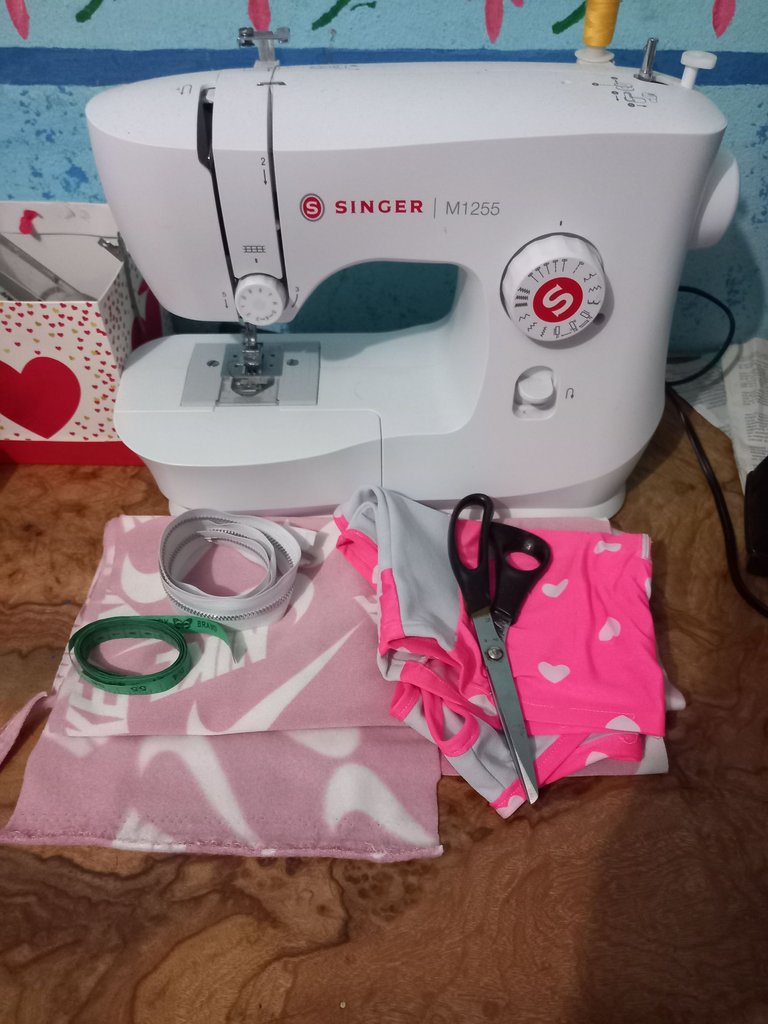
- 1/2 metro de tela de mono estampada.
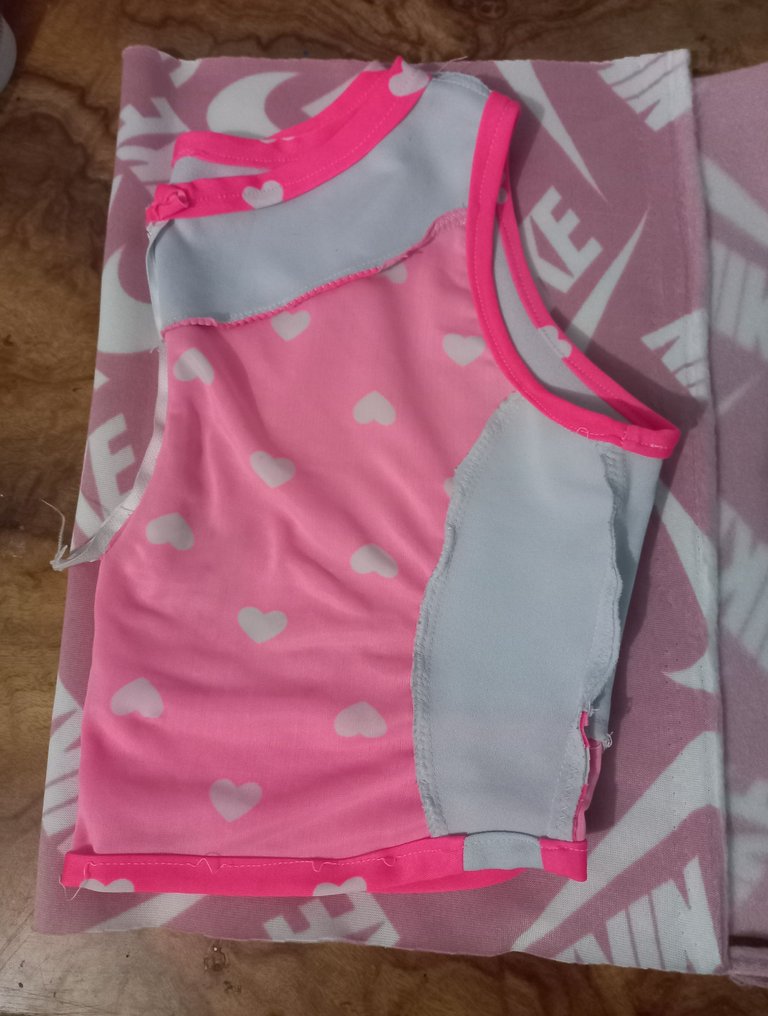
- Top para el modelo a seguir.
- Cierre desmontable.
- Cinta métrica.
- Máquina de coser.
- Tijeras.
- 1/2 meter of printed monkey fabric.
- Top for the model to follow.
- Detachable zipper.
- Measuring tape.
- Sewing machine.
- Scissors.

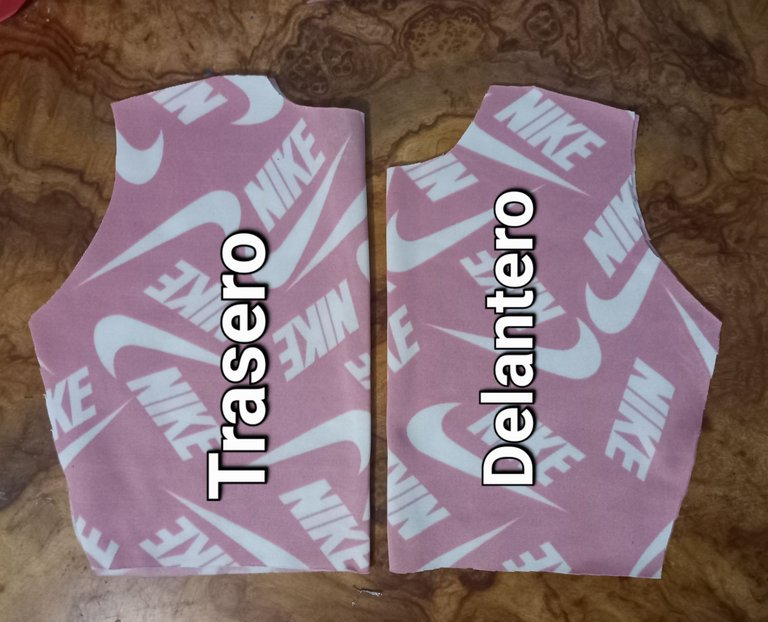
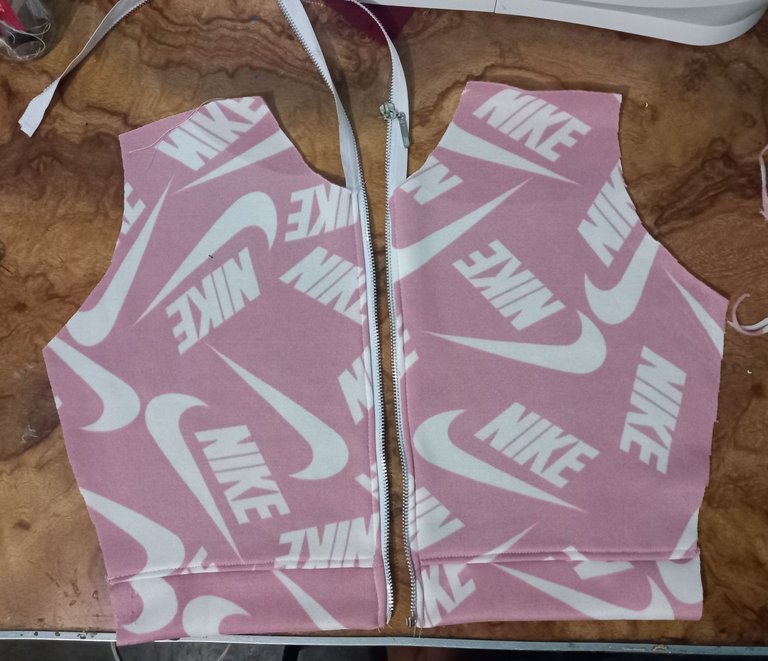
Primero comencé colocando la tela en dos y sobre ella monte el top modelo y saqué de éste la parte delantera y trasera.
First I started by placing the fabric in two and on top of it I mounted the model top and removed the front and back of it.
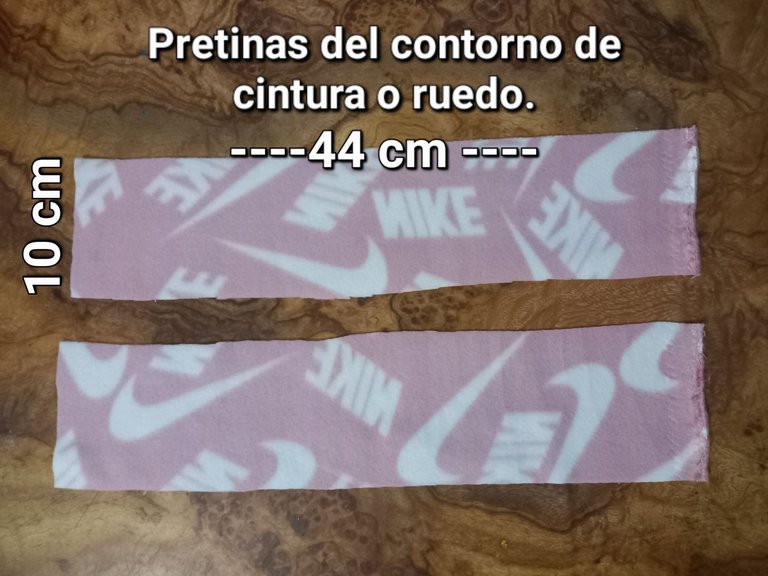
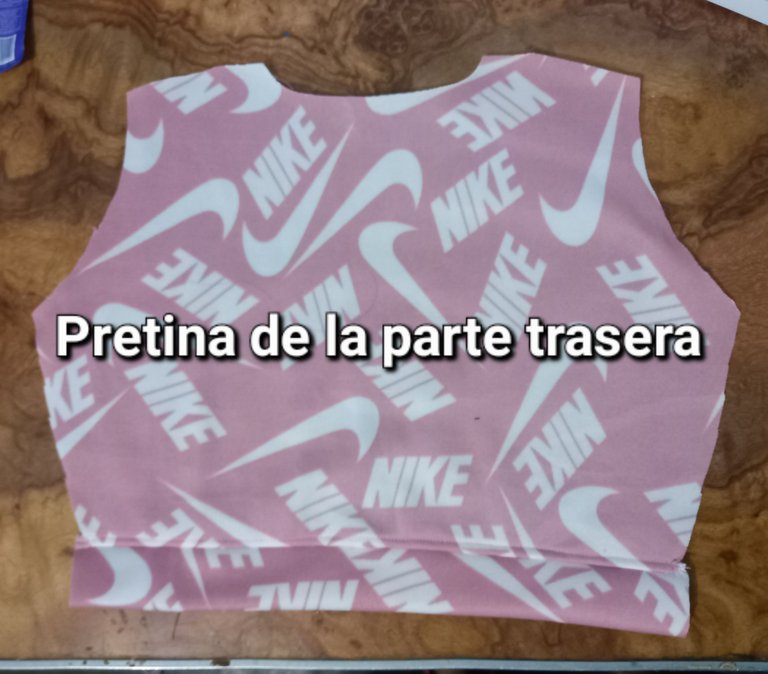
Después corté dos tiras de 44 cm de largo y 10 cm de alto, para hacer las dos pretinas del ruedo del top.
Then I cut two strips of 44 cm long and 10 cm high, to make the two waistbands of the top's hem.
Doble y coloqué la primera pretina en el.controno de cintura de la parte delantera.
I folded and placed the first waistband on the front waistband.
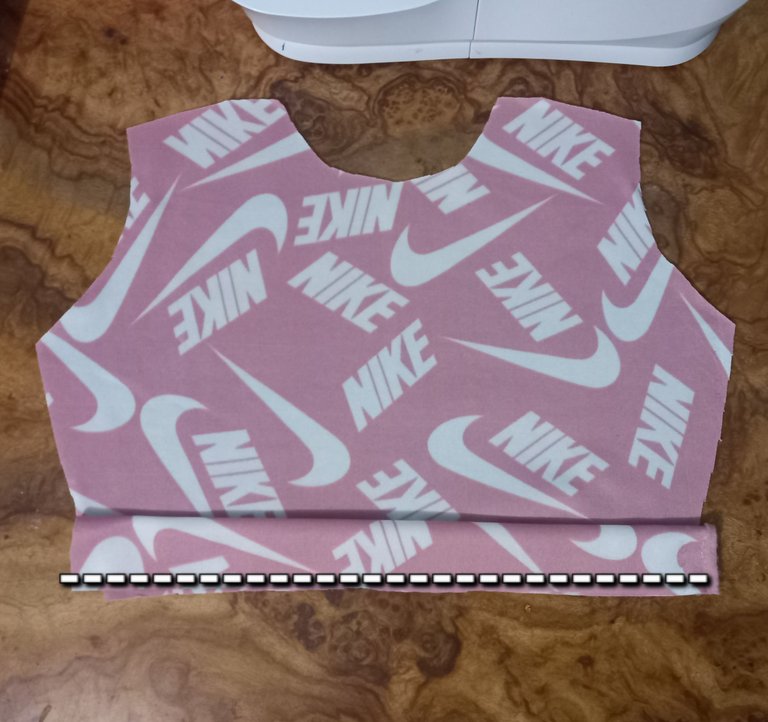
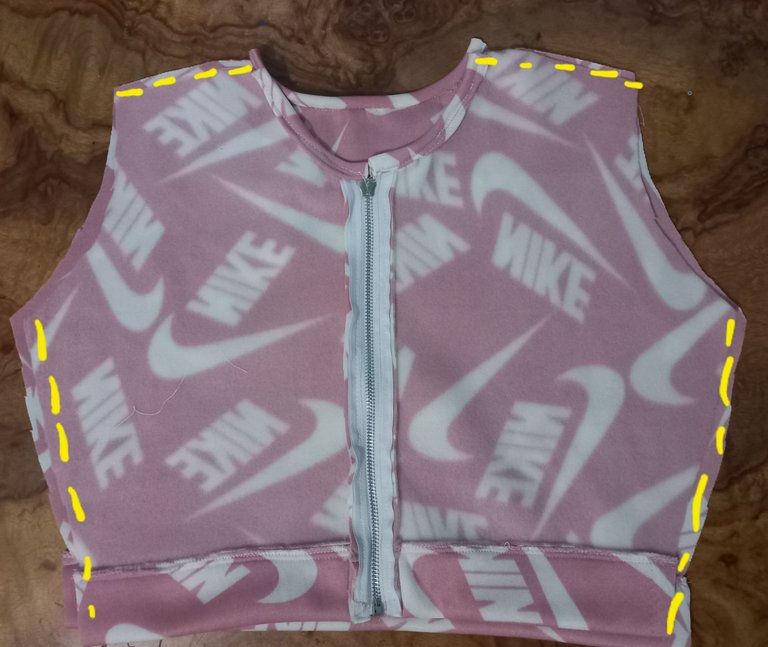
Hice un corte vertical en el centro de la parte delantera, para pegar el cierre. Para pegar el cierre, desmonte ambas partes de éste y coloqué una en cada orilla.
I made a vertical cut in the center of the front, to glue the clasp. To glue the clasp, I disassembled both parts of the clasp and placed one on each side.
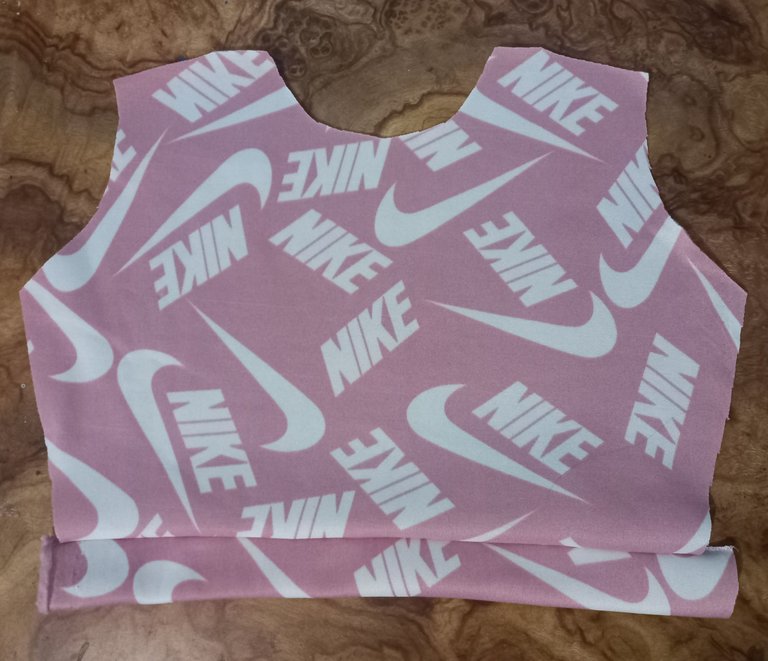
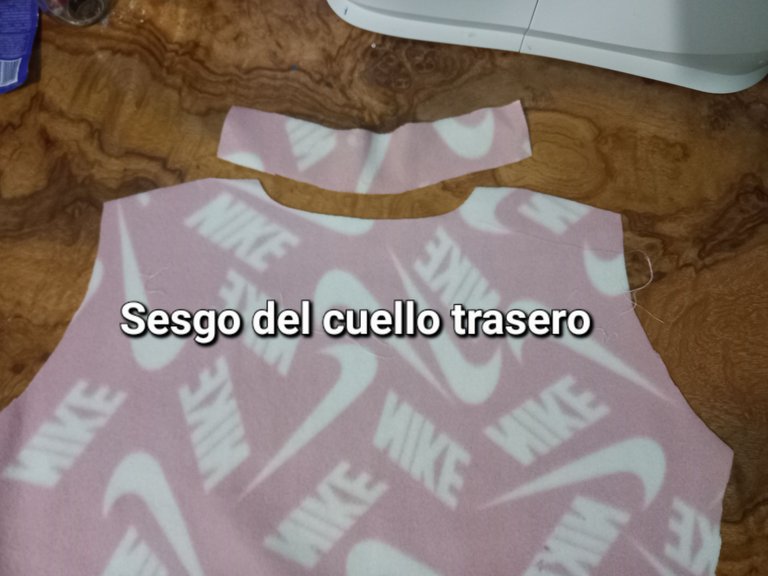
Posteriormente, corte dos tiras de 12 cm de largo y 4 cm de ancho para colocar el sesgo del cuello delantero en cada lado del frente.
Next, cut two strips 12 cm long and 4 cm wide to place the front neck bias on each side of the front.
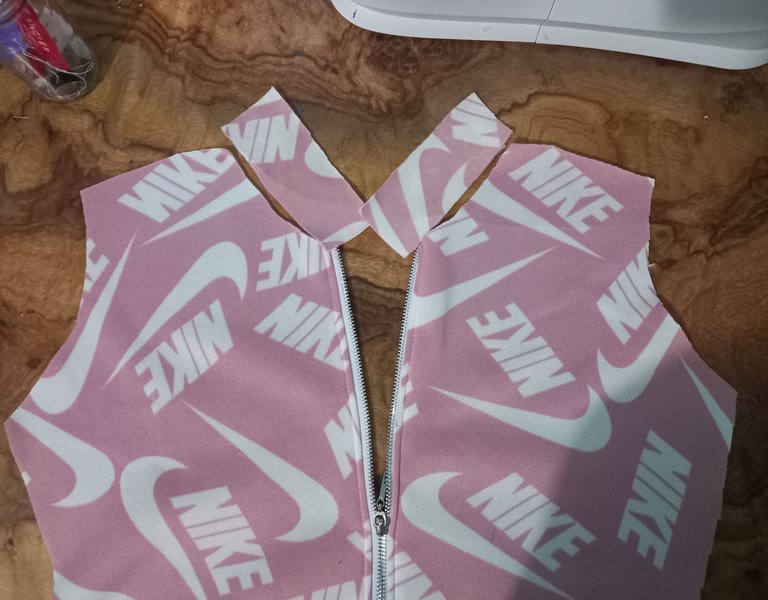
Después, coloqué la pretina de la parte trasera del top y el sesgo del cuello.
Next, I attached the waistband at the back of the top and the neck bias.
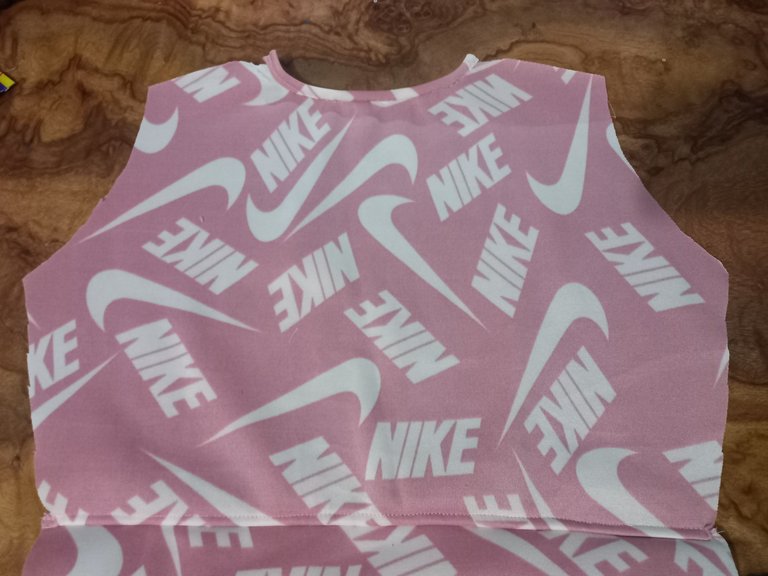
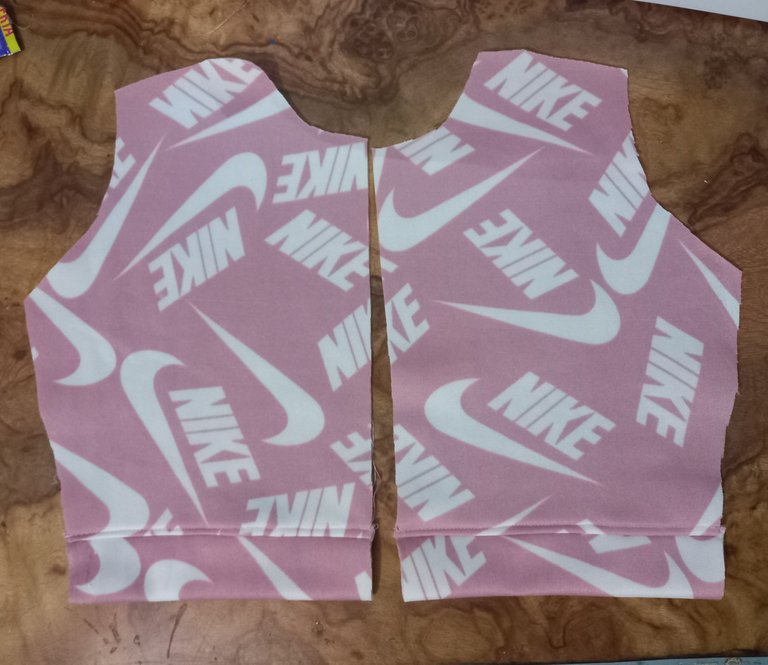
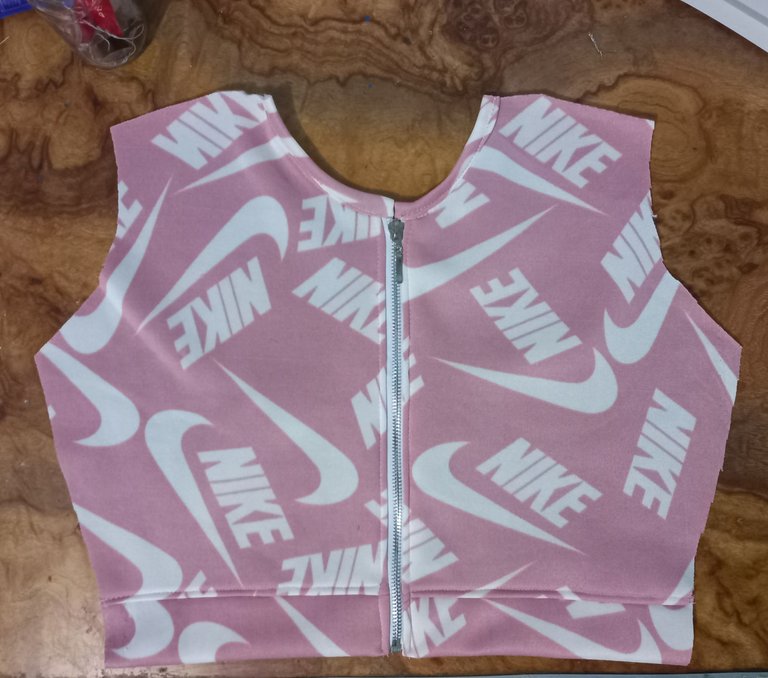
Luego coloqué ambas piezas, una encima de la otra con sus derechos enfrentados, y pasé costura por los hombros y los laterales.
Then I placed both pieces, one on top of the other with their right sides facing each other, and stitched the shoulders and sides.
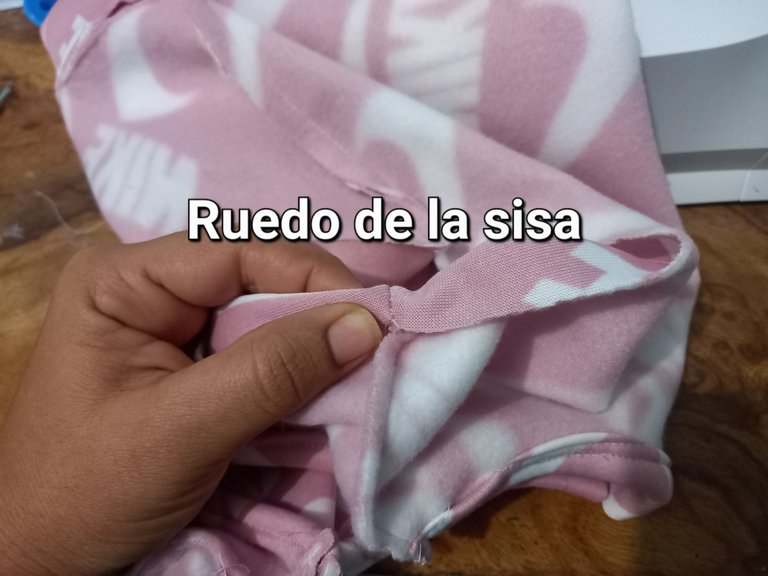
Finalmemte hice un pequeño ruedo de 1 cm de ancho en toda la sisa.
Finally, I made a small 1 cm wide roll all the way around the armhole.

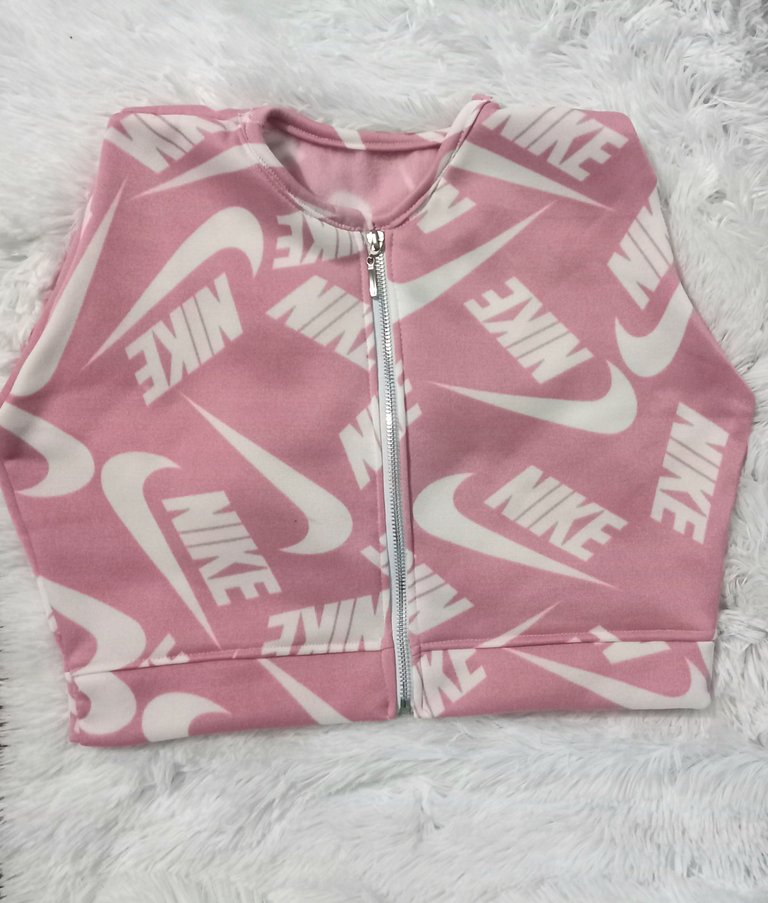


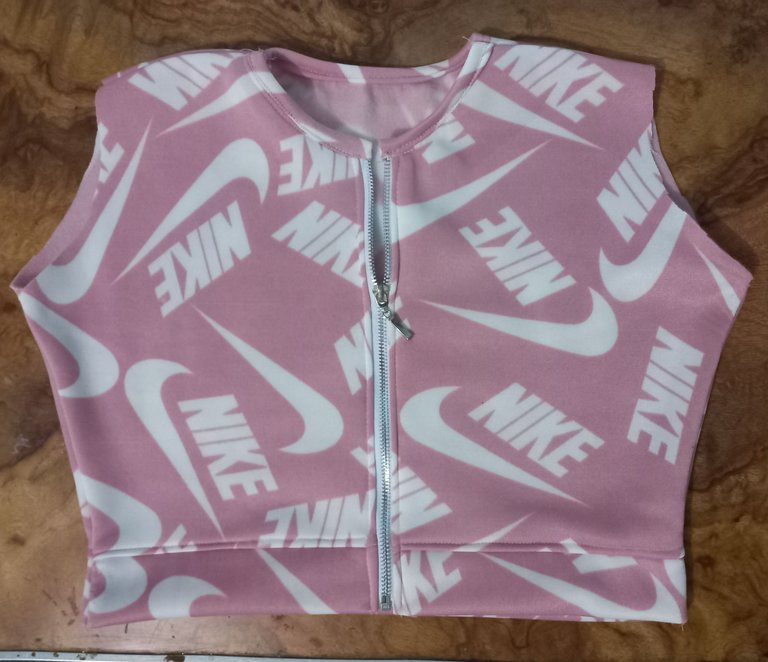
0De esta manera tan sencilla, lograremos obtener un hermoso y juvenil crop too deportivo, el cual podemos llevar cerrado o abierto con un top o straples, por el tipo de cierre que tiene. Espero que éste tutorial sea de gran ayuda para tus próximos proyectos amigo. Muchas bendiciones queridos 🙏🏻😁.
In this simple way, we will get a beautiful and youthful sporty crop too, which we can wear closed or open with a top or straples, because of the type of closure it has. I hope this tutorial will be of great help for your next projects friend. Many blessings dear 🙏🏻😁.