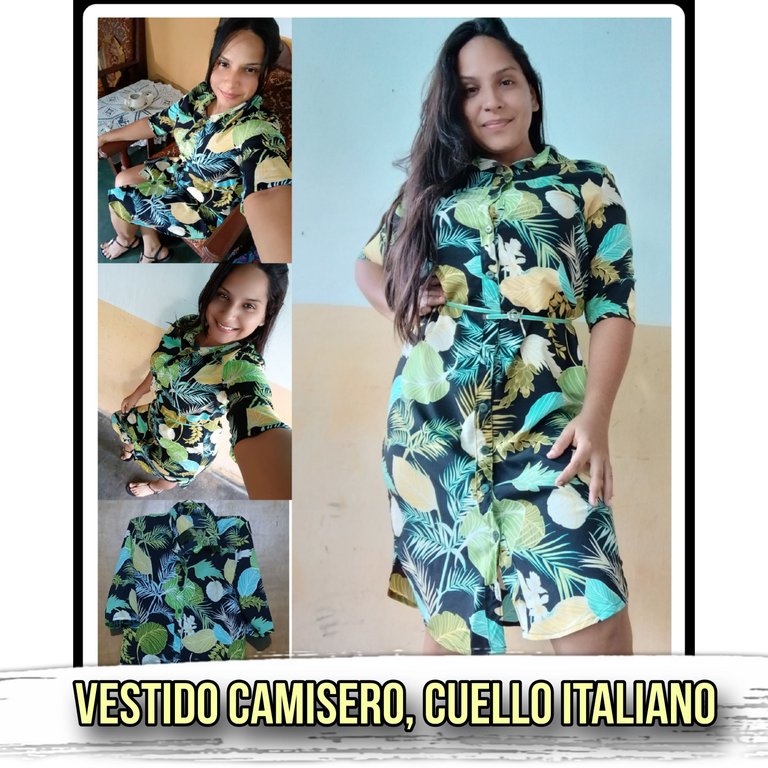
Hola, Hola que tal mi apreciada colmena #Needleworkmonday, Le saluda una vez más su @amigakathelopez77. Deseo que se encuentre pasando un grandioso día. Hoy quiero compartir con ustedes la confección de un vestido camisero con cuello Italiano Y manga 3/4, me encanta Este tipo de vestidos, ya que se pueden lucir con tacos, sandalias bajas y hasta con tenis, ds decir, te aporta elegancia, estilo y comodidad; una buena prenda para una entrevista de trabajo o también para una salida entre amigas, además no tiene límites de uso, es decir, se dapta a cualquier edad. Espero les guste. ¡Manos a la obra!.
Hello, Hello howdy my dear #Needleworkmonday hive, Greetings once again from your @amigakathelopez77. I wish you are having a great day. Today I want to share with you the making of a shirt dress with Italian collar and 3/4 sleeve, I love this kind of dresses, because you can wear it with heels, low sandals and even with tennis shoes, that is, it brings elegance, style and comfort; a good garment for a job interview or also for an outing with friends, also has no limits of use, ie, it adapts to any age. I hope you like it, let's get to work!

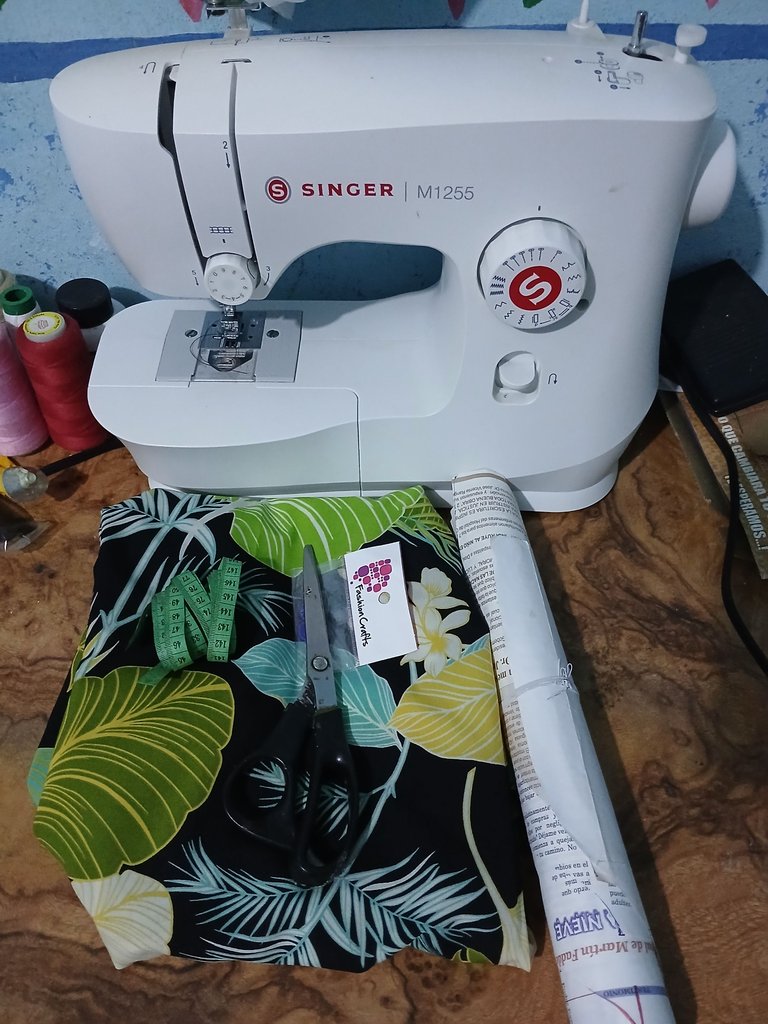
- 2 metros de tela lafayette estampada.
- Patrones.
- Botones.
- Cinta métrica.
- Máquina de cocer.
- Tijeras.
- 2 meters of printed lafayette fabric.
- Patterns.
- Buttons.
- Measuring tape.
- Baking machine.
- Scissors.

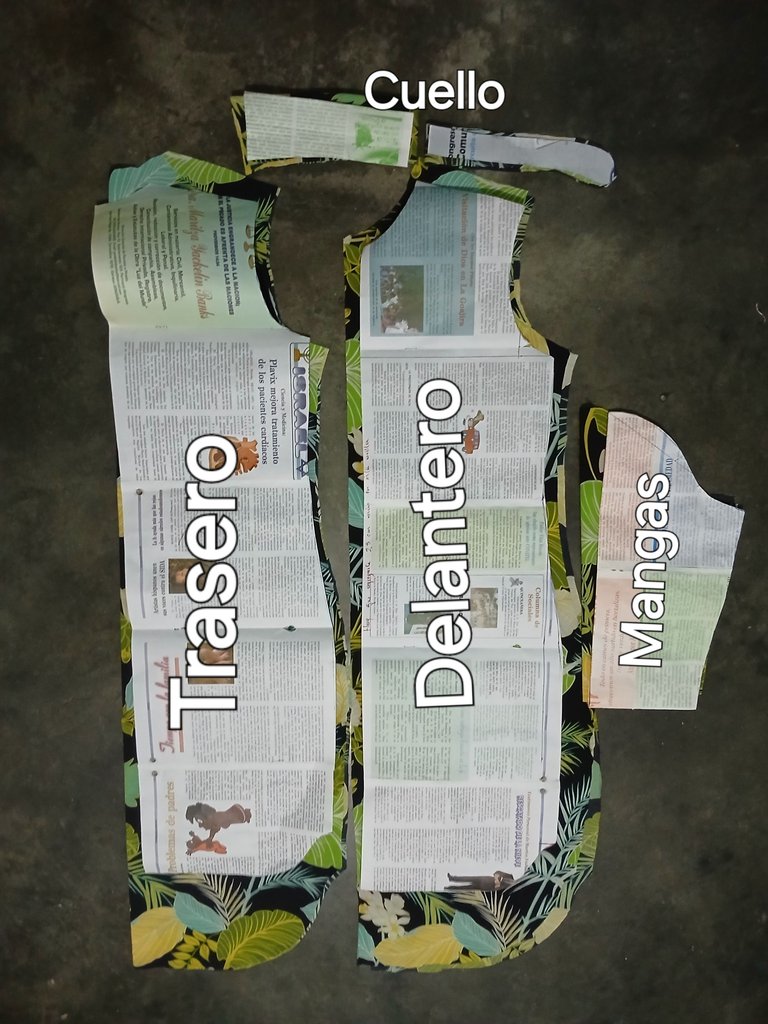
Para la confección de este vestido camisero, lo primero que hice fue sacar todos los patrones que conformarán las partes del vestido, en este caso, 2 piezas delanteras con 2 cm más hacia la orilla en donde irán los botones, la pieza trasera, las 2 mangas y las partes del cuello.
To make this shirt dress, the first thing I did was to make all the patterns that will make up the parts of the dress, in this case, 2 front pieces with 2 cm more towards the edge where the buttons will go, the back piece, the 2 sleeves and the neck parts.
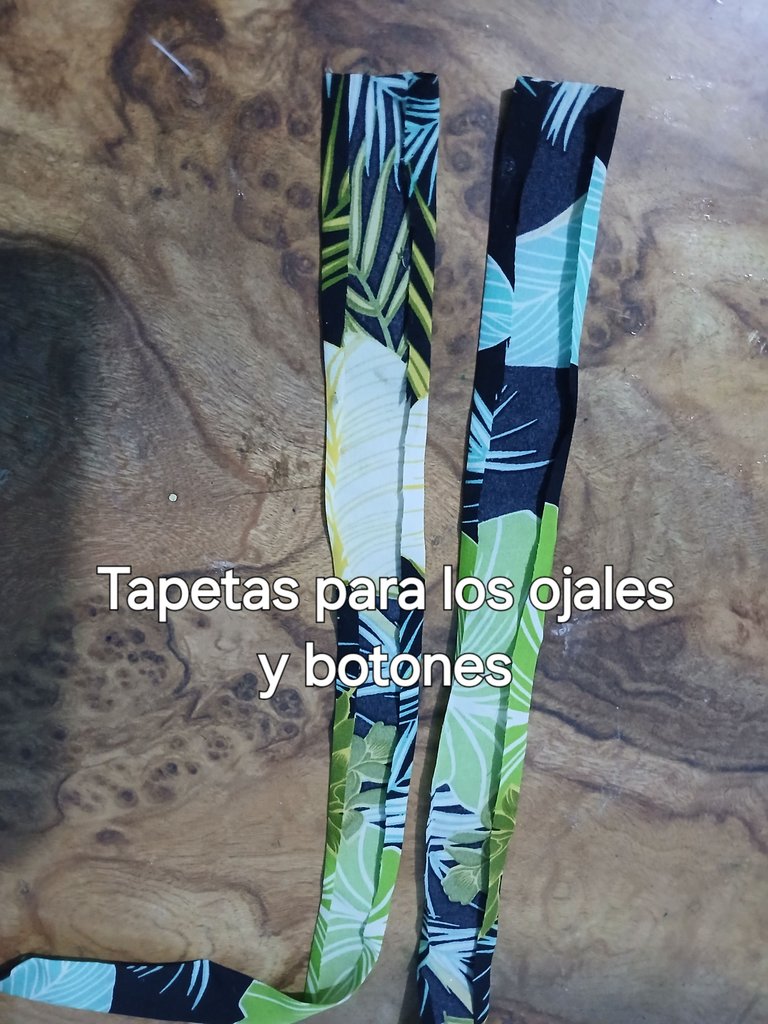
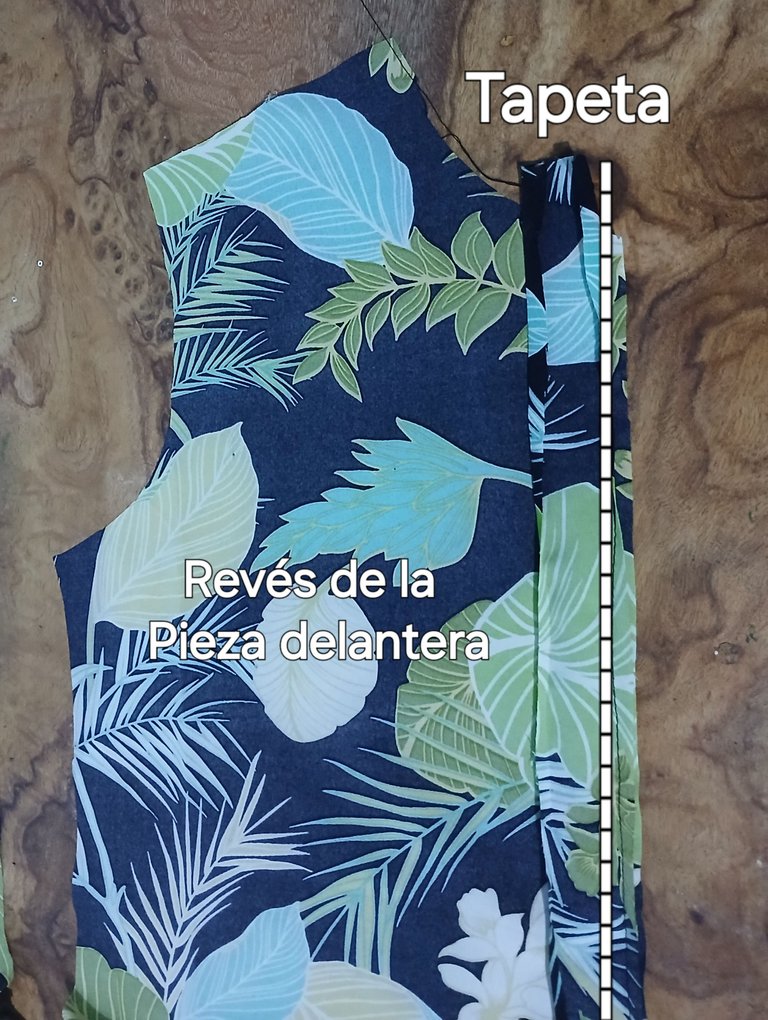
Luego corté dos tiras del largo del vestido de 5 cm ancho, y doblé con una plancha, 0.5 cm por cada lado de sus orillas laterales, para hacer las tapetas de los ojales y los botones.
Then I cut two strips the length of the dress, 5 cm wide, and folded with an iron, 0.5 cm on each side of its lateral edges, to make the buttonhole covers and buttons.
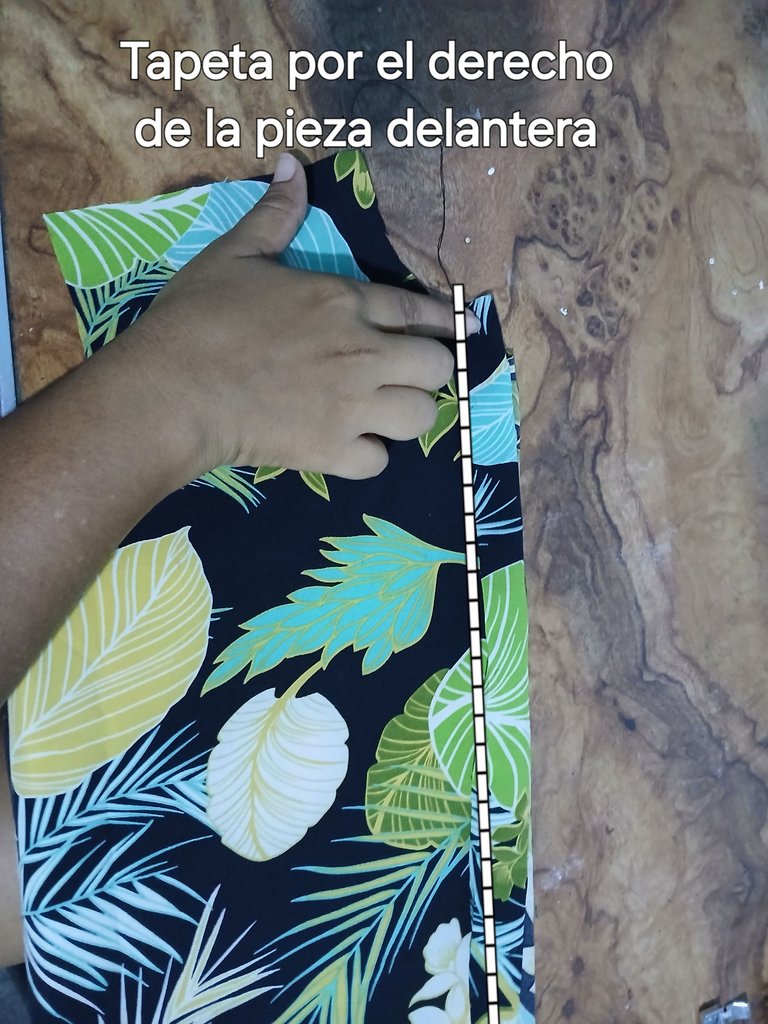
Después coloqué el lado derecho de la tela de la tapeta, encima de la orilla del revés de la pieza delantera del vestido, pasé costura por esa orilla y luego volteé la tapeta hacia el lado derecho de la pieza delantera y pasé costura recta, para sujetar esa otra orilla.
I then placed the right side of the placket fabric on top of the back edge of the front piece of the dress, stitched along that edge and then turned the placket to the right side of the front piece and stitched straight across to hold that other edge.
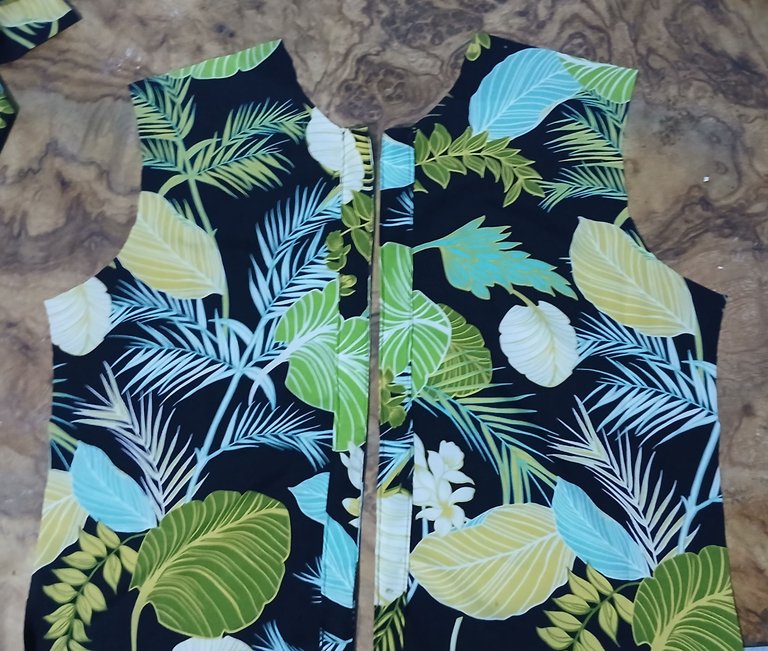
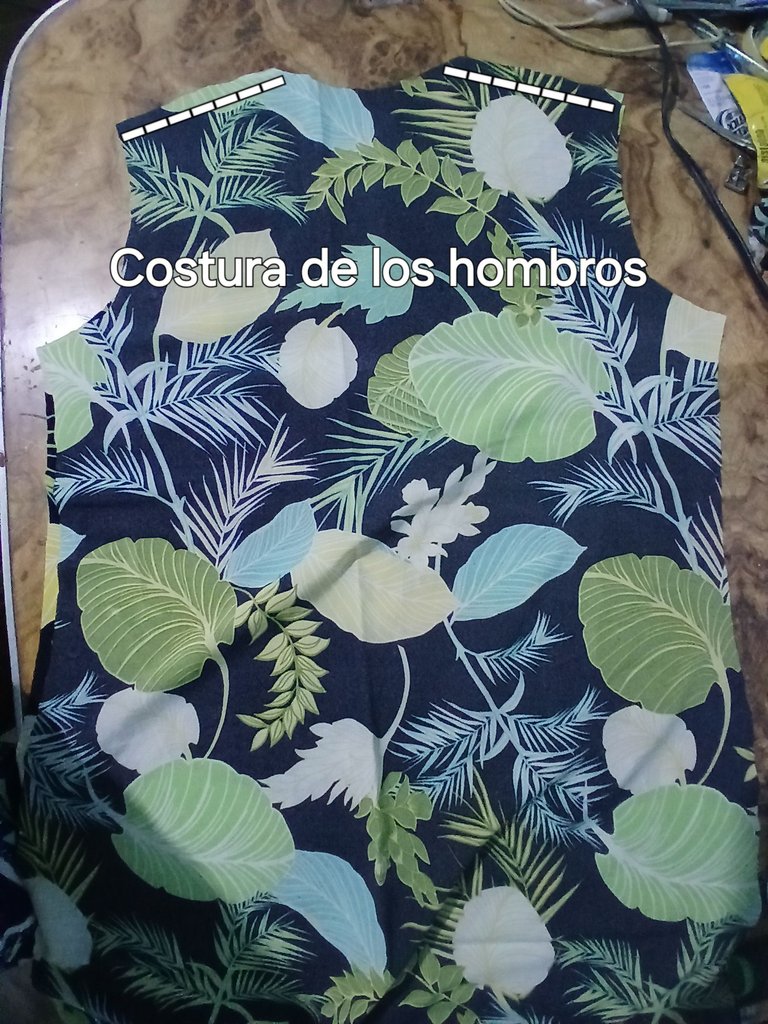
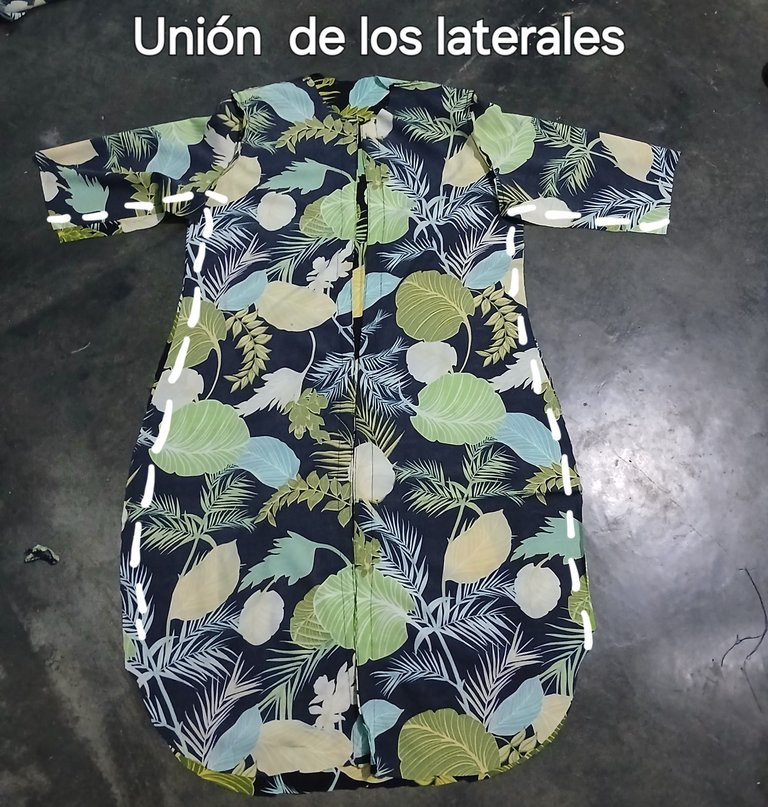
Cuando terminé de pegar las tapetas, procedí a colocar las pieza trasera sobre las dos piezas delanteras, haciendo coincidir derecho con derecho, y las uní con costura recta por los hombros.
When I finished gluing the covers, I proceeded to place the back pieces over the two front pieces, matching them right sides together, and joined them with a straight seam along the shoulders.

Luego cosí las mangas y cerré con costura recta todo los laterales, juntamente con las mangas.
Then I sewed the sleeves and closed with a straight seam all along the sides, together with the sleeves.
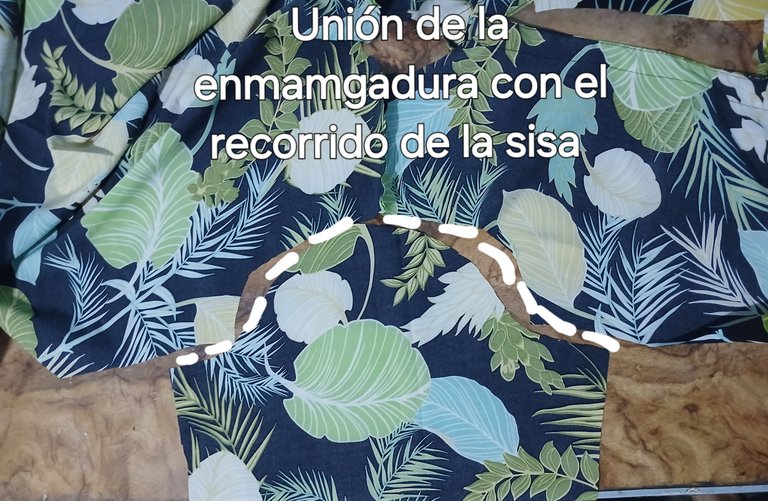
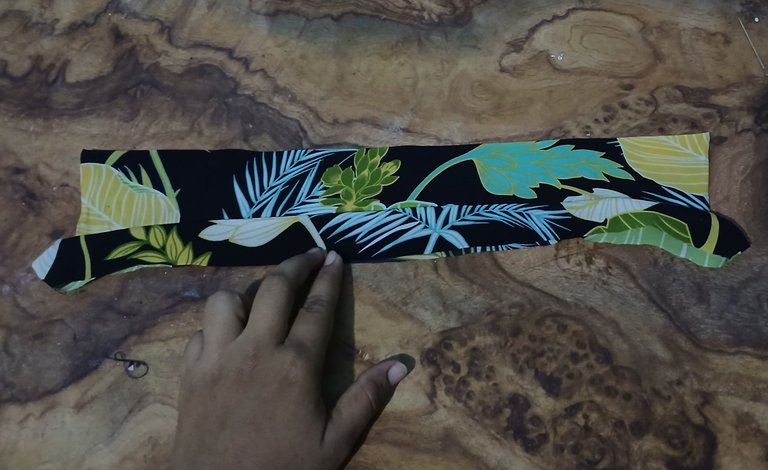
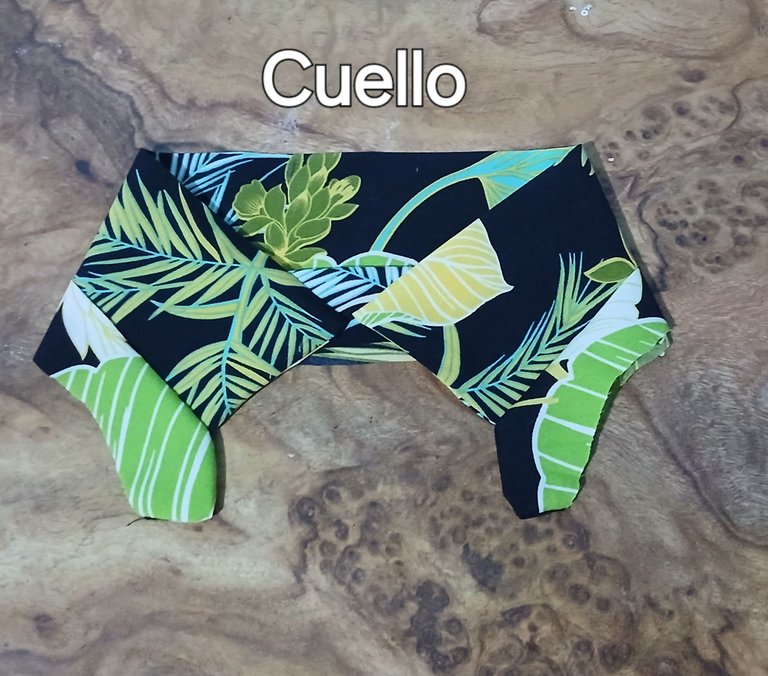
Posteriormente, procedí a armar todas las partes del cuello.
Subsequently, I proceeded to assemble all the parts of the neck.
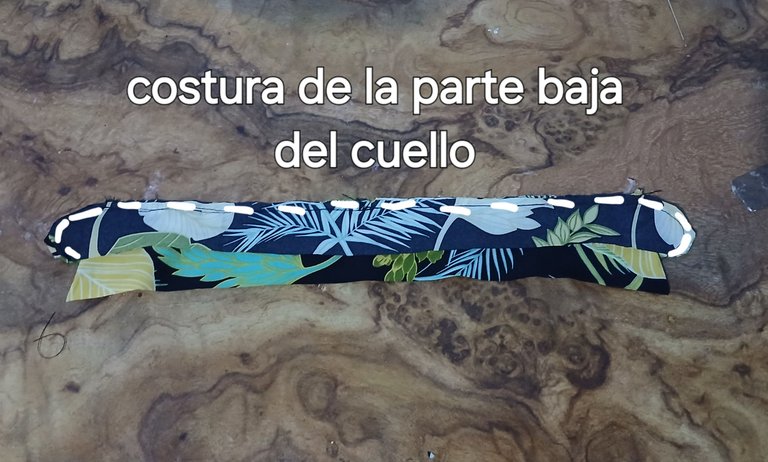
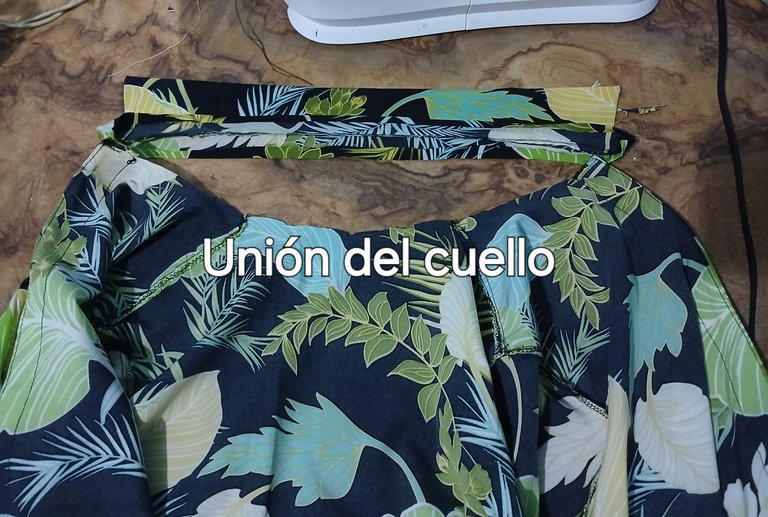
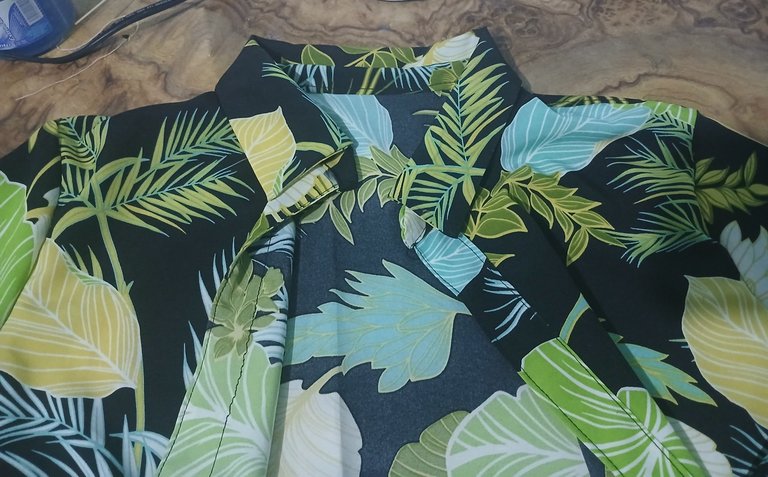
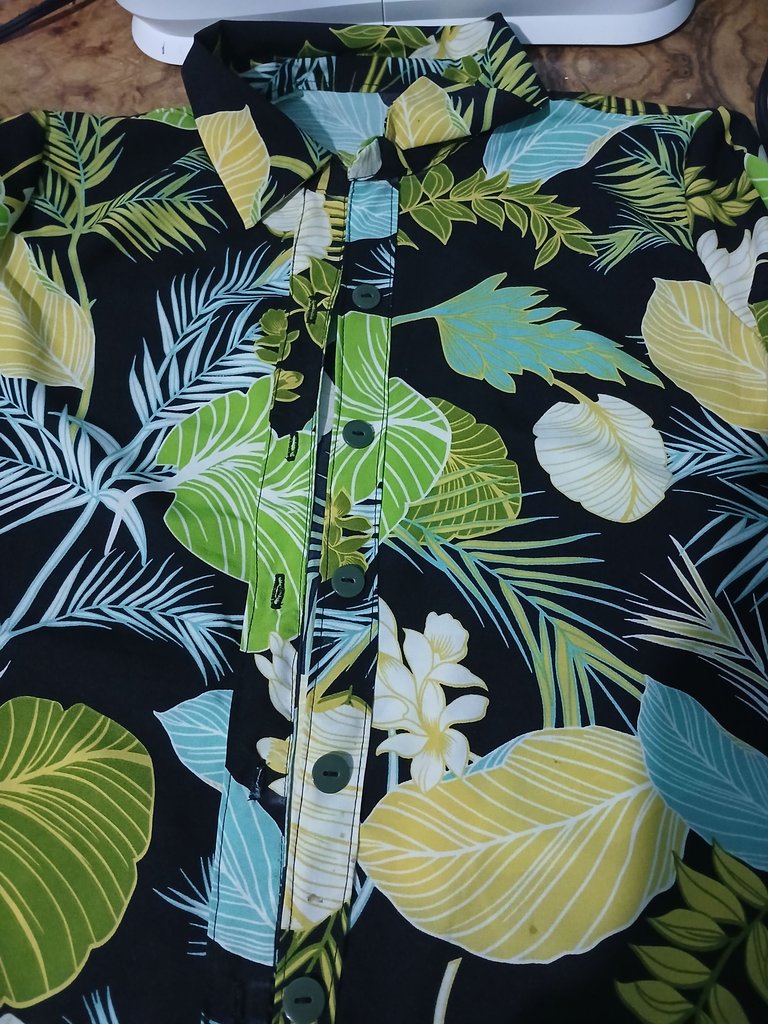
Después pegué el cuello qué hice, por todo el contorno del cuello del vestido.
Then I glued the collar, which I did, all around the neckline of the dress.
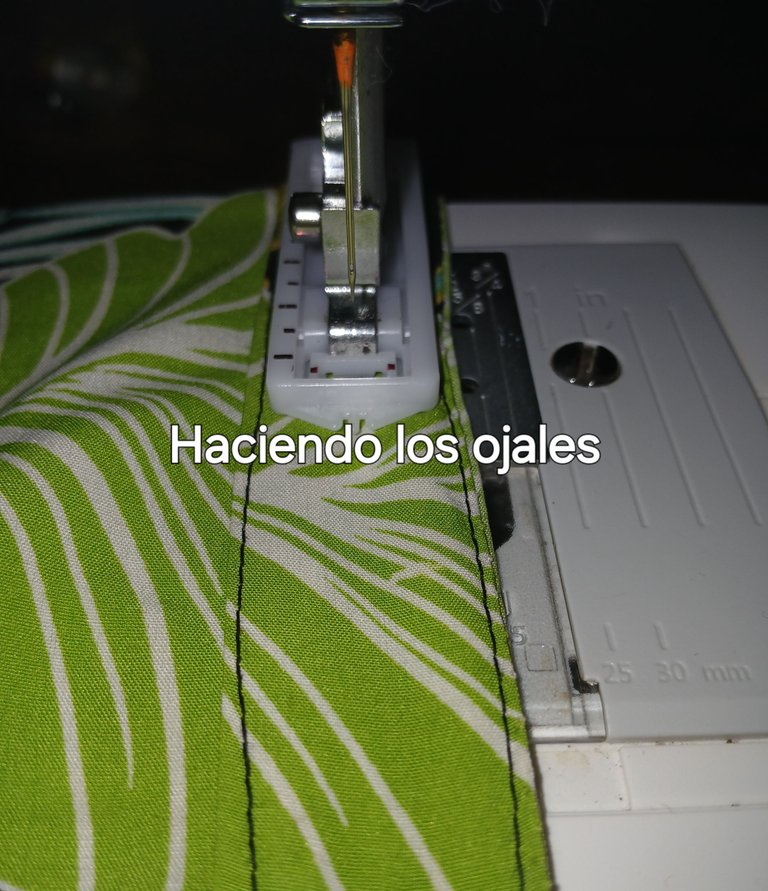
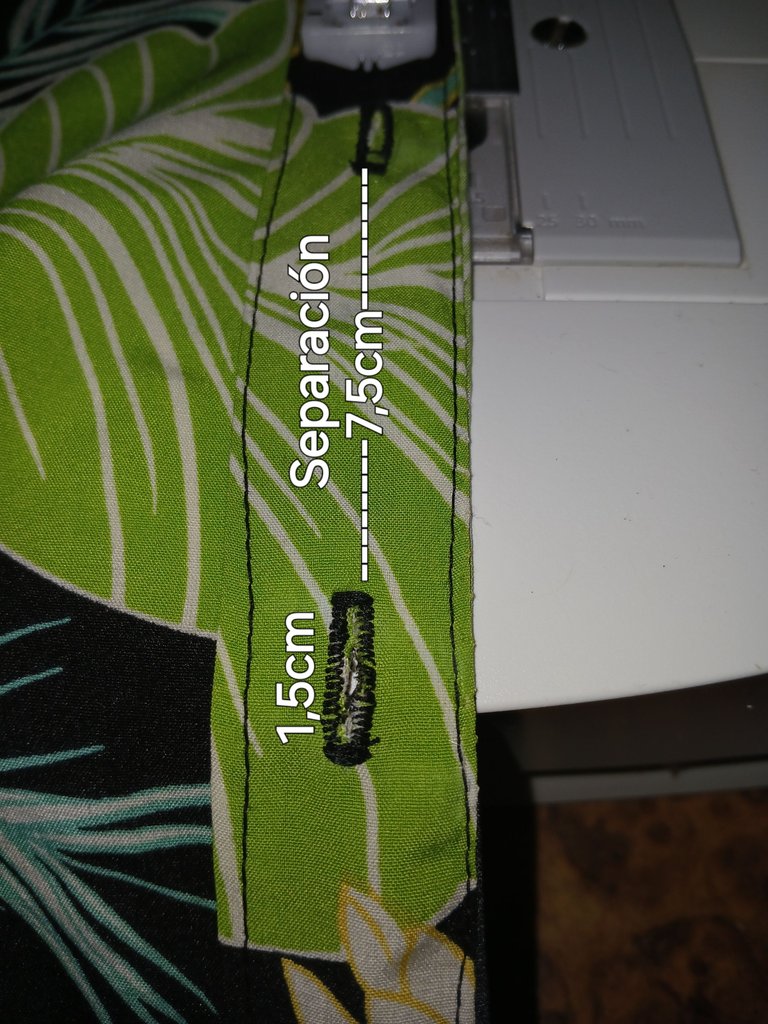
Después hice los ojales del lado derecho de la tapeta, para ello utilicé el pie de máquina para ojal, dejando una distancia de 7,5 cm entre cada ojal y luego pegué los botones de forma manual.
Then I made the buttonholes on the right side of the placket, using the buttonhole machine foot, leaving a distance of 7.5 cm between each buttonhole and then glued the buttons by hand.
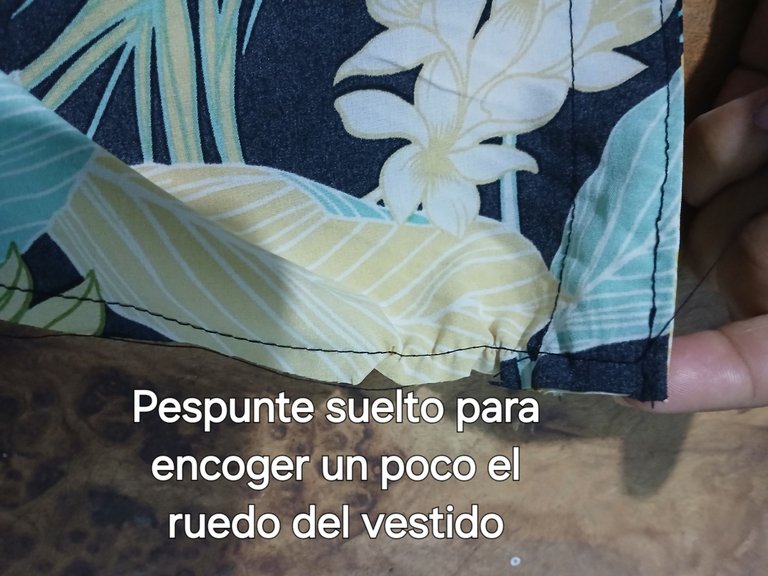
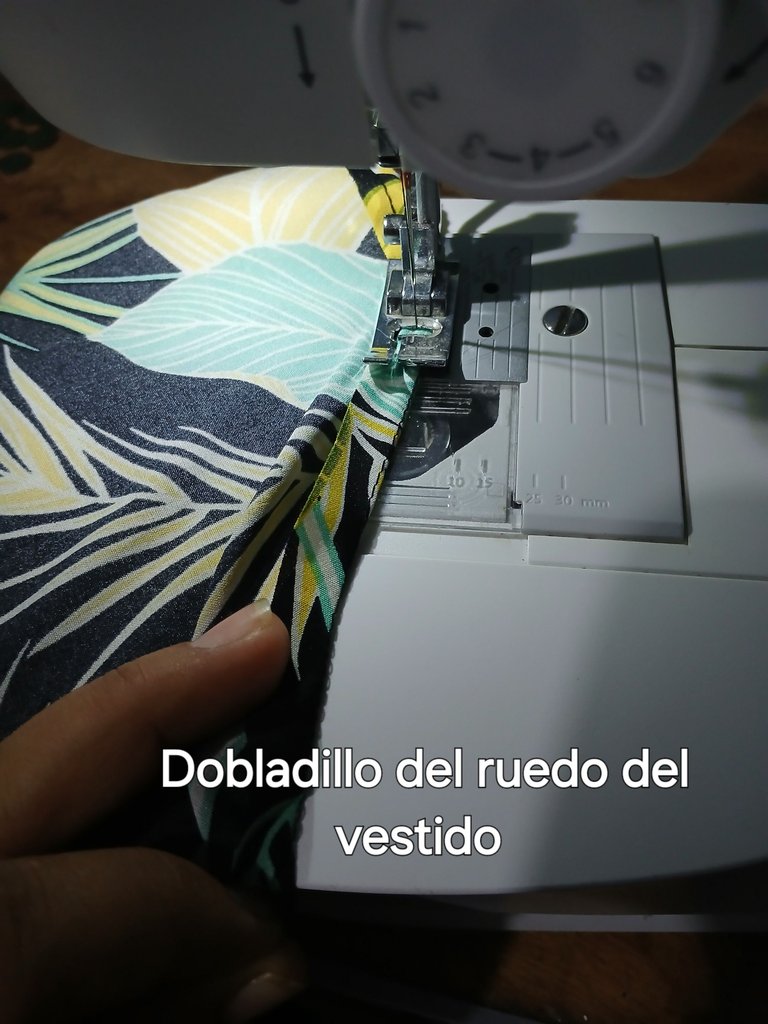
Para hacer el ruedo del vestido, como éste es forma de "U", realicé un pespunte suave para por todas las orillas y la encogí un poco halando el hilo; luego le hice dos dobladillos.
To make the hem of the dress, as it is a "U" shape, I made a soft stitch for all the edges and shrunk it a little by pulling the thread; then I made two hems.
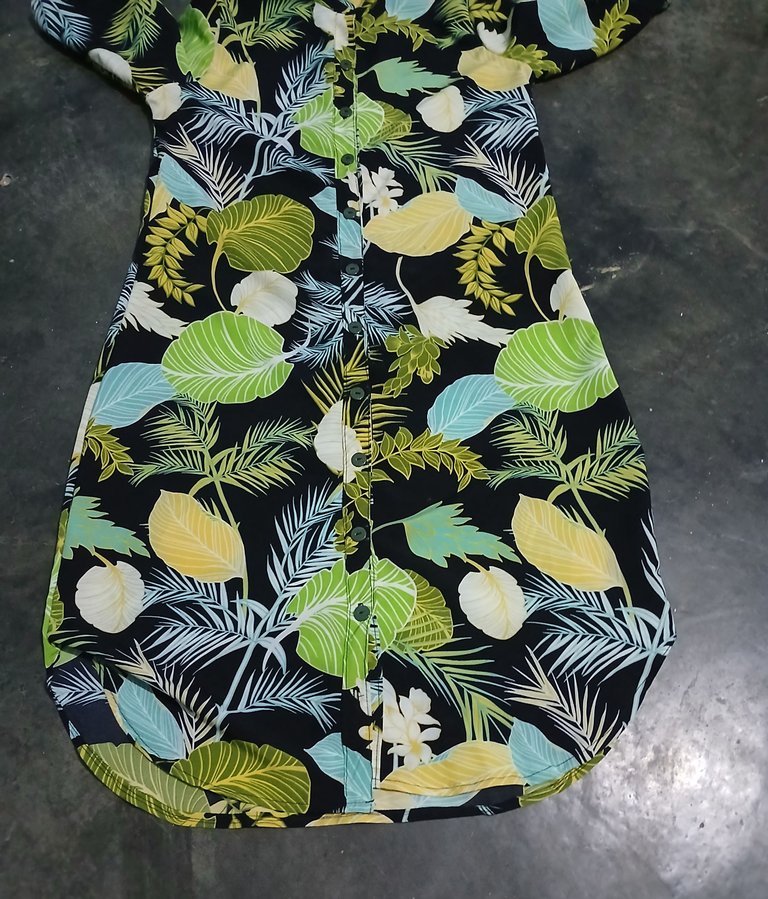


Éste ha sido el hermoso resultado, un vestido camisero qué podemos usar en cualquier ocasión y combinarlos con correas, con diademas y otros. Espero te haya gustado éste tutorial. Hasta luego y muchas bendiciones apreciados 🙏🏻🙂.
This has been the beautiful result, a shirt dress that we can wear in any occasion and combine them with straps, headbands and others. I hope you liked this tutorial. See you later and many blessings appreciated 🙏🏻🙂.
