
What's up community? I am very happy to share one more day with you, I hope you had a great weekend.... I haven't done anything in particular besides practicing some crochet stitches and in this post I'm going to tell you about the ones I've liked the most and I could even consider them my favorites.
¿Que tal comunidad? Estoy muy feliz de compartir un día más con ustedes, espero que hayan pasado un muy buen fin de semana... No he hecho nada en particular además de practicar algunos puntos de crochet y en éste post les voy a hablar de los que más me han gustado e incluso podría considerar que son mis favoritos.
Bubble Stitch
Punto Burbuja

Assuming it is called "Bubble Stitch", I have already used it in one of my creations which I will leave you here, since I saw the YouTube short I said "I love it" and well, the truth is that it is very easy to do...
Suponiendo que se llama "Punto Burbuja", éste ya lo he empleado en una de mis creaciones la cual les dejaré por aquí, desde que ví el short de YouTube dije "me encanta" y bueno, la verdad es que es muy fácil de hacer...

For this stitch is as simple as just pass the yarn through the available stitch as many times as you want until you have the "bubble" of the desired size, in the sample I got a little weird, but no matter, it was for sample 😅.
Para éste punto es tan simple como solamente pasar el hilo por el punto disponible tantas veces como quieras hasta que tengas la "burbuja" del tamaño deseado, en la muestra me quedó un poco raro, pero no importa, era para muestra 😅
Stitch in Relief
Punto en Relieve
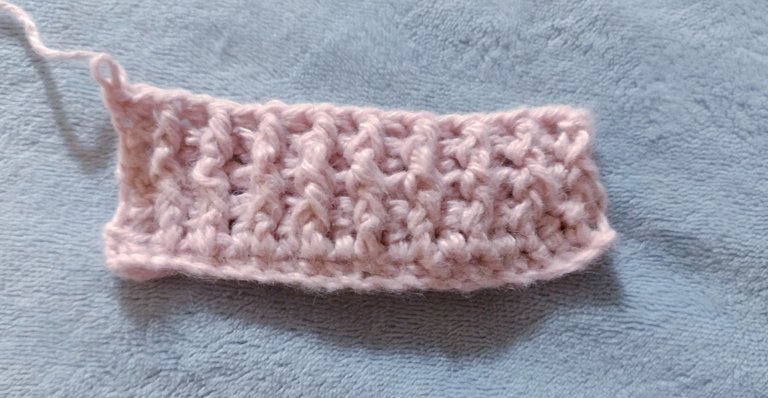
Since I learned this stitch, it became one of my favorites and the truth is that it is very easy...
Desde que aprendí éste punto se volvió en uno de mis favoritos y la verdad es que es facilísimo...
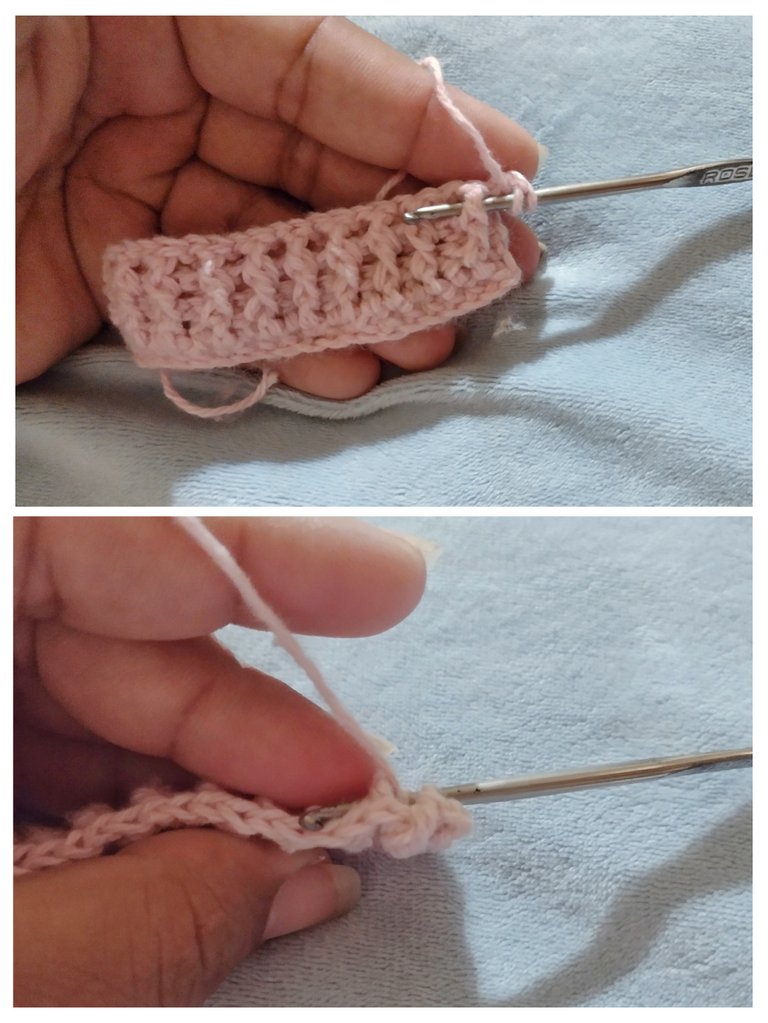
We simply have to make high stitches passing them in front and behind the fabric (as you can see in the pictures). Besides, this stitch is very versatile in my opinion and depending on how you make the stitches, you will get your fabric as in this case:
Simplemente tenemos que hacer puntos altos pasandolos por delante y por detras del tejido (como puedes ver en las fotos). Además de que, éste punto es muy versátil en mi opinión y depende de cómo hagas los puntos, te quedará tu tejido como en éste caso:

Hail Stitch
Punto Granizo
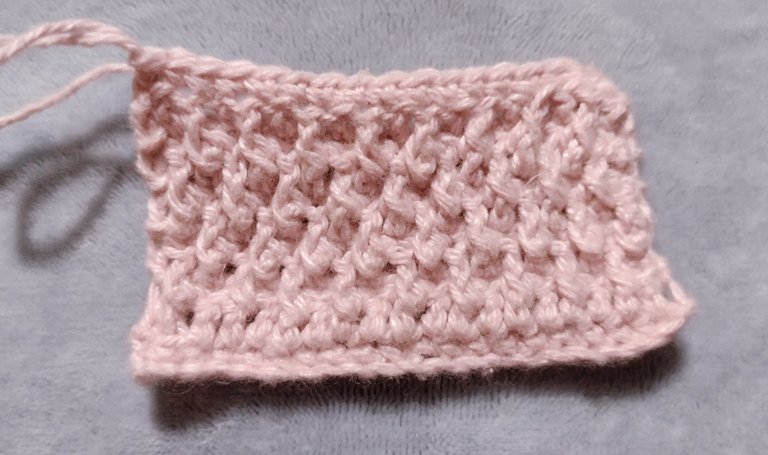
I can't describe how I love this stitch (I'm even thinking of making myself a garment using it 😅) and I hope that in the photo you can appreciate the stitch well and this one is also very easy to make.
No puedo describir cómo me gusta éste punto (incluso estoy pensando en hacerme una prenda utilizándolo 😅) y espero que en la foto se pueda apreciar bien el punto y éste también es muy fácil de hacer.

For this one we are going to be doing relief stitch only in front and we have to do the following: we knit the whole row, then we knit the next row and for the third row what we are going to do is to knit a front relief stitch and in the next row we are going to knit a normal high stitch and so on, after we finish doing that, we knit a row of low stitches and in the next row we will do what we did before but this time we have to knit the front relief stitches where the normal high stitch was and the normal high stitch, where the front relief stitch had been and so on... I hope I have explained correctly.
Para éste vamos a estar haciendo punto en relieve sólo por delante y tenemos que hacer lo siguiente: hacemos puntos altos en toda la fila, luego punto bajo en la fila siguiente y para la tercera fila lo que vamos a hacer es hacer un punto en relieve por delante y en el punto siguiente vamos a hacer un punto alto normal y así sucesivamente, luego que terminemos de hacer eso, hacemos una fila de puntos bajos y en la fila siguiente haremos lo que hicimos anteriormente pero ésta vez los puntos en relieve por delante los tenemos que hacer dónde quedó el punto alto normal y el punto alto normal, dónde había quedado el punto en relieve por delante y así sucesivamente... Espero haber explicado correctamente.
Star Stitch
Punto Estrella
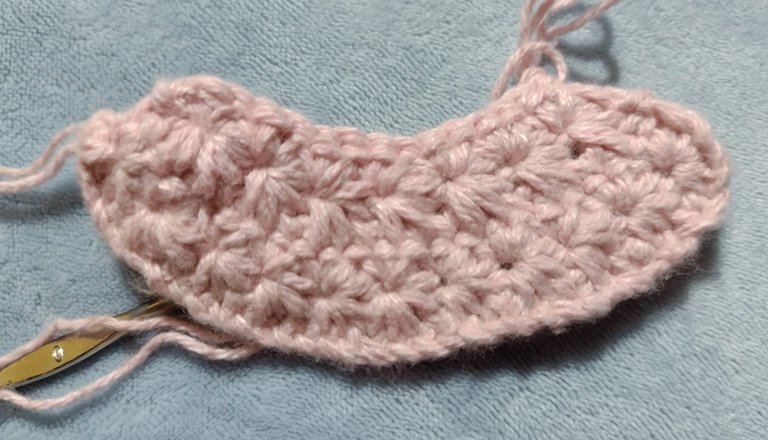
I have not yet used this stitch in anything, but I understand that it can be used to make baby blankets and the truth, it would be beautiful, this stitch is also very easy to do, but I think the best recommendation for this would be to be aware of the chains that we lift because otherwise it can be weird as in the sample photo 😅
Aún no he empleado en nada este punto, pero tengo entendido que se puede usar para hacer mantas para bebés y la verdad, quedaría hermoso, éste punto también es muy fácil de hacer, pero yo creo que la mejor recomendación para éste seria estar pendientes de las cadenas que levantemos porque sino puede quedar raro como en la foto de muestra 😅
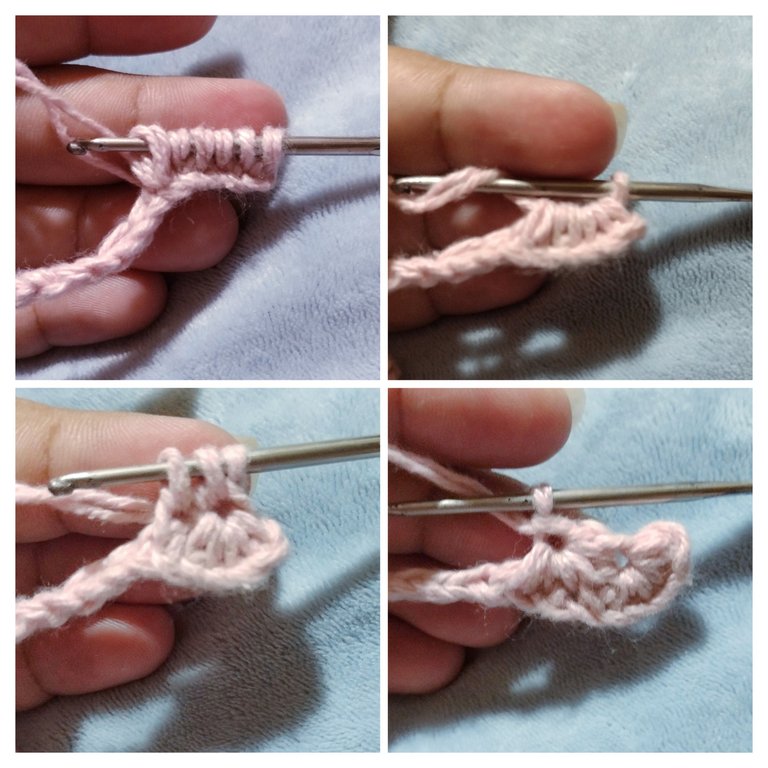
For this stitch we have to pick up yarn in 6 stitches at the same time and then join them, then in the hole left in the first join we pick up yarn and also introduce the needle in the last stitch picked up from the first join to pick up yarn after this and then pick up yarn from another 3 chains and so we have the 6 yarns we need to join, we will do this until we finish the row.
Para este punto tenemos que tomar hilo en 6 puntos a la vez y luego unirlos, luego en el agujero que queda en la primera unión que hicimos tomamos hilo y tambien introducimos la aguja en el último punto tomado de la primera unión para tomar hilo luego de ésto y luego tomamos hilo desde otras 3 cadenas y así tenemos los 6 hilos que necesitamos unir, ésto lo vamos a hacer hasta terminar la fila.
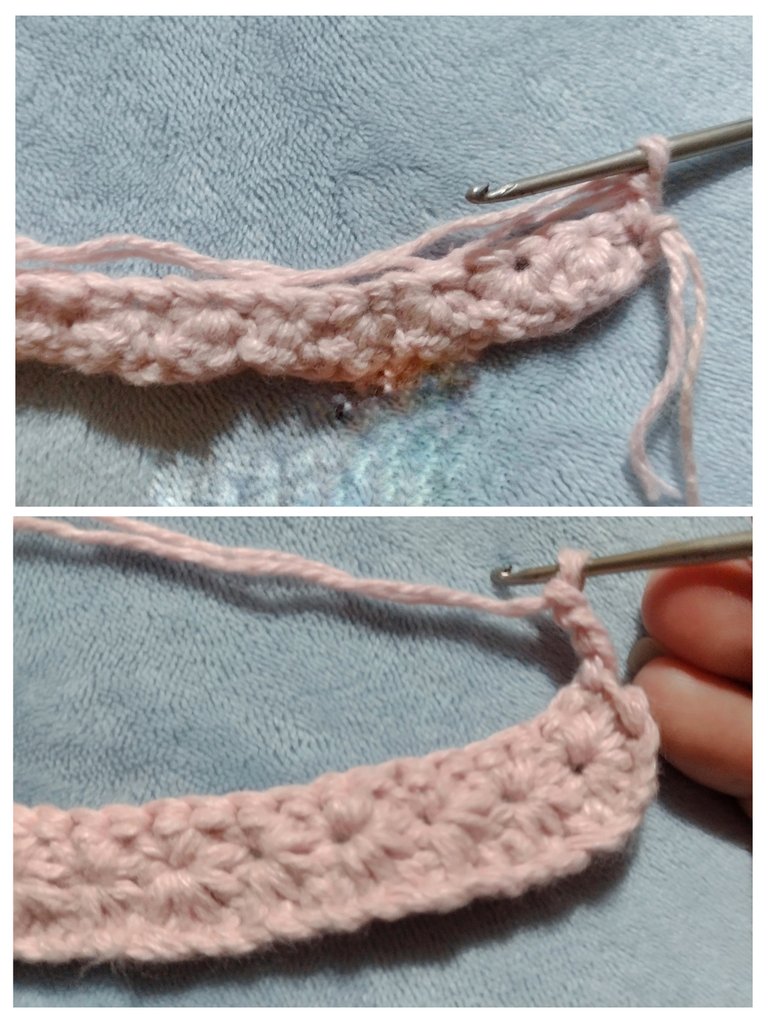
In the next row, we have to make a double crochet increase (that is, two double crochets in the same stitch) in each hole of the previous stitches and it should look like the one shown in the picture, from there we continue as in the first row and this is where I tell you to be careful when lifting the chains because it may not be straight.
En la siguiente fila, tenemos que hacer aumento de punto bajo (es decir, dos puntos bajo en el mismo punto) en cada orificio de las uniones anteriores y nos tiene que quedar cómo se ve en la foto, de ahí seguimos haciendo como en la primera fila y es aquí dónde les digo que deben tener cuidado cuando levanten las cadenas porque puede que no les quede recto.
Zig Zag Stitch
Punto Zig Zag
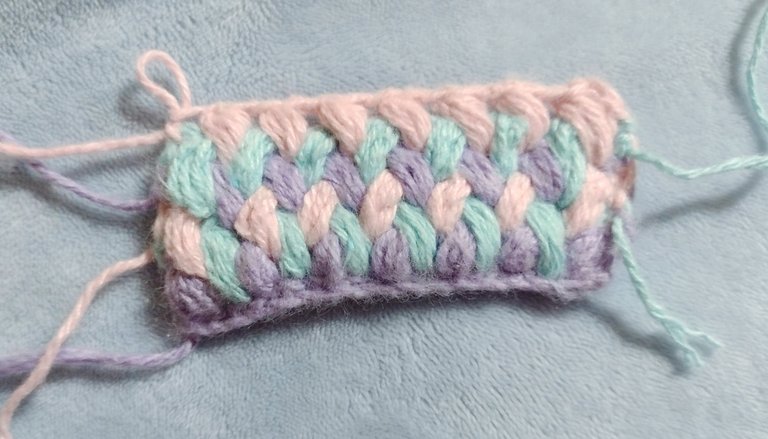
Since I learned this one, it made me want to implement it in an upcoming project I have in mind, this stitch is quite similar to the Bubble Stitch, but it has a slightly different procedure, but it is also very easy to do...
Desde que aprendí éste me dió ganas de implementarlo en un próximo proyecto que tengo en mente, éste punto es bastante similar al Punto Burbuja, pero lleva un procedimiento un poco distinto pero, también es muy fácil de hacer...

To do this, we simply pass the yarn the same as in the bubble stitch, but in the next row, instead of passing the yarn through the free stitch of the previous row, we pass the yarn in the stitch left in the first row and so on with the other color, we pass the yarn through the stitch left in the first row and continue until we obtain the desired size, as you can see in the photos.
Para hacerlo, simplemente pasamos el hilo igual como en el punto burbuja, pero en la siguiente fila, en vez de pasar el hilo por el punto libre de la fila anterior, pasamos el hilo en el punto que se dejó en la primera fila y así sucesivamente con el otro color, se pasa el hilo por el punto dejado en la primera fila y seguimos hasta obtener el tamaño deseado, como pueden ver en las fotos.
I really wanted to share with you the crochet stitches that I have liked the most so far, I hope I have explained well in the process of all of them, I only made small samples but you can use these stitches in different creations, the sky is the limit. I hope you liked today's post, thank you very much for reading and see you later in another post ❤️
Realmente quería compartirles los puntos de crochet que más me han gustado hasta ahora, espero haberme explicado bien en el proceso de todos, yo sólo hice pequeñas muestras pero pueden usar éstos puntos en distintas creaciones, el cielo es el límite. Espero que les haya gustado el post de hoy, muchas gracias por leerme y nos vemos luego en otro post ❤️
Translated by DeepL
Traducido por DeepL