
What's up community? I'm glad to be here again this week to share with you my latest crochet work, as you may have noticed it's already a rule for me to share with you something every week and I feel that thanks to that I'm also advancing quite well in the crochet world. Today I'm going to show you this cute bag I made as a gift for a cousin of my boyfriend who recently turned 15 years old and, of course, I'm going to show you the step by step of how I made it...
¿Que tal comunidad? Me alegra estar de nuevo aqui ésta semana para compartirles mi más reciente trabajo a crochet, como se habrán dado cuenta para mi ya es una regla compartirles algo cada semana y siento que gracias a eso también estoy avanzando bastante bien en el mundo del crochet. Hoy les voy a mostrar éste lindo bolso que hice de regalo para una prima de mi novio que recientemente cumplió 15 años y, por supuesto, les voy a mostrar el paso a paso de como lo hice...
Materials
- 1mm wick yarn in the colors you like ✨
- 2mm crochet needle
- Scissors
- Wool needle
Materiales
- Hilo pabilo de 1mm en los colores que gustes ✨
- Aguja de crochet de 2mm
- Tijeras
- Aguja lanera
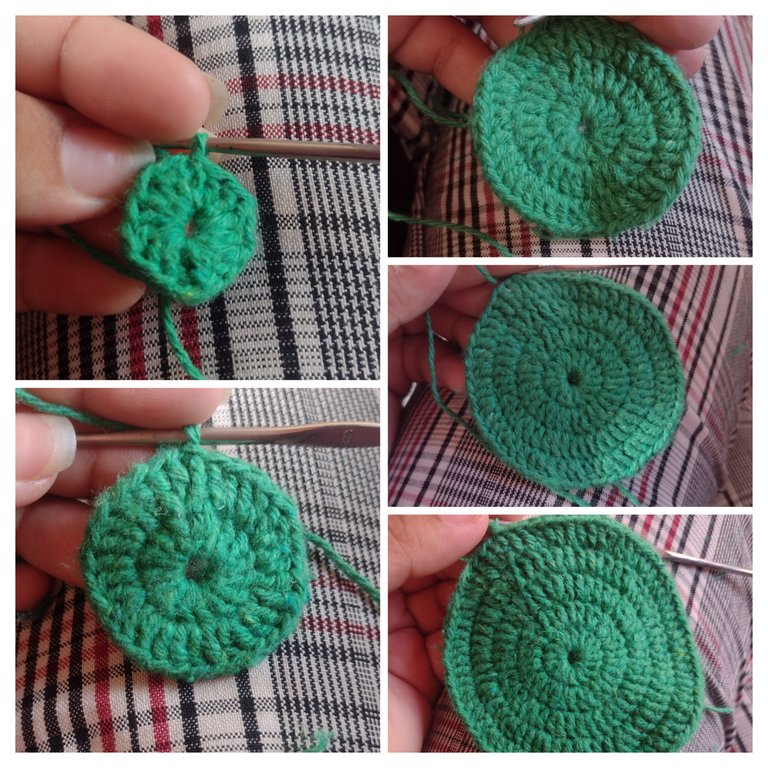
We start by making a magic ring in which we will make 12 high stitches, when we have it ready we will make an increase in each of the previous stitches, that is, we should have 24 stitches, in the third round (if we count the one we did at the beginning with the magic ring) we leave one high stitch only for each increase, in the fourth round we leave two high stitches only for each increase and so on until we have the desired size, I did 9 rounds in which I interspersed the increases of high stitches.
Empezamos haciendo un anillo mágico en el cual haremos 12 puntos altos, cuando lo tengamos listo haremos un aumento en cada uno de los puntos anteriores, es decir, nos deberían quedar 24 puntos, en la tercera vuelta (si cuentan la que hicimos al inicio con el anillo mágico) dejamos un punto alto solo por cada aumento, en la cuarta vuelta dejamos dos puntos altos solos por cada aumento y así sucesivamente hasta tener el tamaño deseado, yo hice 9 vueltas en las que intercalaba los aumentos de punto alto.
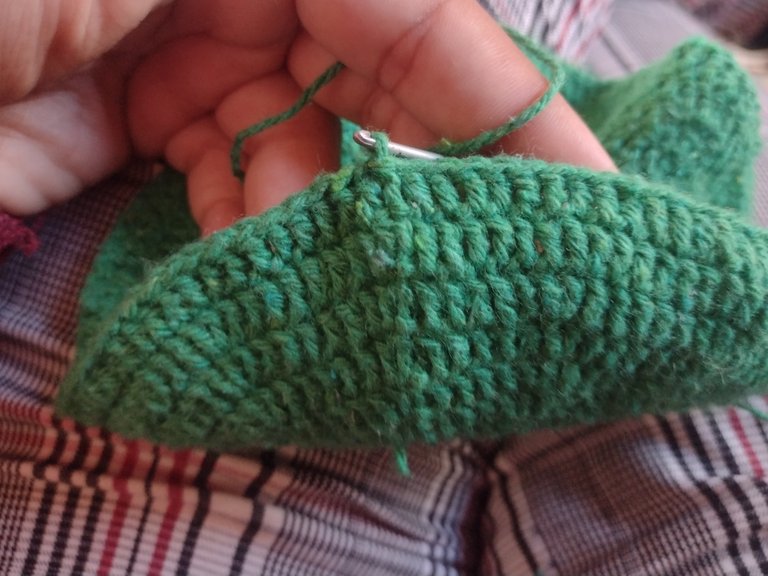
After we have the desired size, we make only high stitches without increases, this will help the base to curve and rise, in total I made 11 laps with the green color.
Luego de que tenemos el tamaño deseado, hacemos sólo puntos altos sin aumentos, ésto ayudara a que se curve la base y suba, en total hice 11 vueltas con el color verde..
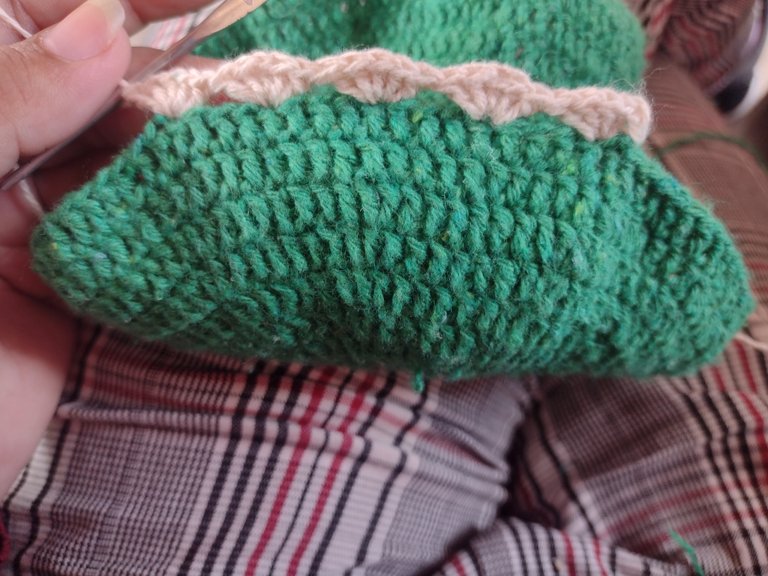
Then we take the other color (if it is our case) and we make this shape that you see in the pictures and this is achieved by making 5 high stitches in the same stitch, we omit 3 stitches and then at the 4th stitch we do the same as we did at the beginning and so on until the end of the round.
Luego tomamos el otro color (si es nuestro caso) y hacemos esta forma que ven en las fotos y ésta la logramos haciendo 5 puntos altos en un mismo punto, omitimos 3 puntos y luego al 4to punto hacemos lo mismo que hicimos al inicio y así sucesivamente hasta terminar la vuelta.
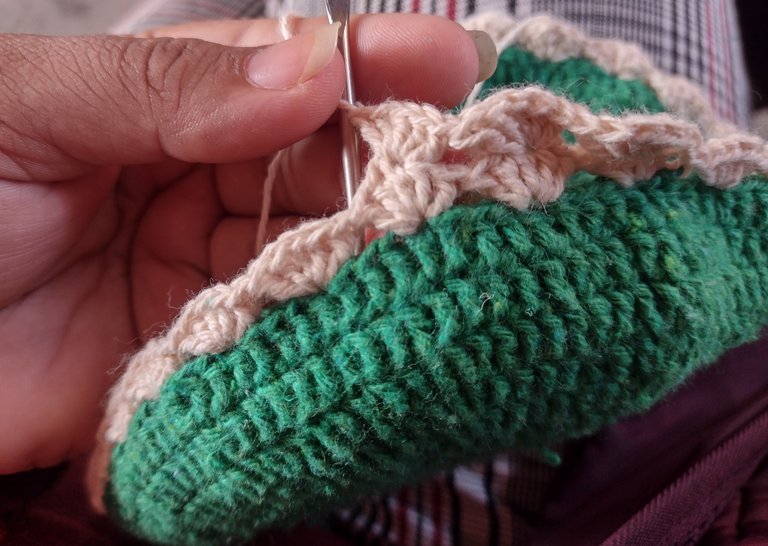
Then, to continue making the other rows, we will do the same as in the previous one, but, we will make the 5 high stitches in the middle stitch of the previous high stitches, it has to be as shown in the picture, we make rows until we get the desired height. Remember that each row we make we close it with a slip stitch over the first stitch we made.
Luego, para seguir haciendo las demas vueltas, haremos lo mismo que en la anterior, pero, vamos a hacer los 5 puntos altos en el punto del medio de los puntos altos anteriores, nos tiene que quedar como se ve en la foto, hacemos vueltas hasta obtener la altura deseada. Recuerden que cada vuelta que hagamos la cerramos con un punto deslizado sobre el primer punto que hicimos.
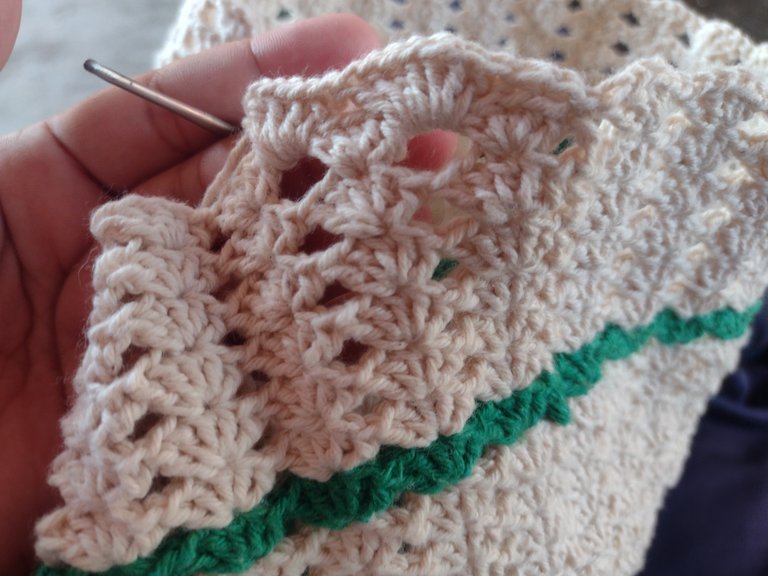
Once we have the desired height, we knit 7 high stitches, but this time we are going to knit them by passing the yarn through the holes left in the previous row.
Una vez tengamos la altura deseada, hacemos 7 puntos altos pero ésta vez los vamos a hacer pasando el hilo por los agujeros que quedaban en la vuelta anterior.
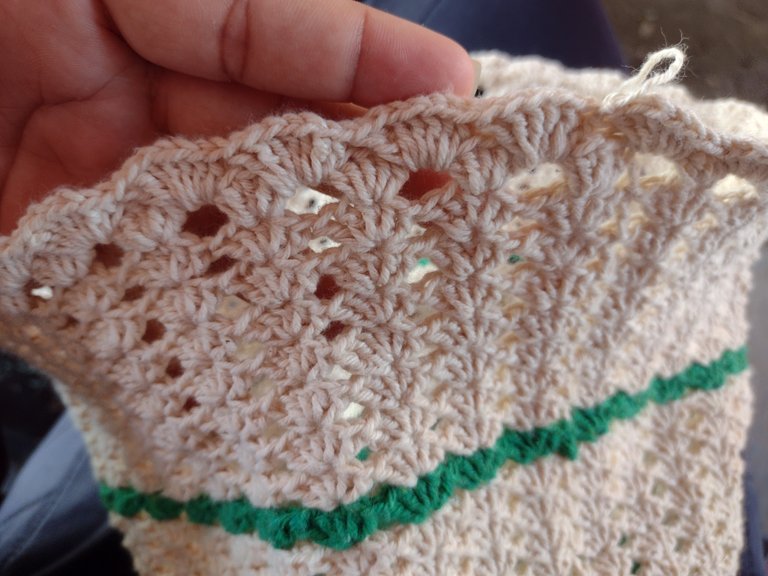
This is how it should be at the end of the whole lap...
Asi debería quedarnos al finalizar toda la vuelta...
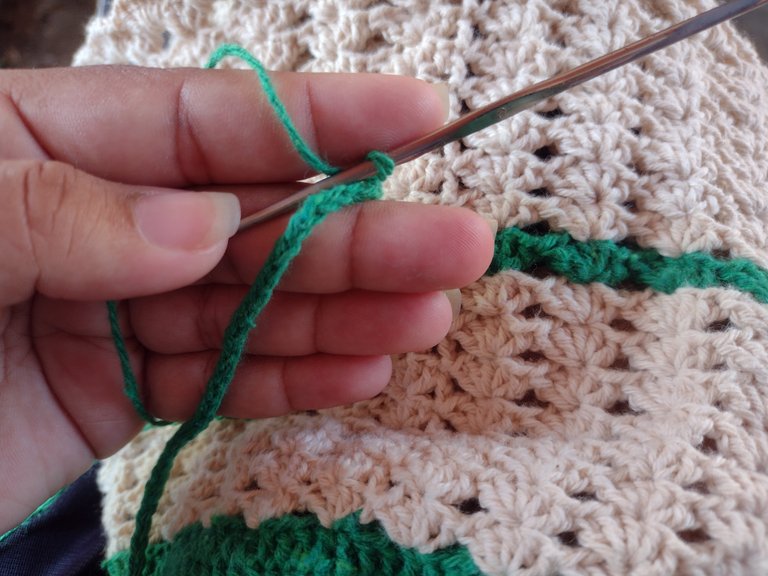
Then we proceed to make the string with which we are going to close our bag and for that we take the thread of the first color we use and make normal chains until we get the length we want, in my case my string was 65cm long, I always guide myself by measuring the width of the bag when open and try to make the string a little longer with the bag open...
Luego procedemos a hacer la cuerda con la que vamos a cerrar nuestro bolso y para eso tomamos el hilo del primer color que usamos y hacemos cadenas normales hasta obtener el largo que deseamos, en mi caso mi cuerda fue de 65cm de largo, yo siempre me guío midiendo el ancho deo bolso estando abierto y trato de hacer la cuerda un poco más larga con el bolso abierto...
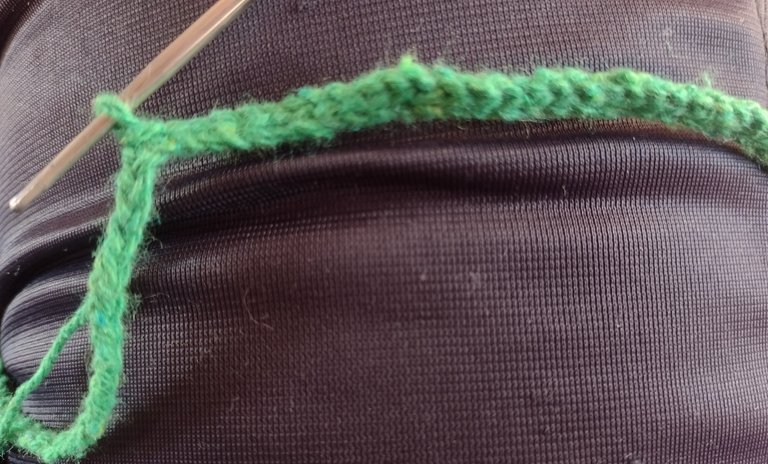
Then, what we will do is make slipped stitches in each of the stitches of the chain we made previously, I made two rounds (apart from the first chain) of slipped stitches.
Luego, lo que haremos es hacer puntos deslizados en cada uno de los puntos de la cadena que hicimos anteriormente, yo hice dos vueltas (aparte de la primera cadena) de puntos deslizados.
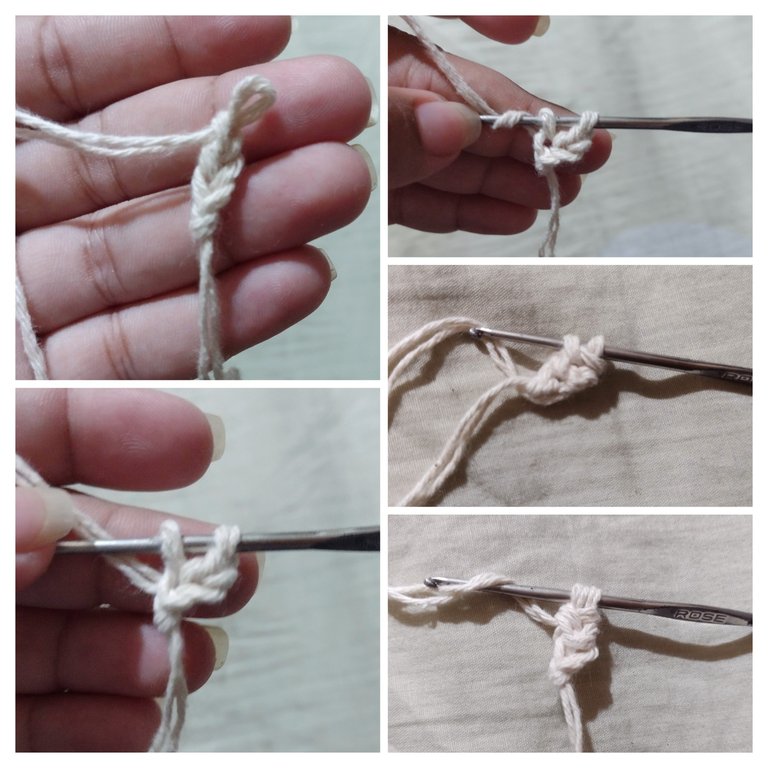
Now we proceed to make the rope with which we will hang our bag and for that what I did was to double my thread because it was very thin (but if you have a thicker thread is not necessary), it is very important that we leave leftover thread, it does not have to be very long, just enough. First we make three chains and insert the needle in the first chain we made, we take thread, we take thread again and pass it through the two threads we already had, then we turn and pass the thread through the other two chains we had before (as shown in the pictures) and so on until we have the desired length...
Ahora procedemos a hacer la cuerda con la que nos colgaremos nuestro bolso y para eso lo que yo hice fue poner doble mi hilo porque era muy delgado (pero si tienes un hilo mas grueso no es necesario), es muy importante que dejemos hilo sobrante, no tiene que ser muy largo, solo lo suficiente. Primero hacemos tres cadenas e insertamos la aguja en la primera cadena que hicimos, tomamos hilo, tomamos de nuevo hilo y lo pasamos por los dos hilos que ya teníamos, luego volteamos y pasamos el hilo por las otras dos cadenas que teniamos anteriormente (como se muestra en las fotos) y así sucesivamente hasta tener el largo deseado...
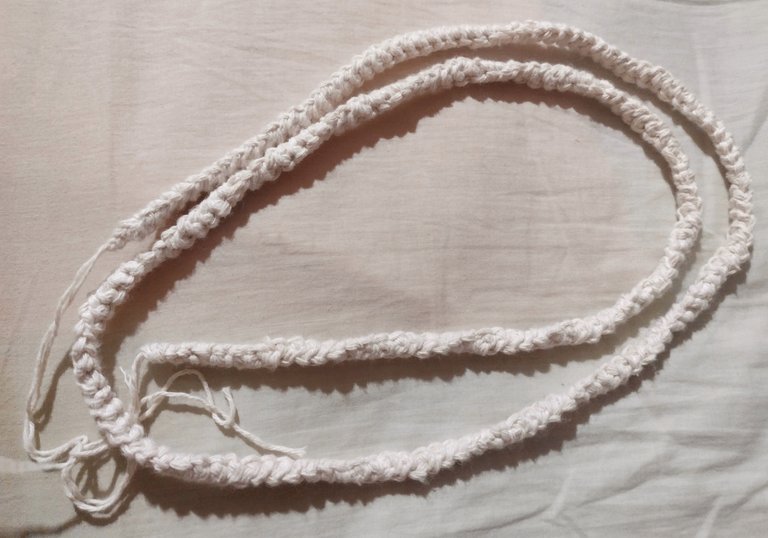
We should have something like this, I left it with a length of 126cm approximately.
Nos deberia quedar algo así, yo la dejé con un largo de 126cm aproximadamente.
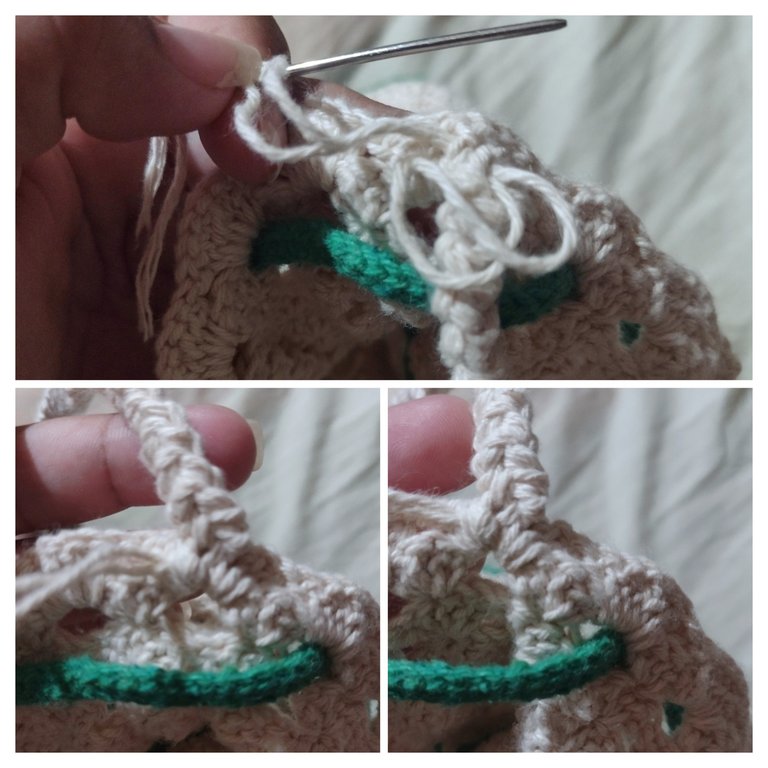
With the leftover thread that I told you before, we are going to sew the string to the bag with the help of our wool needle, this step does not have much science, we have to sew making sure that the string is not going to come out easily.
Con el hilo sobrante que les dije anteriormente que dejaran, vamos a coser la cuerda al bolso con la ayuda de nuestra aguja lanera, éste paso no tiene mucha ciencia, tenemos que coser asegurándonos que no se va a salir fácilmente la cuerda.
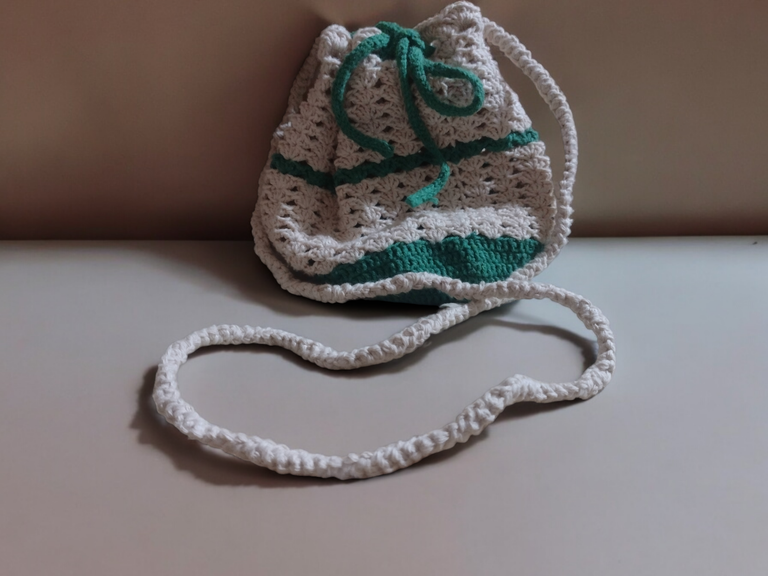
And this would be the final result of our bag, the birthday girl liked it very much and that fills me with satisfaction, I hope you also liked the final result and I hope I have explained very well the step by step, any questions you have do not hesitate to contact me here we are all here to learn. By the way, for this bag I used approximately 120grs of yarn. I'll say goodbye for now, thank you very much for reading and see you later in another post ♥️
Y éste seria el resultado final de nuestro bolso, a la cumpleañera le gustó mucho y eso me llena de satisfacción, espero que a ustedes también les haya gustado el resultado final y espero haber explicado muy bien el paso a paso, cualquier duda que tengan no duden en contactarme aqui estamos todas para aprender. Por cierto, para éste bolso usé 120grs de hilo aproximadamente. Yo por ahora me despido, muchas gracias por leerme y nos vemos luego en otro post ♥️
Cover made in Canva
Final result photo edited in Photoroom
Translated by DeepL
Portada hecha en Canva
Foto de resultado final editada en Photoroom
Traducido por DeepL