Español
Saludos estimados miembros de la comunidad de NeedleWorkMonday, espero que los preparativos para celebrar el día de la madre vayan por buen camino, como sabemos en Venezuela celebramos el día de las madres el segundo domingo del mes de mayo, que para este año cayo el día 14, lo cual me parece muy bueno porque muchos cobran quincenal y pues van a ver recursos para celebrar un poquito, sabemos cómo está todo en el país, pero con mucho amor y ganas algo se puede realizar.
De esta manera, quiero enviarles mis felicitaciones a todas las madres del mundo que celebren o no el domingo dicha festividad, muy especialmente a las madres que hacen vida dentro de la plataforma.
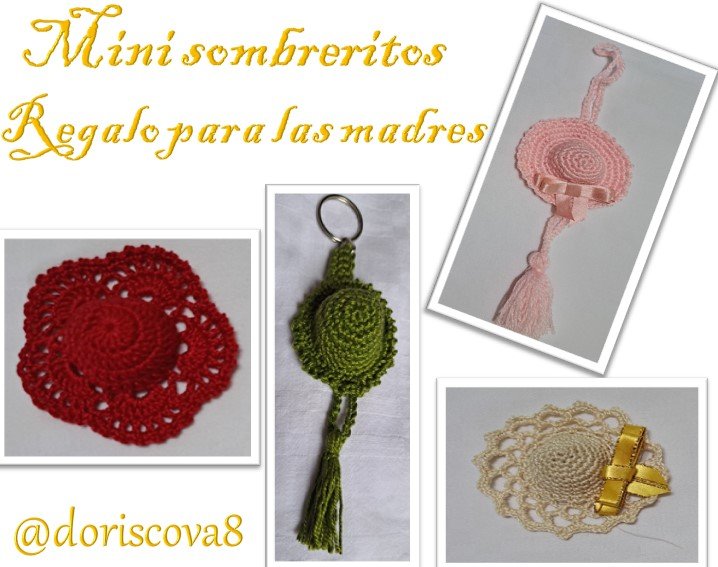
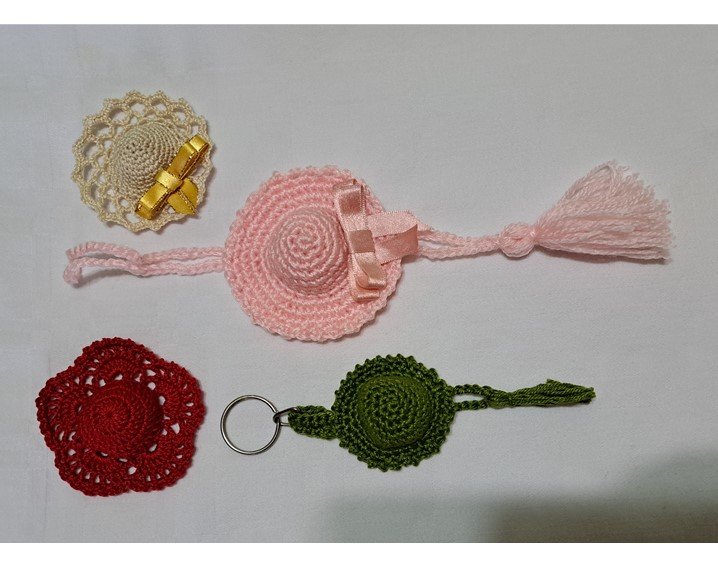
Para hoy les traigo unos detalles que se pueden realizar muy rápido y pueden ser un excelente presenta, como son estos mini sombreritos que lo podemos realizar para diferentes objetivos.
En mi caso los realice pensando en diferentes objetivos, por ejemplo, el rosado lo hice pensando para colocarlo en el carro, el verde lo realice como llavero, el beis se puede utilizar como un broche igual que el rojo, pero también lo hice pensando que el beis y el rojo pueden servir para las muñecas barbie de mis nietas.
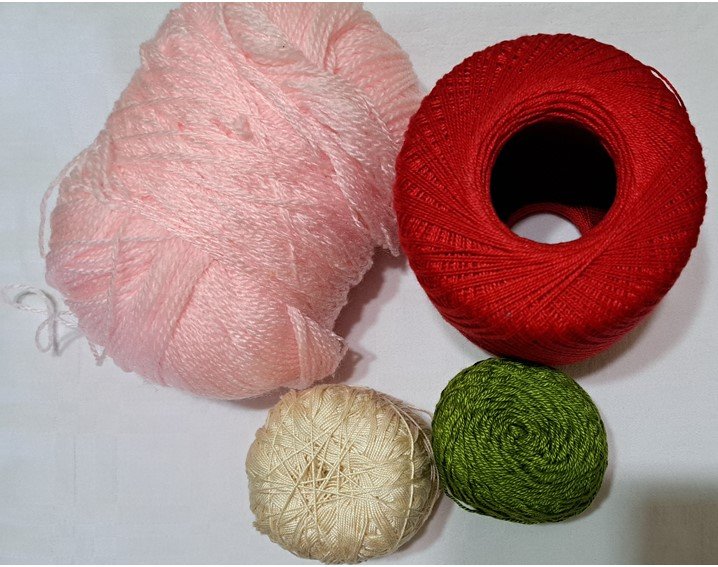
Los materiales utilizados fueron una lana rosada y los demás hilos son de algodón, eso demuestra que lo podemos realizar con cualquier poquito de hilo que tengamos de sobra de algún otro proyecto.
Procedimiento
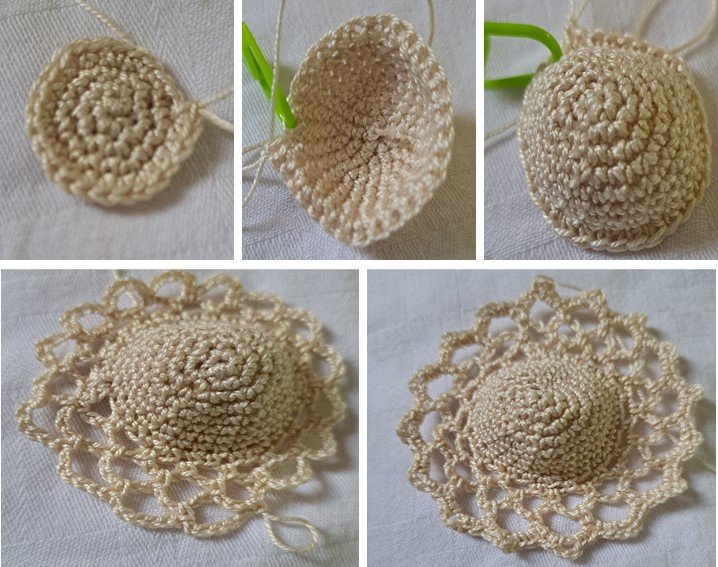
El procedimiento es muy sencillo, empezamos con 1 anillo mágico con 6 puntos bajos, la segunda vuelta realizamos 6 aumentos de puntos bajos, la tercera vuelta realizamos una secuencia de 1 punto bajo y 1 aumento, la cuarta vuelta realizamos una secuencia de 2 puntos bajos y 1 aumento, luego realizamos 4 vueltas sin realizar aumentos ni disminuciones.
La novena que seria la vuelta donde se inicie el ala del sombrerito, lo podemos realizar de diferentes formas como los realice, en los 4 modelos que les presento.
El beis solamente realicé en la vuelta 9 una secuencia de cadenetas, primero 3 cadenas, la vuelta siguiente 4 cadenas y la ultima 5 cadenas, luego le hice un remate de los bordes dejando siempre una cadena intercalada.
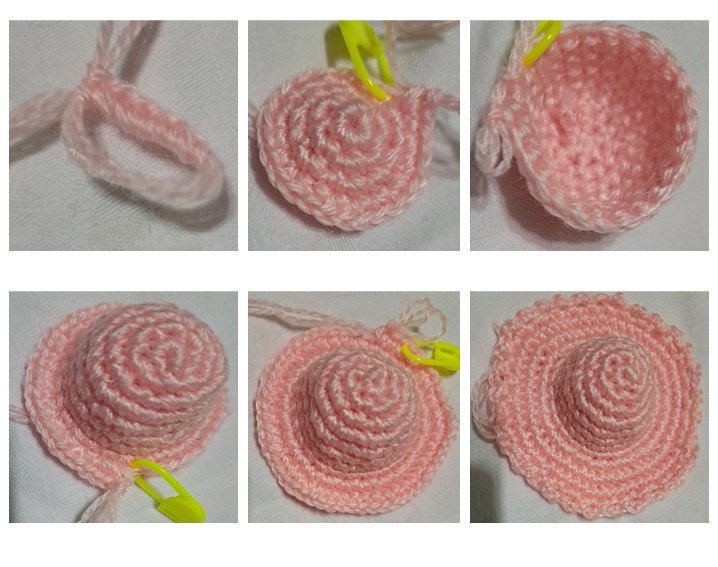
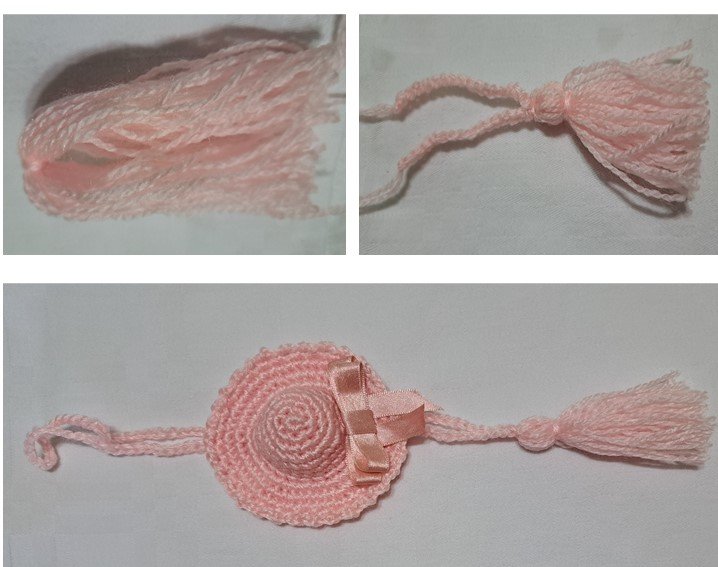
El caso del rosado que fue un tejido liso, fue realizando una secuencia de aumentos en las tres vueltas del ala del sombrerito.
Para el caso del sombrerito rojo, empecé la vuelta 9 con una secuencia de 5 cadenas y uniendo con puntos bajos, luego otra vuelta con cadenas para luego realizar la ondita.
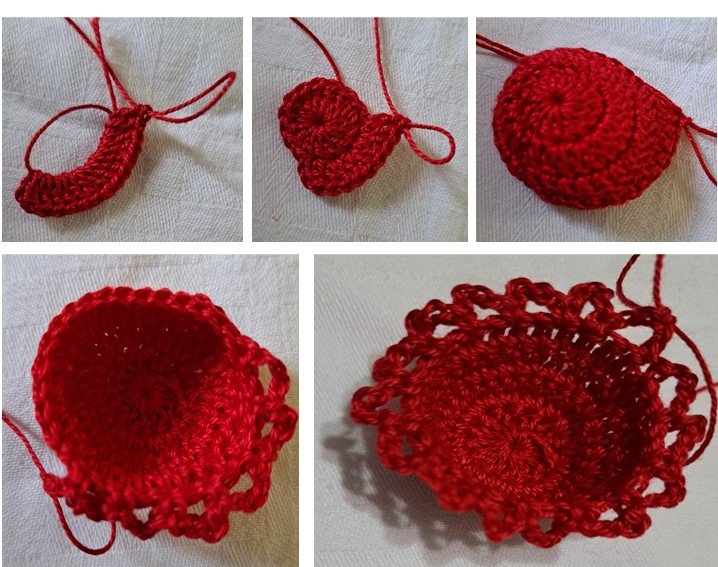
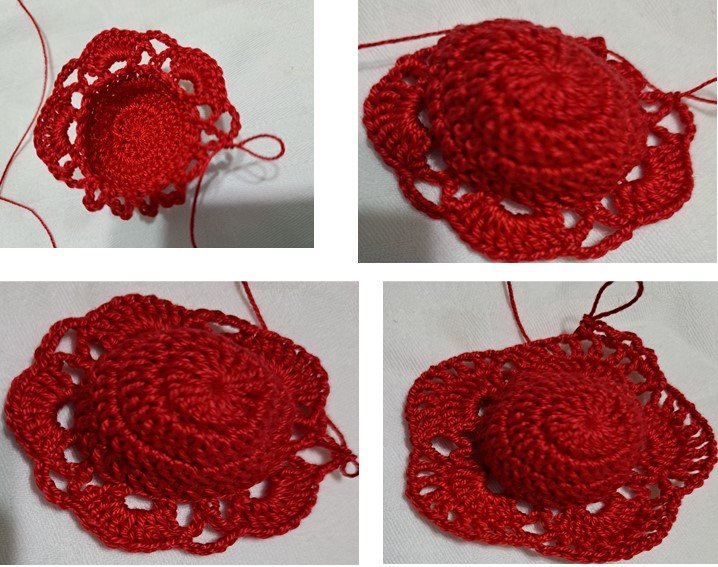
Por eso les estoy mostrando los detalles en las fotos para que se den cuenta que todos se inician igual, luego la variación esta en el detalle que le queramos hacer en el ala.
El caso del sombrerito verde que lo realicé pensando en un llavero le hice el ala bien cortica, este solamente tiene dos vueltas en el ala una, que seria la 9 vuelta es con una secuencia de 3 puntos bajos y 1 aumento y luego también una secuencia de 1 punto bajo y 2 cadenas al aire para unir en el siguiente punto con un punto bajo y listo culminamos.
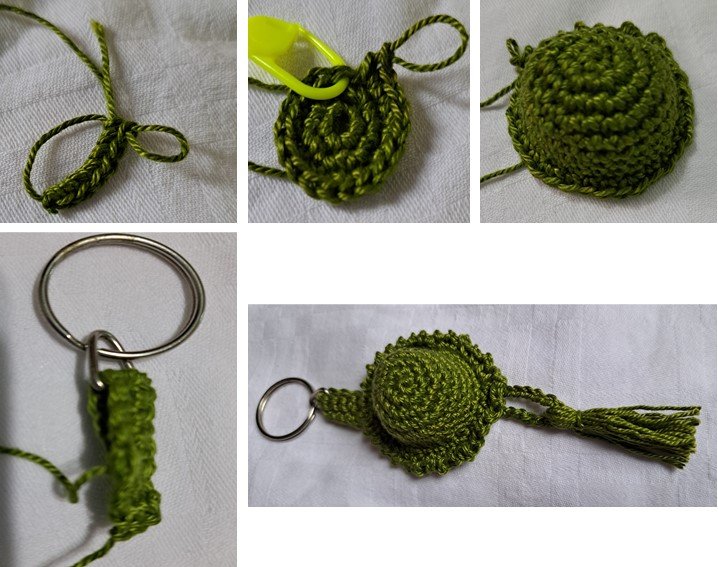
Como pueden darse cuenta las alas de los sombreritos son de diferentes tamaños, la del rosado amplia porque es para adorno del carro, el verde muy cortica y el beis y rojo casi iguales porque fueron hechos pensados en el objetivo que les mencione.
A los sombreritos rosados y verdes les realice una motica, y además al rosado coloque un tejido en cadenas para colocarlo en el retrovisor del carro, y al verde para alargar la argolla del llavero le tejí una especie cinta para unir al sombrero con la argolla
Gracias por leer.
English
Greetings dear members of the NeedleWorkMonday community, I hope that the preparations to celebrate Mother's Day are going well, as we know in Venezuela we celebrate Mother's Day on the second Sunday of May, which this year fell on the 14th, which I think is very good because many people get paid every two weeks and they will have resources to celebrate a little bit, we know how everything is in the country, but with a lot of love and desire something can be done.
In this way, I want to send my congratulations to all the mothers of the world that celebrate or not on Sunday this holiday, especially to mothers who make life within the platform.
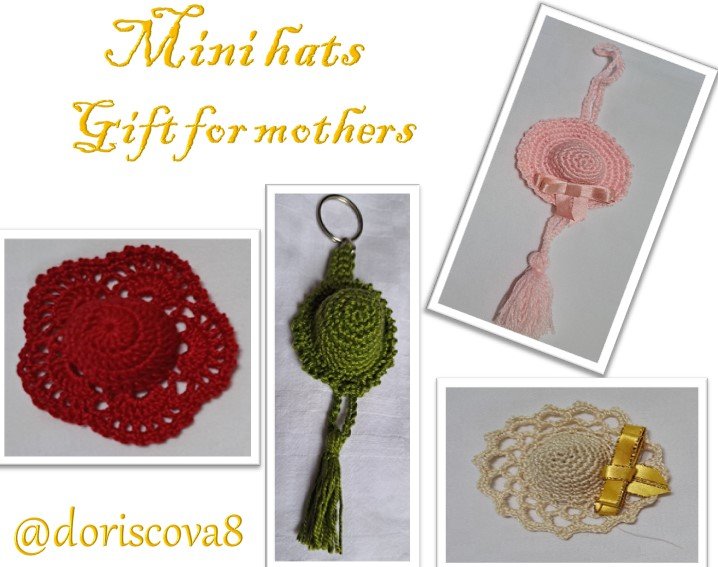
Today I bring you some details that can be made very quickly and can be an excellent present, such as these mini hats that can be made for different purposes.
In my case I made them thinking of different objectives, for example, the pink one I made thinking to place it in the car, the green one I made as a keychain, the beige one can be used as a brooch just like the red one, but I also made it thinking that the beige and the red one can be used for my granddaughters' barbie dolls.
The materials used were a pink yarn and the other threads are cotton, this shows that we can make it with any little bit of yarn that we have left over from some other project.

Procedure
The procedure is very simple, we start with 1 magic ring with 6 single crochets, the second round we make 6 increases of single crochets, the third round we make a sequence of 1 single crochet and 1 increase, the fourth round we make a sequence of 2 single crochets and 1 increase, then we make 4 rounds without making increases or decreases.
The ninth row, which would be the row where the brim of the hat starts, can be done in different ways as I did in the 4 models that I present to you.
The beige one I only made in the 9th row a sequence of chain stitches, first 3 chains, the next row 4 chains and the last one 5 chains, then I finished off the edges always leaving a chain between them.

In the case of the pink one, which was a plain weave, I made a sequence of increases in the three rows of the brim of the hat.


In the case of the red hat, I started on row 9 with a sequence of 5 chains and joined with single crochet, then another row with chains and then made the wavy stitch.


That's why I'm showing you the details in the photos so you can see that they all start the same, then the variation is in the detail we want to make in the brim.
In the case of the green hat that I made thinking of a keychain, I made the brim very short, it only has two rows in the brim, one, which would be the 9th row is with a sequence of 3 single crochets and 1 increase and then also a sequence of 1 single crochet and 2 chains in the air to join in the next stitch with a single crochet and that's it, we are done.

As you can see the wings of the little hats are of different sizes, the pink one is wide because it is for car decoration, the green one is very short and the beige and red ones are almost the same because they were made for the purpose I mentioned.
To the pink and green hats I made a motif, and also to the pink one I put a weave in chains to place it in the rearview mirror of the car, and to the green one to lengthen the ring of the key ring I wove a kind of ribbon to join the hat with the ring.

Thanks for reading
Translated with www.DeepL.com/Translator (free version)
Fuente de imágenes: Archivo Personal.


MIS REDES SOCIALES


