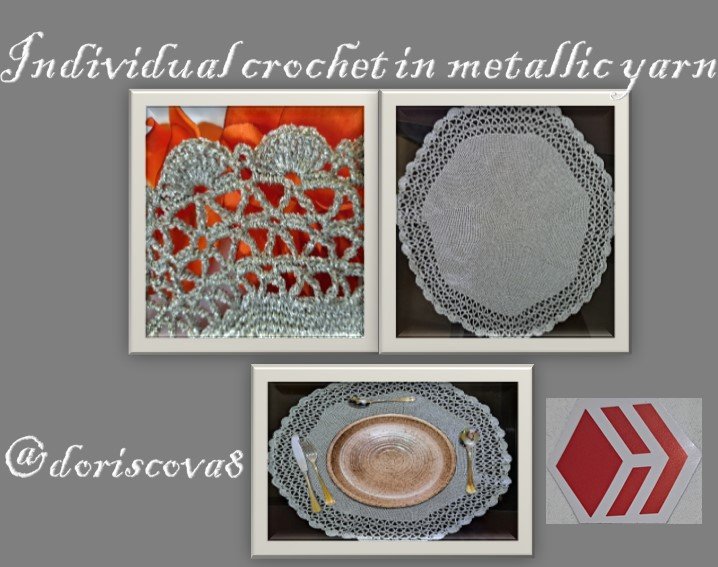
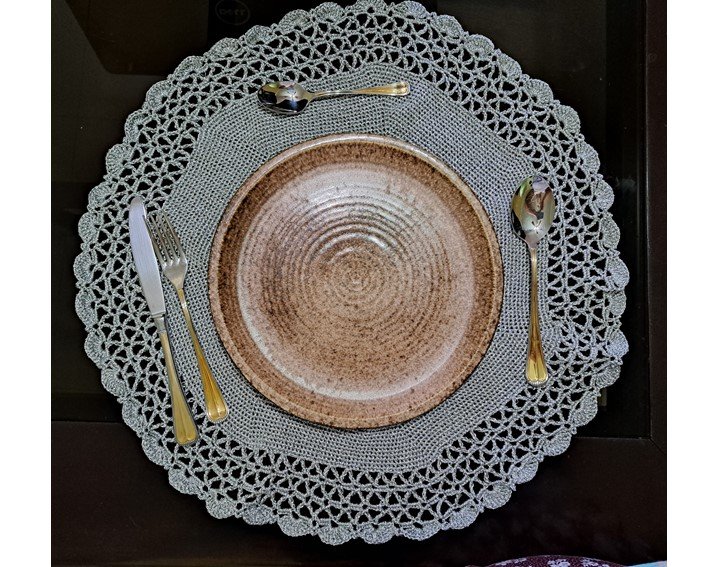
Greetings dear friends and friends of the crafts, I hope you are well and enjoying a great week, today I bring you a beautiful project, and which looks very elegant on a dining table, it is a beautiful placemat made with silver metallic thread.
It turns out that I started to rummage in a small bag that I had not used for a long time and I had it stored in the Vestier, it turns out that when I open it I find the silver thread that I had long saved, I know I had it, but the truth is that I did not remember the place where I had saved it, because it was quite a long time ago, I think I had saved more than 20 years, so much so that the thread is Japanese and now the truth is that little material of that type and of good quality is brought.
So I immediately started to think about what I could make, then it came to my mind that what I was going to make was the placemat, which I plan to make others with shades of those used for Christmas, such as red and green, and then I will think of another color to enhance it and then weave a set of 4 placemats, with the cup holders in the same tones; so once I made the design and I got down to work.
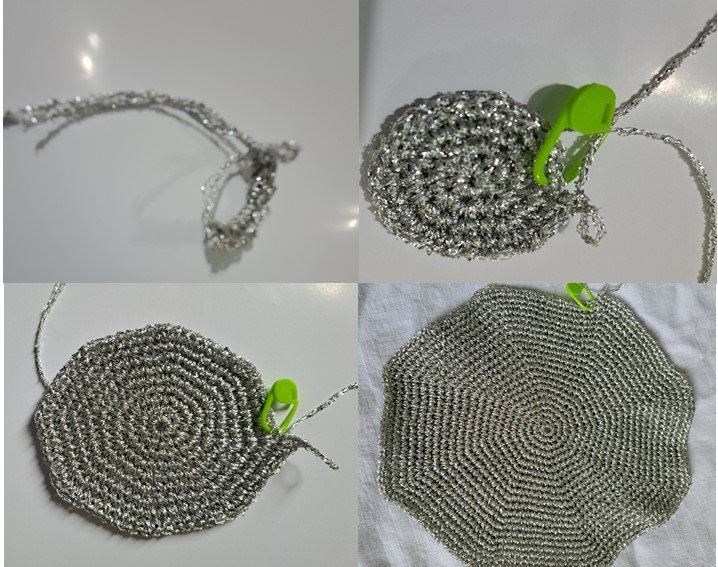
I tell you that first I started with a magic knot of 8 single crochet stitches, but after I got to the 20th row it seemed to me that it was getting too wide and it was not staying flat, but then I told myself that I was going to make 10 more rows to be sure if I would continue or undo everything and make the magic knot with 7 single crochets, so when I got to the 35th row I decided to undo everything to start again making a magic ring of 7 single crochet stitches.
The thing is that when you design a fabric you have to see if it adapts to what you want or if you have to change something, and that's what happened, but then as you can see it turned out to be a beautiful placemat.
I also tell you that this type of metallic thread is not very easy to weave because it is not a thread that comes well woven, on the contrary, the three strands it has seem to be half twisted, another thing that my vision is not so good and I had to weave it with the light of day, and at night it made me shadow, also because of the color; then I will indicate the step by step for those who are encouraged can do it because it looks very elegant on the table.
Materials
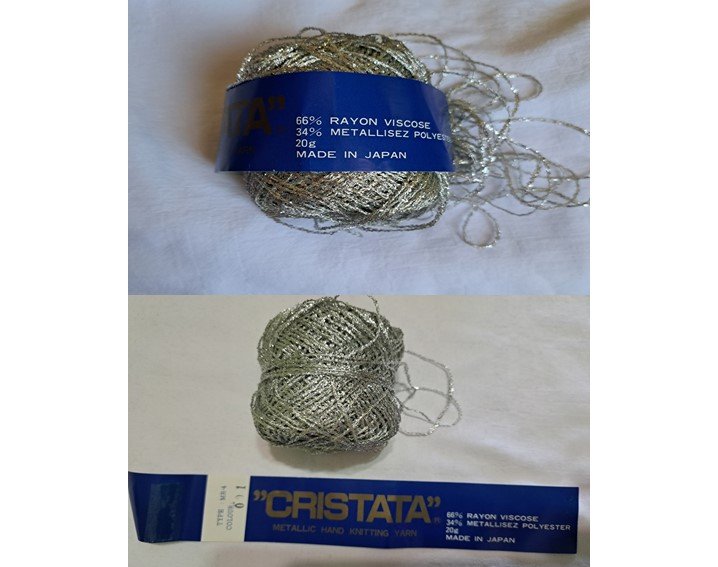
- 4 balls of metallized yarn of 20 grams each
- 1 crochet knitting needle of 1.5 mm
- 1 counter
- Knitting markers
Step by Step
The first thing to do is to make a magic ring with 7 single crochet stitches, in the second row we make 7 increases of single crochet stitches, that is two double crochet stitches in each single crochet stitch, then as we are going to knit in a spiral way it is necessary to have a marker at the beginning of the row.
In the third row: (1 single crochet - 1 increase) x 7
Row 4: (2 sts - 1 increase) x 7
Row 5: (3 sts - 1 increases) x 7
Row 6: (4 sts - 1 increase) x 7
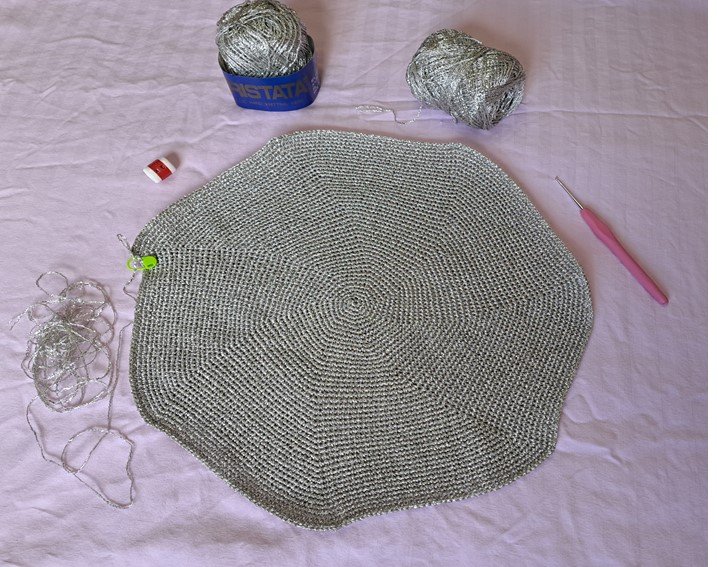
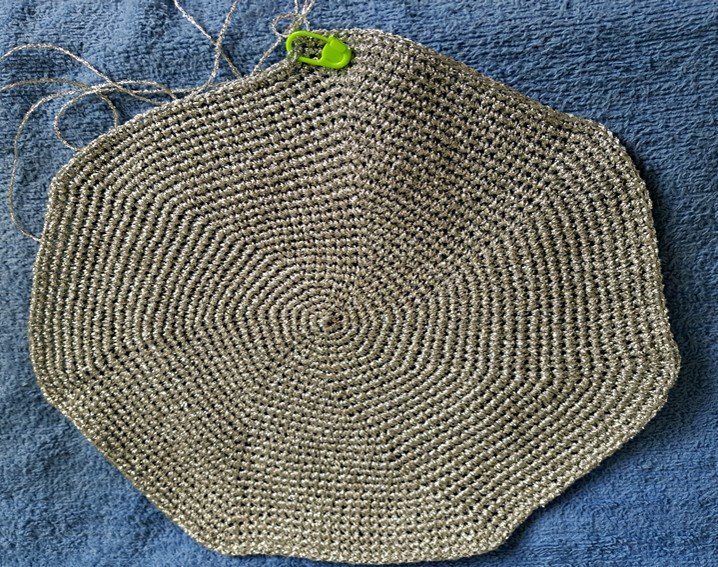
In this way, we will continue knitting until we reach row 48: (46 sts - 1 st - 1 increase) x 7
In row 49 we knit double rods that coincide in a V-shaped stitch, and with a separation of 3 single crochet stitches and in the upper part to form the V, they are separated by 3 chains.
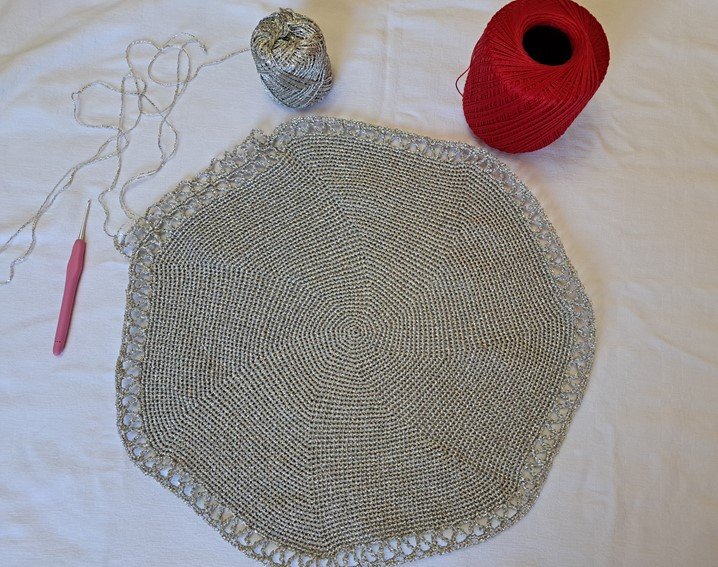
In row 50, in the 3 chains, knit 3 single crochet stitches and separate them by 2 chains.
In row 51, repeat row 49 but now separate by 4 chains, and the lower part of the V will go where we made the 2 chains.
Row 52, similar to row 50, but where 4 chains were made, we will make 4 single crochet stitches and separate them by 3 chains.
Row 53, is the same as in row 51.
Row 54, where the 4 chains go, now make 5 single crochet stitches and separate them by 3 chains.
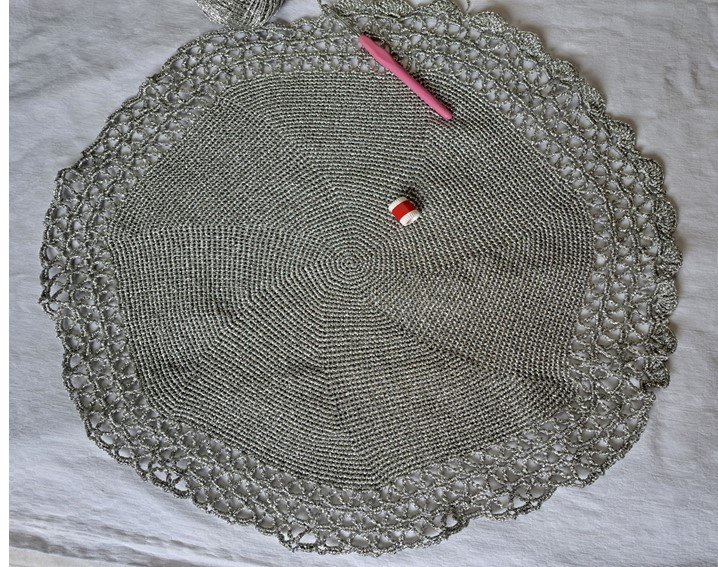
Row 55, last row, where the 3 chains were made, 9 double rods are going to be made, forming a fan, and in an intercalated way, since in the other 3 chains we join with a single crochet, 3 chains are made and we return there with a single crochet.
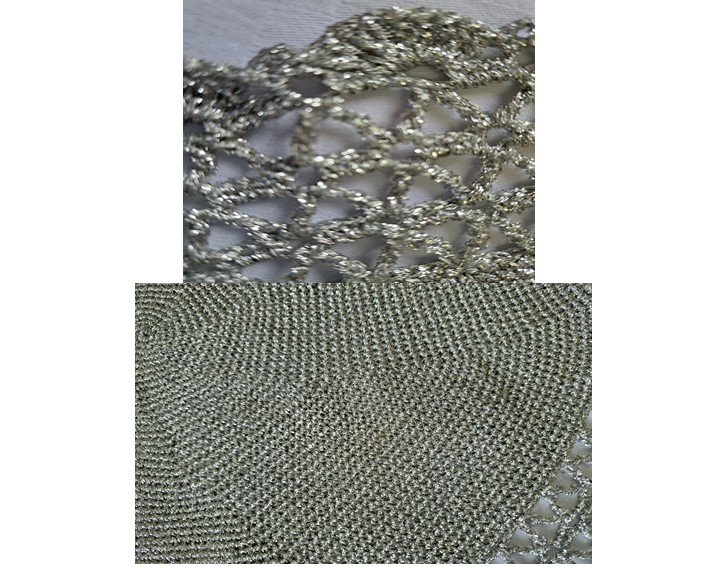
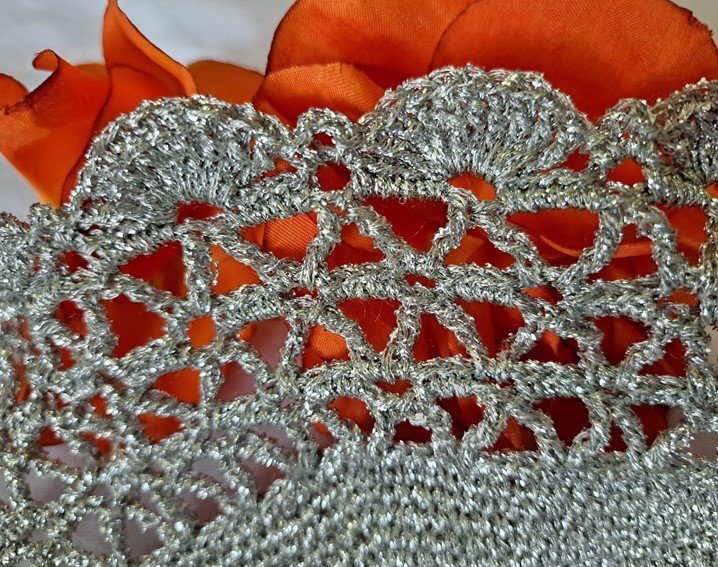
I hope you can appreciate in the photo taken close up the details of the border, there it is very well appreciated.
Español

Saludos estimados amigos y amigas de las artes manuales, espero se encuentren bien y disfrutando de una excelente semana, hoy les traigo un hermoso proyecto, y el cual luce muy elegante en una mesa de comedor, se trata de un precioso mantel individual realizado con hilo metalizado plateado.
Resulta que me puse a hurgar en un pequeño bolso que tenía tiempo que no lo utilizaba y lo tenía guardado en el Vestier, resulta que cuando lo abro a me encuentro el hilo plateado que tenía mucho tiempo guardado, sé que lo tenía, pero la verdad que no recordaba el sitio donde lo había guardado, porque de ello hace bastante tiempo, creo que tenía guardado más de 20 años, tan es así que el hilo es japonés y ahora la verdad que se trae poco material de ese tipo y de buena calidad.
Así que inmediatamente me puse a pensar que podía realizar, entonces se me vino a la mente que lo que iba a realizar era el mantel individual, que pienso realizar otros con tonos de los usados para navidad, como son rojo, y verde, y después pensaré en que otro color lo realzo para entonces tejer un juego de 4 individuales, con los porta vasos en los mismos tonos; por lo cual de una vez realice el diseño y me puse manos a la obra.
Les cuento que primero empecé con un nudo mágico de 8 puntos bajos, pero después que llegue a la vuelta 20 me fue pareciendo que estaba quedando como muy amplio y no estaba quedando plano, pero entonces me dije que iba a realizar 10 vueltas más para estar segura si seguía o desbarataba todo y hacia el nudo mágico con 7 puntos bajos, total que cuando llegue a la vuelta 35 decidí desbaratarlo todo para empezar de nuevo realizando un anillo mágico de 7 puntos bajos.
Lo que pasa que cuando uno diseña un tejido tiene que ir viendo si se adapta a lo que uno quiere o tiene que cambiar algo, y eso fue lo que paso, pero después como pueden apreciar quedo un precioso mantel individual.
También les cuento que ese tipo de hilo metalizado no es muy fácil de tejer porque no es un hilo que venga bien tejido, por el contrario, las tres hebras que tiene parece que estuvieran medio entorchadas, otra cosa que ya mi visión no es tan buena y tenía que tejerlo con la luz del día, ya por la noche se me hacía sombra, también por el color; les indicaré entonces el paso a paso para el que se anime puede realizarlo porque se ve muy elegante en la mesa.
Materiales
- 4 ovillos de hilo metalizado de 20 gramos cada uno
- 1 aguja de tejer crochet de 1,5 mm
- 1 contador
- Marcadores de tejido

Paso a Paso
Lo primero que debemos realizar es un anillo mágico con 7 puntos bajos, en la segunda vuelta realizamos 7 aumentos de puntos bajos, es decir dos puntos bajos en cada punto bajo, entonces como vamos a tejer en forma de espiral es necesario tener un marcador al inicio de la vuelta.
En la tercera vuelta: (1 punto bajo – 1 aumento) x 7
Cuarta vuelta: (2 pb – 1 aumt) x 7
Quinta vuelta: (3 pb – 1 aumt) x 7
Sexta vuelta: (4 pb – 1 aumt) x 7


Así, vamos a seguir tejiendo hasta llegar a la vuelta 48: (46 pb – 1 aumt) x 7
En la vuelta 49 se tejen varetas dobles que coincidan en un punto como en forma de V, y con una separación de 3 puntos bajos y en la parte superior para formar la V se separan por 3 cadenas.

En la vuelta 50 en las 3 cadenas se realizan 3 puntos bajos y se separan por 2 cadenas.
En la vuelta 51, se repite la vuelta 49 pero ahora se separan por 4 cadenas, y la parte inferior de la V va ir donde realizamos las 2 cadenas.
Vuelta 52, similar a la 50, pero donde se hicieron 4 cadenas se van a realizar 4 puntos bajos y se separan por 3 cadenas.
Vuelta 53, es igual a la vuelta 51.
Vuelta 54, donde van las 4 cadenas ahora se realizan 5 puntos bajos y se separan por 3 cadenas.

Vuelta 55, última vuelta, donde se realizaron las 3 cadenas, se van a realizar 9 varetas dobles, formando un abanico, y en forma intercalada, ya que en las otras 3 cadenas unimos con un punto bajo se realizan 3 cadenas y se vuelve allí mismo con un punto bajo.


Espero puedan apreciar en la foto tomada de cerca sobre los detalles del borde, allí se aprecia muy bien.

Translated with www.DeepL.com/Translator (free version)
Fuente de imágenes: Archivo Personal.


MIS REDES SOCIALES


