
Hello, friends especially needleworkers!
Today i would like to share the project I made recently, it was so creepy for Halloween that I can’t hold to share it with all of you, guys. I got the idea to make this creepy skull plushie from the Halloween season nearby. Now let me share to you of how I made it..
Project Time: approximately 5 hours
Difficulty: Medium
Skills Needed:
- Basic handsewing
- Whipped stitch
- French knot
- Daisy stitch
- Stem stitch
- Running stitch
Materials & things needed:
- A piece of paper to draw the pattern
- Pencil
- Paper and Craft scissors (craft scissors used for small details objects)
- Felt fabrics in white, grey, bright green and purple
- Pin
- Sewing needle
- Embroidery floss
- White thick floss
- Fiber Filling (I used dacron)
How to make it:
1ST
I made the skull on a piece of paper, then part of the skull body and the circle for the hollow. Next I folded the paper in the middle then cut the skull to make sure that it would be symmetric . Then I drew the nose and mouth I would make on the skull.
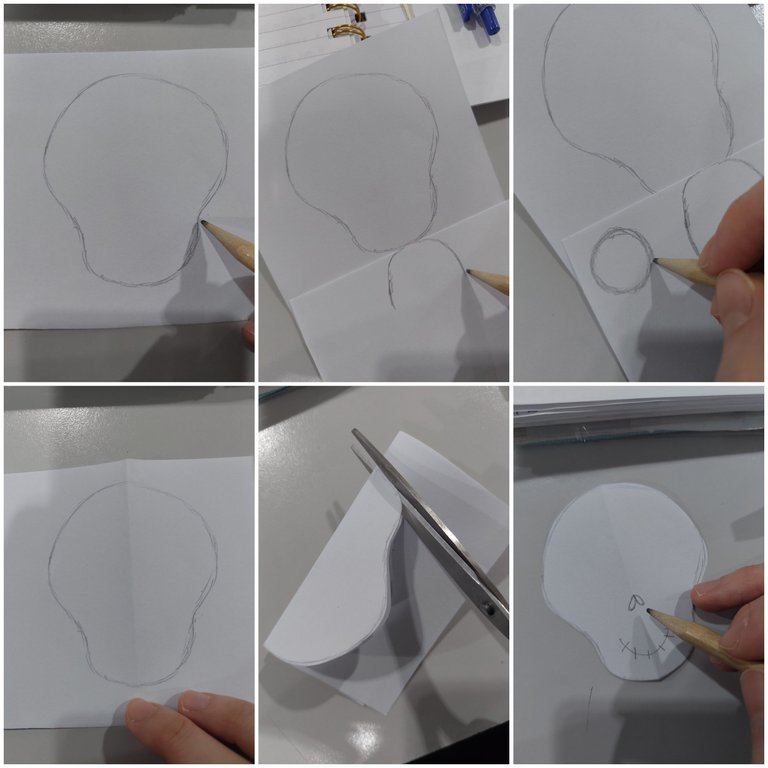
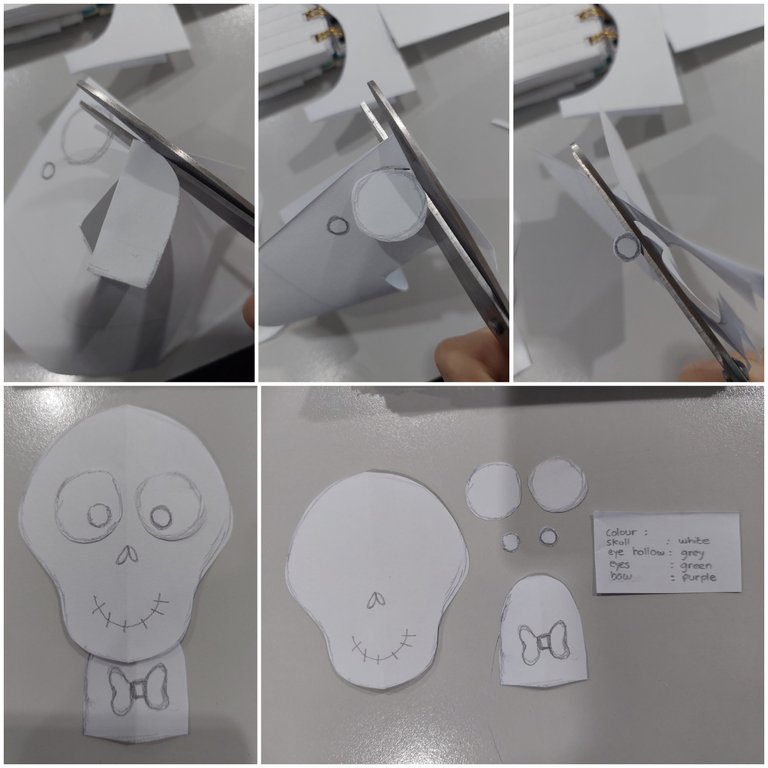
2ND
Then, I cut also the skull’s body, I used the same trick to make it symmetric. I also cut the hollows and the eyes. These were all the pattern I made for this creepy skull. I also wrote down the color I would bring for each part.
3RD
I transferred the skull pattern on the white felt. Cut it off for two pieces. Finished, I continued with the hollows on the grey felt. I also cut them off.
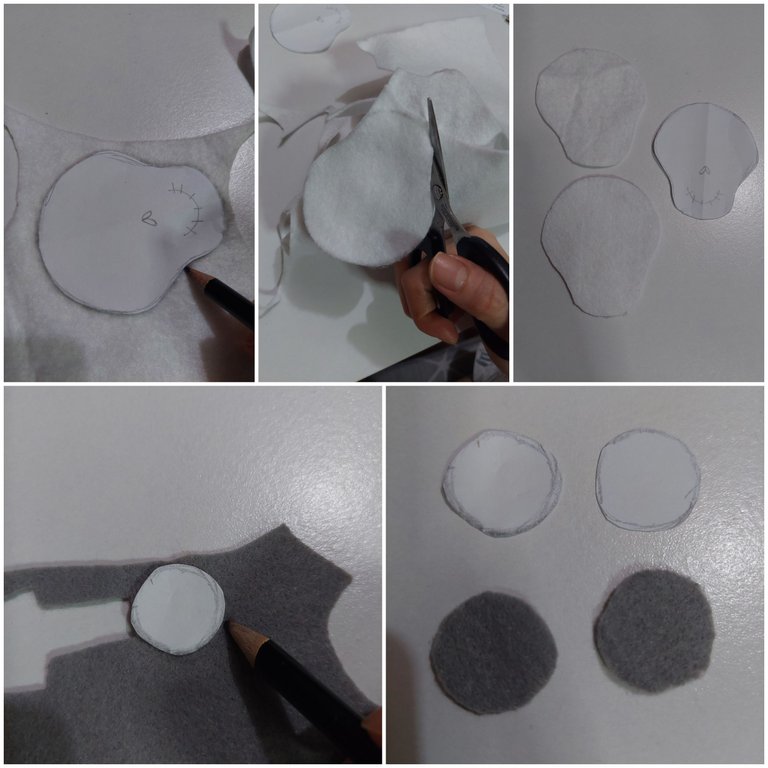
4TH
After that, I cut off the small circle from the bright green felt. For this part I used my skill without any transferred pattern. Then I transferred then cut the skull’s body.
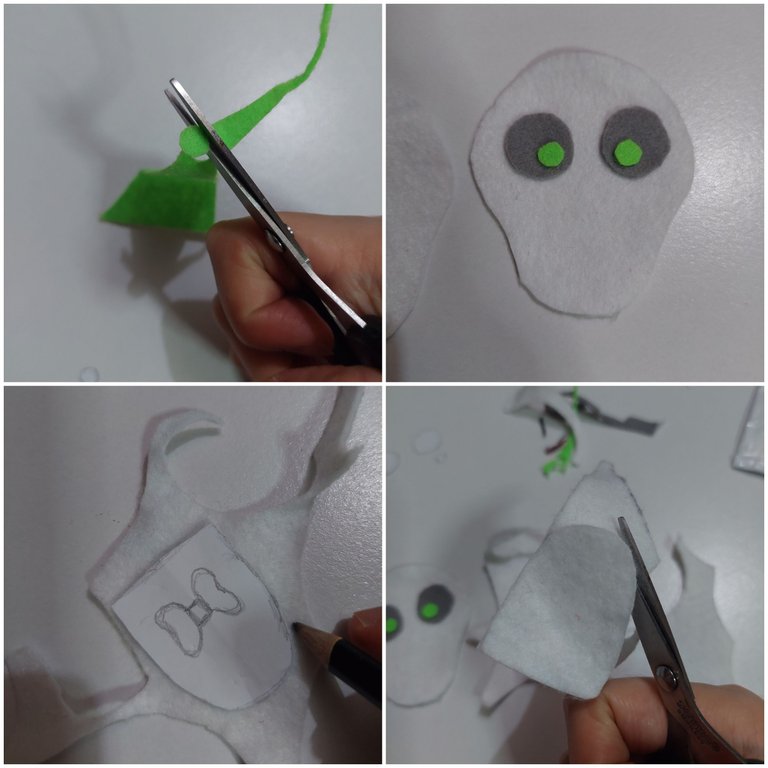
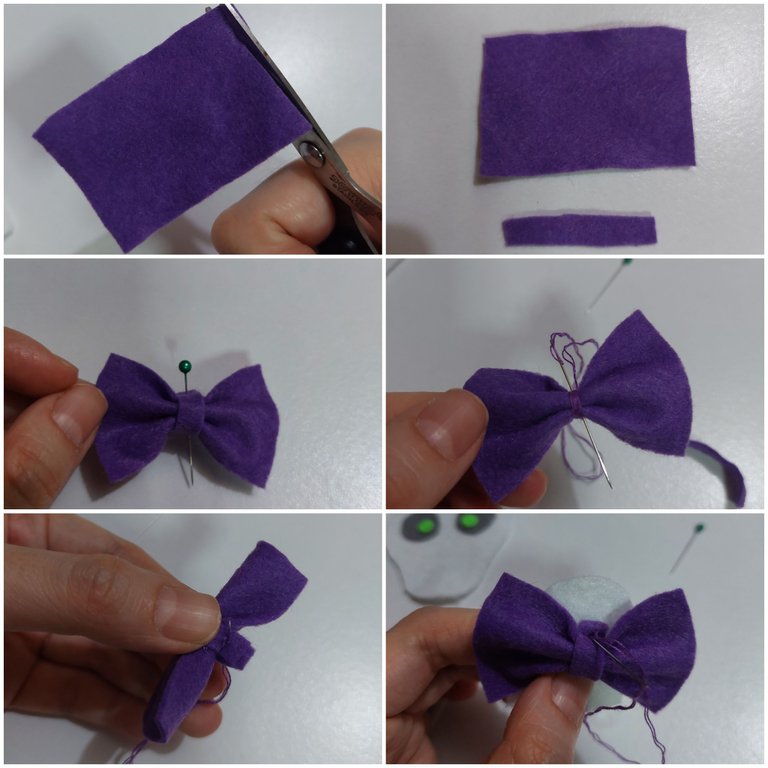
5TH
I also cut the purple felt in rectangle form, made two of it like on the picture. Pin to help the look, I folded the bigger rectangle to make the form of a bow, then sew the middle of it. Closed it with the smaller rectangle, sew also behind it, then the bow was finished.
6TH
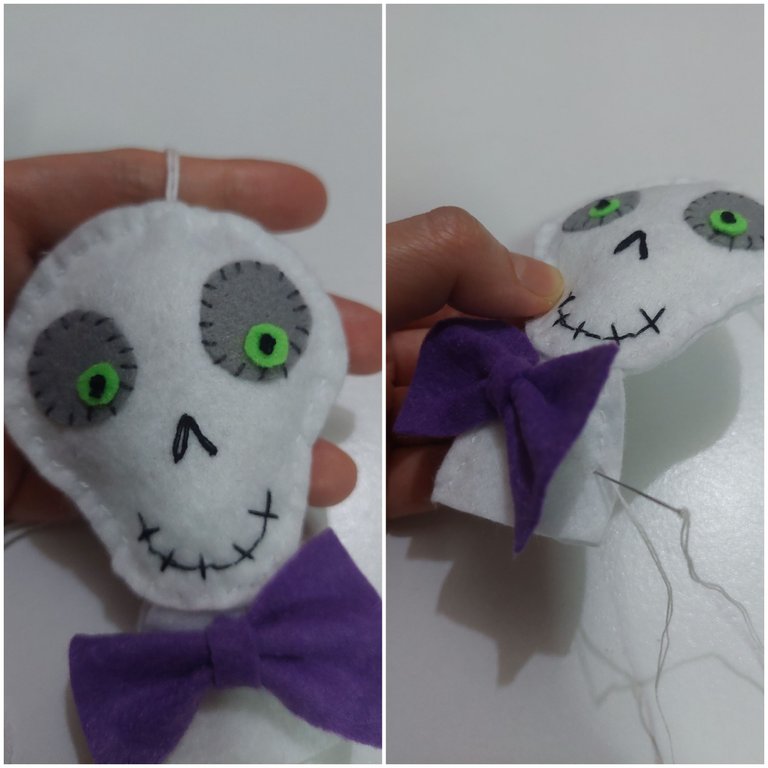
Next, I whipped stitched the grey hollow to the skull. For the eyes, french knotted the green circles. Then for the nose, I used the daisy stitch.
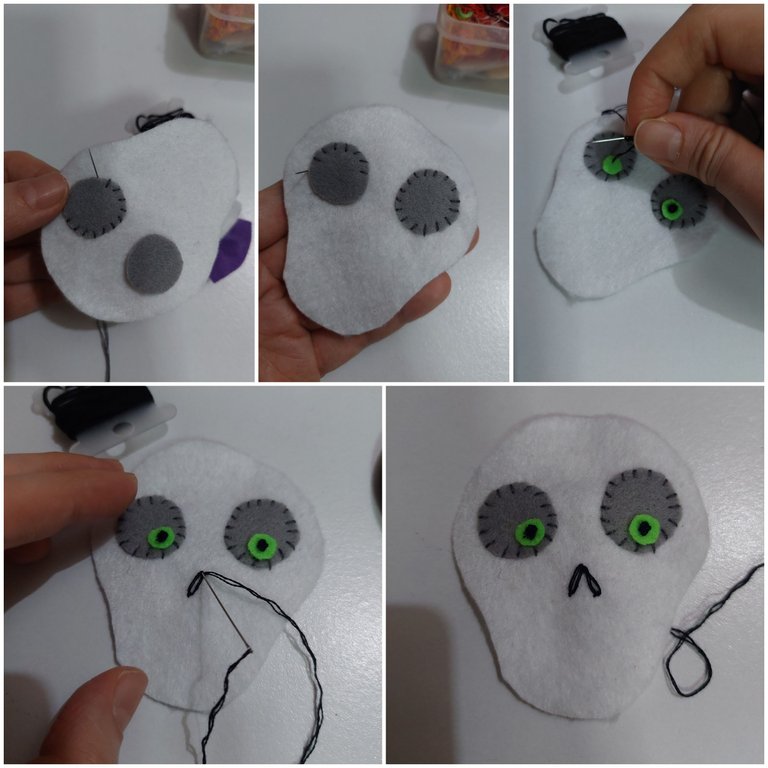
7TH
Next I stem stitched the mouth and then made the vertical lines on it too. Just like below.
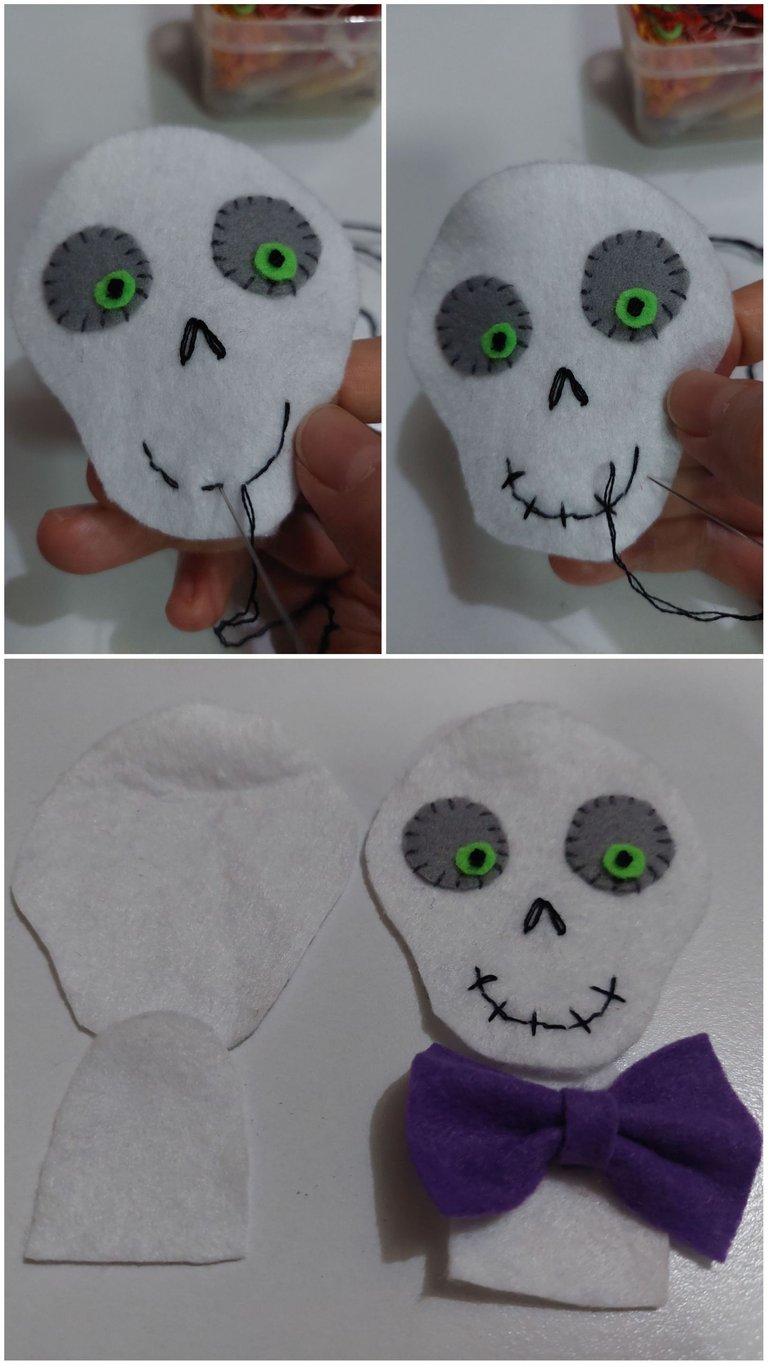
8TH
I did the running stitch around to connect the front and back part of the skull’s body with the head. Then sew around the head. I did the knot on the white thick floss then not forget to put it on the top of the skull. I sew around and before close the head part, I fill in the dacron to it.
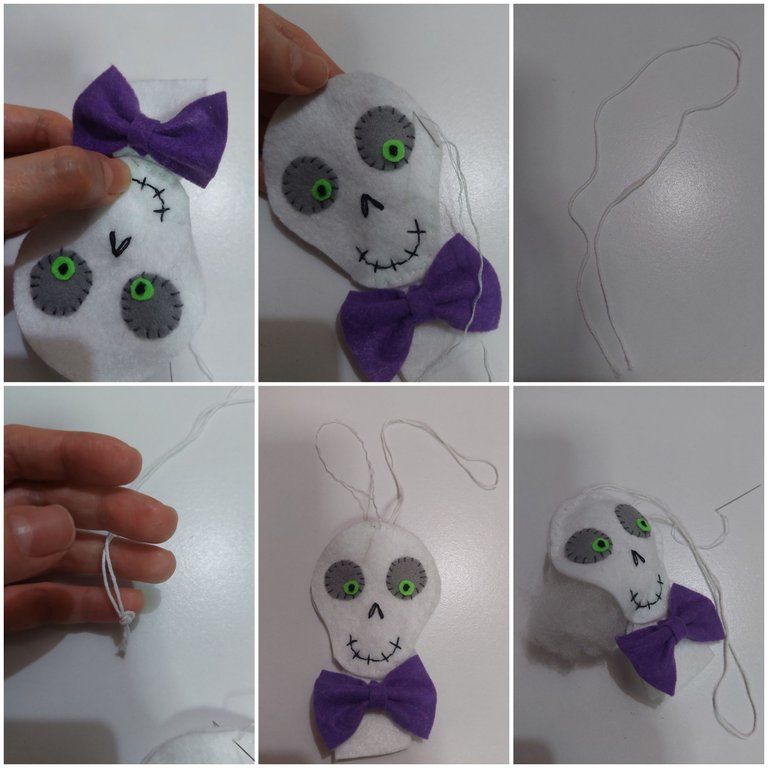
9TH
Last, I did the running stitch for the left and right of the body.
VOILA, now this creepy skull plushie is finished. I’m so satisfied with the result.
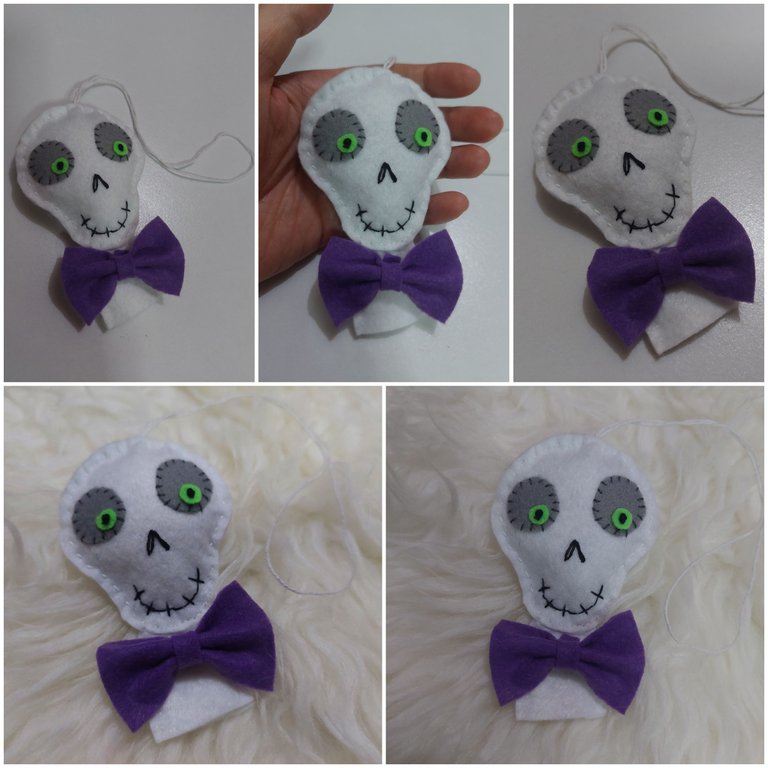
And now I would like to know how do you think of it?
Thanks for reading my article, hope you enjoy it and stay tune for more CRAFT things from me!
All of the pictures were taken with Samsung A52 5G android phone with no filters.
A bit about the author

She works in a bank but she interests in CRAFT (CRaft, Art, Food and Travel). To pursue her art passion she does the cross stitch, embroidery, handsewing, crafts, crochet and also draws. Find hers in
https://de-creartique.redbubble.com and https://decreartique.threadless.com/designs. Also find her cute collectibles pixel cat pictures here https://opensea.io/collection/pixelcryptocat .