Good day everyone and trust you're doing fine?
Today, I'll love to teach you how to make a pinafore dress.
Materials you'll be needing.
Fabrics (I used Ankara fabrics)
Zipper
Lining
Thread
Scissors
Thread
Button
Tape rule
Sewing machine
And the measurement of your client.
Cutting the skirt part/ lower part
The first thing is to fold your fabrics in two and measure the waistline, hipline, and knee length.
The waist of my client is 27 inches so I divided it by 4 which gave me 6.75, I added 2 inches allowance for dart allowance and sewing allowance which made it 8.75, so I marked it out.
Since it's a high waistband, I measured my hipline from my waist, which is 9 inches.
On that hipline, you will mark out your hip circumference. My client's hip is 37÷4 = 9.25 + 2 inches allowance to turn the lining and a dart allowance.
I did the same for my waistband.
I connected the points, I used my French curve to connect the point.
I did the same for the back and then added a 1-inch allowance for the zipper.
Then you place your front part on a lining and cut the same.
Do the same for the back part of the lining as well.
Cutting the upper part
I folded my fabrics in two, I measured 8 inches in depth and 10 inches in width.
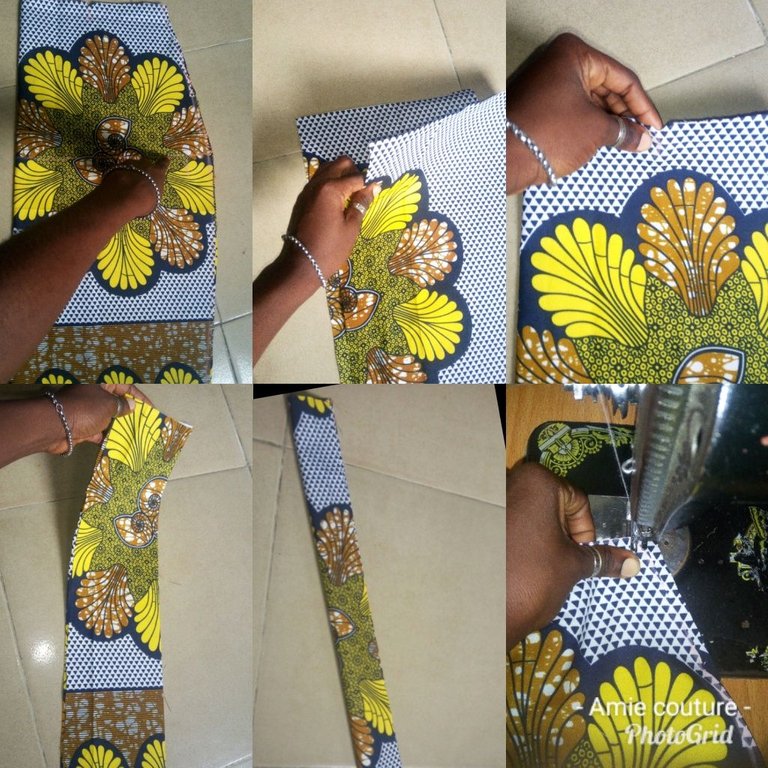
cutting the strap
I measured 23 inches in depth.
4 inches in width which is to be folded to give 2 inches after turning.
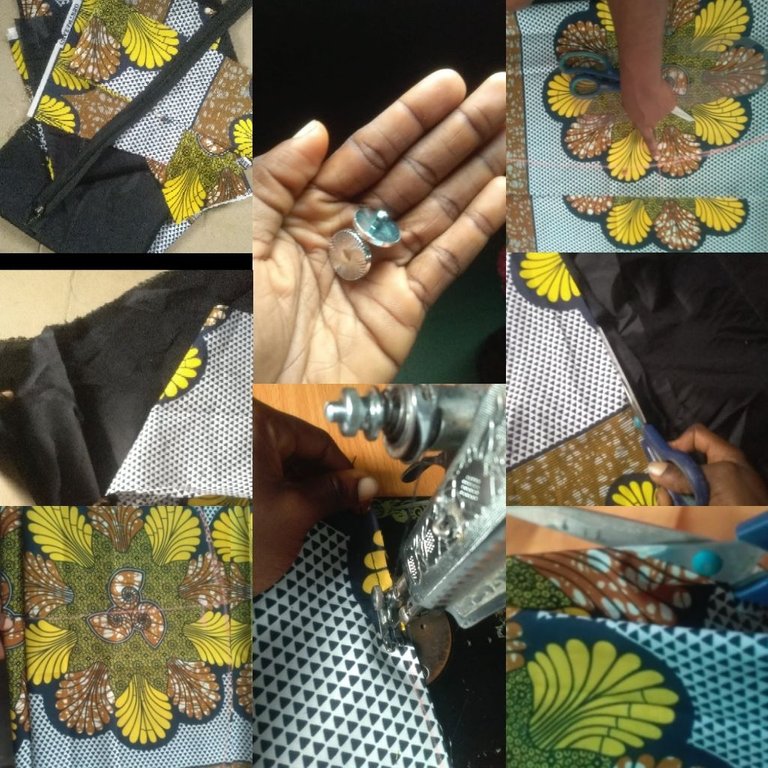
These are the panels of my pinafore,
College 1: front skirt panel
Collage2: Back skirt panel
Collage 3: Upper part
Collage 4: Waistband
Collage 5: strap
College 6: on my sewing machine trying to turn the fabrics with the lining to give it a neat finish.
Turning each panel with my lining on my sewing machine.
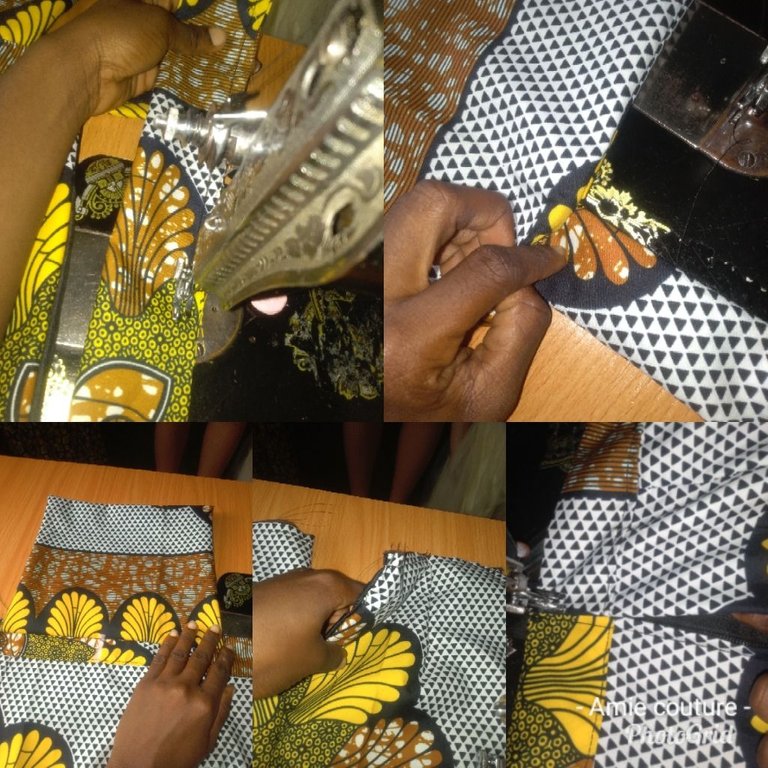
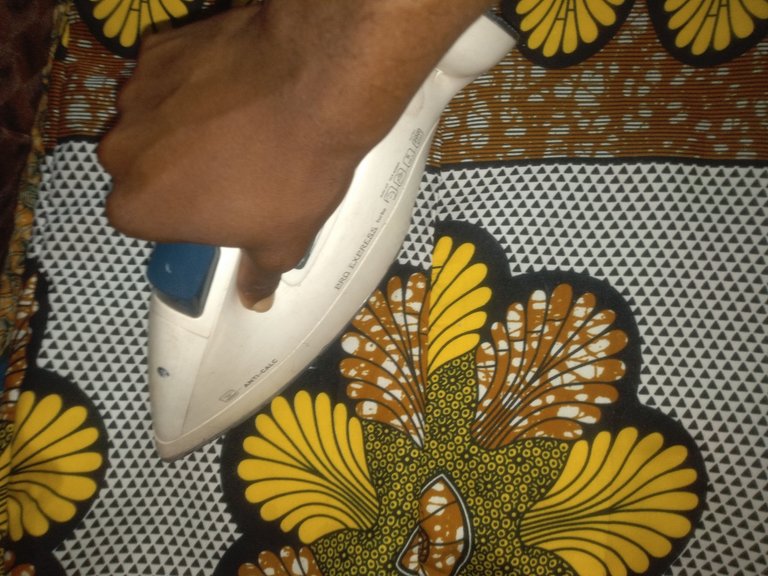
After turning my lining, I attached my zipper at the back and then gave it a good press. Hehe

I attached the upper part to the lower part, I achieved that perfectly by notching the upper middle part and the lower middle part so it fits perfectly and then I added my strap, to the upper part, and then I sewed my buttons to the straps and of course, my pinafore is ready to be worn.
I'm sure you would love to see the outcome.
This is what it looks like. Hehe
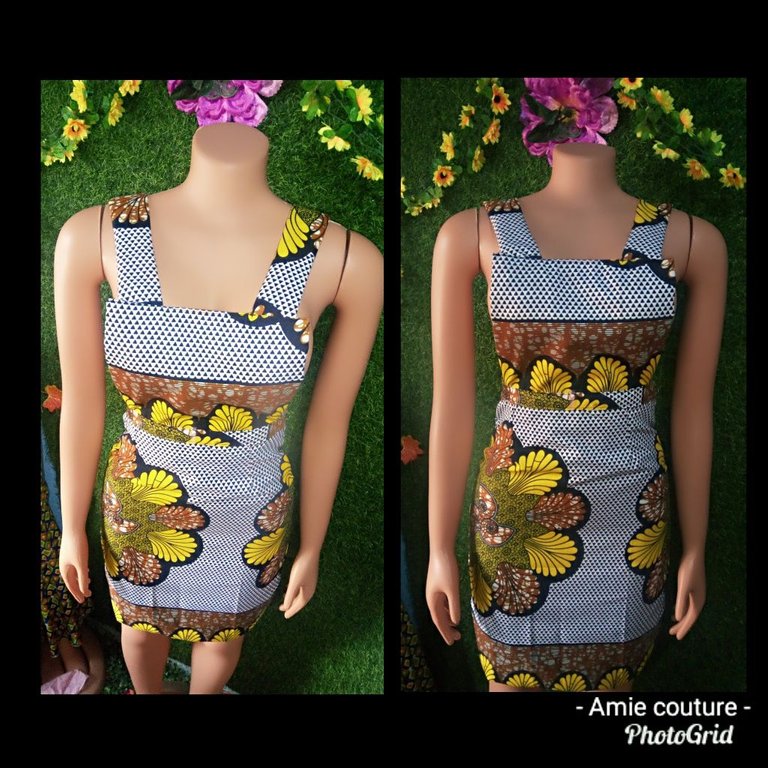
Front view.
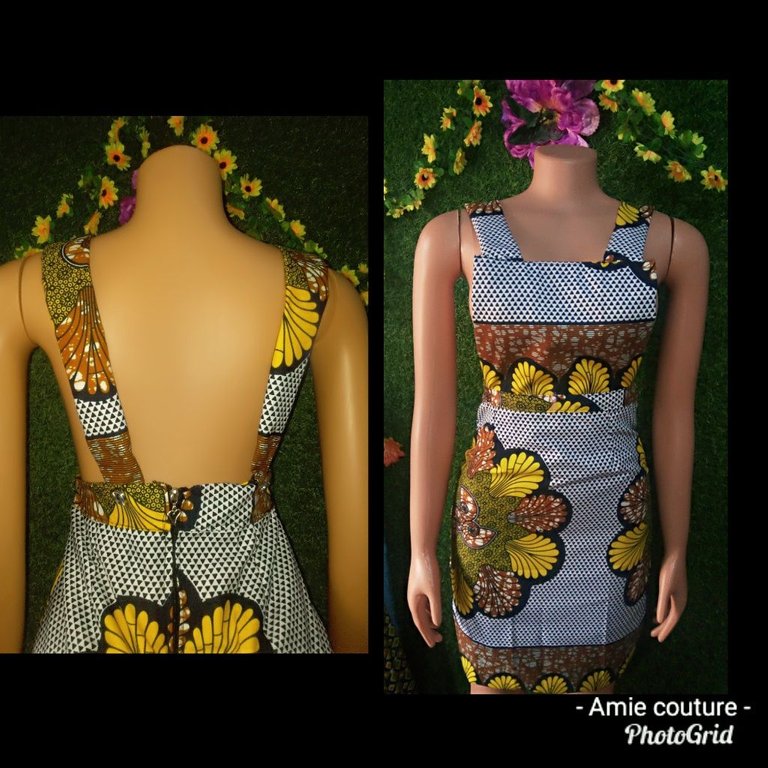
The front and back views.
I hope you love my work?
Thanks for reading, I am Amie Geoffrey, and all images used are mine.
I had fun while sewing this, maybe because i was listening to music, documenting the process and eating in between. Hehe.

Español
Buenos días a todos y confiar en que estás haciendo bien?
Hoy os voy a enseñar a hacer un vestido pichi.
Materiales que vais a necesitar
Telas (yo he utilizado telas de Ankara)
Cremallera
Forro
Hilo
Tijeras
Hilo
Botón
Regla de cinta
Máquina de coser
Y la medida de su cliente.
Cortar la parte inferior de la falda
Lo primero es doblar las telas en dos y medir la cintura, el tiro y el largo de la rodilla.
La cintura de mi clienta es de 27 pulgadas, así que la dividí por 4, lo que me dio 6.75, añadí 2 pulgadas de margen para el margen de la pinza y el margen de costura, lo que me dio 8.75, así que lo marqué.
Como la cintura es alta, medí el contorno desde la cintura, que es de 9 pulgadas.
En esa tubería, marcarás la circunferencia de tu cadera. La cadera de mi clienta es 37÷4 = 9.25 + 2 pulgadas de margen para dar la vuelta al forro y un margen para la pinza.
Hice lo mismo para la cintura.
Conecté los puntos, utilicé mi curva francesa para conectar el punto.
Hice lo mismo para la espalda y luego añadí 1 pulgada de margen para la cremallera.
A continuación, coloca la parte delantera sobre un forro y corta lo mismo.
Haz lo mismo para la parte trasera del forro también.
Cortar la parte superior
Doblé mis telas en dos, medí 8 pulgadas de fondo y 10 pulgadas de ancho.
Cortar la correa
Medí 23 pulgadas de profundidad.
4 pulgadas de ancho que hay que doblar para dar 2 pulgadas despues de girar.
Estos son los paneles de mi pichi,
Collage1: panel delantero de la falda
Collage2: Panel trasero de la falda
Collage 3: Parte superior
Collage 4: Cintura
Collage 5: tirante
Collage 6: en mi máquina de coser intentando girar las telas con el forro para darle un acabado limpio.
Girando cada panel con mi forro en mi máquina de coser.
Después de girar mi forro, fijé mi cremallera en la parte posterior y luego le di una buena prensa. Hehe
Uní la parte superior a la inferior, lo conseguí perfectamente haciendo muescas en la parte media superior y en la parte media inferior para que encajara perfectamente y luego añadí mi tirante, a la parte superior, y luego cosí mis botones a los tirantes y por supuesto, mi pichi está listo para ser usado.
Seguro que os encantará ver el resultado.
Esto es lo que parece. Jeje
Vista frontal.
Las vistas frontal y trasera.
Espero que os guste mi trabajo.
Gracias por leer, soy Amie Geoffrey, y todas las imágenes utilizadas son mías.
Disfruté mucho haciendo este conjunto, no consume mucho tiempo y las telas son fáciles de trabajar.
Me divertí mucho mientras lo cosía, quizá porque escuchaba música, documentaba el proceso y comía entre medias. Jeje.
