

(EN) Hello Hive Family. Today I want to tell you about 3D Wall clock installation. I had some free time last night and wanted to mount the clock on the wall. The final state of the watch was really perfect. So, how was the 3D Wall Clock made?
(TR) Merhaba Hive Ailem. Bugün sizlere 3D Duvar saati kurulumunu anlatmak istiyorum. Dün akşam biraz boş zamanım oldu ve saati duvara montaj yapmak istedim. Saatin son hali gerçekten mükemmel oldu. Peki, 3D Duvar Saati nasıl yapıldı?

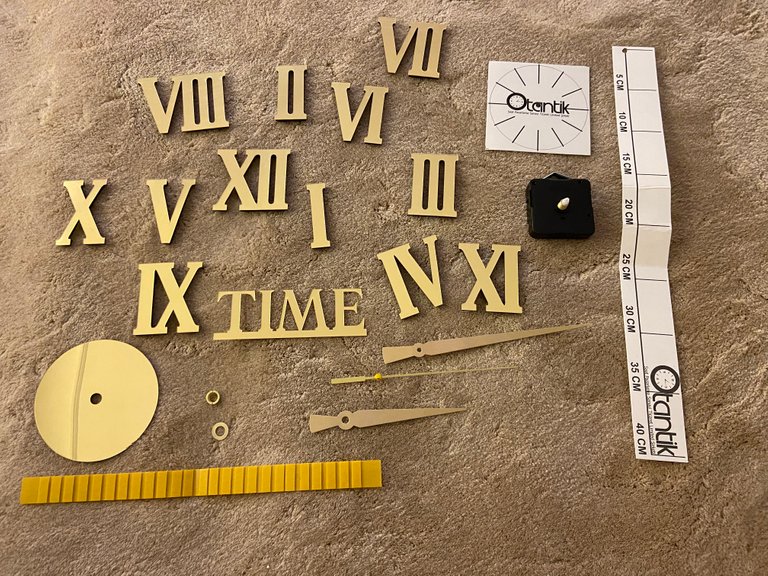
(EN) First of all, our materials; Clock numerals, two-sided adhesive, clock faces and measuring sheets for mounting the clock. We ordered the watch online and all these materials arrived. We did not receive any extra material.
(TR) Öncelik olarak malzemelerimiz; Saat rakamları, iki taraflı yapışkan, saat kadranları ve saati montaj yapmak için ölçüm kağıtları. Biz saati internetten sipariş ettik ve bütün bu malzemeler geldi. Ekstra olarak başka bir malzeme almadık.
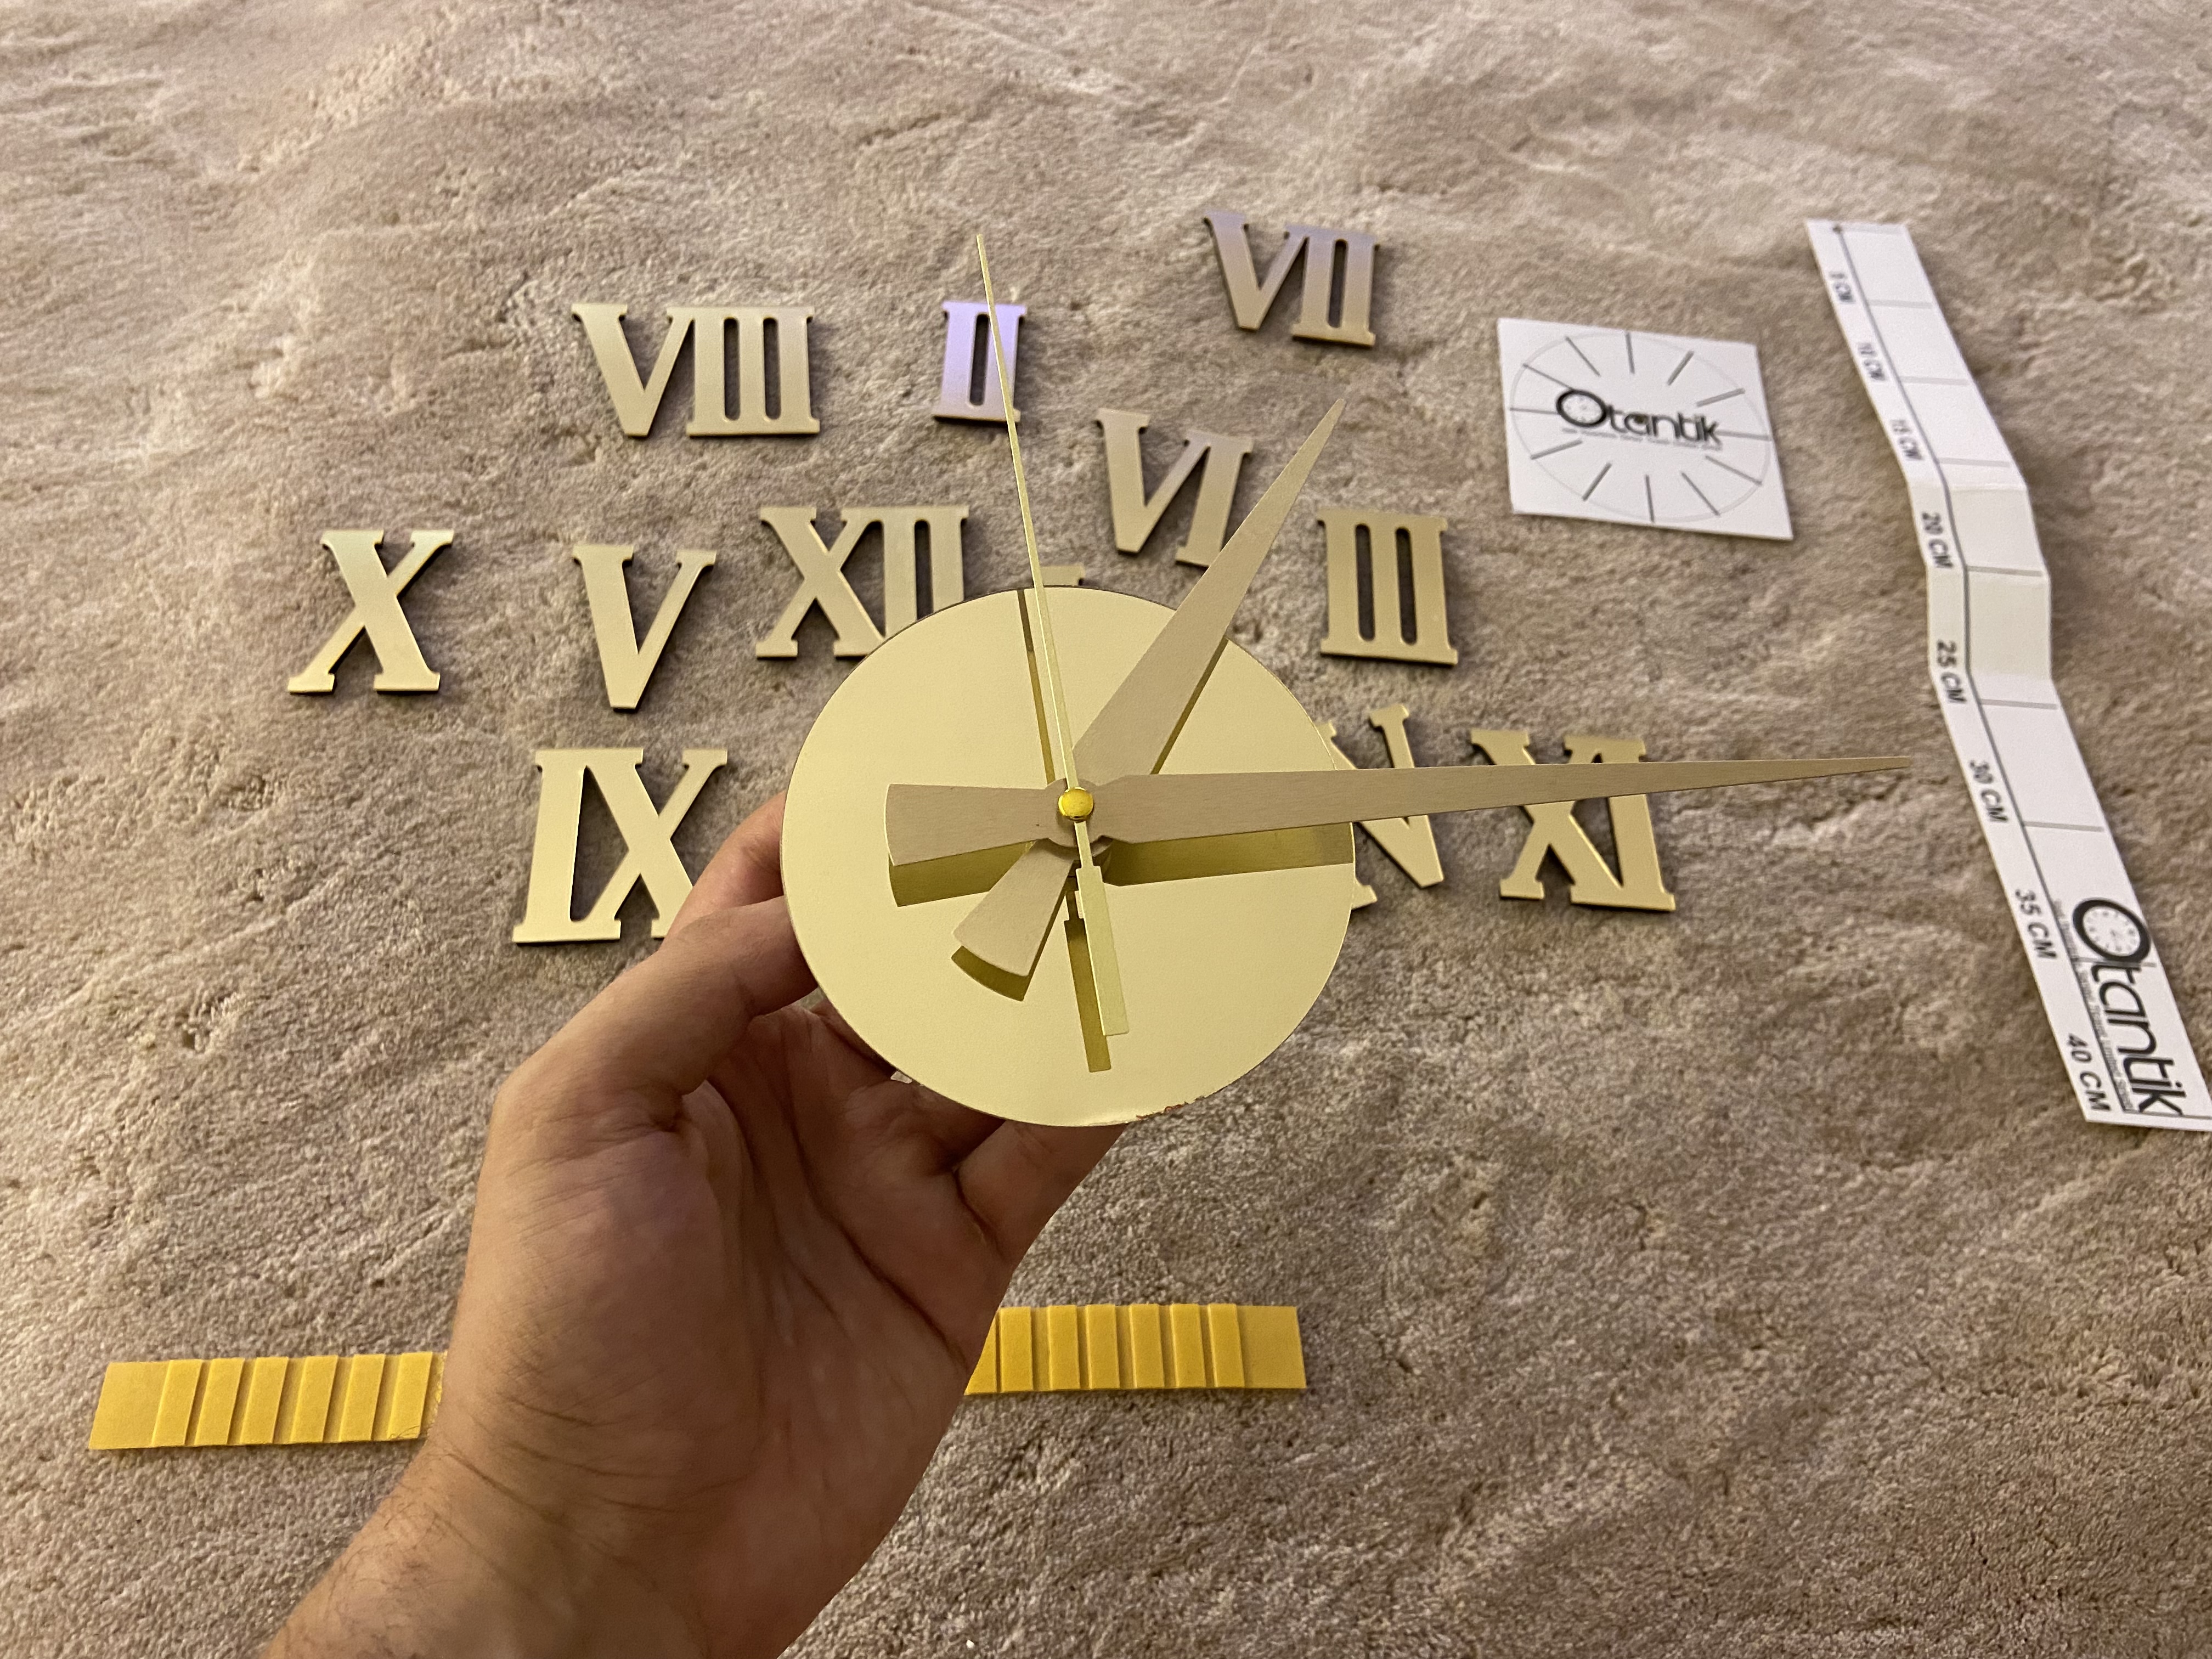
(EN) Before starting the installation, I assembled the dial part of the watch. You can get help from youtube for installation. There are many videos. Let's see what's the next step?
(TR) Kuruluma başlamadan önce saatin kadran kısmını montaj yaptım. Kurulum için youtubedan yardım alabilirsiniz. Bir çok video var. Bakalım sıradaki adım ne?
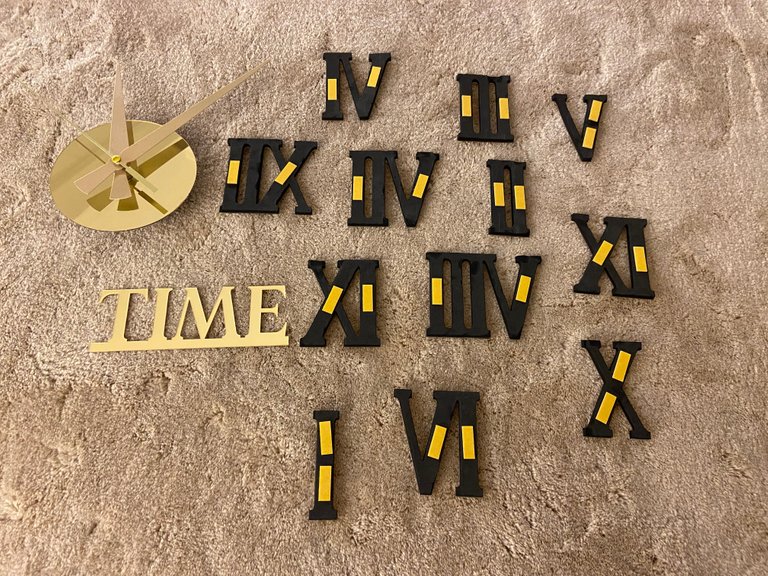
(EN) In this step, we stick double-sided tape on the back of the numbers. I used 2 because I don't want the numbers to fall off the wall as time goes on. ☺️
(TR) Bu adımda, rakamların arkasına çift taraflı bantları yapıştırıyoruz. 2 tane kullandım çünkü zaman geçtikçe duvardan rakamların düşmesini istemiyorum. ☺️
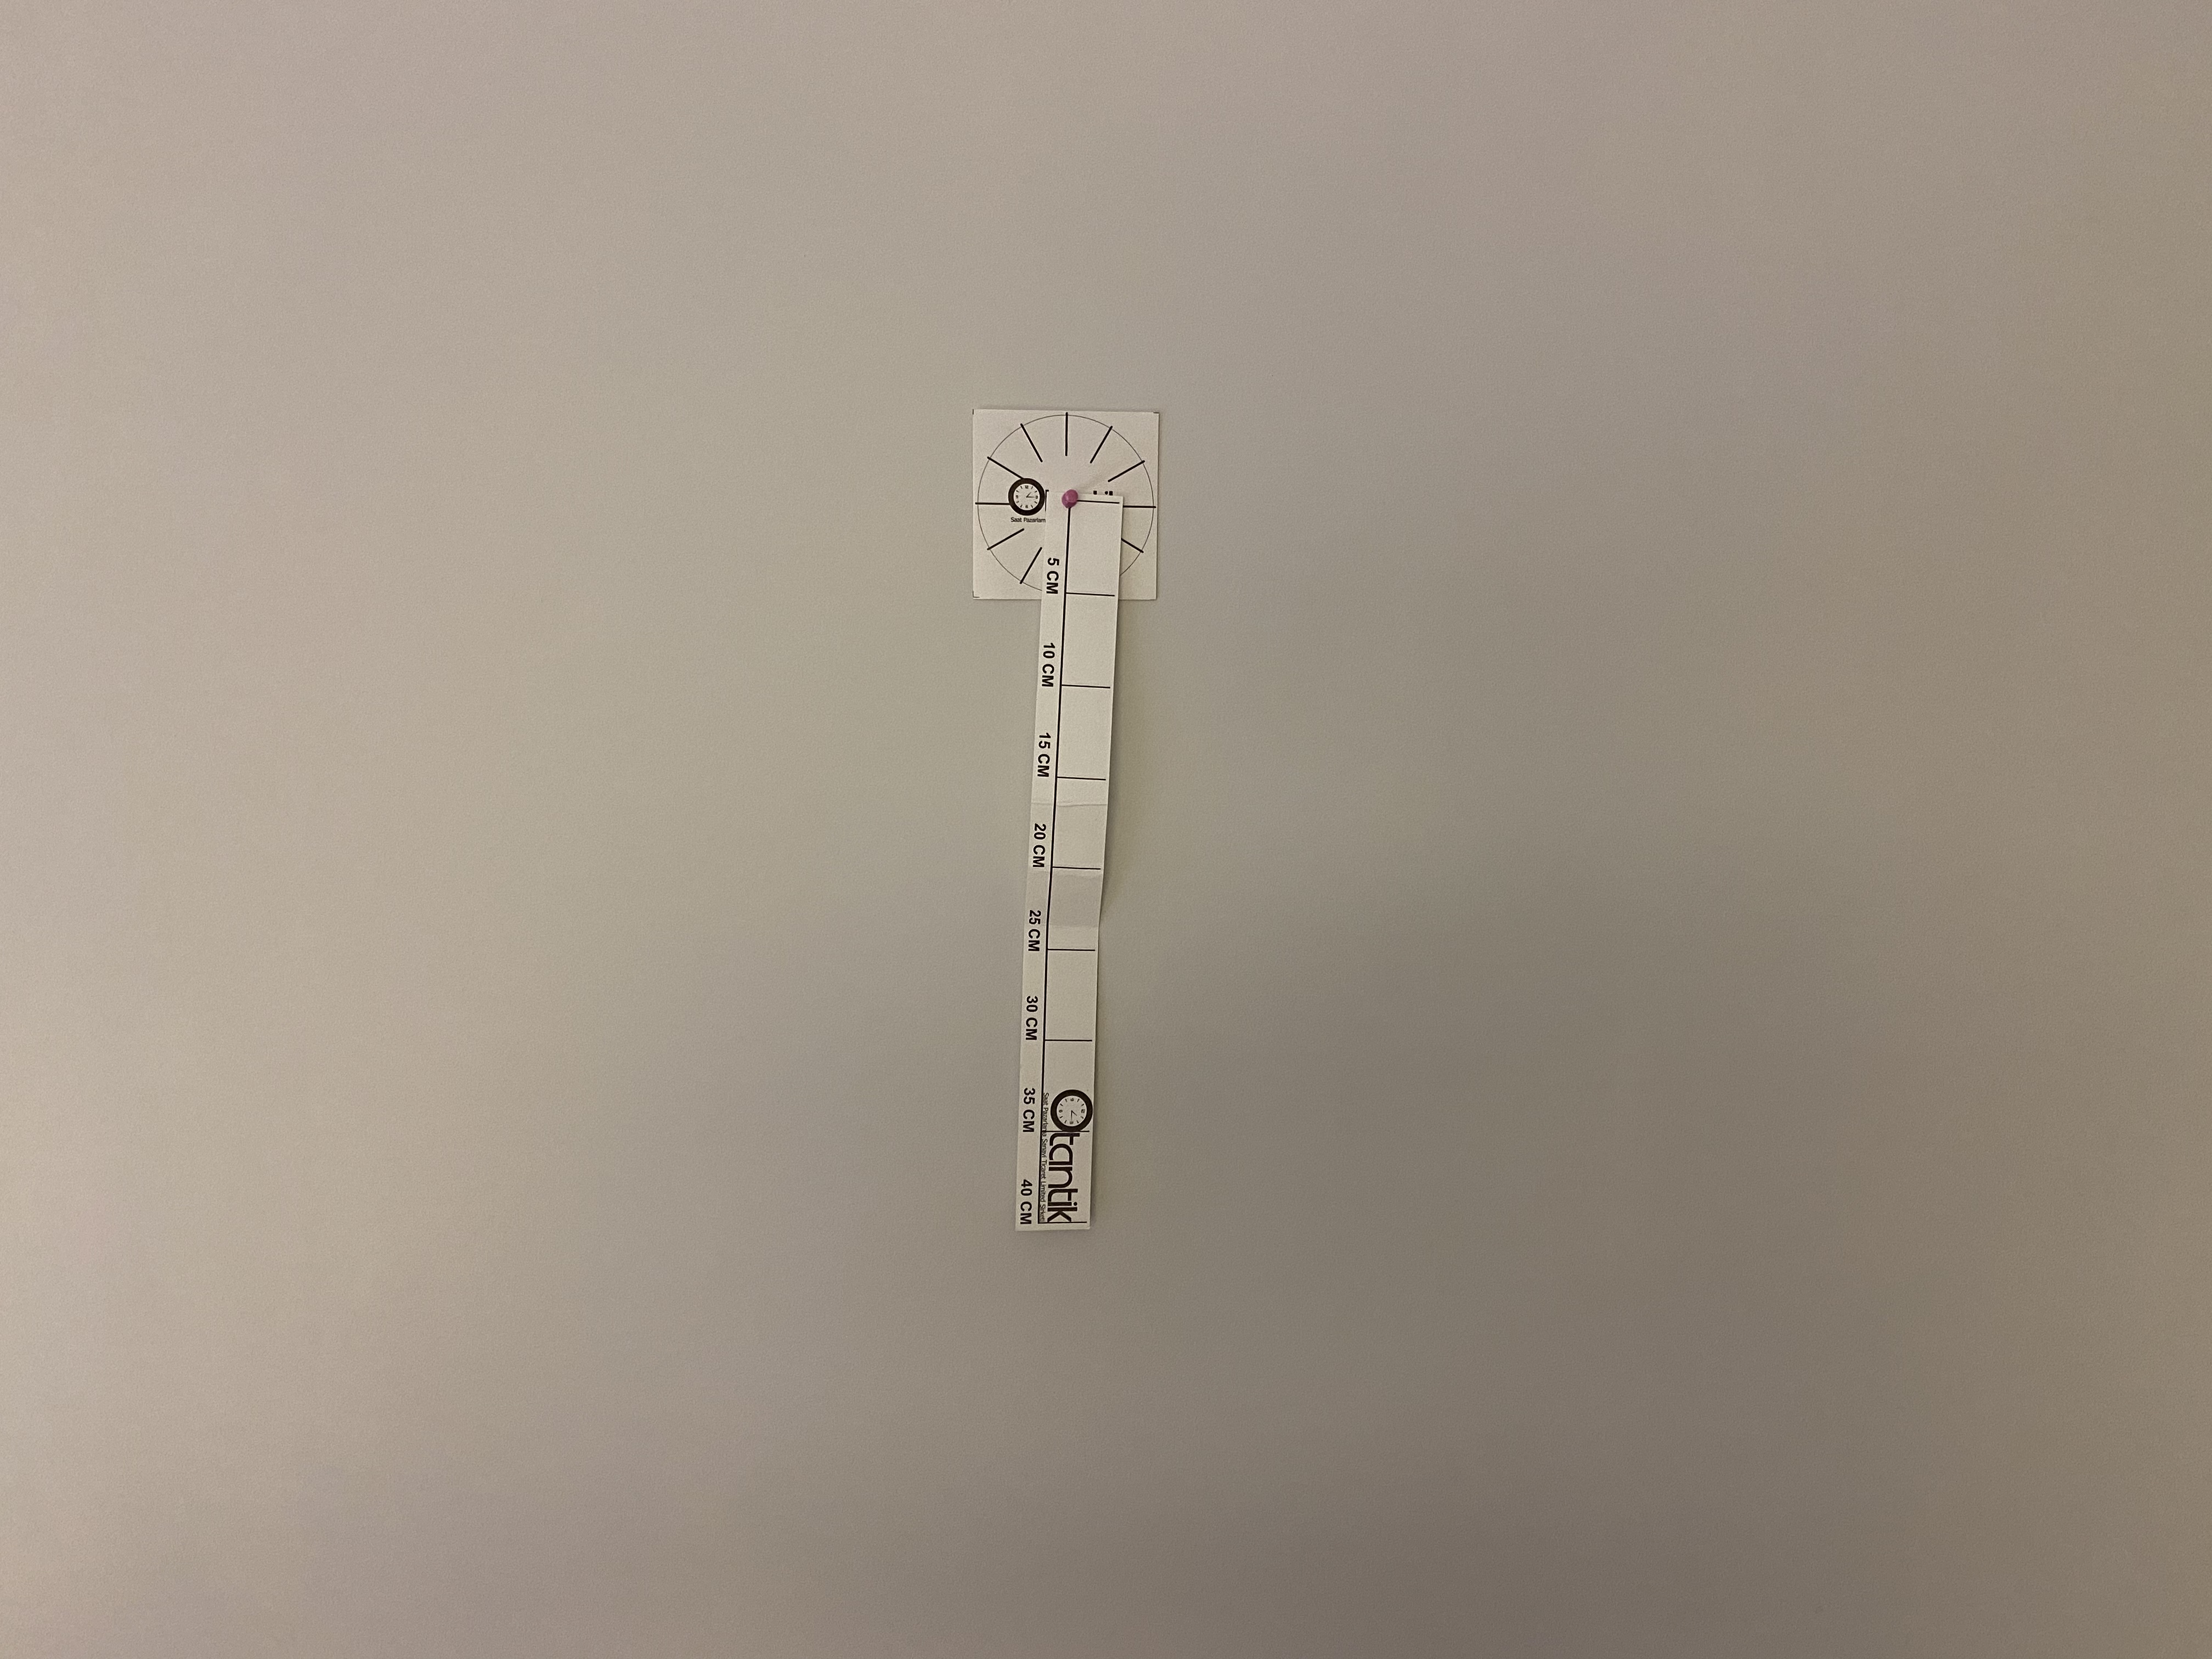
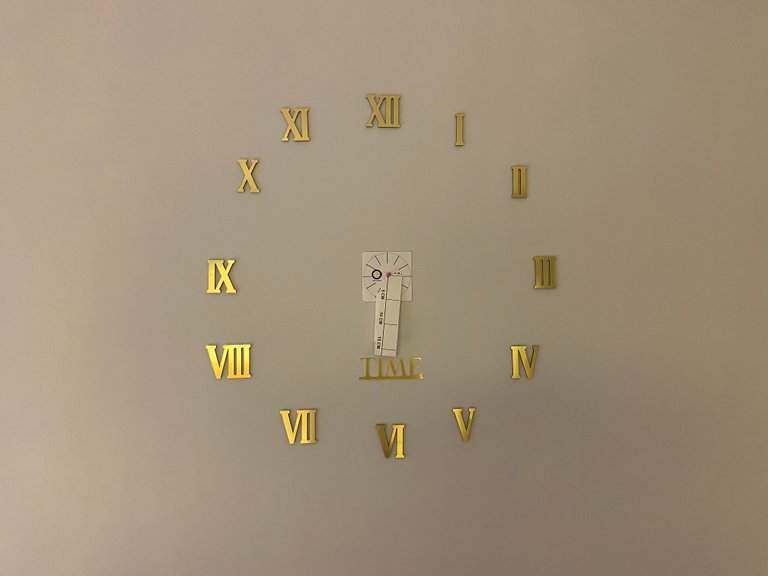
(EN) In the next step, we fix the measuring papers to the wall as you can see in the picture. This makes it easier to set up the watch.
(TR) Sıradaki adımda, ölçüm kağıtlarını resimde gördüğünüz gibi duvara sabitliyoruz. Bu sayede saatin kurulumu daha kolay oluyor.
(EN) As you can see in the picture, I easily pasted the numbers using the long measuring paper. Our clock is about to be installed. Let's see what's the next step?
(TR) Resimde gördüğünüz gibi uzun ölçü kağıdını kullanarak rakamları kolay bir şekilde yapıştırdım. Saatimizin kurulumu bitmek üzere. Bakalım sıradaki adım ne?
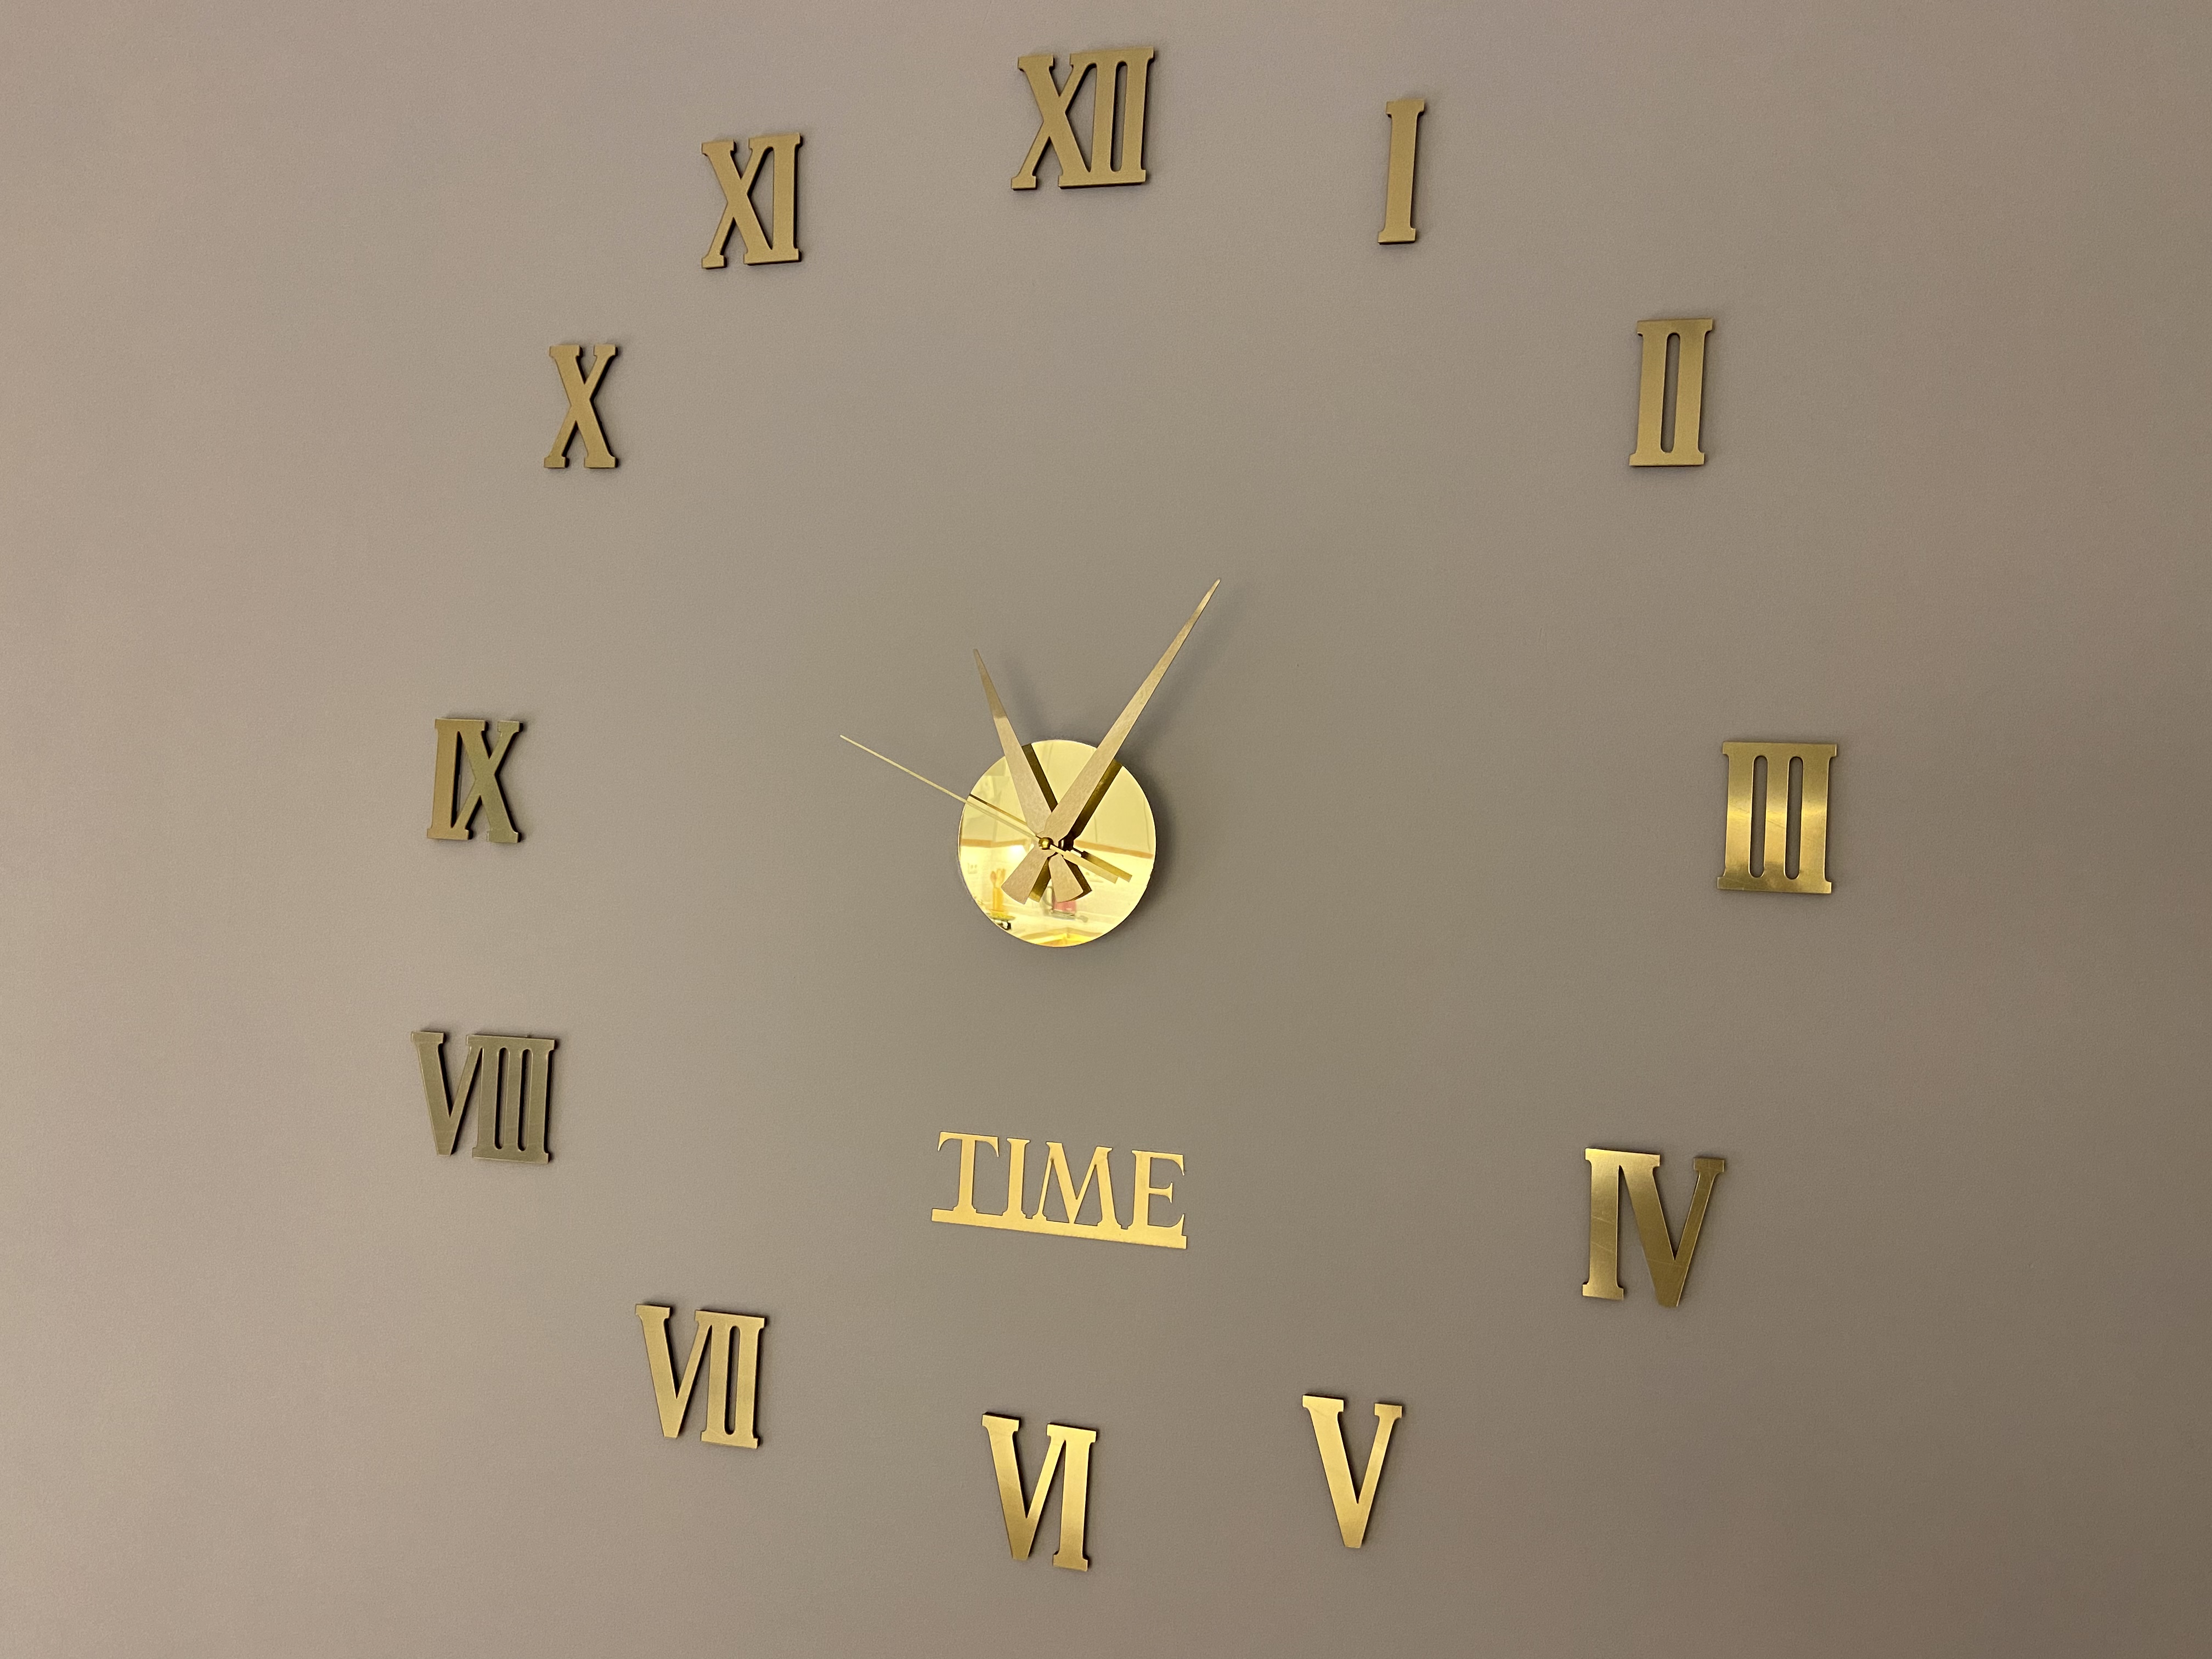
(EN) Finally, we take out the measuring sheets and hang the watch face right in the middle. It was really perfect. A stylish and useful clock for your home.
(TR) Son olarak, ölçüm kağıtlarını çıkartıyoruz ve saatin kadranını tam ortaya asıyoruz. Gerçekten mükemmel oldu. Eviniz için hem şık hem de kullanışlı bir saat.
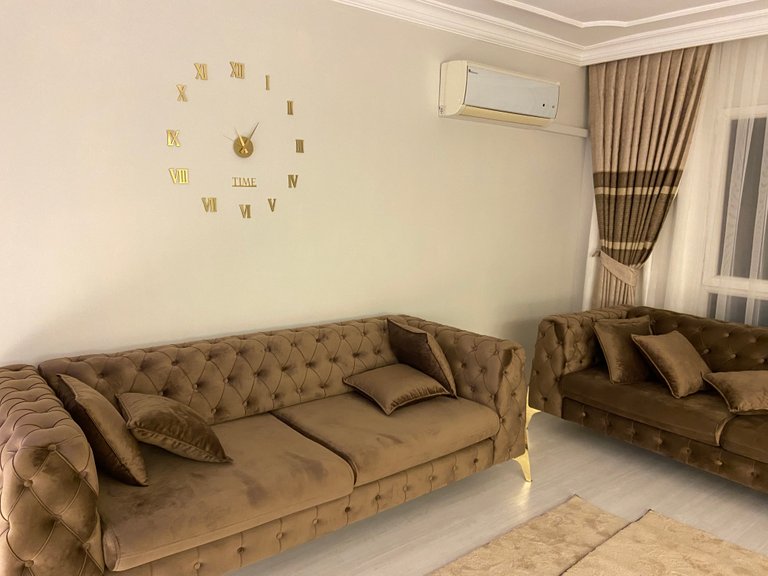
(EN) You can also make a beautiful clock for your home by searching the internet. I love you all. See you in my next DIY post....🫡
(TR) Sizler de internetten araştırarak eviniz için güzel bir saat yapabilirsiniz. Hepinizi seviyorum. Bir dahaki kendin yap postumda görüşürüz....🫡

Thanks for Reading and Supports…


