The way these biscuits came out makes me want to try all new fillings and see what kind of results we can get. Now with a machine to mill our own flour gives us limitless potential.
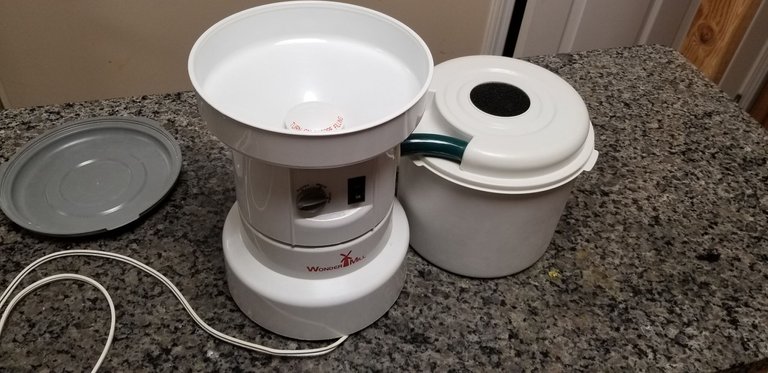
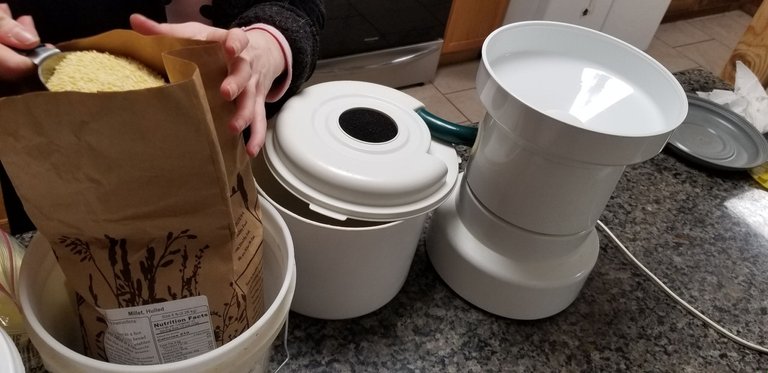
What you see on the left here is called the “hopper” This is where the motor grinds the grains, then the freshly milled grains travel through that green tube into the storage bin on the right.
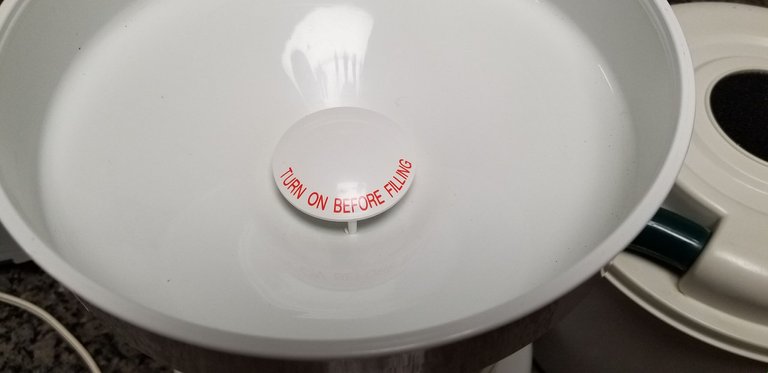
You can see in big, red letters here the most important step of the wondermill’s operation: You MUST turn the motor on BEFORE beginning to add the grains. Otherwise you will jam the machine, which will usually break it completely. Another warning that isn’t mentioned here, is that this machine is LOUD and we strongly recommend ear protection if you’re going to be near one in use.
The wondermill is compatible with a wide range of grains, including wheat berries, which would be how you make traditional wheat flour, however my partner cannot consume wheat, so we use different grains. Here we have amaranth, millet, and white rice. The wondermill has specific settings for different sized grains, and you must be sure to set the machine to the accurate size for whichever grain you’re about to grind.

When you make a gluten free flour, it works best as a blend, using properties of different grains all working together to help mimic the taste and texture of wheat flour. Here we’re using amaranth, which adds a wonderful texture and taste, and indeed is one of the few gluten free flours that can sort of stand on its own, however it’s also fairly expensive. We use three cups of it here, making up half the blend. Amaranth is very tiny, and we grind it on the finest setting, marked as “pastry” on the device.
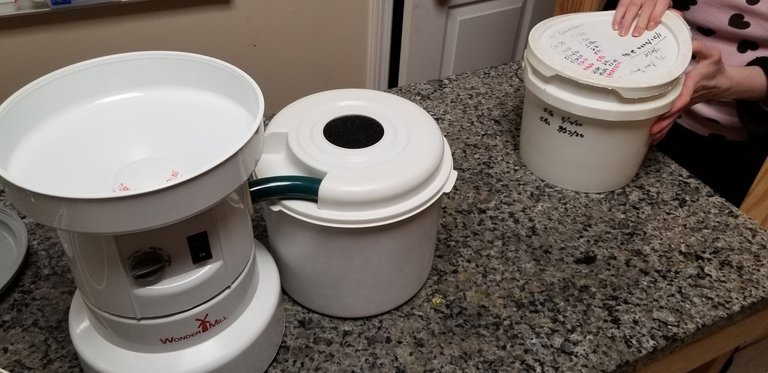
Millet represents the smallest portion of our blend, only 1/6th, as though it adds a great texture, and a lot of nutrients, it also has somewhat of a bitter flavor and too much can make your blend taste a little too bitter or earthy. We grind this on the coarsest setting, however we could have also ground it on the middle setting. Also, important to note if the lid of your storage container is firmly attached before you begin, unless you want to spray your kitchen with freshly milled flour like we did
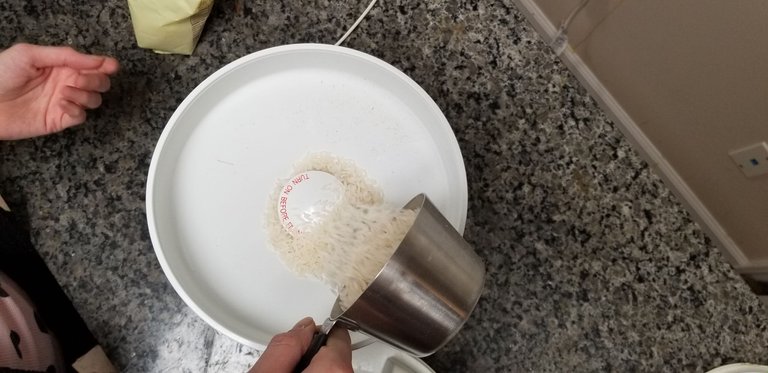
White rice adds a sweet, wonderful flavor to the flour blend, but it does have a bit of a crumbly texture by itself. We used it as ⅓ of our blend here, and we grind it on the coarsest setting.
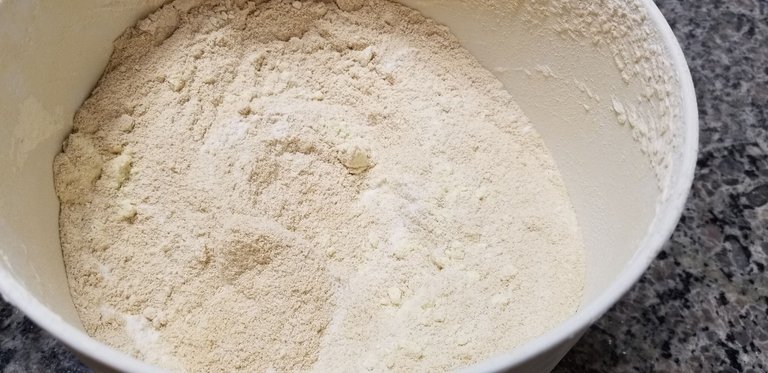
Let the machine run for 20 or so seconds after you add your last cup of grains, just to make absolutely sure everything is ground and no whole grains are trapped in your machine (which could jam it next time you turn it on.) After that, shut the machine off and wait another few seconds until it powers down completely. And now you’re only one step away from a beautiful, homemade gf flour blend! Gently combine the flours with a fork or whisk 2-3 times, not vigorously, you don’t want to over work the flour, just a few light stirs to get it combined. And now you’re ready to do some baking!
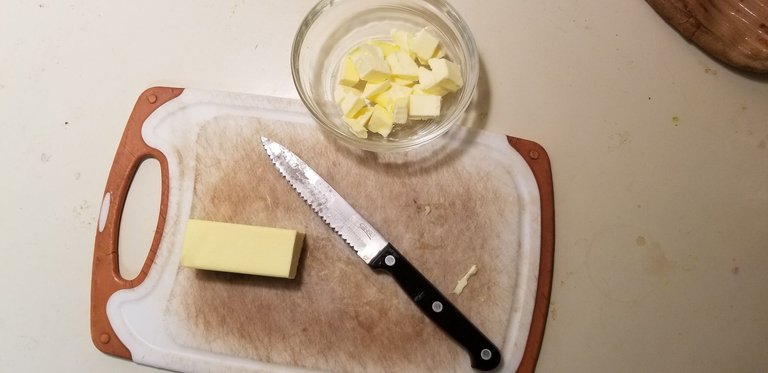
We decided to make egg & cheese stuffed biscuits. So first we had to make biscuit dough. We chopped up a stick of frozen butter, then placed the butter cubes back in the freezer to rechill.
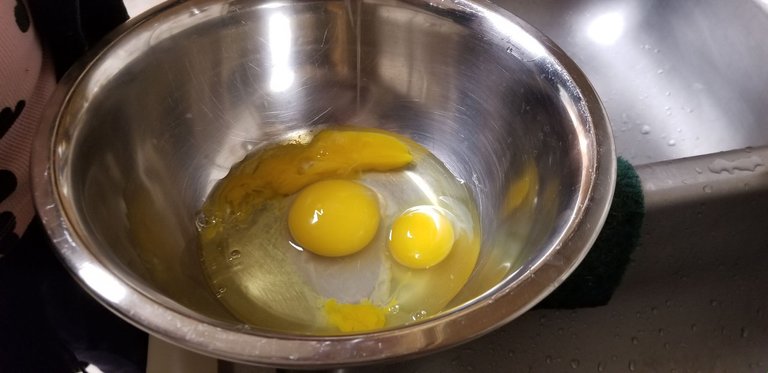
For the scrambled eggs, we did a mix of 3 duck eggs and 2 hen eggs. You can see how much bigger the duck yolk is than that little chicken yolk.
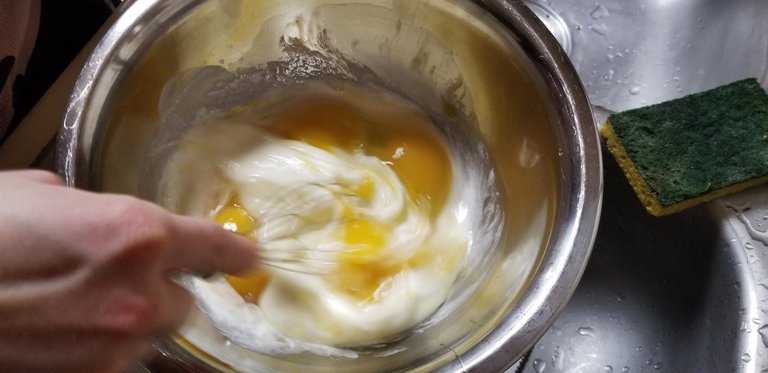
We added a little bit of half and half and then gave them a thorough whisking and scrambled them up!
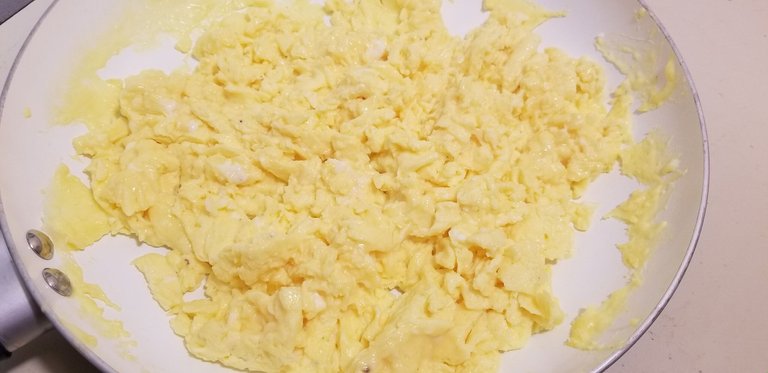
We left the eggs just a little undercooked so that they don’t dry out in the oven and you end up with perfectly cooked scrambled eggs inside of the biscuit.
Now back to making the dough! We added 1 and ¾ C of our freshly milled flour plus a ¼ cup of arrowroot starch (which helps add better flavor and texture to gluten free goods) a generous dash of salt and a tbsp of baking powder to our food processor,and then semi buried our butter cubes in the flour mixture. Pulse a few times until the butter is mostly the size of grains of rice, and the flour starts to look crumbly.
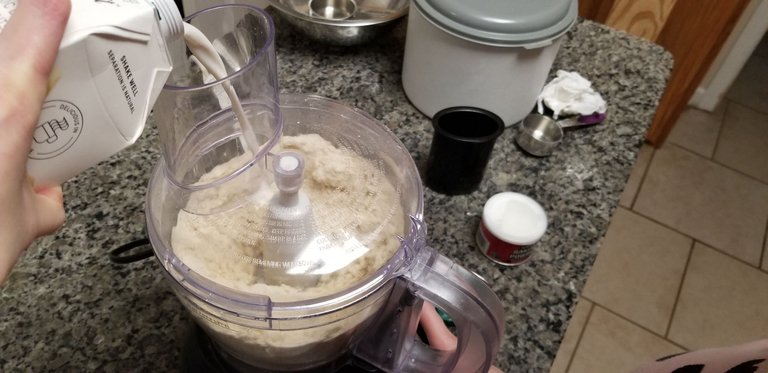
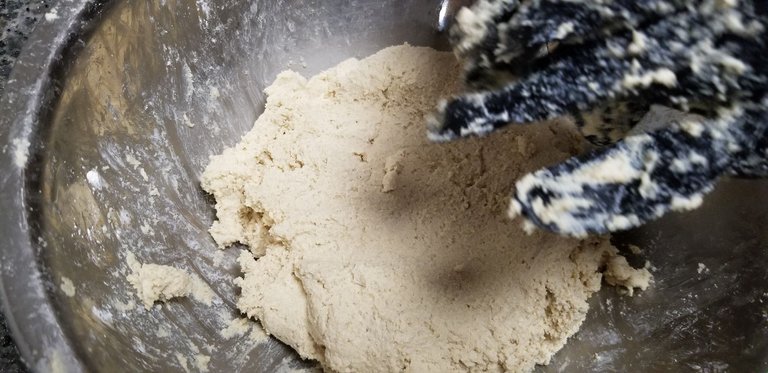
Next add cold milk. We used a dairy free milk here to make the biscuits a little less heavy. Add the milk very slowly, unlike how we did it here, when LovelyLogic accidentally poured way too much milk in, and we had to compensate with extra flour. But baking can be forgiving if you’re stubborn enough!
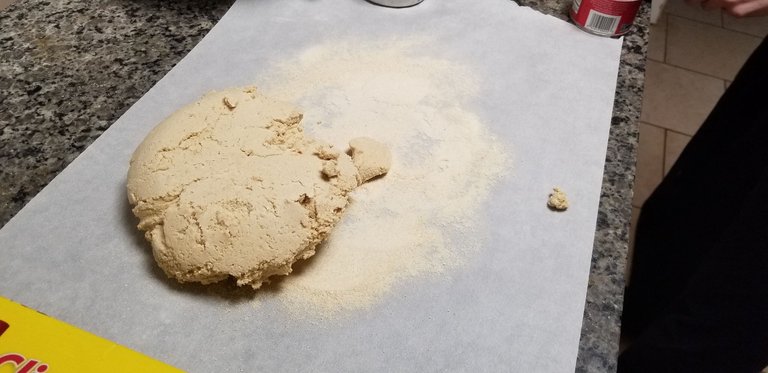
LovelyLogic added about a cup of extra flour until the dough started to come together. Then we kneaded it thoroughly several times, and placed in the fridge to chill for about 45min. Then we kneaded it several times more, rolled it out, and now it was biscuit stuffing time!

We gathered up our dough, our “soft scrambled” eggs, and several little squares of cheddar cheese in preparation for the assembling process.
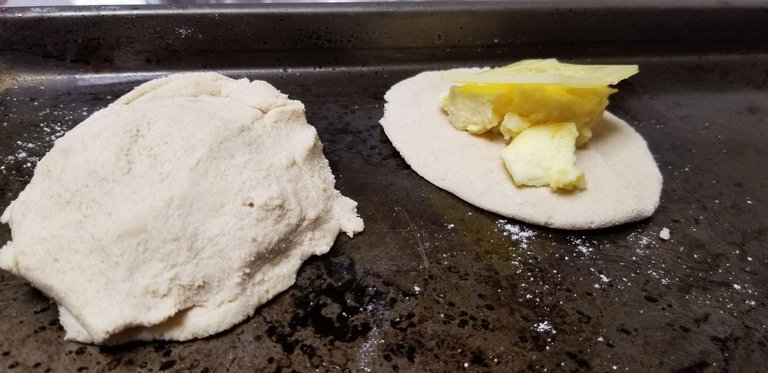
We rolled out a small circle of dough and placed about 1tbsp of eggs and 1 square of cheese in the center. Then rolled out a second circle of about the same size, placed it on top, then pressed the edges together to seal the cheesey, eggy goodness inside.
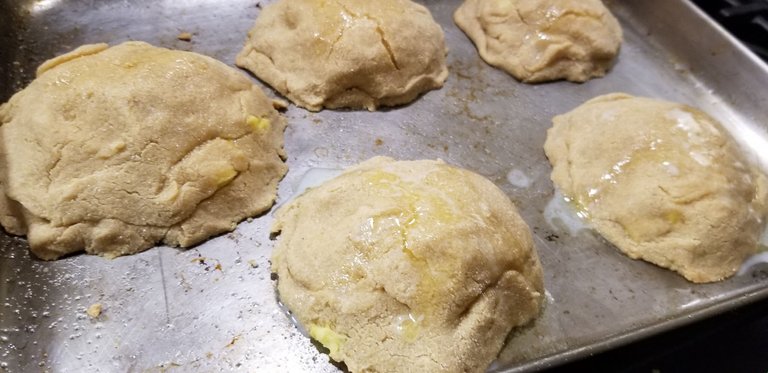
Then we loaded the stuffed biscuits onto a lightly greased baking tray, anointed them with melted butter, and baked them at 350F for about 20 minutes
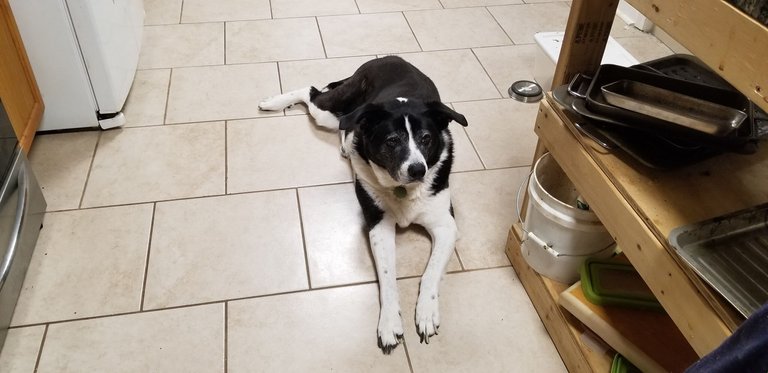
Here you see our sweet, big dog Luci, with her hopes high in the sky that we might drop some eggs or cheese. Sadly her hopes did not become reality.
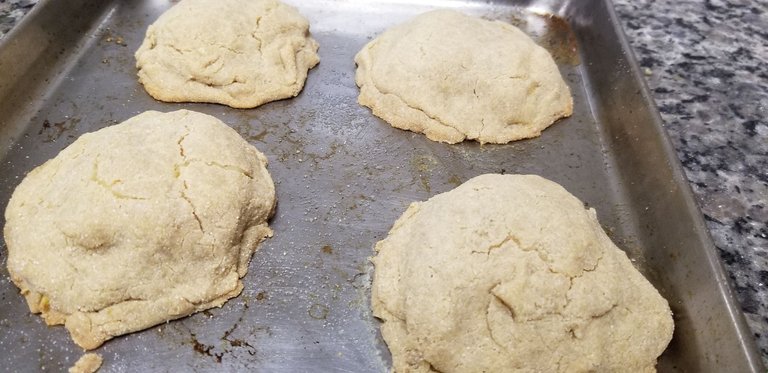
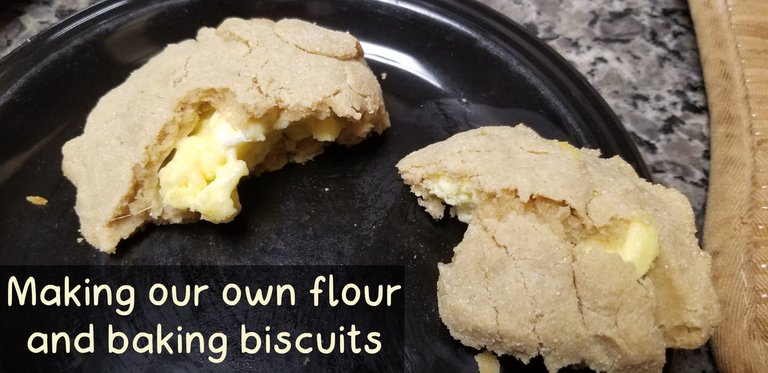
Gluten free baked goods, especially when using arrowroot don’t look the same “golden brown” as wheat products do. They tend to look much lighter in comparison, but we can assure you these were baked to perfection
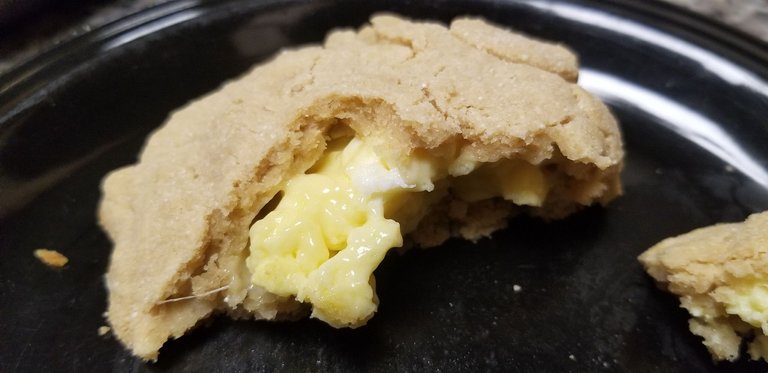
And here it is, the finished product. Perfectly cooked eggs and melty cheese inside a butter biscuit. The dog may have been disappointed, but we were not.
Written by @activate.alpha
Pictures by @solominer