Hoy les traigo un sencillo tutorial de como reducir el peso de archivos multimedia, bien sean archivos de tipo imagen, audio o video, en este caso realizaremos el ejemplo con un archivo de video en formato MP4, el cual tiene un peso de casi 1Gb. Esto resulta bastante útil al momento de querer cargarlo en internet o traspasarlo a otro dispositivo, ya que con un peso menor el archivo tardará menos tiempo en llegar a su destino.
Entonces, manos a la obra apreciados Hivers...
Welcome once again to my blog dear Hivers, I hope you are doing great, wishing you always find the inspiration and creativity necessary and fundamental to create quality content on this amazing platform.
Today I bring you a simple tutorial on how to reduce the weight of multimedia files, whether image, audio or video files, in this case we will perform the example with a video file in MP4 format, which has a weight of almost 1Gb. This is quite useful when you want to upload it to the Internet or transfer it to another device, because with a lower weight the file will take less time to reach its destination.
So, let's get to work, dear Hivers...

Para el siguiente tutorial utilizare Movavi Video Converter Premium V. 21.1.0. Este es un programa sumamente versátil que nos permite convertir nuestros archivos multimedia a más de 180 formatos, incluso a formato HD, es fácil de usar, es seguro, rápido, mejora la calidad de los videos, normaliza y ajusta el audio, fusiona, divide, gira y hasta recorta los archivos antes de convertirlos.
For the following tutorial I will use Movavi Video Converter Premium V. 21.1.0. This is an extremely versatile program that allows us to convert our multimedia files to more than 180 formats, including HD format, it is easy to use, it is safe, fast, improves the quality of the videos, normalizes and adjusts the audio, merges, splits, rotates and even trims the files before converting them.

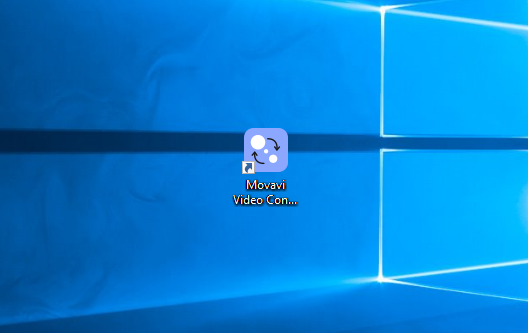
Cuando hayamos realizado la instalación en nuestra computadora, veremos en el escritorio de la pantalla el icono de acceso rápido al programa, accederemos a este dando doble clic sobre el mismo.
When we have installed the program on our computer, we will see on the screen desktop the quick access icon to the program, we will access it by double clicking on it.

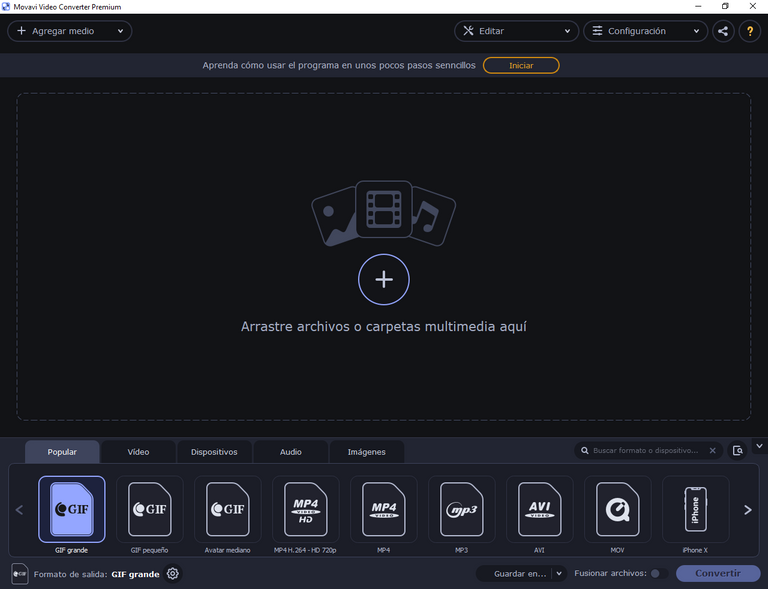
Al abrirse el programa esta será la ventana principal, como pueden observar se trata de una interfaz bastante sencilla y amigable.
When you open the program this will be the main window, as you can see it is a quite simple and friendly interface.

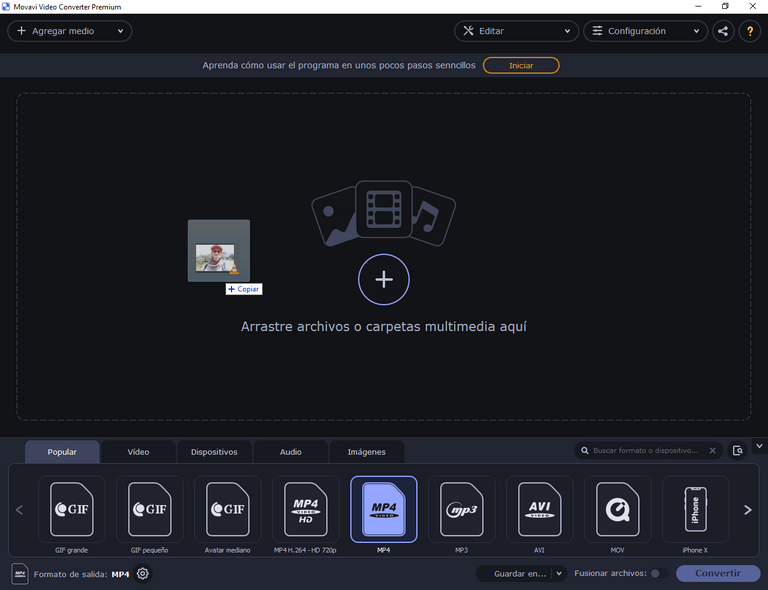
Para convertir un archivo o reducir su peso, como es el caso para este tutorial, debemos ubicar el archivo, luego arrastrarlo a la ventana principal del programa y soltarlo allí.
To convert a file or reduce its weight, as is the case for this tutorial, we must locate the file, then drag it to the main program window and drop it there.

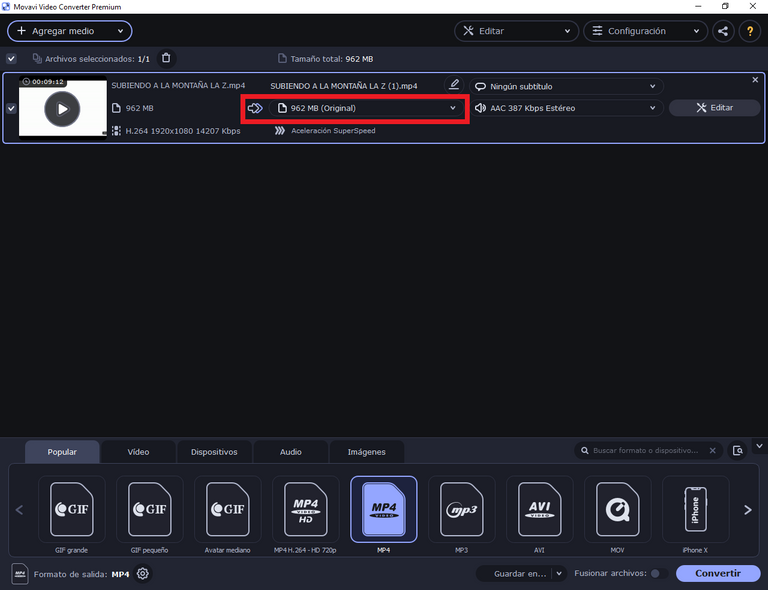
Cuando el archivo se cargue en el programa, podremos ver las propiedades de dicho archivo. En este caso el archivo que estoy utilizando pesa 962Mb.
When the file is loaded into the program, we can see the properties of the file. In this case the file I am using weighs 962Mb.

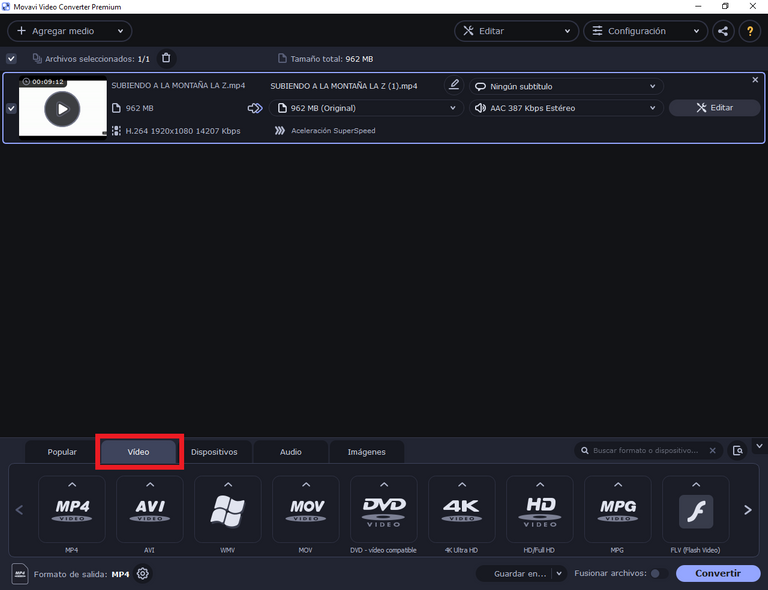
El paso siguiente será seleccionar la pestaña video en la parte inferior de la ventana.
The next step is to select the video tab at the bottom of the window.

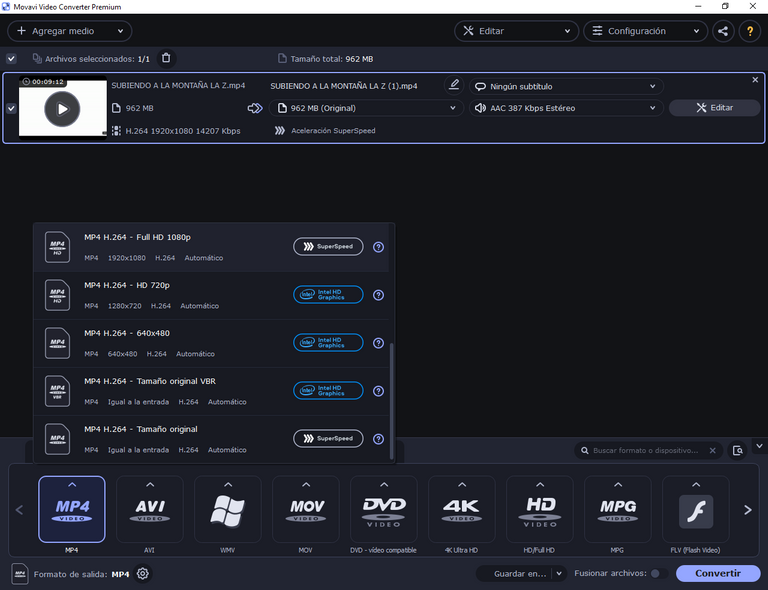
Dentro de las opciones de la pestaña video encontraremos varios formatos de video, como en esta oportunidad lo que queremos es solo reducir el peso, seleccionaremos el mismo formato de nuestro video original el cual como ya les mencioné anteriormente es formato MP4. En cada tipo de formato se desplegaran varias opciones, según la calidad.
Within the options of the video tab we will find several video formats, as in this opportunity what we want is only to reduce the weight, we will select the same format of our original video which as I mentioned before is MP4 format. In each type of format several options will be displayed, according to the quality.

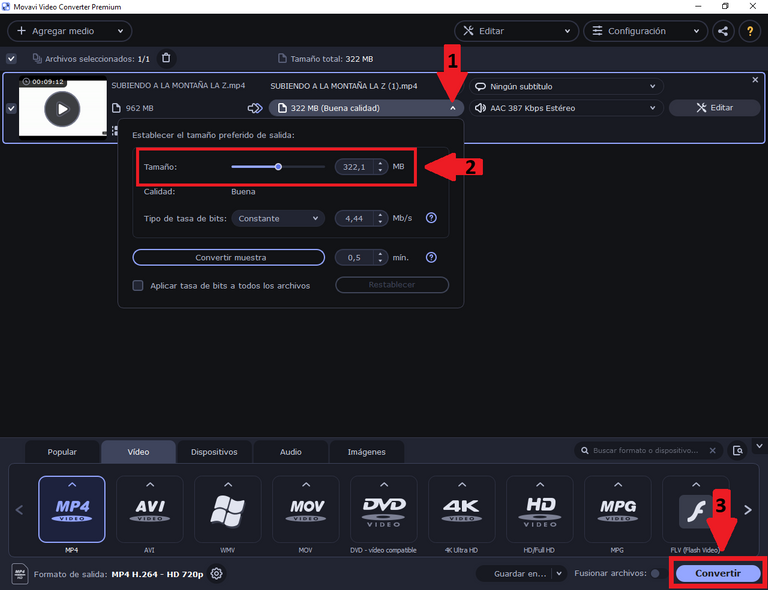
Una vez seleccionado el formato y la calidad, aún podremos jugar con el balance entre el peso y la calidad, según nuestros requerimientos, para esto seleccionamos donde se muestra el peso del archivo (Flecha 1), al hacerlo se desplegara una ventana donde podemos modificar el tamaño del archivo final, allí mismo nos irá indicando la calidad correspondiente (Flecha 2) y el ultimo paso para completar la operación será hacer clic en el botón de Convertir (Flecha 3).
Once the format and quality have been selected, we can still play with the balance between weight and quality, according to our requirements, for this we select where the file weight is shown (Arrow 1), when doing so a window will be displayed where we can modify the size of the final file, right there it will indicate the corresponding quality (Arrow 2) and the last step to complete the operation will be to click on the Convert button (Arrow 3).

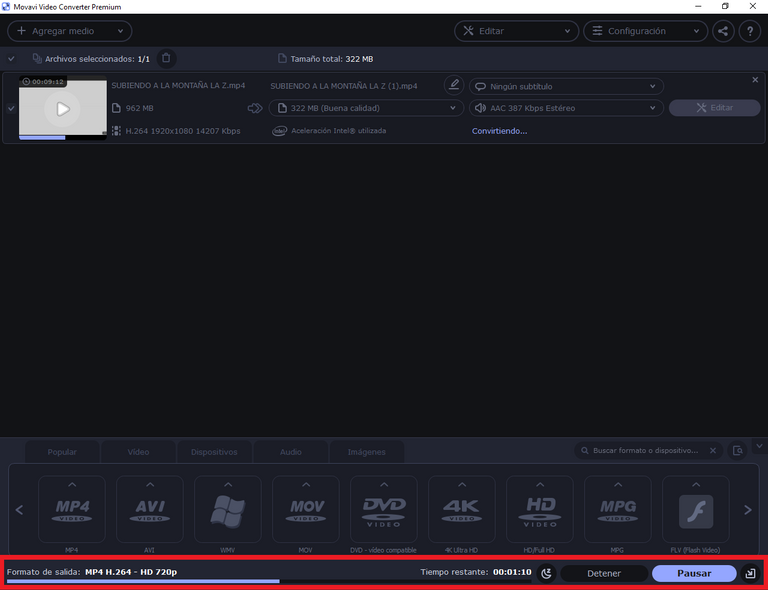
Al realizar el último paso anterior, podremos visualizar en la parte inferior de la ventana del programa una barra de progreso, la cual nos indicará el avance de la conversión.
After the last step above, a progress bar will be displayed at the bottom of the program window, which will indicate the progress of the conversion.

Finalmente, cuando el programa haya realizado la conversión del archivo, nos avisará con un sonido y se abrirá automáticamente la carpeta donde se encuentra el archivo convertido.
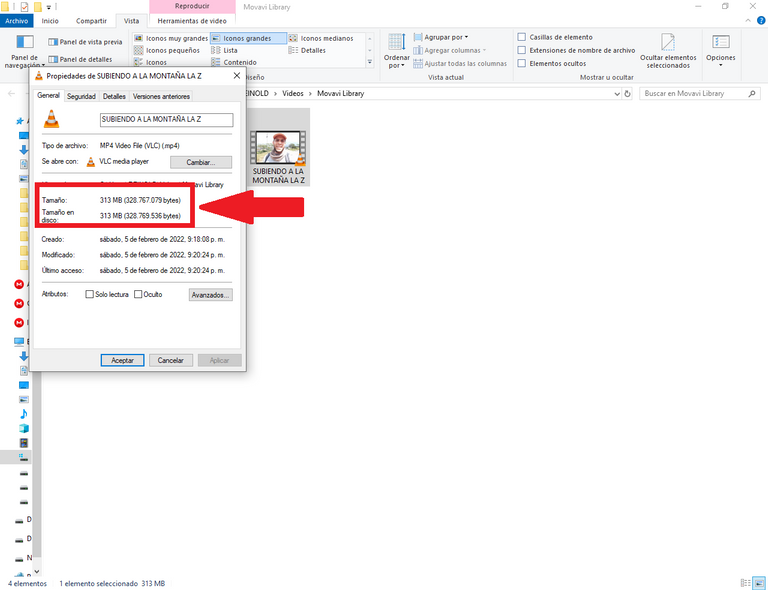
Para verificar el tamaño del archivo revisaremos en las propiedades de este.
Finally, when the program has finished converting the file, it will notify us with a sound and will automatically open the folder where the converted file is located.
To verify the size of the file we will check the file properties.

Hasta la siguiente publicación!
Until the next post!
El separador de texto y las demás imágenes son de mi autoría.
The text separator and other images are of my authorship.
Las imágenes son capturas de pantalla hechas en mi computadora.
The images are screenshots taken on my computer.
Imagen de portada/Cover image: Realizada en Canva / Made on Canva
Translated with: www.DeepL.com/Translator (free version)

