Recuerdo vivamente cuando era un niño, esos momentos en que mis abuelos me llevaban a las “maquinitas”.
Así le decíamos que los gabinetes de videojuegos arcade que solo podías encontrar en esos locales tan únicos y especiales.
Desde que inserte mi primera moneda en una de esas máquinas descubrí muchas emociones a la vez. La curiosidad de conocer el juego que yacía en frente de mi, descubrir que tan lejos podía llegar con una sola moneda era todo un reto y cada victoria era pura adrenalina.
La música del local quedaba de fondo y se mezclaba con todos los sonidos de cada máquina, provocando un caos sonoro de disparos, saltos, explosiones, melodías, motores y rayos lásers que te mantenían con la emoción al máximo y a veces era difícil decidir que máquina escoger para gastar tus monedas y jugar.
Luego llegaron las consolas caseras de atari, Nintendo, Sega y PlayStation. Ya podía jugar en casa sin gastar dinero en un local (alivio para padres y abuelos seguramente $$$) pero a pesar de los gratos recuerdos que hoy me traen dichas consolas nunca perdí la fantasía de tener una máquina arcade en mi casa.
Era mi sueño desde que pise un salón recreativo pues los juegos arcade no eran igual a las consolas caseras, estas ofrecían adaptaciones según sus limitaciones y a pesar de que eran muy entretenidas nunca fue lo mismo.
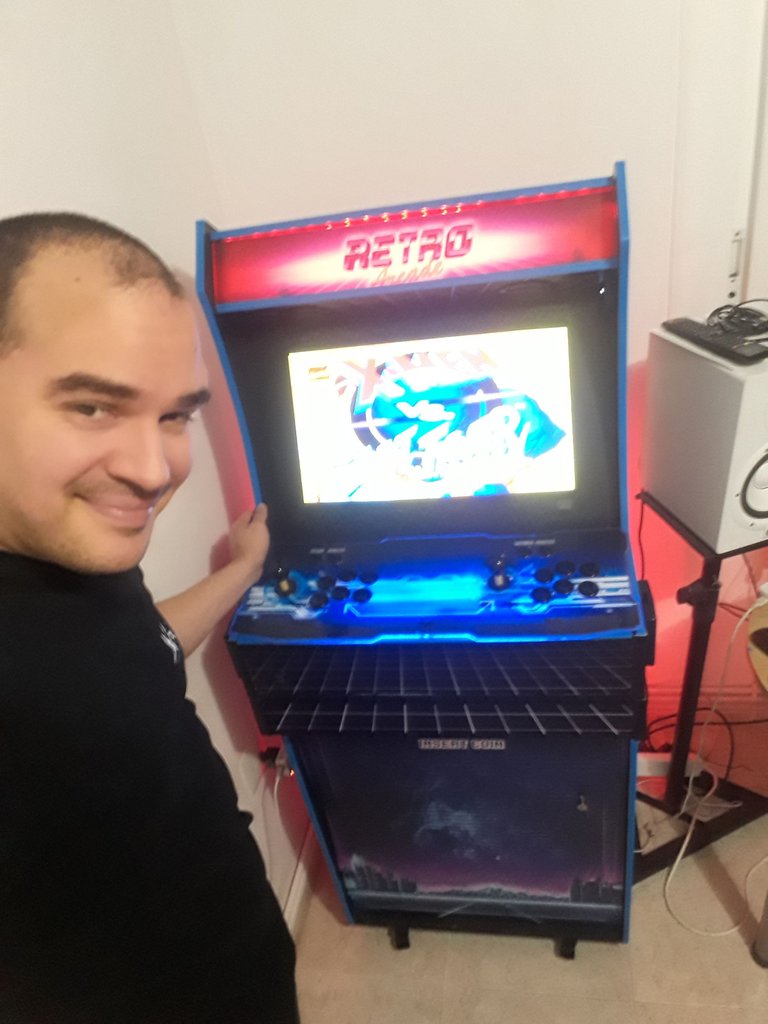
Hoy, siendo adulto, decidí cumplir el sueño de mi infancia.
Hoy no solo puedo decir que tengo una máquina arcade en mi propia casa con la cual disfruto la experiencia más cercana a esos días, si no que además la he construido yo mismo con mucho cariño y esfuerzo.
En este post quiero compartir a detalle todo lo que hice para hacerlo desde cero y sin experiencia en ser un manitas más que armar muebles prefabricados tipo Ikea.
I remember vividly from when I was a child, those moments when my grandparents would take me to the "maquinitas". That's how we called the arcade video game cabinets that you could only find in those unique and special places.
Since I inserted my first coin in one of those machines I discovered so many emotions at the same time. The curiosity of knowing the game that lay in front of me, discovering how far I could go with a single coin was a challenge and each victory was pure adrenaline.
The music of the store was in the background and mixed with all the sounds of each machine, causing a sonorous chaos of shots, jumps, explosions, melodies, engines and laser beams that kept you with the excitement to the maximum and sometimes it was difficult to decide which machine to choose to spend your coins and play.
Then came the home consoles from Atari, Nintendo, Sega, PlayStation. I could now play at home without spending money in a store (relief for parents and grandparents surely $$$) but despite the fond memories that these consoles bring me today I never lost the fantasy of having an arcade machine in my house. It was my dream since I stepped in an arcade because arcade games were not the same as home consoles, these offered adaptations according to their limitations and although they were enjoyable it was never the same.
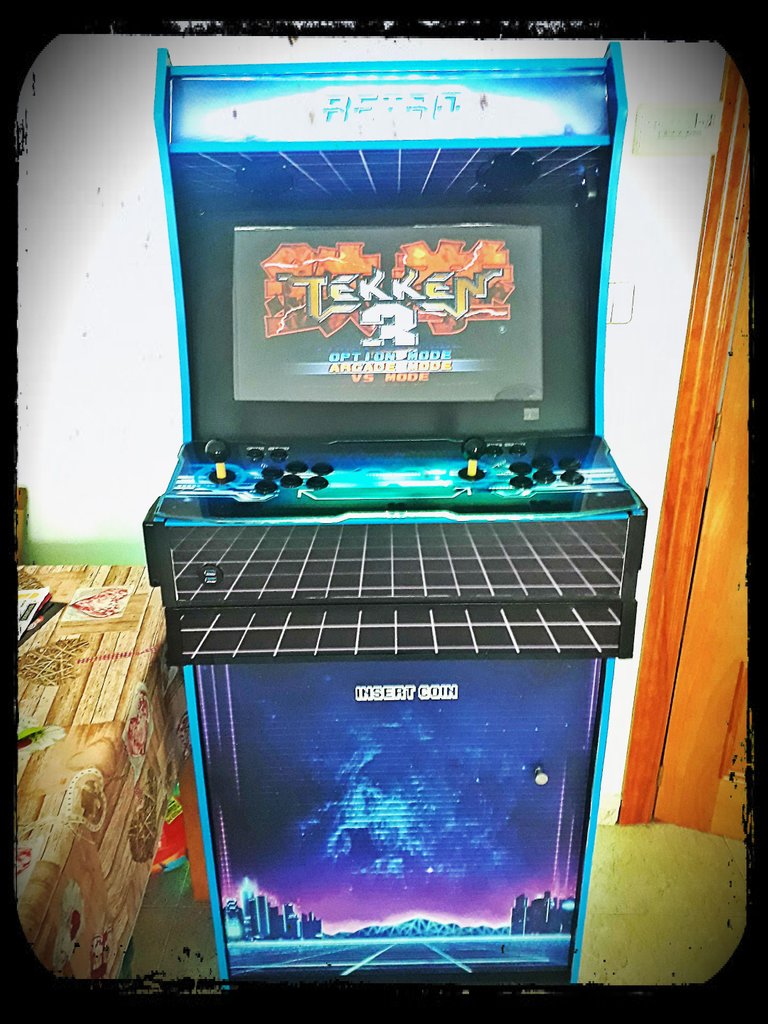
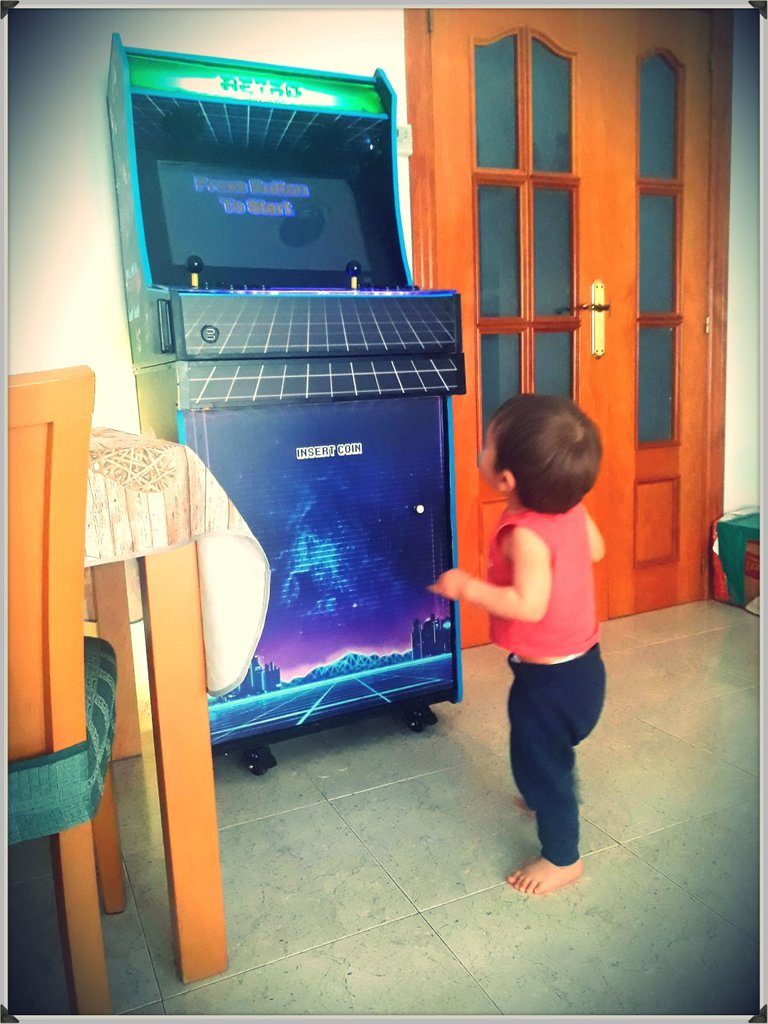
Today, as an adult, I decided to fulfill my childhood dream. Today I can not only say that I have an arcade machine in my own home with which I enjoy the experience closer to those days as when I was a child, but I have also built it myself, with much love and effort.
In this post I want to share in detail everything I did to make it from scratch and without experience in being a handyman rather than assembling prefabricated furniture.
El corazón de la bestia.
Hace unos años atrás me empezó la curiosidad de buscar alternativas para tener un arcade en casa y buscando opciones me encontré con el raspberry pi.
Es un mini computador que se usa mucho para emular videojuegos retro de casi todo tipo de consolas, desde la Gameboy hasta PlayStation 1 pasando por Súper Nintendo y juegos arcade, es una maravilla.
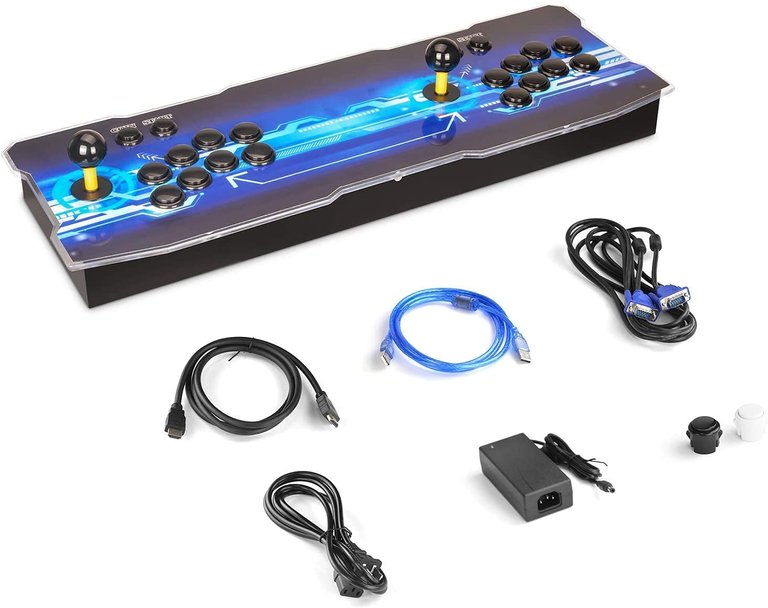
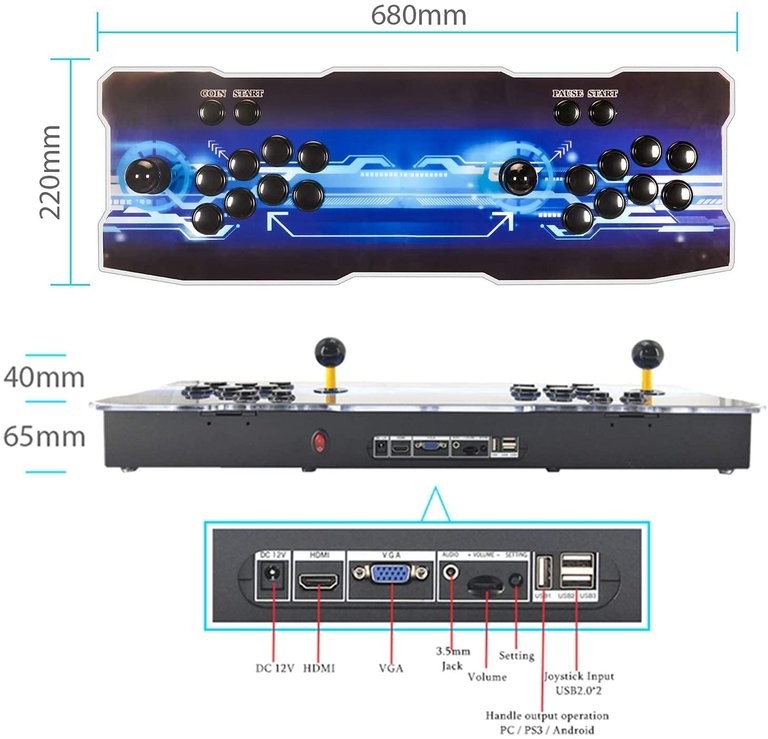
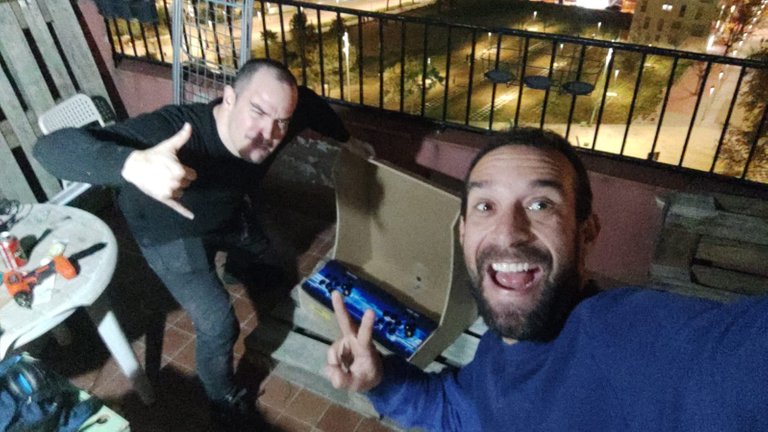
Pero buscando por internet encontré otra opción proveniente de China, se llama Pandora box. Esta es una caja muy bien hecha y visualmente atractiva que tiene en su interior una mini computadora con joysticks y botones instalados y listos para jugar a dos personas, solo es de conectarla por HDMI o VGA a la tele, monitor, o hasta un proyector y boom!, a jugar arcade a lo grande.
El aparato ya trae como 3000 juegos instalados así que es de conectar y jugar sin configurar nada.
Así que me compré un pandora box y lo disfruté frente a la televisión por un tiempo pero a pesar de todo no me sentía muy a gusto, así que lo guardé en su caja y lo tuve un buen tiempo guardado en el clóset para no molestar en la casa con un trasto que parece un juguete y que no tiene sitio en ningún lugar.
Con esa inconformidad empecé a buscar una solución. Me molestaba haber gastado ese dinero para quedar insatisfecho, así que de pronto recordé el disfrute de estar frente a una máquina arcade de verdad y fue ahí cuando se me ocurrió la idea de construir el gabinete arcade full size para replicar la experiencia .
 |  |
|---|
The heart of the beast.
A few years ago I was curious to look for alternatives to have an arcade at home and looking for options I found the raspberry pi.
It is a mini computer that is widely used to emulate retro video games of almost all types of consoles, from the gameboy to PlayStation 1 through super Nintendo and arcade games, it's a wonder.
But searching the internet I found another option from China, it's called pandora box. This is a very well made and visually attractive box that has inside a mini computer with joysticks and buttons installed and ready to play for two people, just connect it via HDMI or VGA to the TV, monitor, or even a projector and boom, to play arcade games in a big way. The device already comes with about 3000 games installed so it's plug and play without configuring anything.
So I bought a pandora box and enjoyed it in front of the TV for a while but despite everything I did not feel very comfortable, so I kept it in its box and had it for a long time in the closet to not bother the house with a thing that looks like a toy and has no place anywhere.
With that dissatisfaction I started to look for a solution. It bothered me to have spent that money to be unsatisfied, so suddenly I remembered the enjoyment of being in front of a real arcade machine and that's when I came up with the idea of building the full size arcade cabinet to replicate the experience.
Lugar, lugar, lugar.
Antes de comprar nada hay que tener un lugar óptimo para trabajar, por el ruido y el olor a pintura, además de los residuos de Cortes de madera. Yo no tengo ni lo uno ni lo otro y por eso agradezco a mi compadre Francisco Lobo por prestarme la terraza de su casa y las herramientas para hacer esto posible.

Herramientas importantes:
Sierra caladora
Destornillador eléctrico
Fresadora (para instalar T-molding)
Pistola de silicon
Lijadora
Martillo
Capitanes y prensas
Mesa de trabajo estable, limpia y recta.
Cinta métrica
Taladro con mechas de copa y de madera en varios tamaños .
Unas birras, buena música grunge de los 90
Y lo demás es tornilleria y ganas.
Location, location, location.
Before buying anything you have to have an optimal place to work, because of the noise and the smell of paint, in addition to the residues of wood cuts. I have neither one nor the other and for that I thank my compadre Francisco Lobo for lending me the terrace of his house and the tools to make this possible.
Important tools:
Jig saw
Electric screwdriver
Milling machine (to install T-molding)
Silicone gun
Sander
Hammer
Captains and presses
Stable, clean and straight work table.
Tape measure
Drill with cup and wood bits in various sizes.
Some beers, good grunge music from the 90's.
And the rest is hardware and desire.
Empápate de información
Vi muchos videos en internet de como hacer tu máquina arcade, pero pocos videos reflejaban mi caso. Muchos usaron la raspberry pi con botones y joysticks perforando un panel de madera donde van los controles, y me enteré de que el mundo de los gabinetes arcade es variado y con muchos diseños.
Low boy, bartop, coffee table, son algunos de los diseños ya establecidos como estándares, además de que marcas como Williams y Midway en los años 80 ya habían desarrollado gabinetes estándares para juegos específicos como Pacman, Star Wars o Pole position, que se han vuelto referentes para los amantes del arcade.
Además me encontré con un revival del retrogaming en España, con empresas que te venden el arcade ya listo y personalizado (omniretro, rexarcade) otras compañías que te venden el gabinete prefabricado para que lo armes en casa (talentec) y otras alternativas donde consigues desde tornilleria, electrónica y accesorios.
Yo me decidí por hacer un gabinete en dos partes. Bartop y pedestal. Pero decidí hacerlo desde cero, madera cruda y manos a trabajar.
Soak up with information
I saw many videos on the internet on how to make your arcade machine, but few videos reflected my case. Many used the raspberry pi with buttons and joysticks drilling a wooden panel where the controls go, and I learned that the world of arcade cabinets is varied and with many designs. Low boy, bartop, coffee tablet, are some of the designs already established as standards, besides brands like Williams and Midway in the 80's had already developed standard cabinets for specific games like Pacman, Star Wars or Pole position, which have become references for arcade lovers.
In addition I found a revival of retrogaming in Spain, with companies that sell you the arcade ready and customized (omniretro, rexarcade) other companies that sell you the cabinet prefabricated for you to assemble it at home (talentec) and other alternatives where you get from screws, electronics and accessories.I decided to make a cabinet in two parts. Bartop and pedestal. But I decided to do it from scratch, raw wood and hands to work.
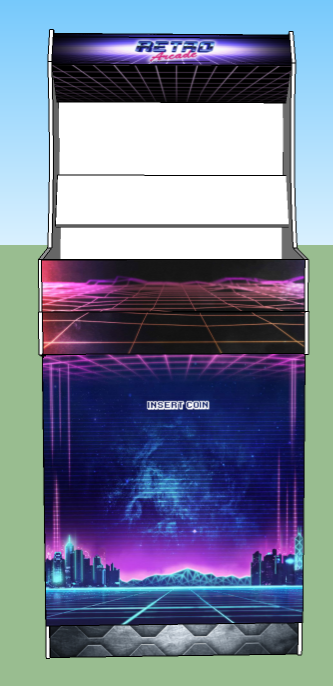
Virtualizar y visualizar el sueño.
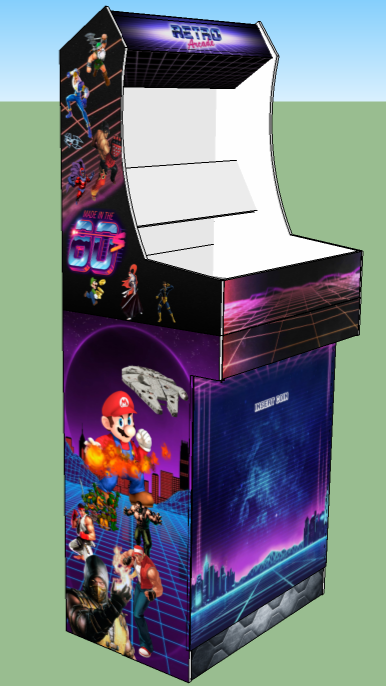
Ya sabiendo que tengo el lugar, un amigo para conversar con unas cervezas mientras pongo tornillos y las herramientas básicas para hacer el trabajo viene lo más importante. El diseño.
Para esto utilicé Google Sketchup.
Un programa gratuito que te permite diseñar en 3D cualquier proyecto que se te ocurra, desde una casa hasta un gabinete para videojuegos retro.
Por supuesto antes de diseñar tomé en cuenta las medidas del Pandora box para empotrarlo además de varios planos que encontré en internet para usar como referencia (arcade blueprint, fue una de mis búsquedas claves) para de esta forma poder diseñar a medida lo que tenia en mente.
 |  |  |  |
|---|
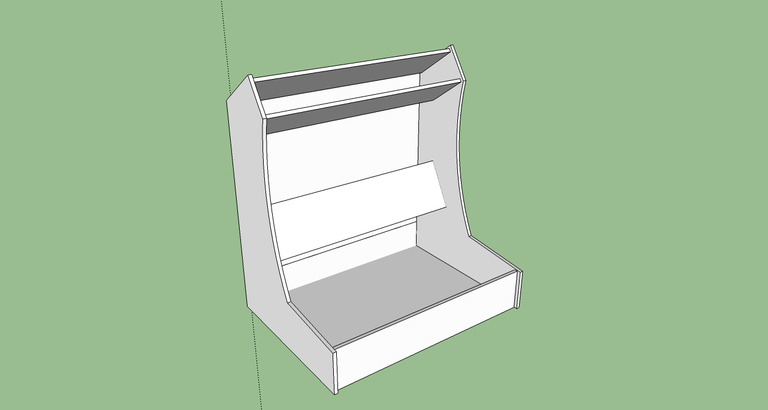
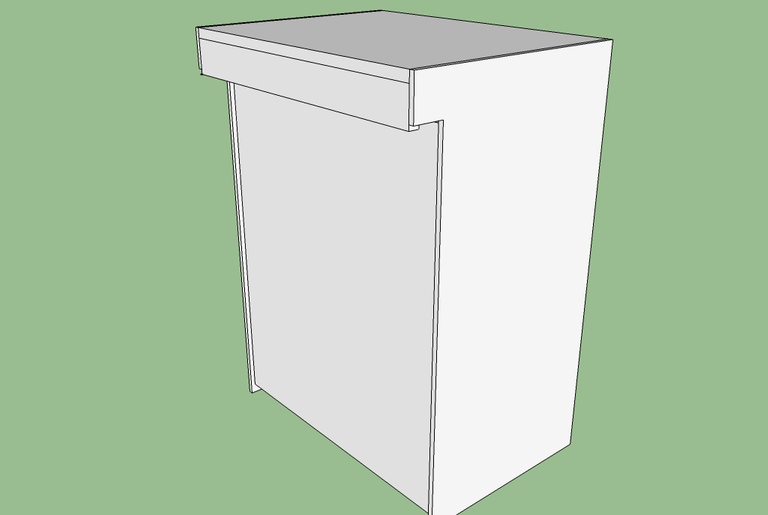
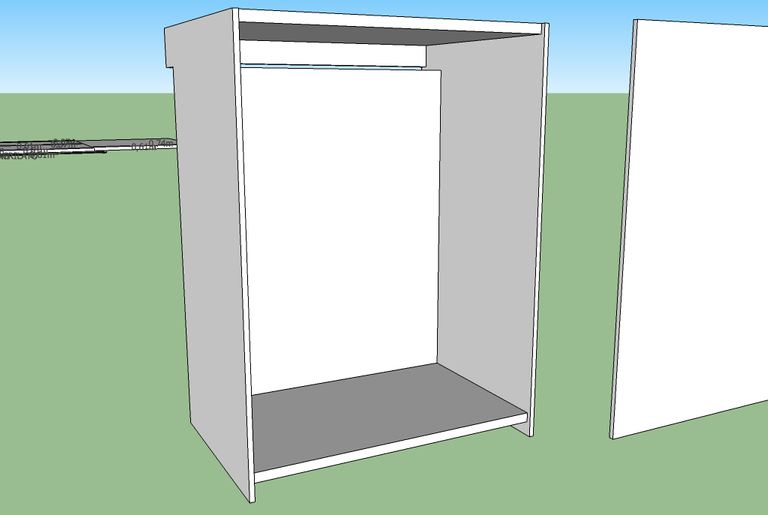
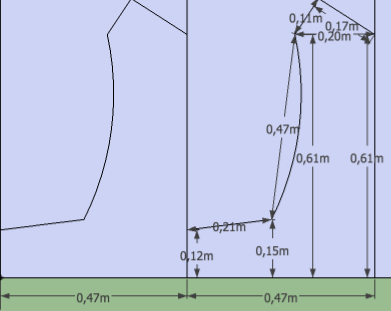
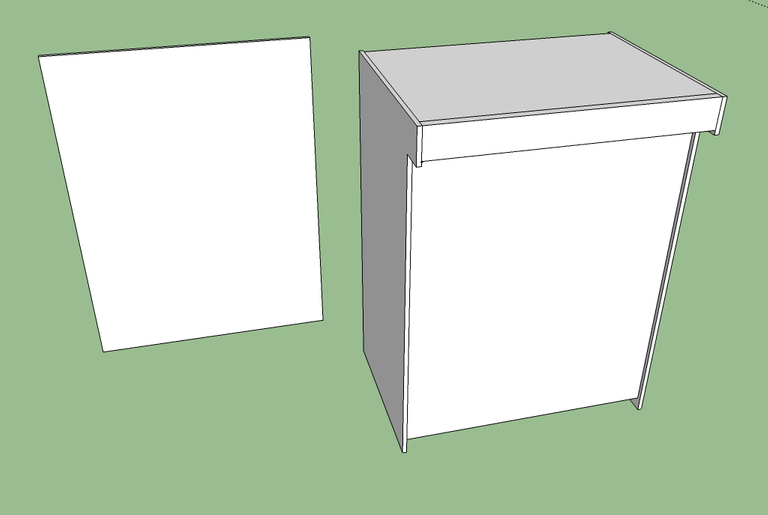
Terminado el diseño se ven muy bonitas las imágenes en 3D y se puede visualizar de forma clara cómo puede quedar físicamente pero les advierto que un error de 1 cm en un corte de madera te puede traer complicaciones que no te dejarán dormir, por eso la previsualización en 3D y las herramientas de Sketchup te permiten revisar varias veces y de forma continua las medidas y el montaje de todo el proyecto.
 |  |  |
|---|
Sin embargo, por más revisiones que hagas es muy probable que cometas algún error como yo lo cometí, pero si algo aprendí en el camino de realizar este proyecto es que todo se puede solucionar sobre la marcha, así que sin miedo al éxito y una vez terminado el diseño en 3D pude ver claramente cómo proceder a la hora de tener las maderas en el lugar de trabajo.
Siempre tenia fotos de varios angulos en el modelo 3D en mi teléfono y mientras avanzaba en el proyecto las miraba para tener claro el montaje, el diseño 3D es una guía muy útil.
Virtualize and visualize the dream.
Already knowing that I have the place, a friend to chat with a few beers while I put screws and the basic tools to do the job comes the most important thing. The design.
For this I used Google Sketchup.
A free program that allows you to design in 3D any project you can think of, from a house to a cabinet for retro video games.
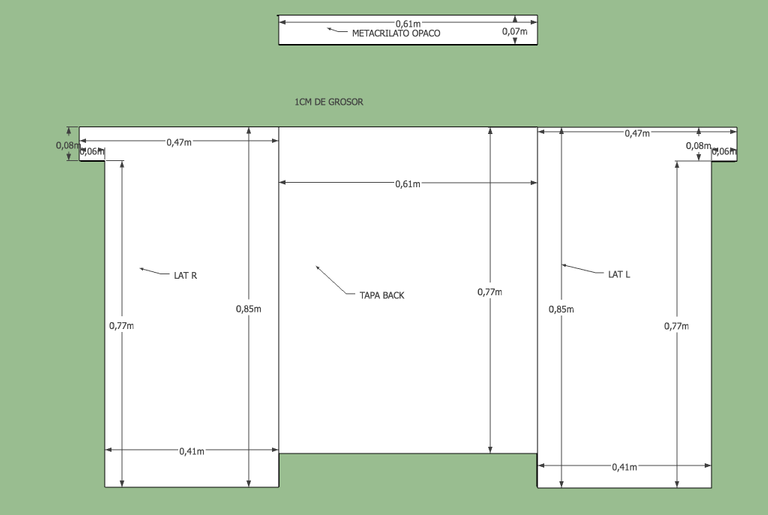
Of course before designing I took into account the measurements of the Pandora box to embed it plus several plans that I found on the internet to use as reference (arcade blueprint, was one of my key searches) so I could design what I had in mind.
Finished the design looks very nice 3D images and you can clearly visualize how it can be physically but I warn you a 1 cm error in a wood cut can bring complications that will not let you sleep, so the 3D preview and Sketchup tools allow you to review several times and continuously the measurements and assembly of the entire project.
However, no matter how many revisions you make you will surely make some mistakes as I did, but if I learned something on the way to do this project is that everything can be solved on the fly so without fear of success and once the 3D design was finished I could see clearly how to proceed when it came to have the timbers in the workplace.
I always had photos of various angles in the 3D model and as I progressed in the project I looked at them to be clear about the assembly, the 3D design is a very useful guide.
Toco madera.
Ya con los planos y las medidas claras toca cortar madera. Yo utilicé MDF crudo por lo barato y lo maleable que es y aquí les doy un dato. Si pueden ahorrar la cortadera, háganlo. Yo encontré una compañía en Tarragona llamada Corte Maderas
Cortemaderas
Esta compañía es lo máximo! entras en la página web, especificas la madera que quieres, las medidas, añades al carrito, repites hasta tener todas las maderas que nesecitas, pagas y en 9 días te llegan las maderas cortadas a medida a tu casa, listas para ensamblar y a muy buen precio todo.
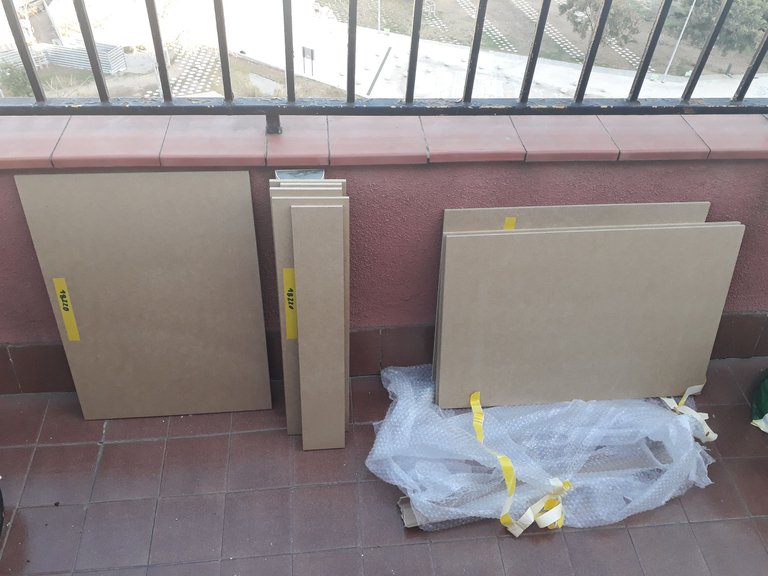
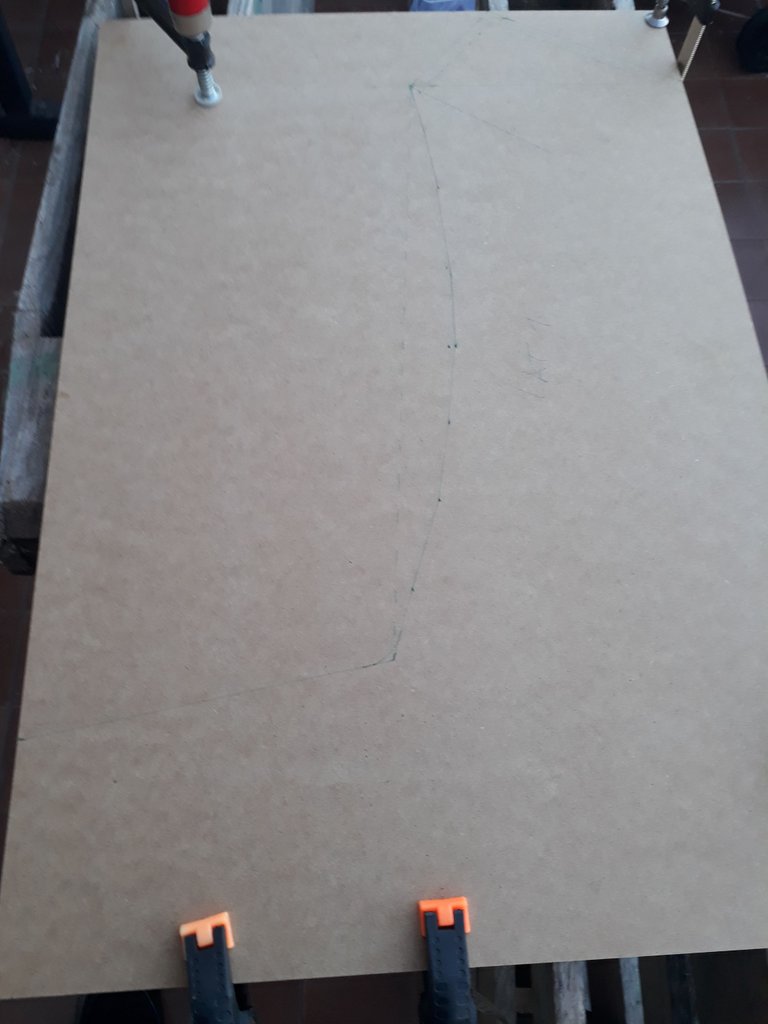
A mí me funcionó de maravilla porque la sierra caladora va a pulso y nunca te queda un corte recto si no tienes guía y no tenia mesa de corte que sería lo ideal.
Touch wood for good luck.
Once the plans and measurements were clear, it was time to cut wood. I used raw MDF because of its cheap and here is a tip. If you can save mcutting the wood by yourself, do it. I found a company in Tarragona called Corte Maderas
Cortemaderas
This company is the best! you enter the web page, specify the wood you want, the measurements, add to the cart, repeat until you have all the wood you need, pay and in 9 days you get the wood cut to size at home ready to assemble and at a very good price.
It worked wonders for me because the jigsaw is pulse and you never get a straight cut if you don't have a guide and I didn't have a cutting table which would be ideal.
Y hasta aquí el post de hoy, es bastante información considerando que fue una aventura de meses. En el próximo post hablare del ensamblaje e instalación de componentes electrónicos, vinilos y los retoques finales, espero les guste el post y nos vemos en la segunda parte.
Este post es más un relato de mi experiencia que un tutorial detallado, sin embargo a través de mi relato pueden obtener algunos tips además de inspiración y si estas en España puedes conocer un poco de las opciones y servicios con los que puedes contar para este tipo de proyectos. Espero lo disfruten o les sea de provecho.
And so far for today's post, it's quite a lot of information considering it was an adventure of months. In the next post I will talk about the assembly and installation of electronic components, vinyls and the final touches, I hope you like the post and see you in the second part.
Las fotos tomadas durante el proceso de construcción fueron hechas con mi teléfono móvil, las fotos de referencia del pandora box son tomadas de Amazon.es y los render 3D son de mi autoría.
The photos taken during the construction process were taken with my cell phone, the reference photos of the pandora box are taken from Amazon.es and the 3D renders are of my authorship.