ENGLISH
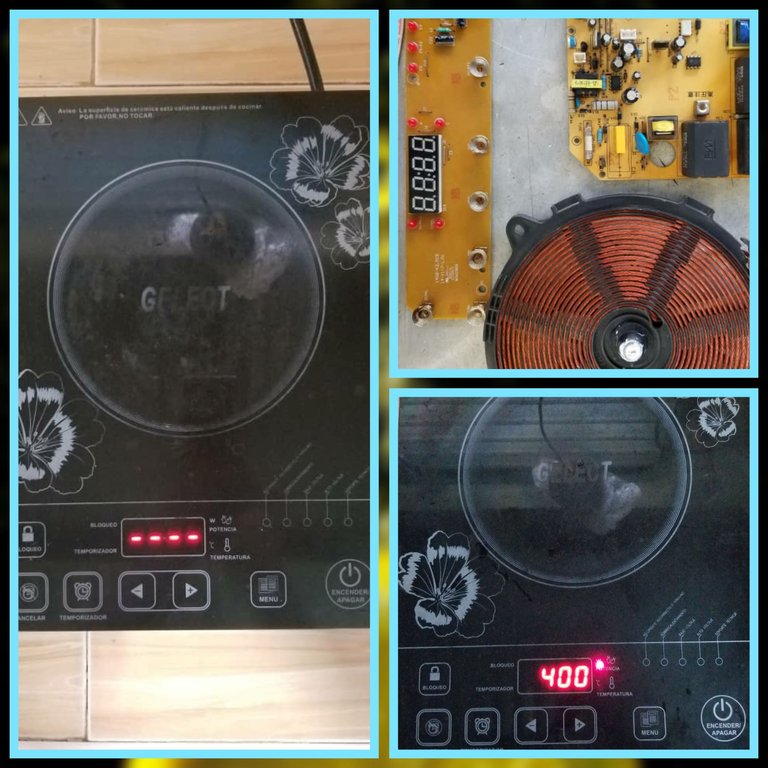
Greetings once again to the entire community, it is a pleasure to come back here to share with you my experiences during the repair and maintenance of the induction stove I have at home, which presented problems in the seven-segment LEDs of the touch panel.
The issue is that some of the segments of these LEDs did not light up, which worried me and motivated me to check what was the cause, because from experience in other occasions this failure is the preamble of greater evils, or symptoms that the board needs cleaning because the corrosive action of dust linked with moisture is beginning to cause damage to the copper connections.
Next I will show you that precisely the failure was caused by a lack of maintenance, which fortunately had no major problems, but if the problem had not been solved the consequences would be greater, incurring economic expenses, because right now in my country spare parts for this type of kitchen are quite expensive, and do not even think about buying a new one, because you bleed 😂.
Here I show you what happened to me.
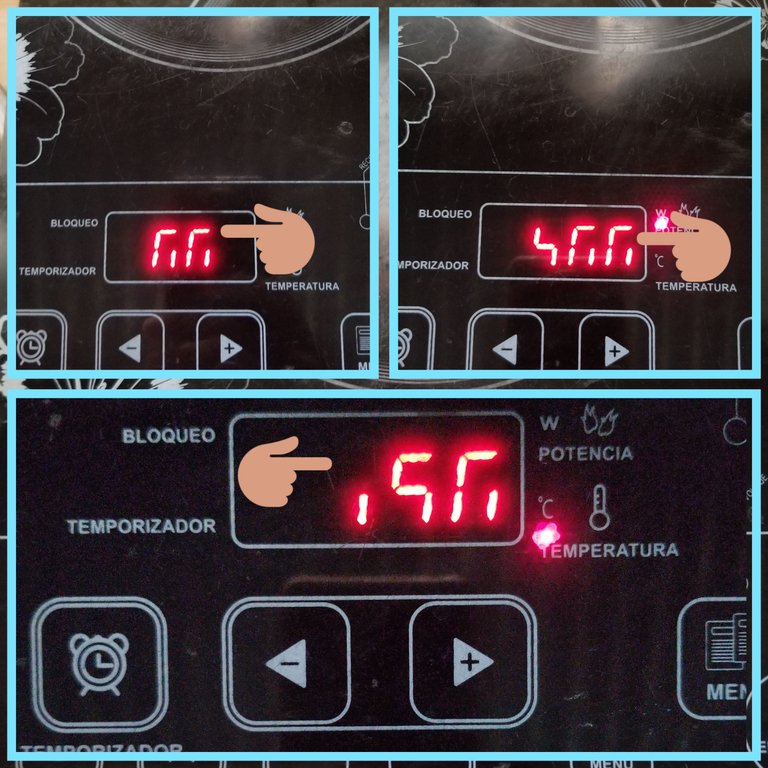
In the previous image I show you how the fault manifested itself, it can be seen that some of the segments are turned off.
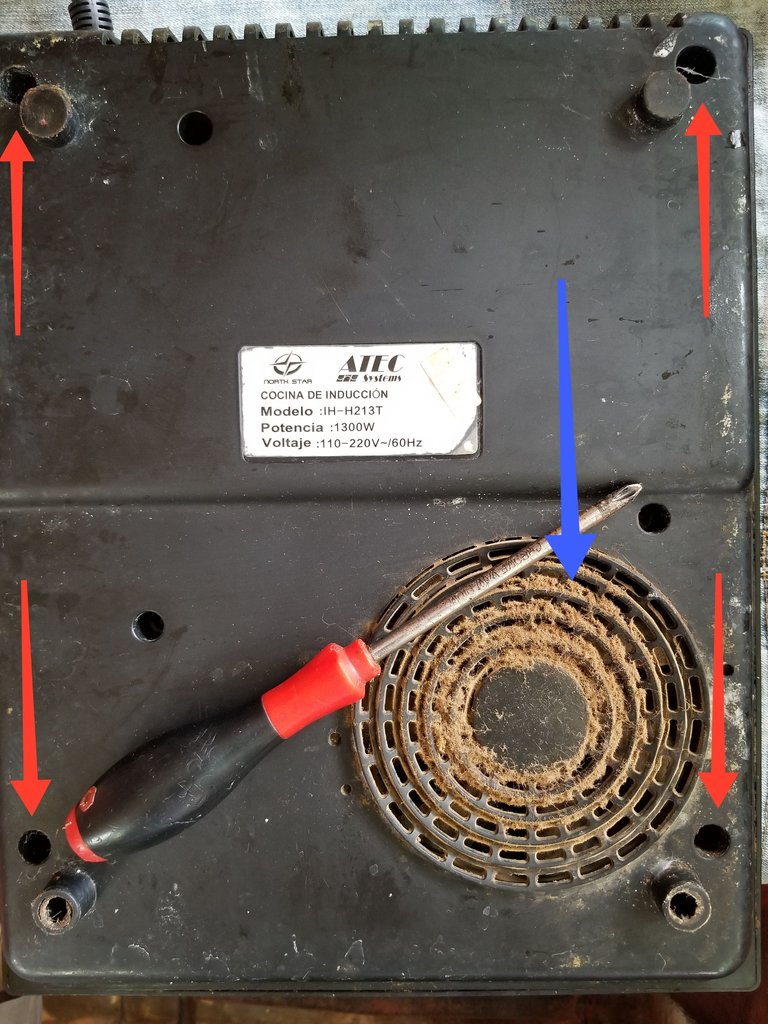
Marked with a blue arrow you can see the great dirt present in the ventilation grill, due to the lack of maintenance.
Marked with red arrows are the holes where the screws that I removed with the help of a screwdriver, to be able to access the interior of the kitchen.
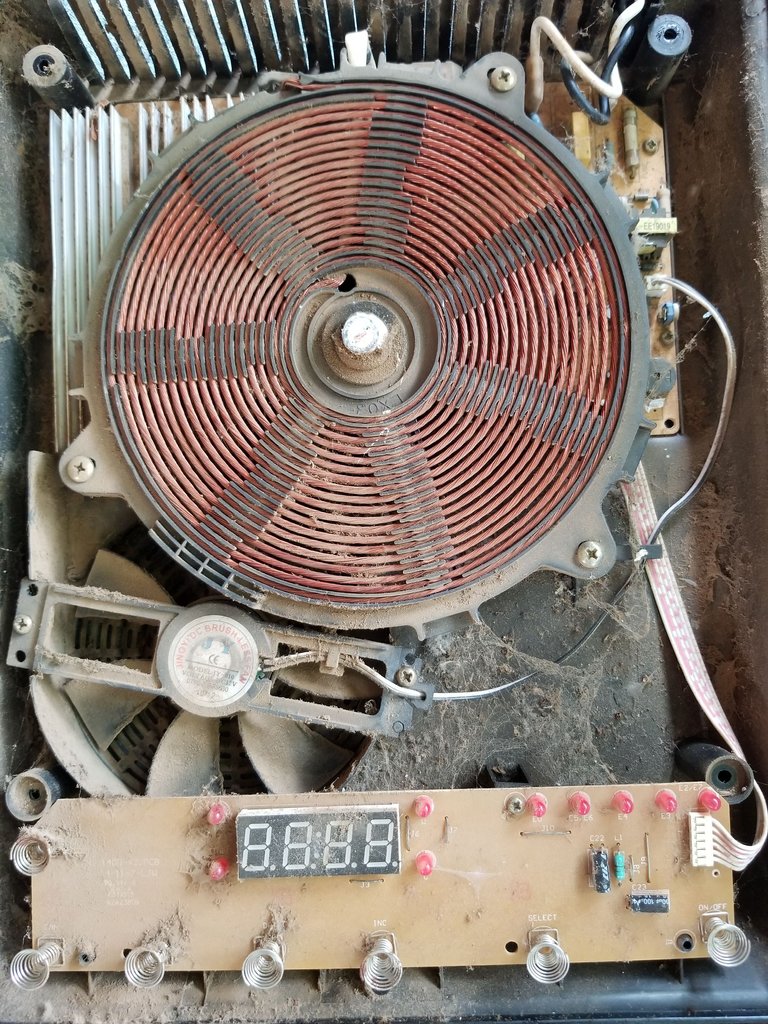
When removing the cover, which is the tempered glass itself, I notice that there is a high level of dirt as you can see in the picture above.
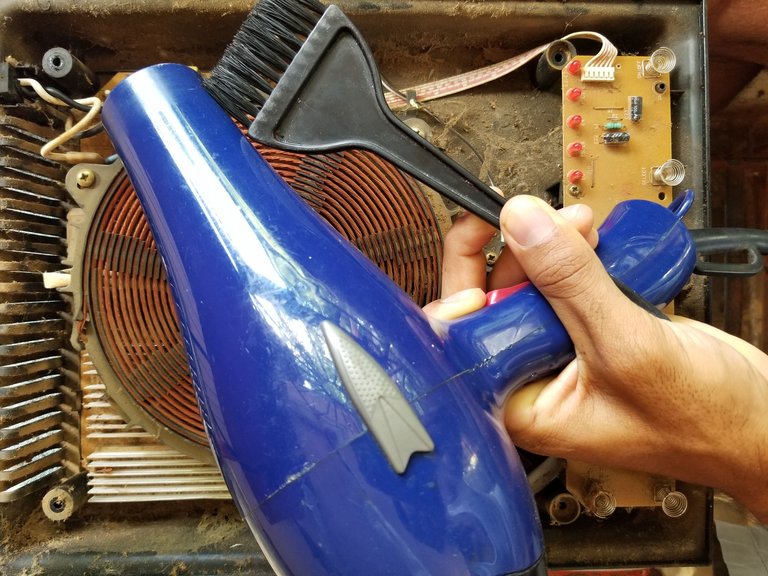
Before continuing with the repair, I do a preliminary cleaning with the help of a hair dryer and a brush.
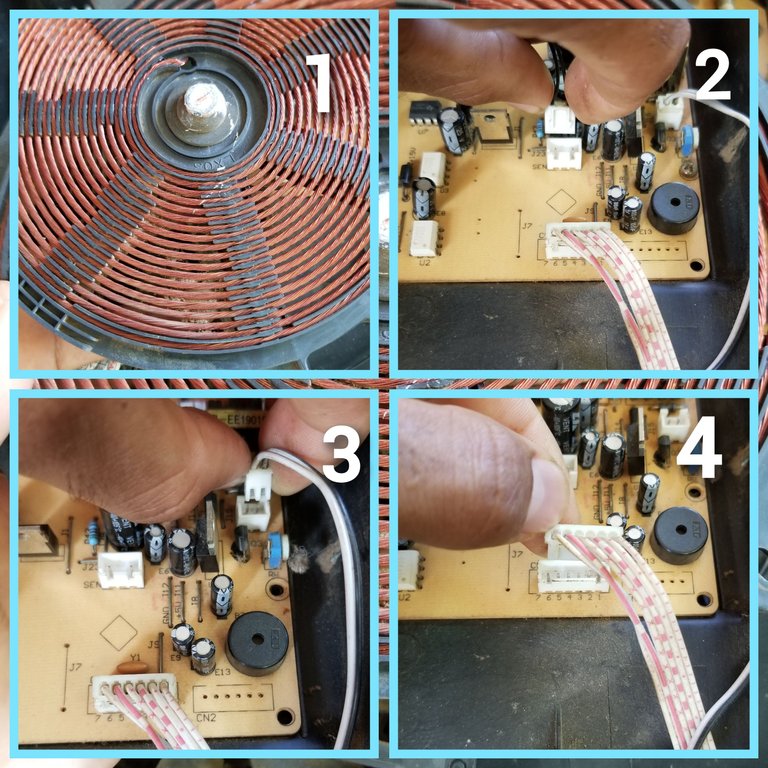
After doing a superficial cleaning I removed the parts from the stove.
1-I removed the flat induction coil.
2-I removed the connector of the temperature sensor that is in the center of the induction coil.
3- I removed the connector of the fan in charge of expelling the hot air to the outside.
4-Remove the connector of the control touch panel.
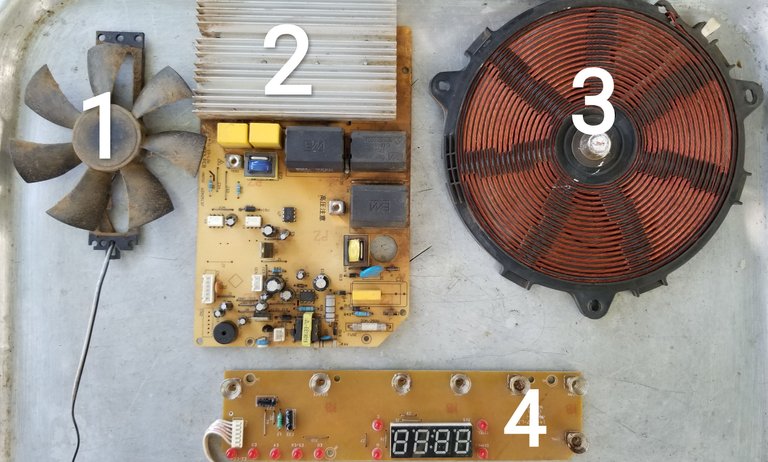
Here I show you the main parts to give it a cleaning with a higher level of detail.
1- Cooling fan.
2- Main plate.
3- Induction coil.
4- Control touch panel.
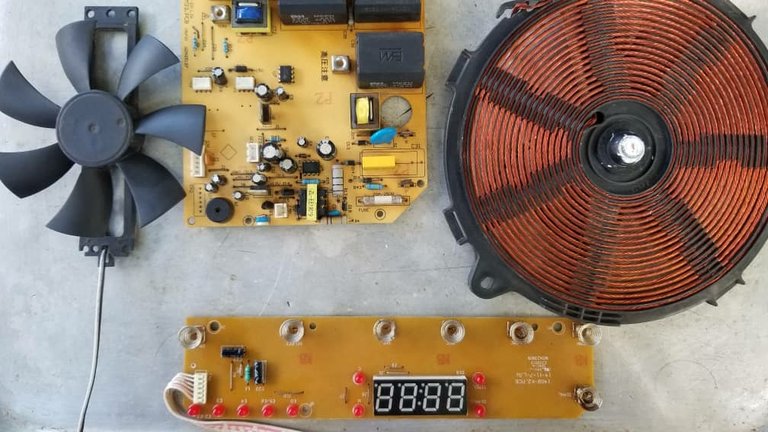
Here I show you the main parts already cleaned.
###ONCE I GOT ALL THE PARTS CLEAN, THEN I SOLVED THE PANEL FAILURE AND HERE'S HOW I DID IT.
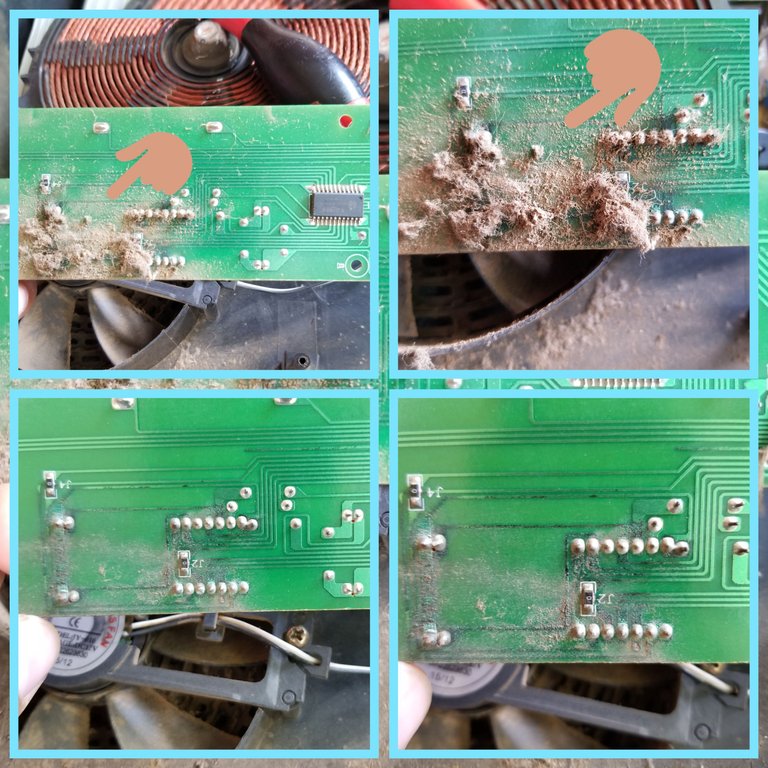
This is the touch panel before cleaning, under all that dirt there are copper connections that suffered wear due to corrosion.
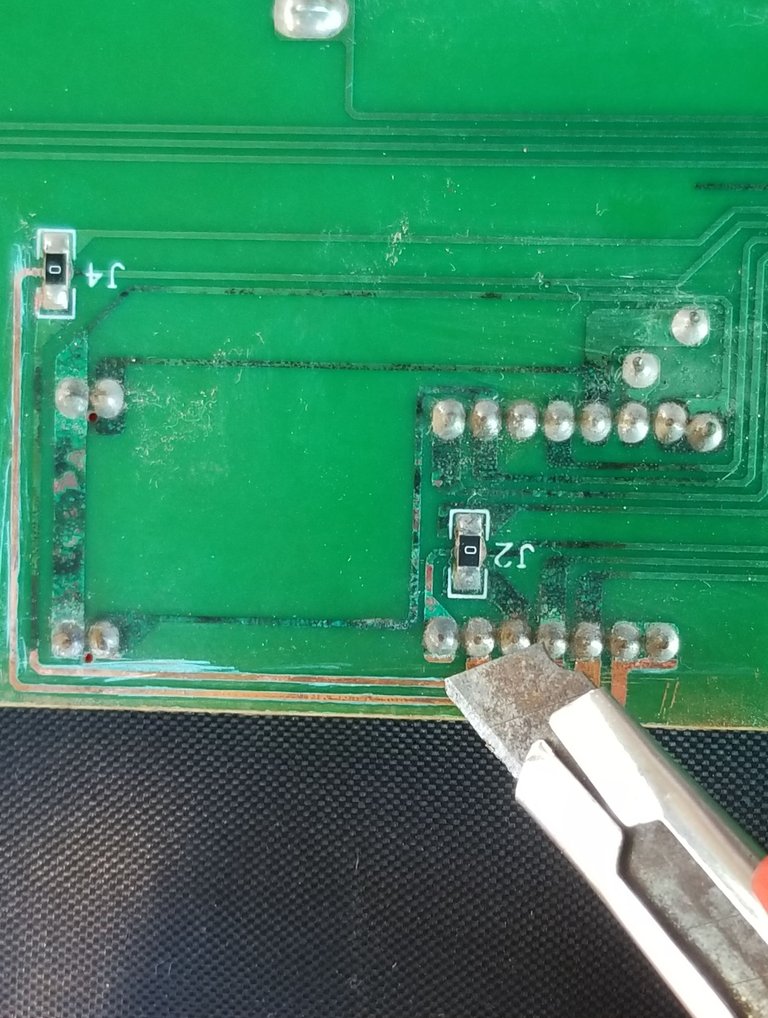
With the help of a box cutter, I carefully scraped the copper connections to determine where they were broken.
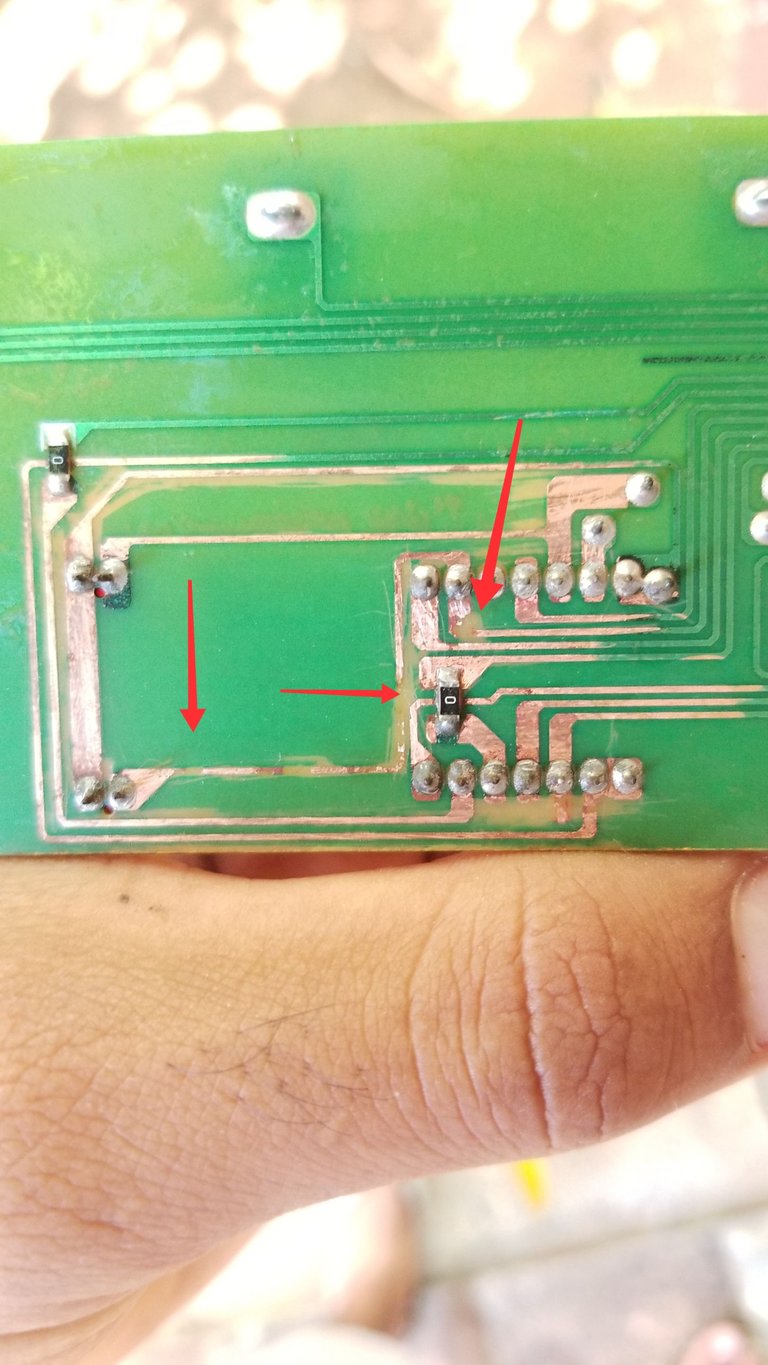
Here you can see how the connections are interrupted due to corrosion caused by humidity and dust.
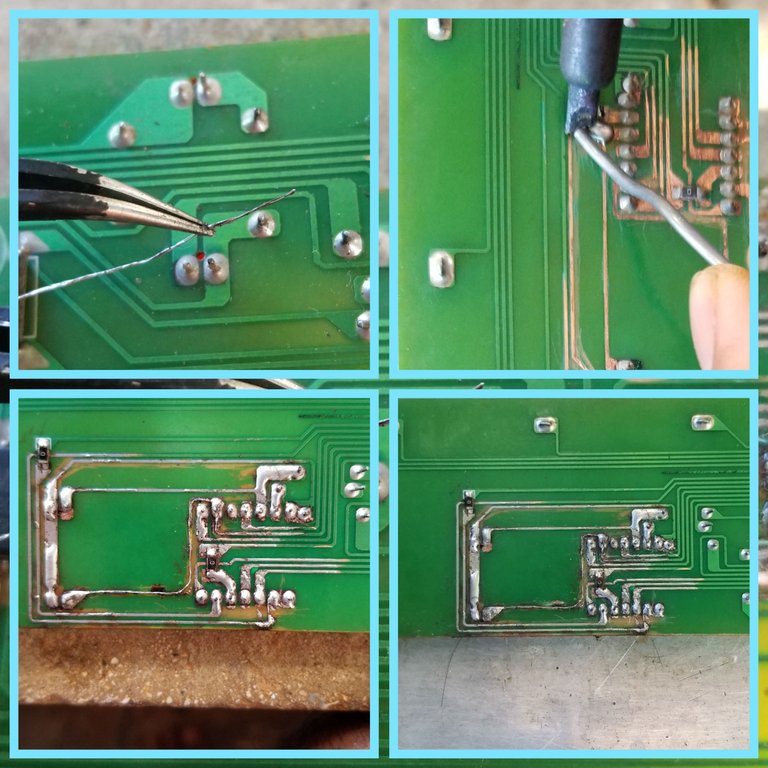
With the help of a tweezers, thin tinned wire, and a soldering iron, I rebuilt and improved the connections, as shown in the collage images.
Luckily the main board was not damaged like the touch panel board, and I only had to clean it, however the dust and humidity was starting to cause damage, but I corrected it in time.
After rebuilding the touch panel board connections, I assembled the stove following the above steps but in reverse, and tested the operation of the cooker.
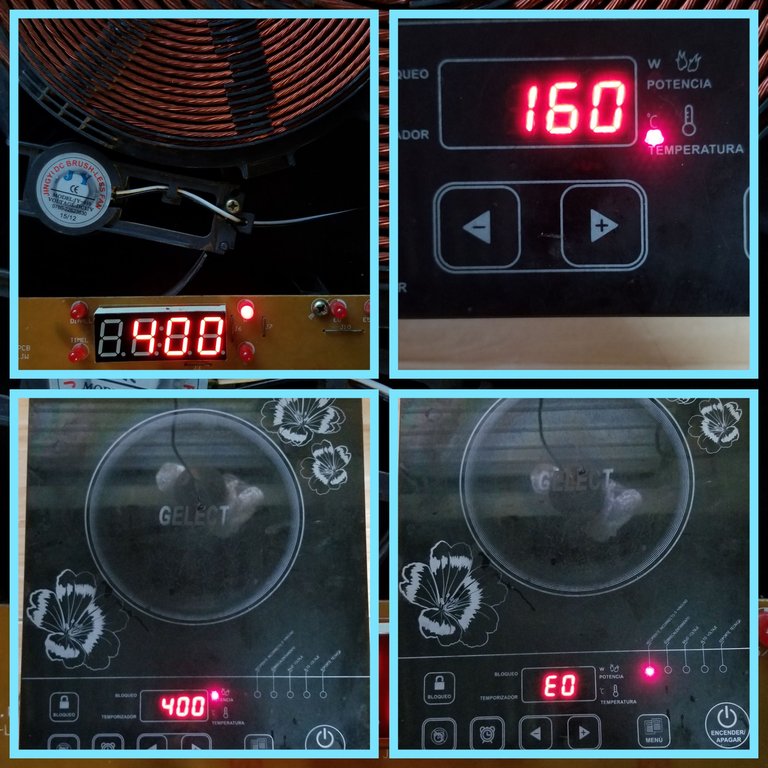
Here is the repaired kitchen with the touch panel working properly.
In this way I managed to repair a failure in the induction stove avoiding that it could aggravate the problem and at the same time extending its useful life.
The importance of giving you my experience is that you keep in mind that it is essential to give maintenance to household appliances to ensure the minimum conditions that enable its proper functioning, in my case I left to give the necessary maintenance to my kitchen, for reasons of not having time, and I almost got expensive neglect, because if the damage had been in the main board ran the risk of damage to the IGBT transistors or other component and the solution would be much more expensive, as it would involve buying spare parts.
If you got this far, thanks for your time, I hope you found my experience useful.
Greetings to you who read me, and until the next post 😉.
The images are of my authorship and were taken with a Samsung Galaxy Note 8 cell phone.
Images edited in the phone's "Gallery" app and the Photo Collage-GridArt app.
Text translated to English in Deepl translator.
You can see me on Facebook
ESPAÑOL
Saludos una vez más a toda la comunidad, es un placer volver por acá a compartir con ustedes mis experiencias durante la reparación y mantenimiento de la cocina de inducción que tengo en casa, la cual presentó problemas en los LED siete segmentos del panel táctil.
La cuestión es que algunos de los segmentos de dichos LEDs no encendían, lo que me preocupó y me motivó a revisar cuál era la causa , ya que por experiencia en otras ocasiones esta falla es el preámbulo de males mayores, o síntomas de que la placa necesita una limpieza pues la acción corrosiva del polvo ligado con la humedad está empezando a causar daño en las conexiones de cobre.
A continuación les mostraré que precisamente la falla fue provocada por una falta de mantenimiento, que por suerte no tuvo males mayores , pero que de no haberse resulto el problema, las consecuencias serían mayores, incurriendo en gastos económicos, pues ahora mismo en mi país los repuestos para este tipo de cocina están bastante caros, y ni pensar en comprar una nueva, porque te desangras 😂.
Acá les muestro lo que me pasó.

En la imagen anterior les muestro como se manifestaba la falla, se aprecia que algunos de los segmentos están apagados.

Señalado con una flecha azul se aprecia la gran suciedad presente en la rejilla de ventilación, por la falta de mantenimiento.
Señalado con flechas rojas están los orificios donde se alojan los tornillos que retiré con la ayuda de un destornillador, para poder acceder al interior de la cocina.

Al retirar la tapa, que es el propio cristal templado, me percato de que existe un alto nivel de suciedad como se pude ver en la foto anterior.

Antes de continuar la reparación hago una limpieza previa con ayuda de un secador de pelo y una brocha.

Luego de hacer una limpieza superficial retiré las partes de la cocina.
1-Retiré la bobina plana de inducción.
2-Retiré el conector del sensor de temperatura que está en el centro de la bobina de inducción.
3- Retiré el conector del ventilador encargado de expulsar el aire caliente hacia el exterior.
4 Retiré el conector del panel táctil de control.

Acá les muestro las partes principales para darle una limpieza con un mayor nivel de detalles.
1- Ventilador de refrigeración.
2- Placa principal.
3- Bobina de inducción.
4- Panel táctil de control.

Acá les muestro las partes principales ya limpias.
UNA VEZ QUE DEJÉ TODAS LAS PARTES BIEN LIMPIAS, ENTONCES RESOLVÍ LA FALLA DEL PANEL Y A CONTINUACIÓN EXPLICO COMO LO HICE.

Este es el panel táctil antes de limpiarlo, debajo de toda esa suciedad hay conexiones de cobre que sufrieron un desgaste producto a la corrosión.

Con ayuda de un cúter y cuidadosamente, raspé las conexiones de cobre para determinar dónde estaban interrumpidas.

Aquí se aprecia como las conexiones están interrumpidas debido a la corrosión que sufrieron al estar bajo la humedad y el polvo.

Con ayuda de una pinza, alambre fino estañado, y un cautín, reconstruí y mejoré las conexiones, cómo se muestra en las imágenes del collage.
Por suerte la placa principal no sufrió daño como la placa del panel táctil, y solo tuve que limpiarla , sin embargo ya el polvo ligado con la humedad estaba empezando a causar daño , pero lo corregí a tiempo.
Luego de reconstruir las conexiones de la placa del panel táctil, armé la cocina siguiendo los pasos anteriores pero en sentido inverso, y probé el funcionamiento de la misma.

Acá la cocina reparada con el panel táctil funcionando correctamente.
De esta forma logré reparar una falla en la cocina de inducción evitando que pudiera agravarse más el problema y a la vez alargando su vida útil.
La importancia de darle mi experiencia es que tengan en cuenta que es fundamental darle mantenimiento a los equipos electrodomésticos para garantizarles las condiciones mínimas que le posibilitan su buen funcionamiento, en mi caso dejé de darle el mantenimiento necesario a mi cocina, por cuestiones de no tener tiempo, y por poco me sale caro el descuido, ya que si el daño hubiese sido en la placa principal corría el riesgo de que se me averiaran los transistores IGBT u otro componente y la solución sería mucho más cara, ya que implicaría comprar piezas de repuestos.
Si llegaste hasta aquí, gracias por tu tiempo, espero que te haya servido de algo mi experiencia.
Un saludo para ti que me lees, y hasta el próximo post 😉.
Las imágenes son de mi autoría y fueron tomadas con un celular Samsung Galaxy Note 8.
Imágenes editadas en la aplicación "Galería" del teléfono y la aplicación Foto Collage-GridArt.
Puedes verme en Facebook


