The absolute beginner’s solar dehydrator for fruits and vegetables
Forget about expensive electric dehydrators! Today I'm going to show you how to build a solar dehydrator from scratch that will consume zero electricity. But first let me show you the benefits of using the performant technology behind.
Why do you need a solar dehydrator?
First of all we have to admit the quality of the dried food if we were to compare it with other types of food preservation techniques like fermentation, canning, freezing. The nutrients content per gram is higher for any dehydrated food simply because the overall volume is smaller. Keep in mind that it's easy to overeat dried food. This means that it requires a smaller storage space than canning or freezing. Unlike boiling, the dehydration process is not depleting our veggies and fruits from the important nutrients. And if you use a solar dehydrator you'll have no surprises on the electricity bill which is great for someone who tried the electric dehydrator.
How a solar dehydrator works?
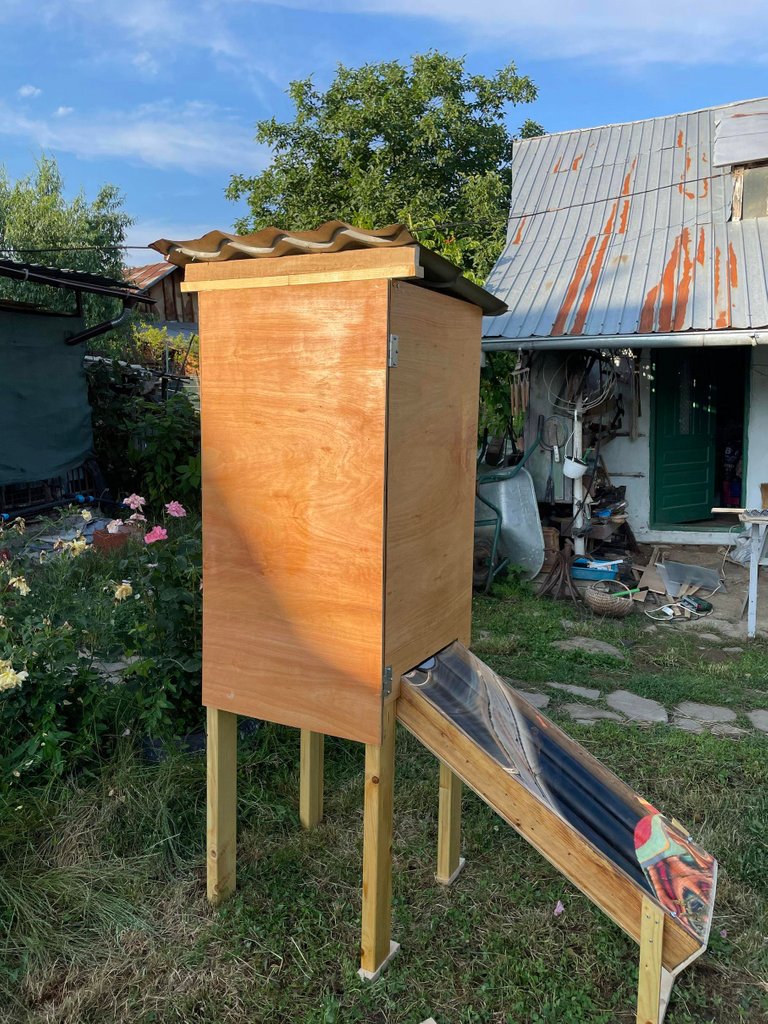
The sun enters through the glass into the black painted warming chamber. The air is getting heated up and then escape upwards into the sliced vegetables box where the mesh trays are placed. The humid air is carried through a chimney placed at the top of the system. The average vegetable will get dehydrated in only 2 days on a hot sunny day.
Ok, I'm a believer. Now show me how to do it!
There are several constructive elements which compose a solar dehydrator:
- Glass-encased solar collector
- Drying chamber
- Mesh trays where the sliced fruits and vegetables are placed
- Air entrance and exit so that air can move through the collector
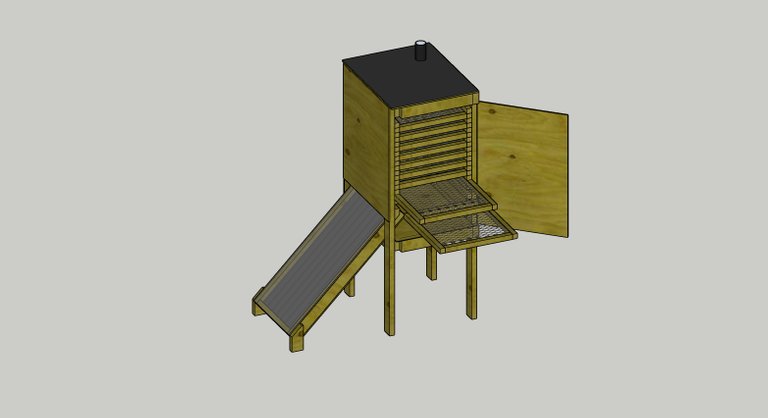
We will start from these simple elements to offer you a guide about how to build a solar dehydrator. Note that the dimensions used are meant for a family-scale dehydrator and the project can be scaled up according to your own needs.
** Instructions step-by-step**
The Structure:
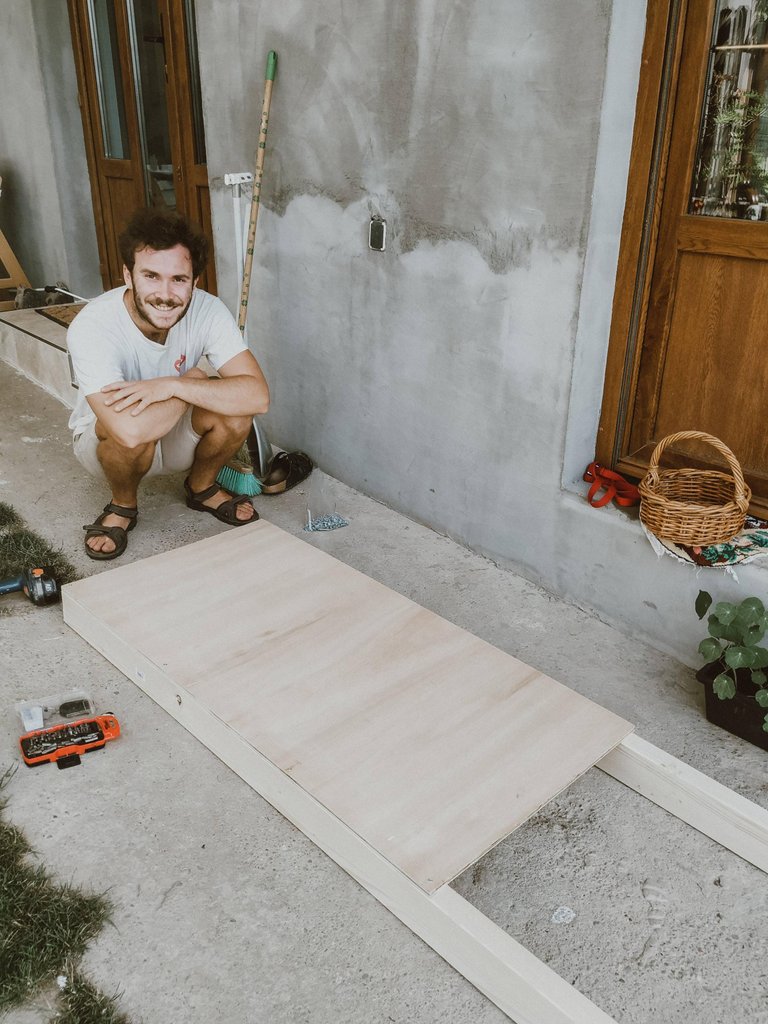
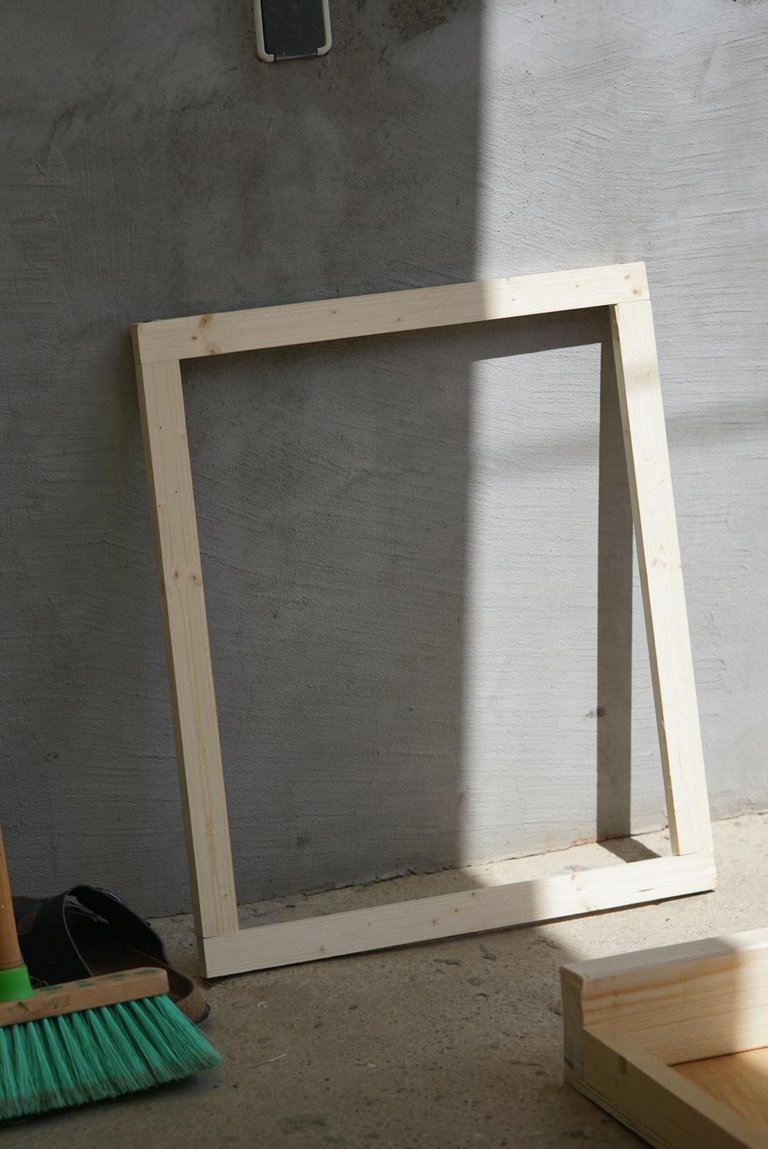
Cut the 4 pillars and the panels with a jigsaw.
Screw the panels directly into the pillars except the front panel which is the door. I recommend Torx screws because they drill better in the wood.
Screw the support cleats between the pillars to gain rigidity. The bottom cleats will support the bottom panel which can be cut and placed at this step. I recommend to use a soft hammer to make the bottom panel fit perfectly between the 4 pillars. If you don’t have soft hammer use a normal one with a book or a piece of cardboard between the hammer and the panel.
Cut a squared mosquito net and dispose it on the top of the structure between the pillars. You don’t want any holes or slot in your structure because insects will surely take advantage of this ;)
Cut an oversize metal panel for the roof to the structure. It will protect the dryer from the rain. We screwed a cleat in the top front face so the metal panel is inclined and lets the water evacuate properly.
We used linseed oil to protect the wood from the humidity. We applied it to the whole structure and the solar 4 times each one separated of at least 24 hours.
The Shelfs:
For each shelf, we screwed one cleat on each side of the structure so the « drawer » can slide on them. We put 9 shelf but you can put more or less depending on how much space you want between each floor. To build the drawers you use cleats that you screw in a square shape. You can add metallic angles to improve the rigidity. Then dispose a net inside the square (it will be the place where the fruits drys) with a mosquito net or something similar).
The Solar Panel.

Assemble the wood boards directly into the panel and use cleats to build the support. Test how the solar panel fits into the structure before cutting and screwing the cleats. Cut and dispose the black pipes along the solar. At the bottom you will need to make some holes for the air to come in and at the top also for the hot air to go inside the structure. The bottom and top holes can be covered with mosquito net.
Material list:
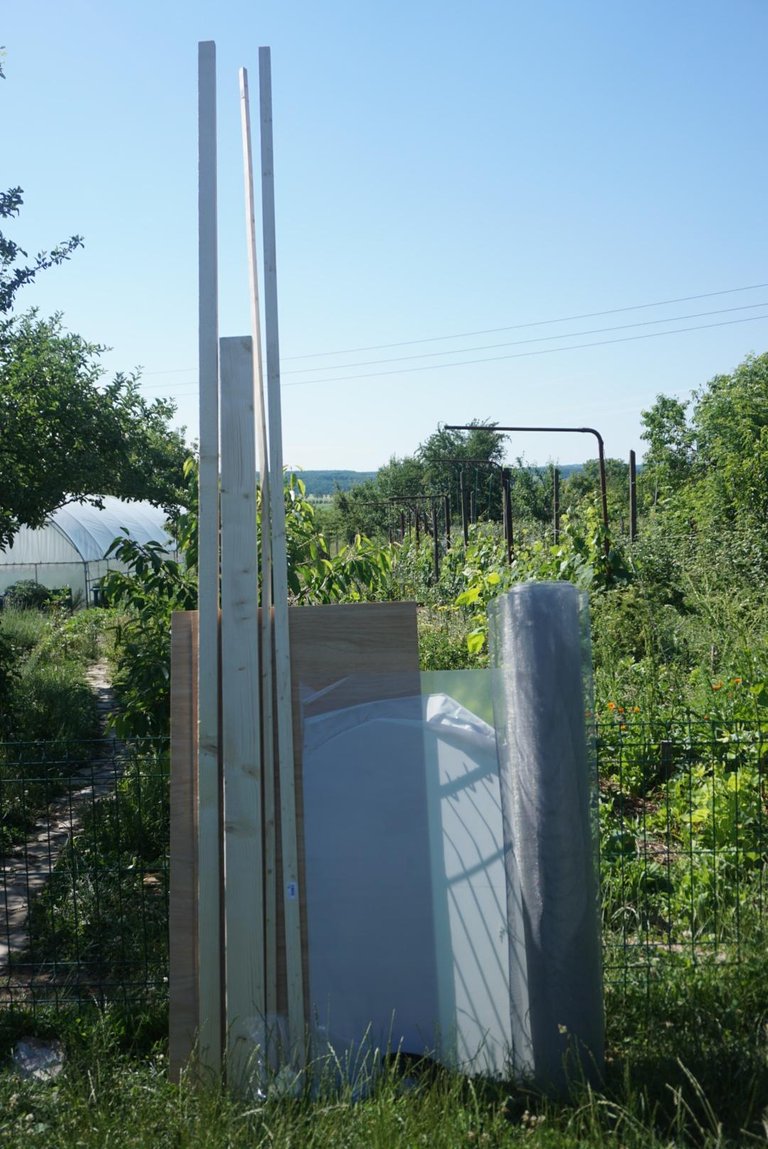
- 4 beams for the pillars 44 x 94 x 1890 mm
- 4 Small squared cleats : 18 x 18 X 3000mm
- 8 Rectangle small cleats : 17 x 36 x 3000mm
- 2 Rectangle medium cleats : 24 x 48 X 3000mm
- 6 wood Panels (MDF) : 12mm X 610mm X 1220m
- Metal pannel for the roof
- 1 plexiglass plate
- 2 hinges
- 1 roll of metal net
- 1 plastic roof
- 2 pots of linseed oil
- small and large screws
Support our project on https://www.patreon.com/spheraterra so we can bring more interesting permaculture projects to life. Here, you will find a in-depth tutorial to help you build the solar dehydrator and live support from our designer community.

